Bulk Upload
Bulk SMS allows you to reach large number contacts at a time. It helps you to inform your customer base without having to store the contact information. You can send text messages to numbers belonging to different groups.
Sending bulk text messages
To send bulk text messages:
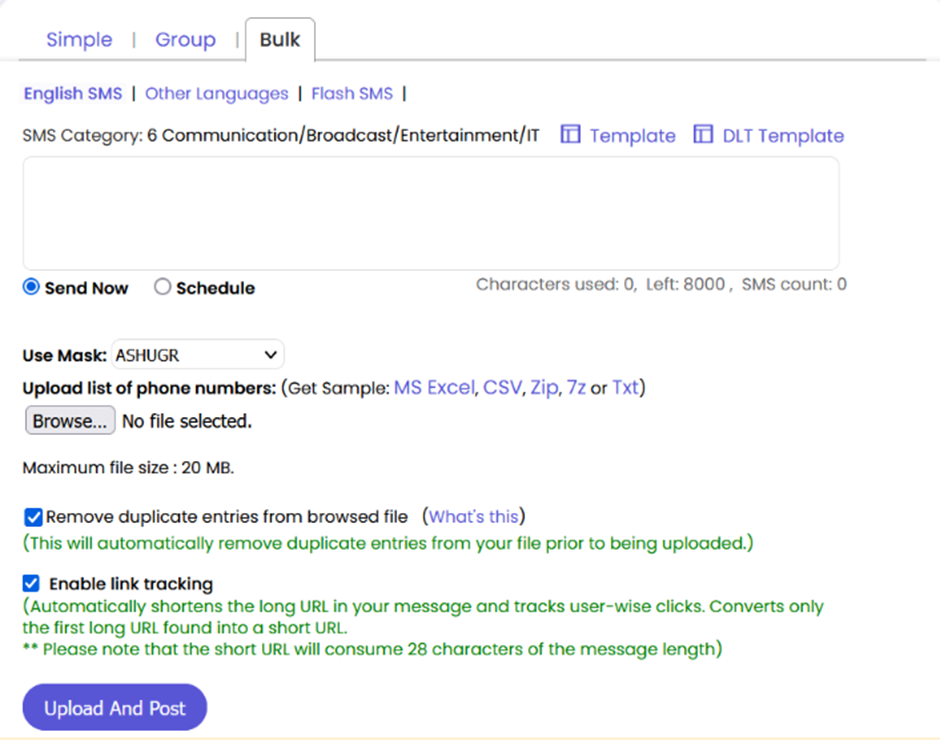
- Click SMS tab from the menu bar and then click Bulk tab.
- Select the type of message to be sent .
- Select a template to send message from the DLT template tab.
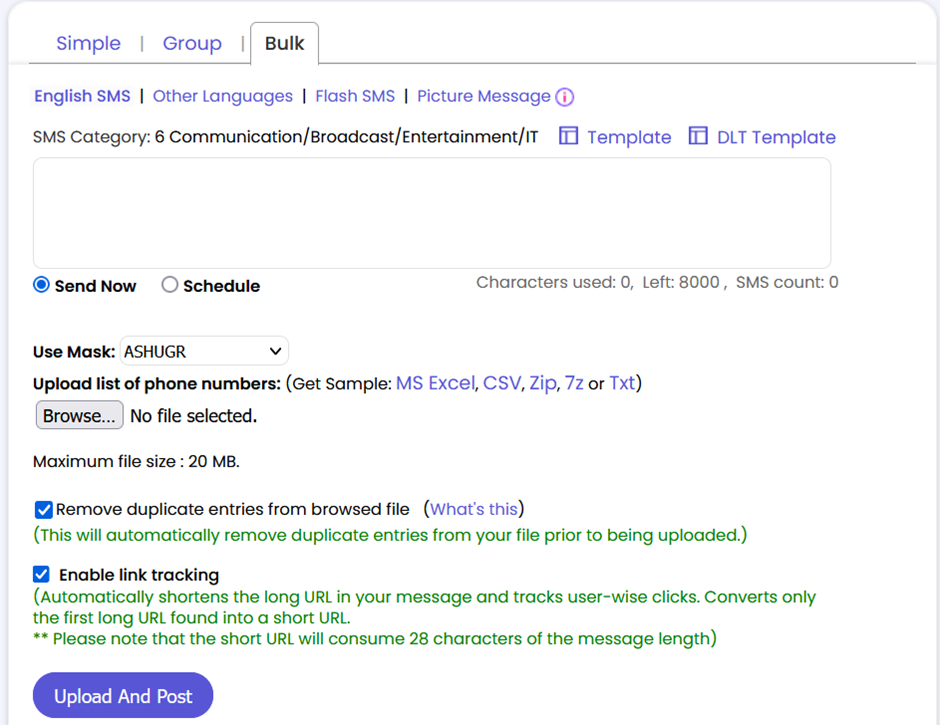
- Enter the message text and then select Send Now option.
- Click Select File to upload the list of numbers. The supported file types are .xls, .csv, and .zip, 7z or Txt
- Click Upload And Post to complete uploading the file and sending of messages. This displays the following message at the top of the page.

Any duplicate entries are automatically deleted while uploading the file.
Scheduling bulk upload
You can schedule bulk upload any time between the posting hours.
To schedule bulk upload:
- Click SMS tab from the menu bar and then click Bulk tab.
- Select the type of message to be sent.
- Enter the message text and then select the Schedule option.

- Set date and time and click Select File to upload the list of numbers.
- Click Upload And Post.
Cancel bulk upload
To cancel scheduled bulk upload:
- In the Upload History section, click Cancel for the Transaction ID to be cancelled.
- . In the confirmation box, click OK. This displays the following message at the top of the page.

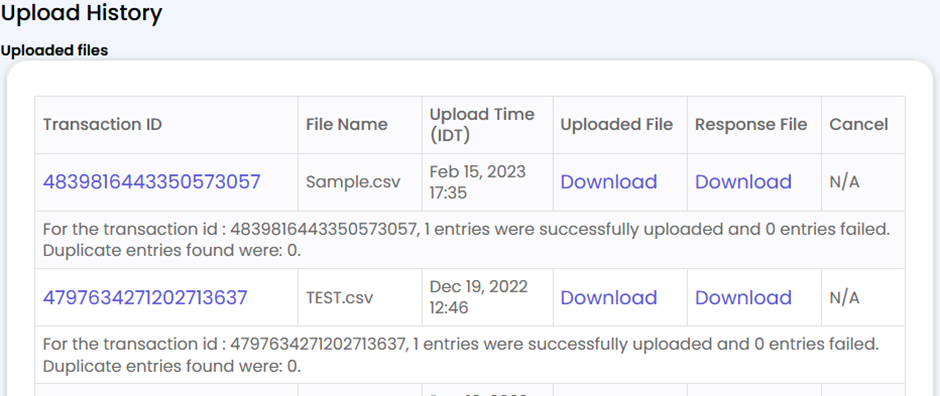
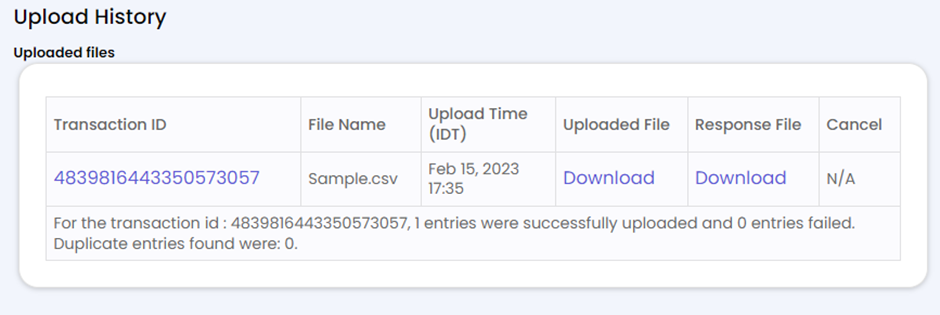
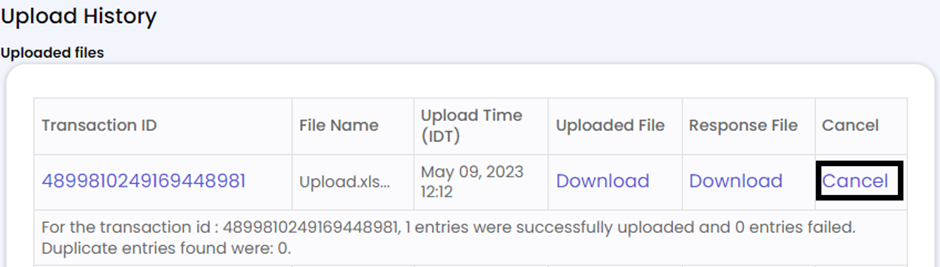
Viewing upload history and delivery report
You can view the Upload History at the end of the page. This section allows you to download the uploaded file(s), response file(s) or cancel the scheduled messages.
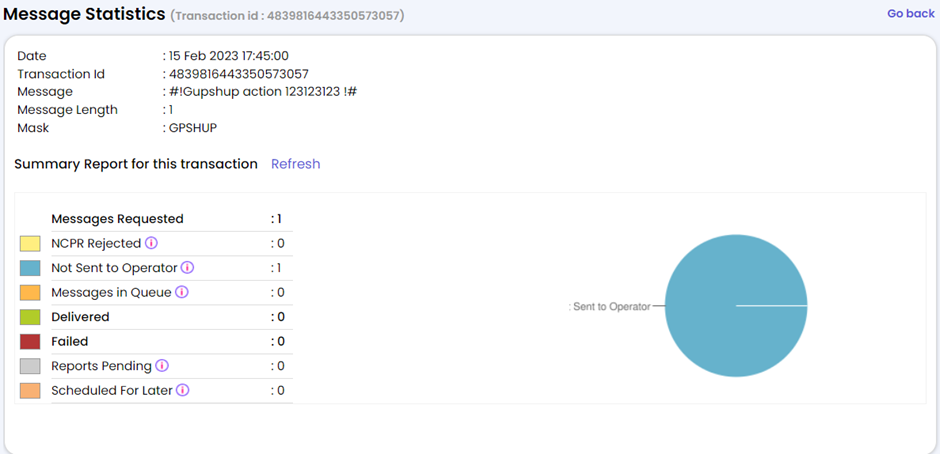
Click the Transaction ID to view the message statistics.
Customized bulk upload
You can use bulk upload to send different text messages to different numbers. When you upload your contacts using a file for sending bulk text messages, you can make changes in that file which will allow you to send different messages to different numbers.
To do so, create columns as as shown in the image below:
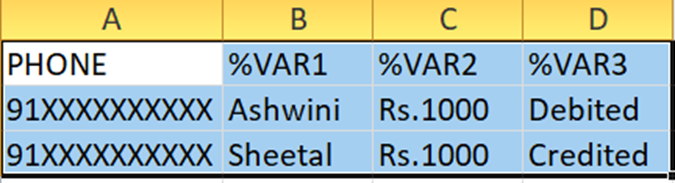
When you upload this file, customized messages will be sent to all the numbers.
When selecting the template from UI, in place of variables in the content you need to add %VAR1 for where the name is to be mentioned, %VAR2 for where the amount is to be mentioned and %VAR3 for where the action is to be mentioned. While execution, the system will automatically take this value from the file while sending messages to the respective numbers.
Note: Only .CSV format is supported for customer upload.
Updated 9 months ago