Bulk Messaging using Workflows
- Once the HubSpot app has been installed in the account, then user can be able to send Bulk WhatsApp messages.
- For sending Bulk WhatsApp messages, User needs to create Workflow in their HubSpot Account.
To Creating a Workflow User must have these following HubSpot licenses: -
-
Marketing Hub Professional, Enterprise
-
Sales Hub Professional, Enterprise
-
Service Hub Professional, Enterprise
-
Operations Hub Professional, Enterprise
-
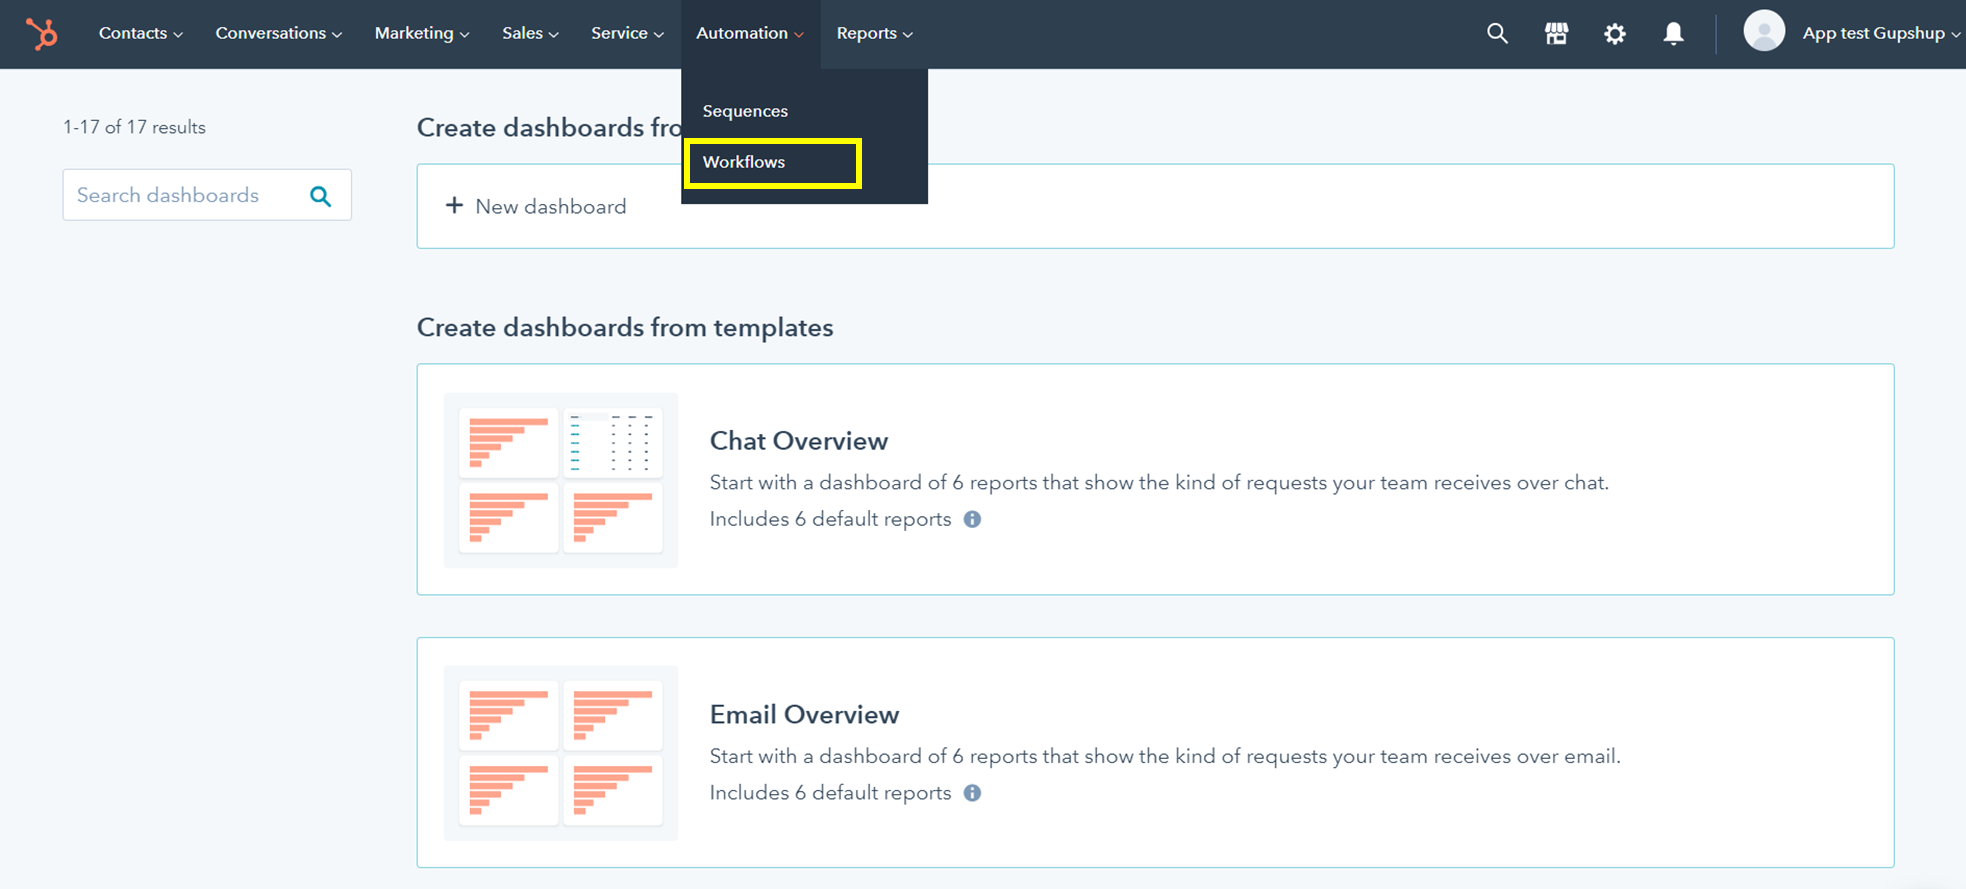
In HubSpot Tab, click on Automation dropdown and select Workflows option.
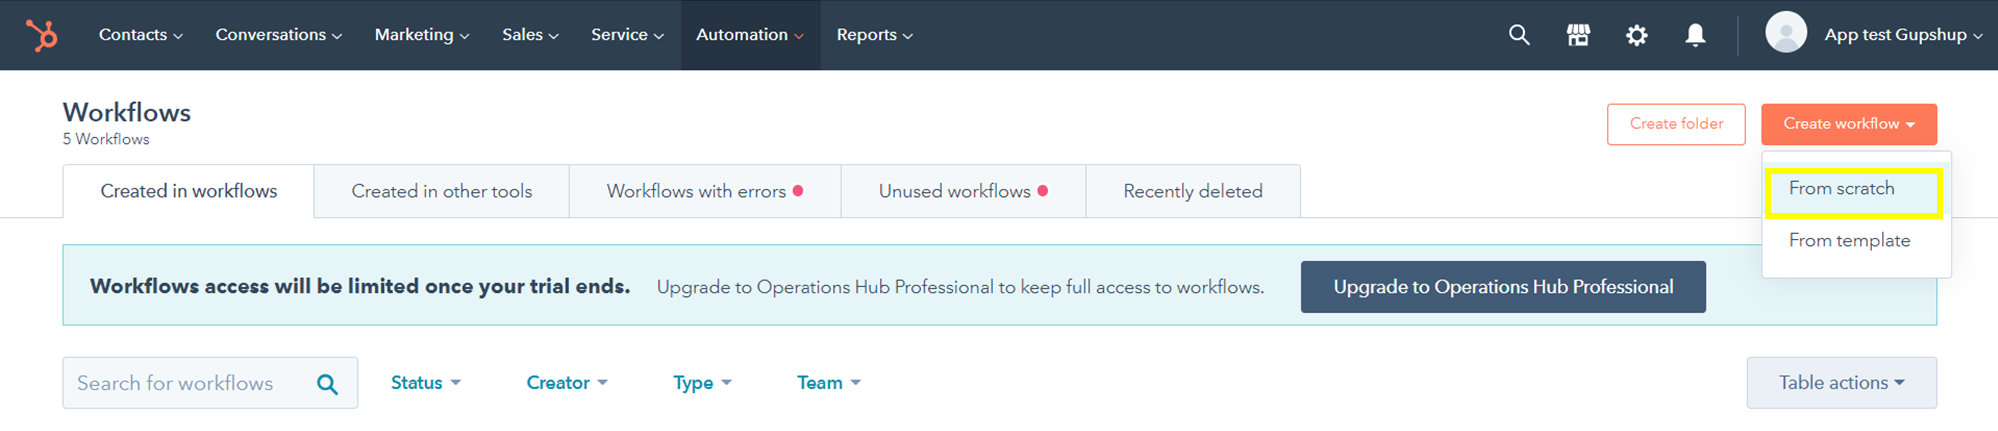
- Now click on Create workflow dropdown button and select From scratch option.
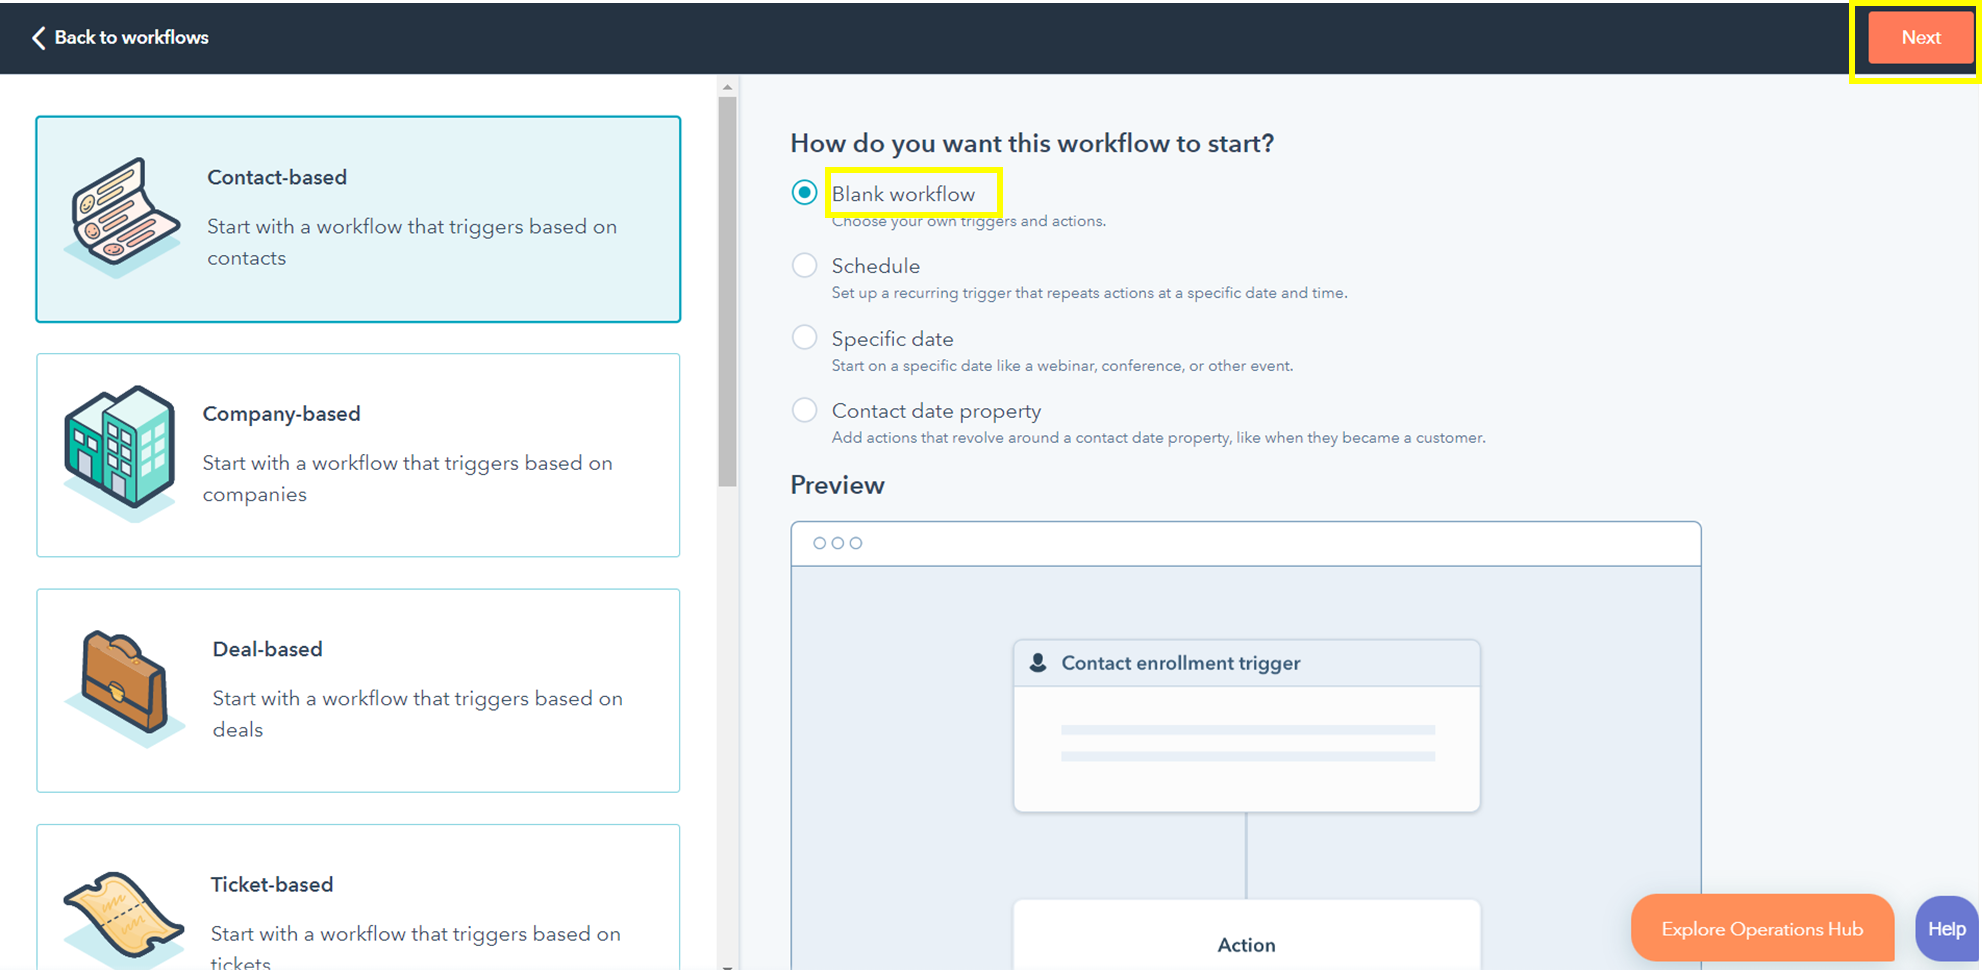
- Select Blank workflow and click on Next button.
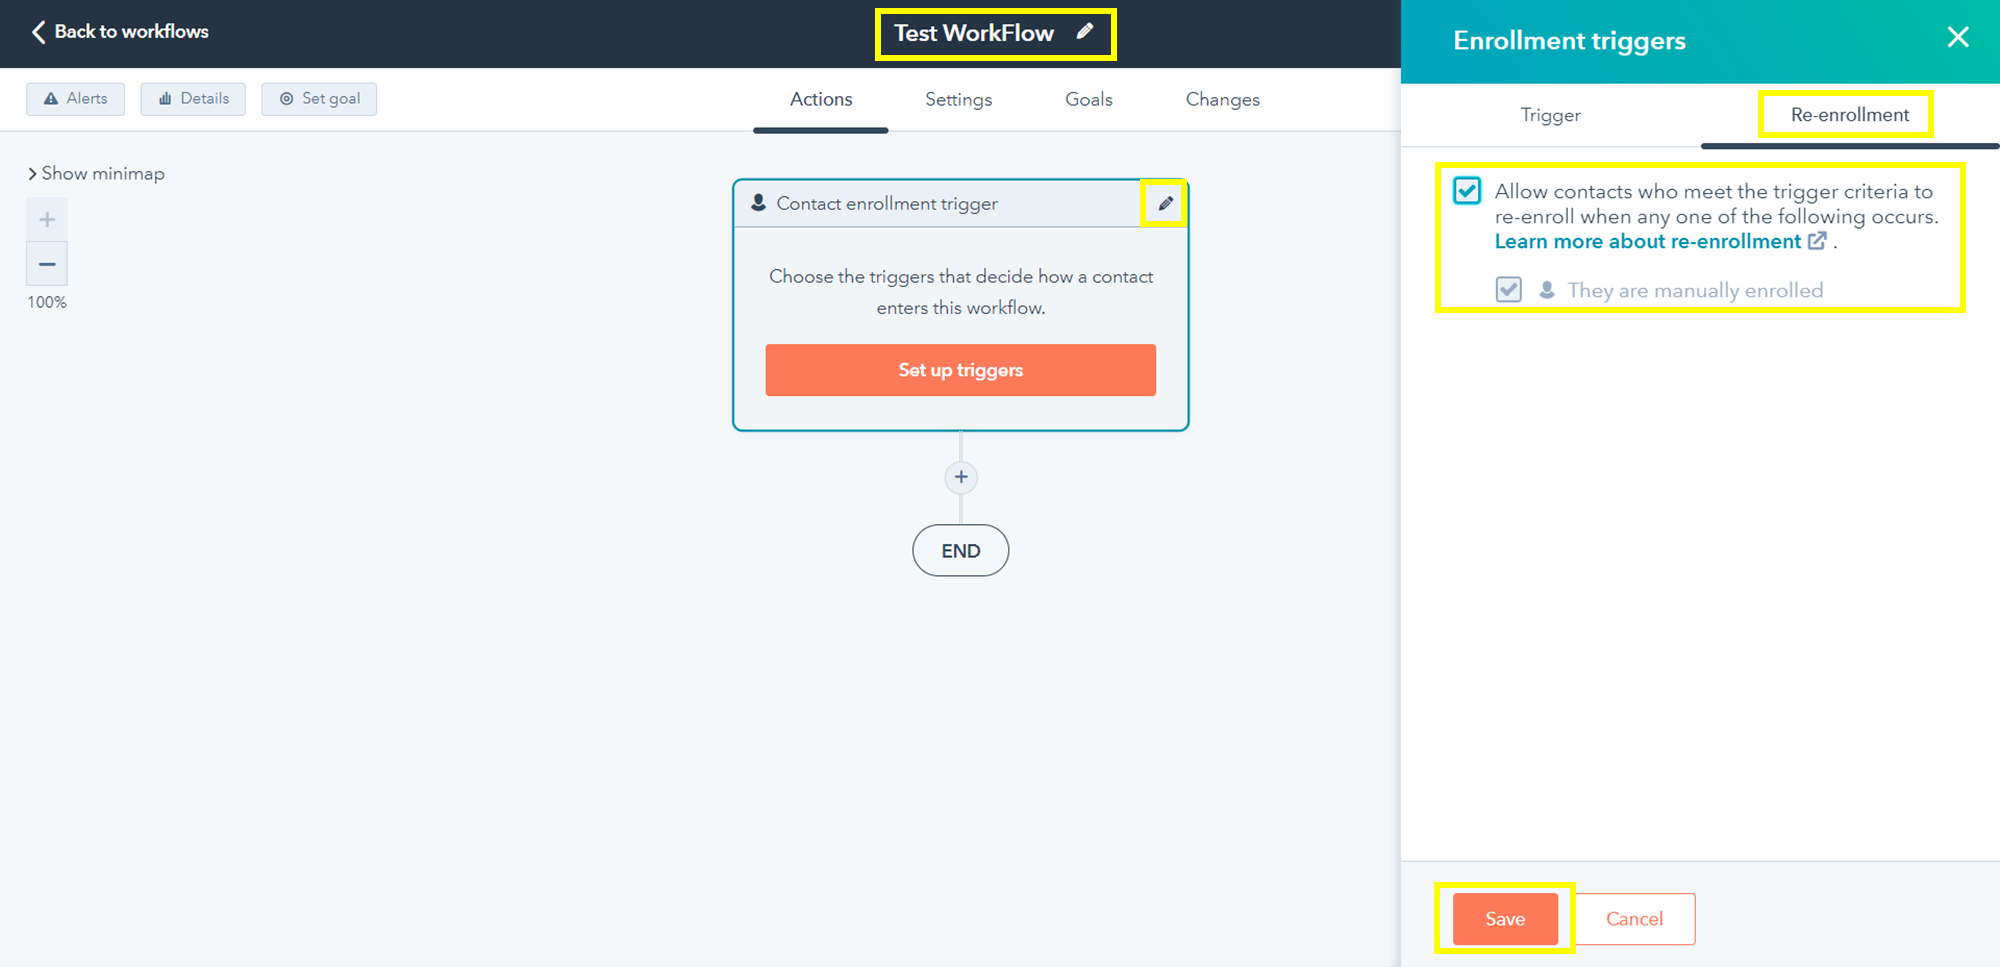
- User can edit the Title of the Workflow. User needs to click on edit button in Contact enrolment trigger section, then a pop-up will open, user have to select Re-enrollment section and check the checkbox as shown in the below figure and click on Save.
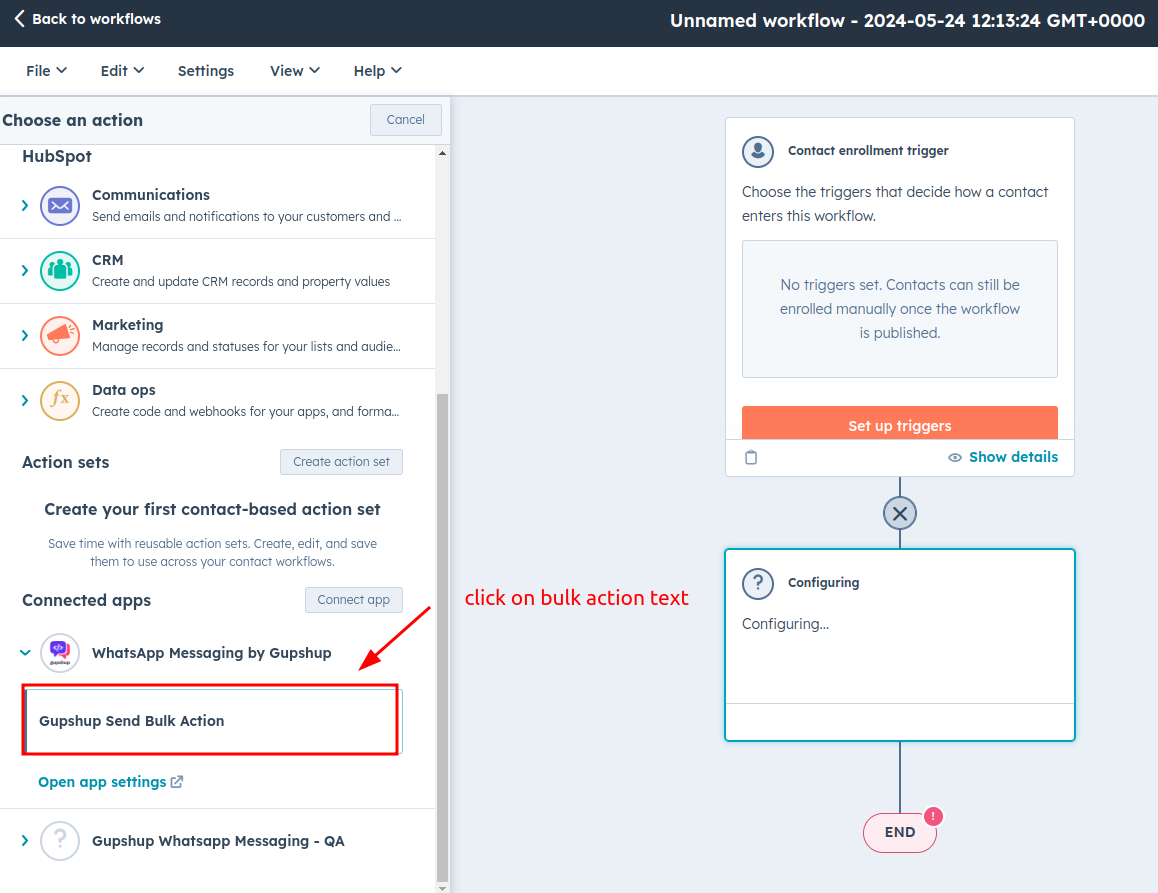
- Below Contact enrollment trigger section, User have to click the + button in order to add the action. When User click the + button a pop-up will open, scrolling at bottom user will find Gupshup App custom action. User needs to click on Gupshup Send Bulk Action button.
-
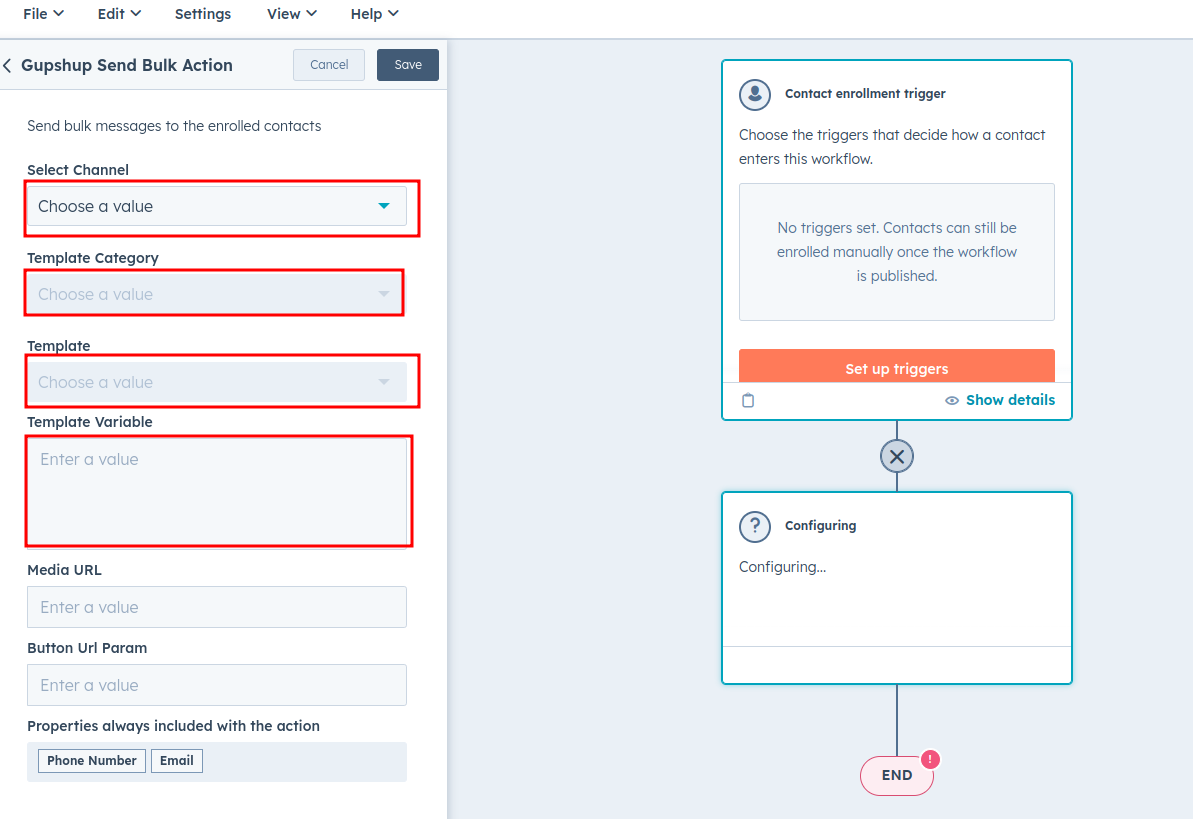
Next pop-up will open Gupshup Send Bulk Action. User needs to select channel which user has already configured in it’s HubSpot account, then select template category. For selecting template category there could be following two scenarios: -
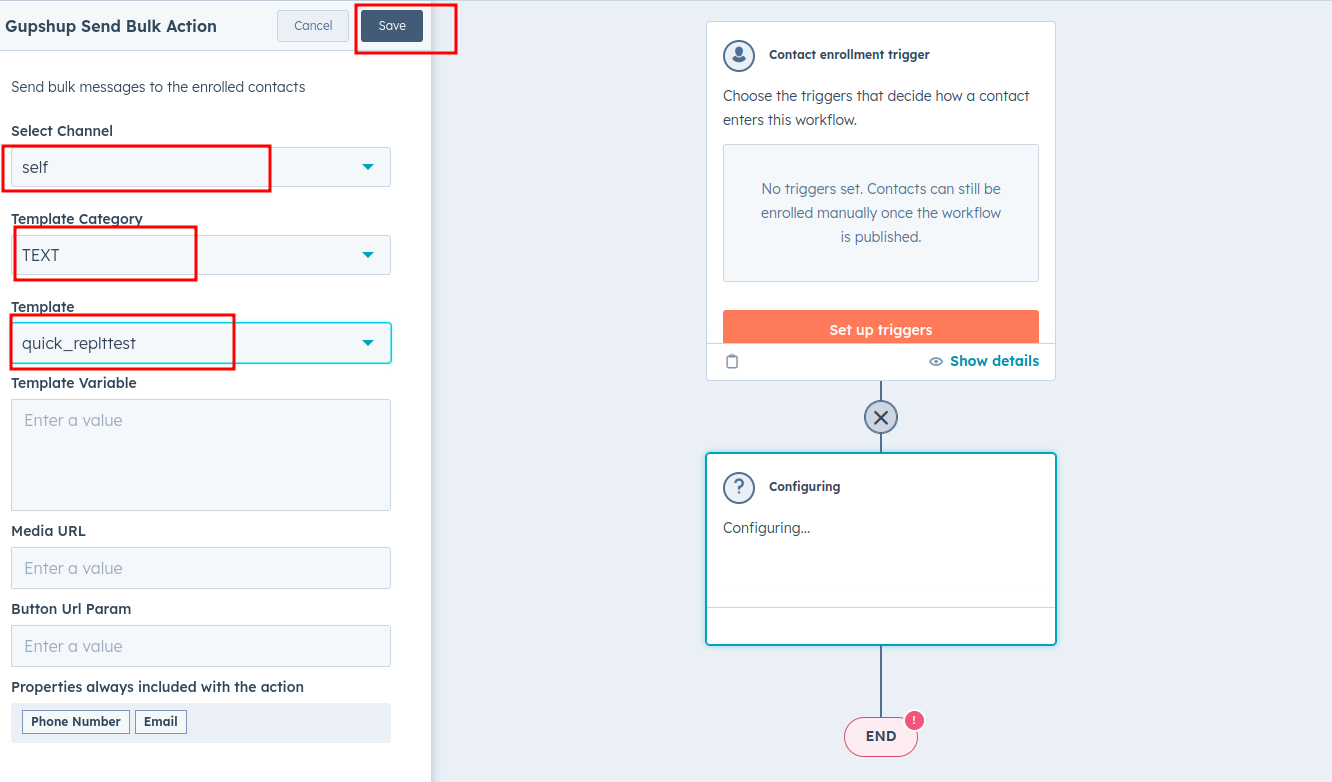
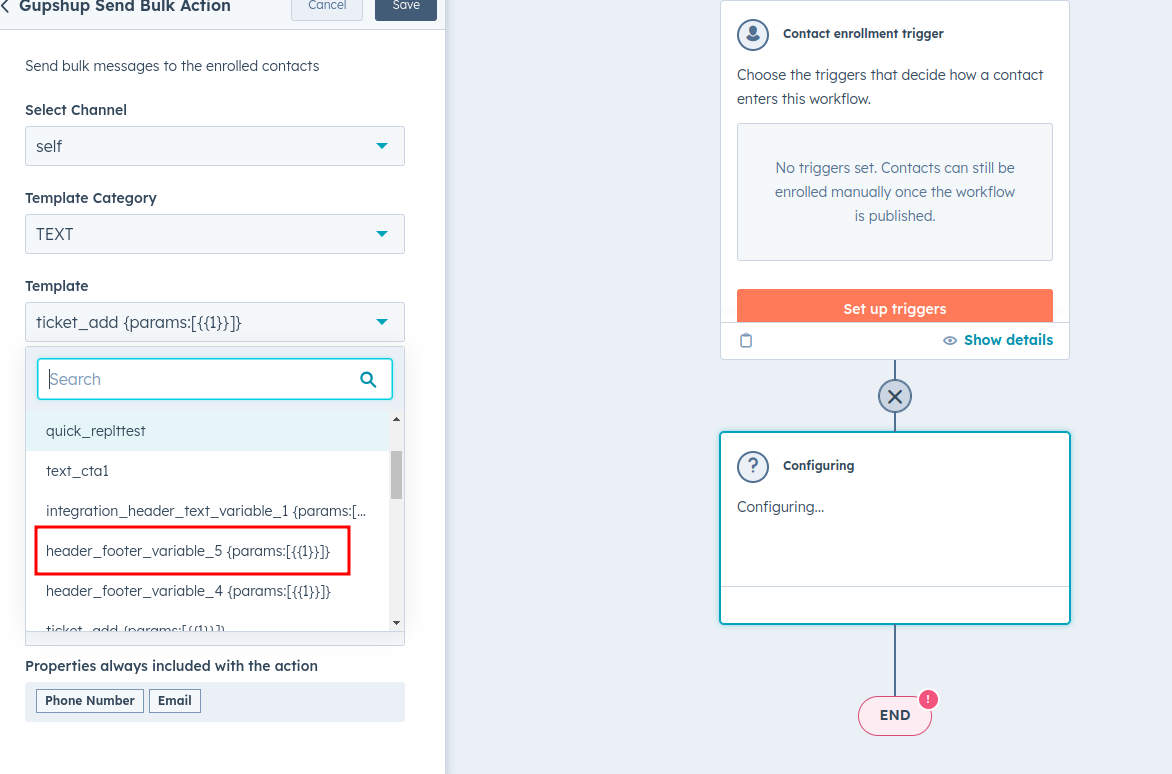
- TEXT:- If user select TEXT as template category, user will get options to select text template in Template dropdown.
- If user select simple text message without any variable, then user don’t need to provide Template Variable text field and Media URL text field.
- TEXT:- If user select TEXT as template category, user will get options to select text template in Template dropdown.
Select the appropriate option: choose template for Enterprise] channel, an channel, and choose category."
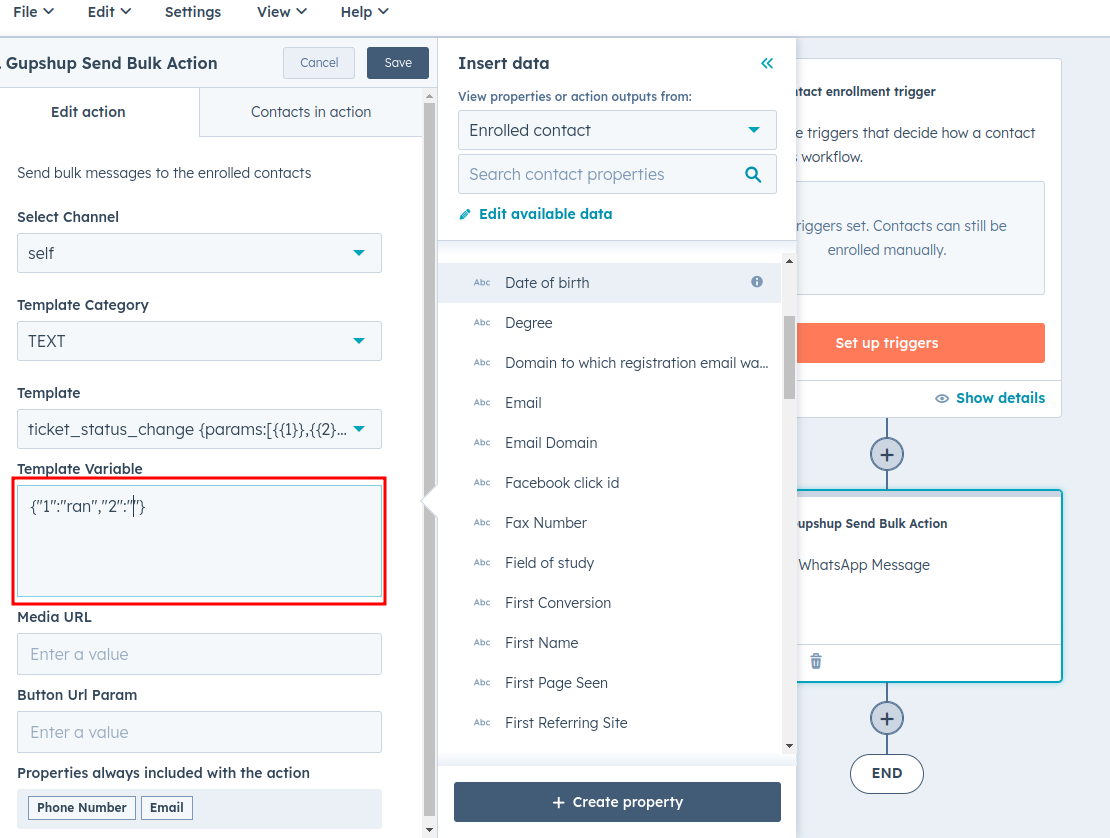
If User selects a template which have variables, then User needs to provide “Template Variable” text field value.
- Template Variable format should be like, let’s suppose there are two variables present in selected template. User need to provide body like this
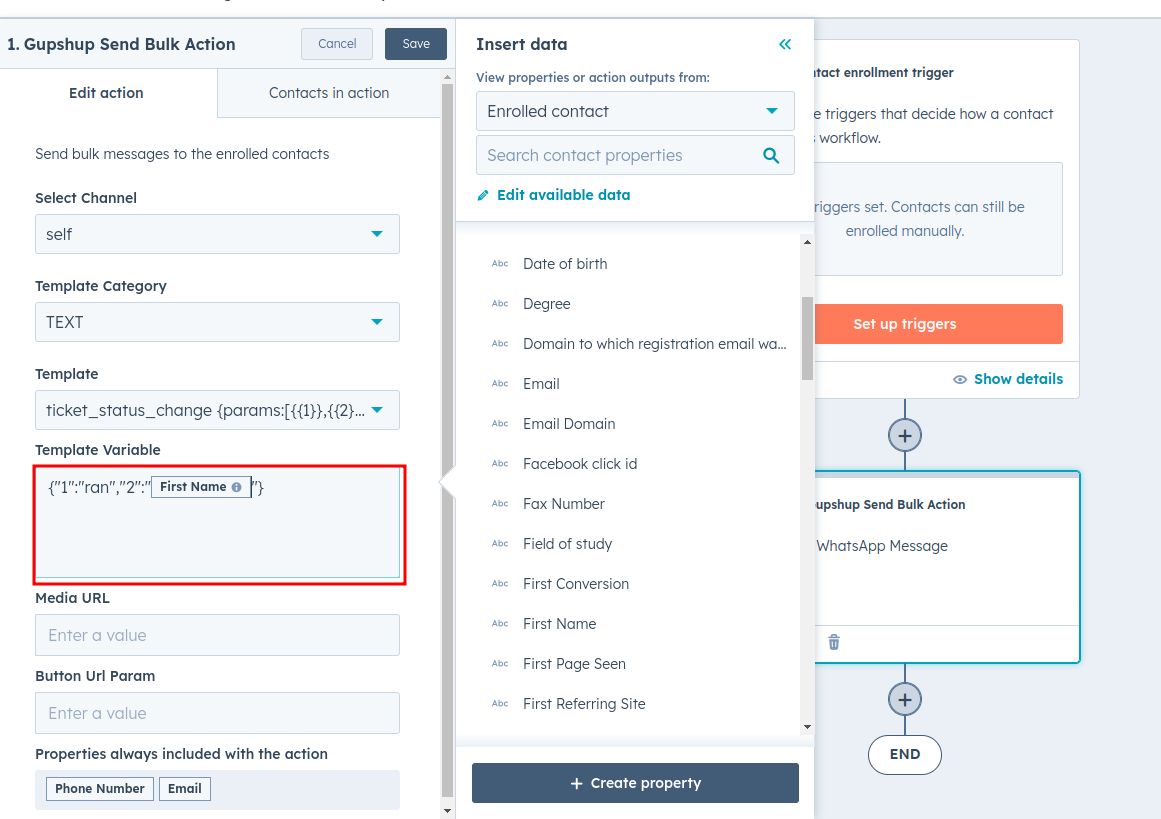
- User can provide variable value by typing text or by selecting the property value by clicking on “Contact token”. Example is shown in figure below: -
IMAGE/VIDEO/DOCUMENT: -
- If user select any of IMAGE, VIDEO or DOCUMENT as template category, user will get options to select templates from “Template” drop-down. In case of IMAGE, VIDEO or DOCUMENT user needs to provide public URL of media for selected template category in “Media URL” text field. It could be any public URL or user can upload media file in files of it’s HubSpot account (refer section 6) and after uploading media file, it can get public URL of the file. In case of variables in template user also have to provide values of template variables in “Template Variable” text field in format {“Variable Name 1”:”Variable Value 1”, “Variable Name 2”:”Variable Value 2”} as shown in above figure. Example of Media templates is shown in below figure.
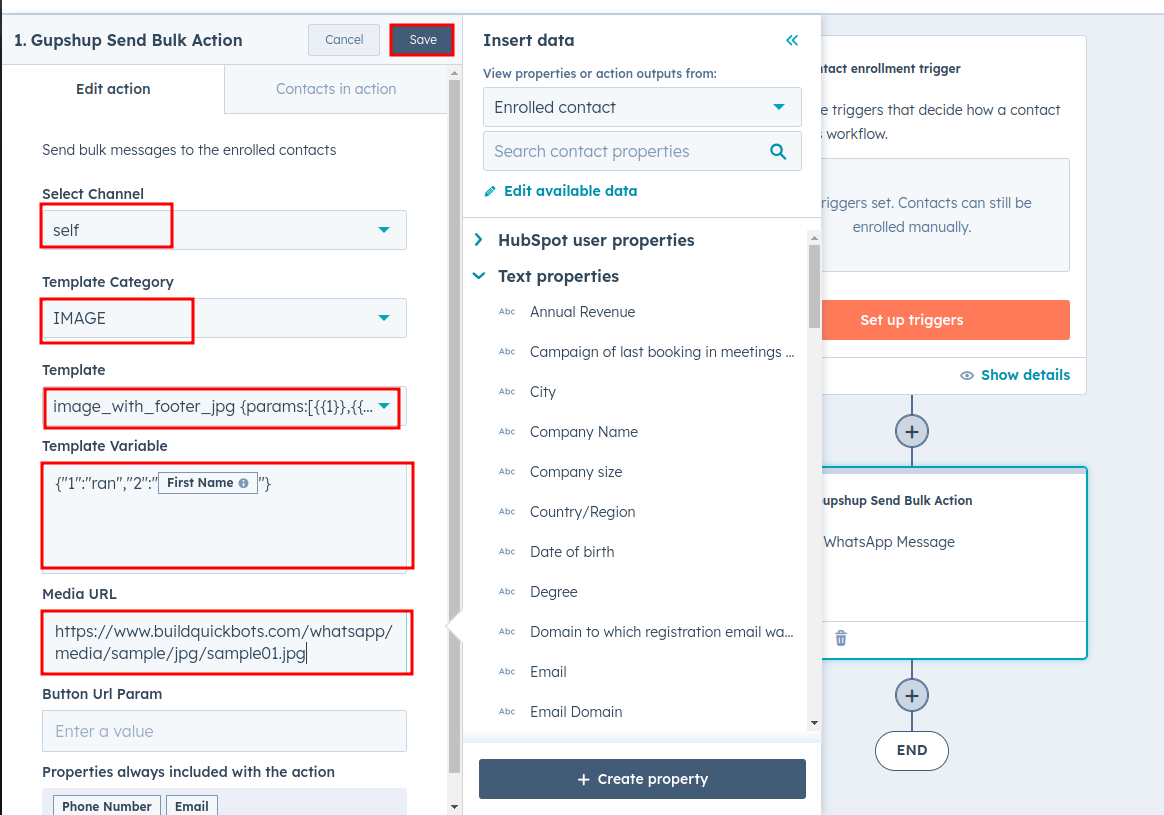
- Click on Save.
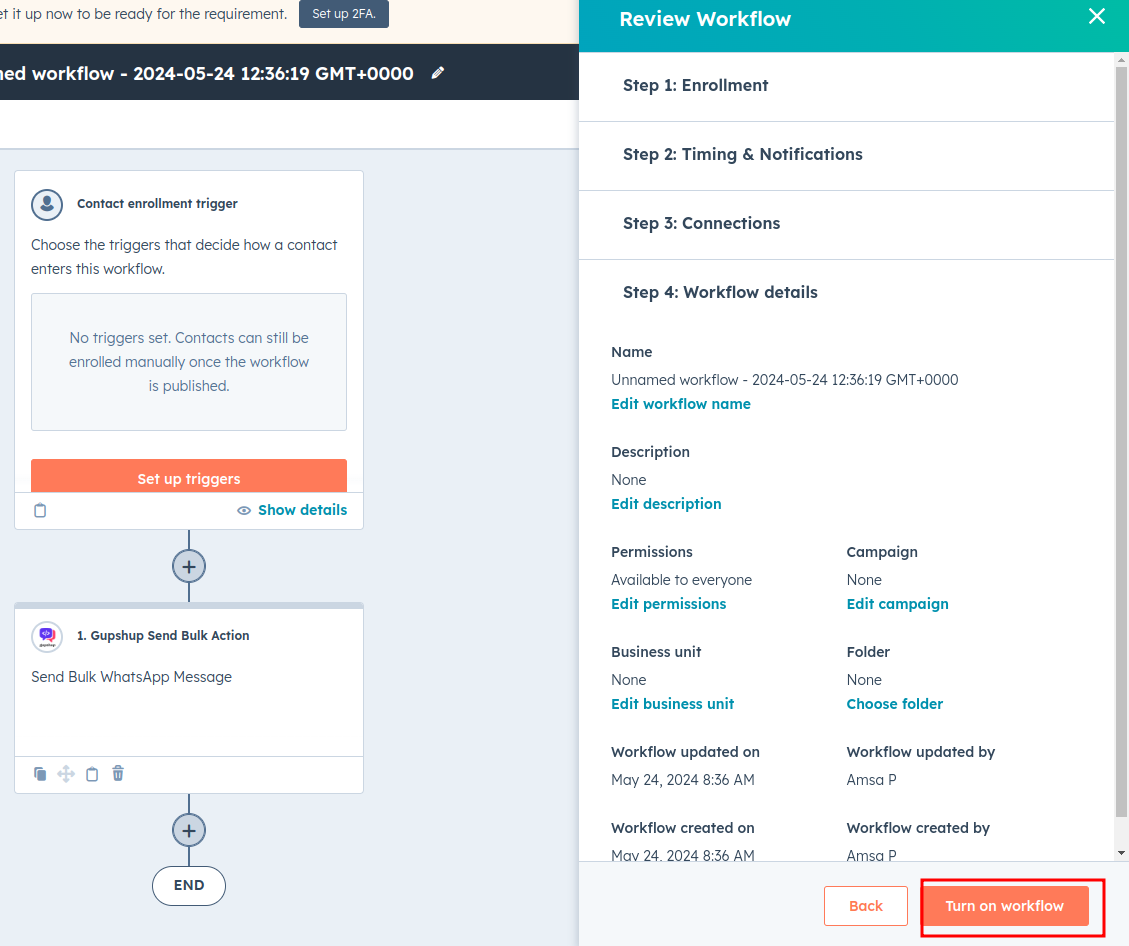
- Click on Review and Publish.
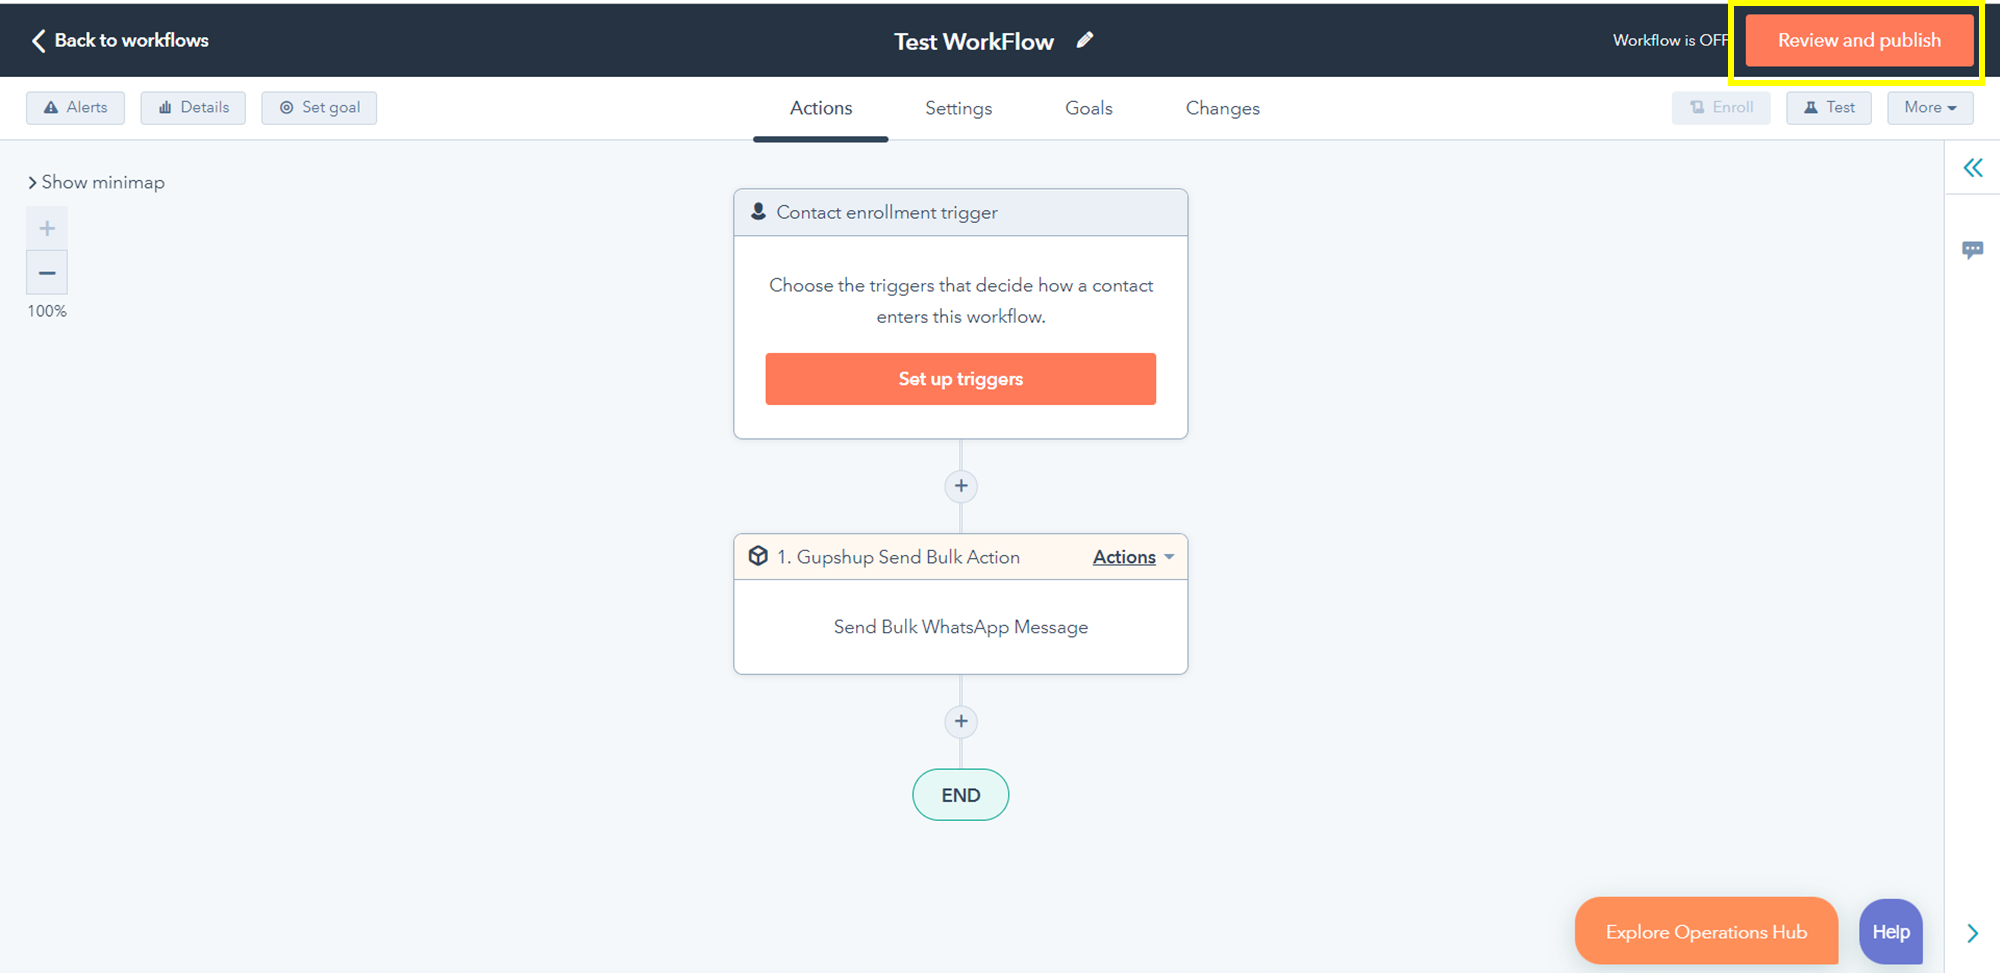
- A new page will open then click on “Turn on” button. After Clicking on “Turn on” button User’s workflow will be active.
-
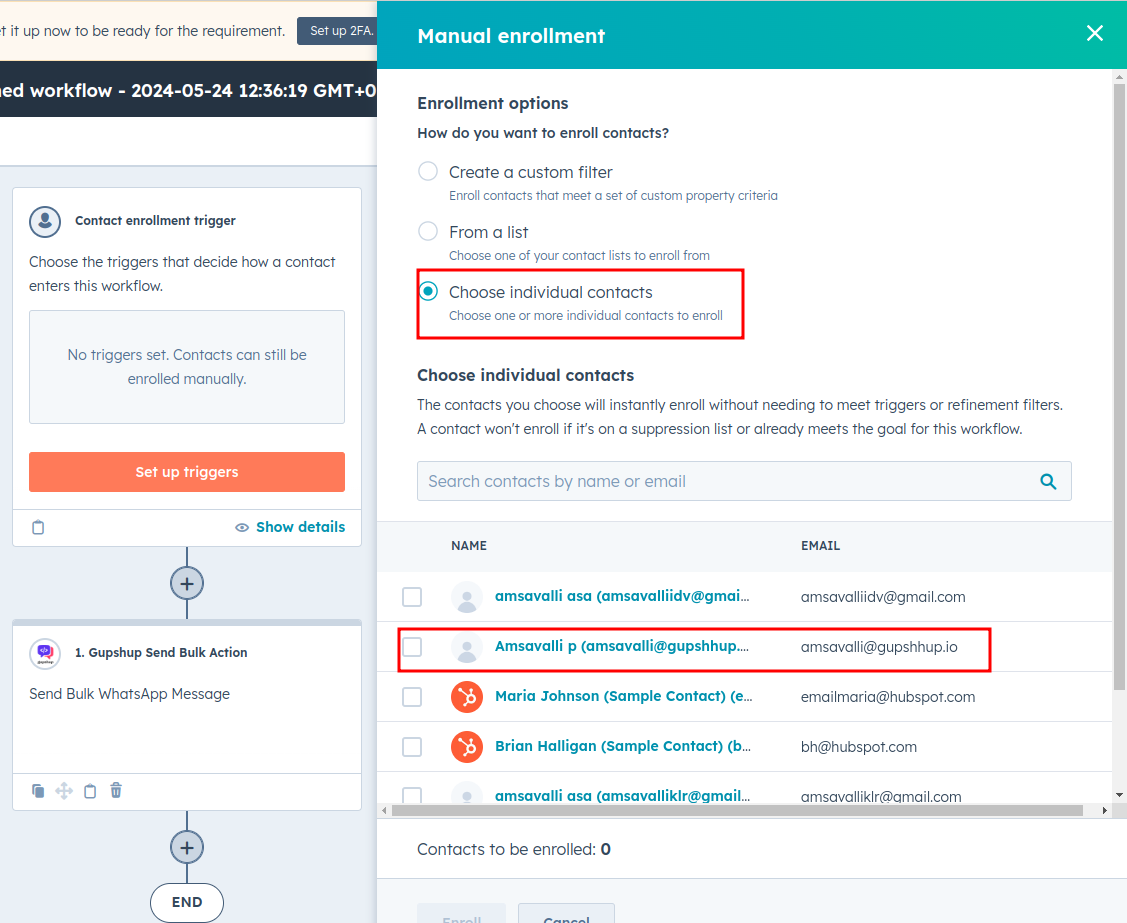
click on entroll button and click the check icon for user contact
-
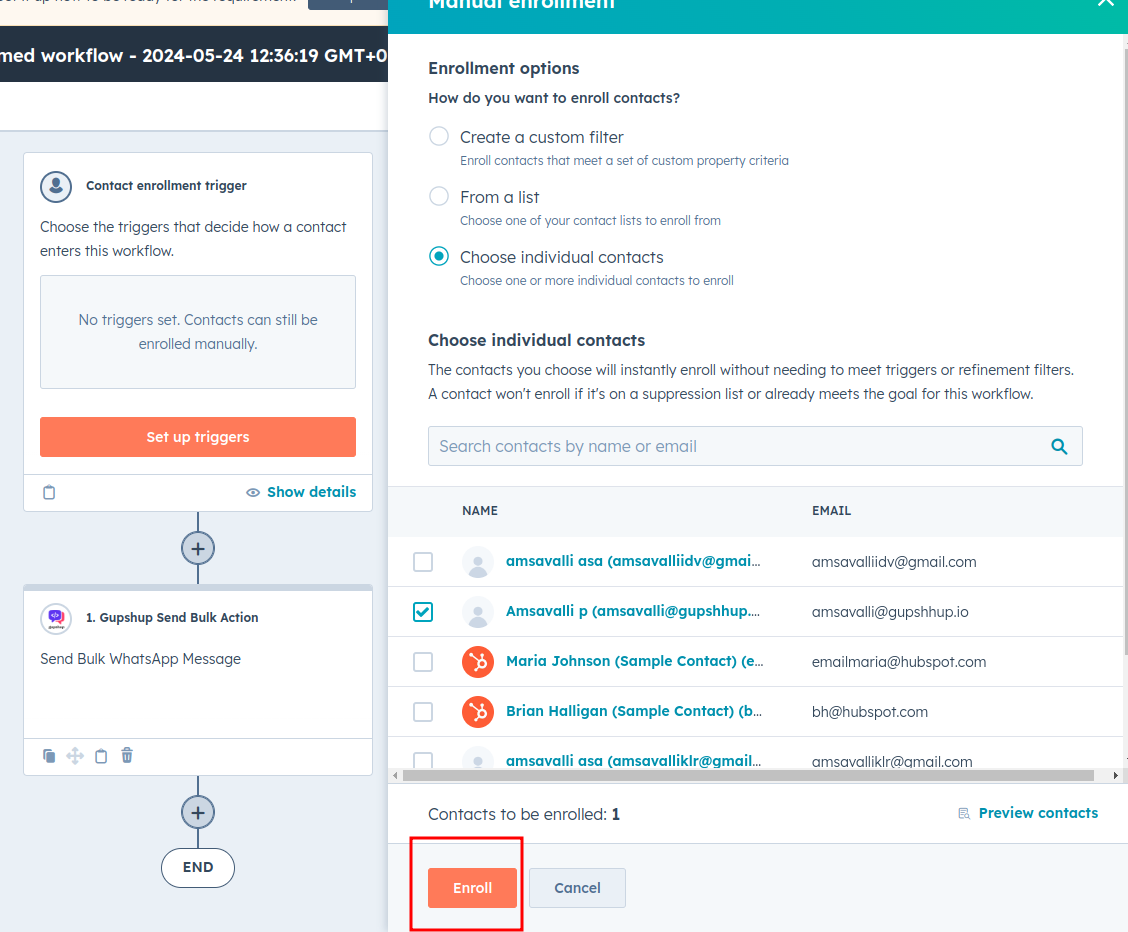
Click the 'Enroll' button and then click the check icon next to the user contact."
-
again click the enroll below bottom text.
- verify this message - new contact have been enrolled open the view button -
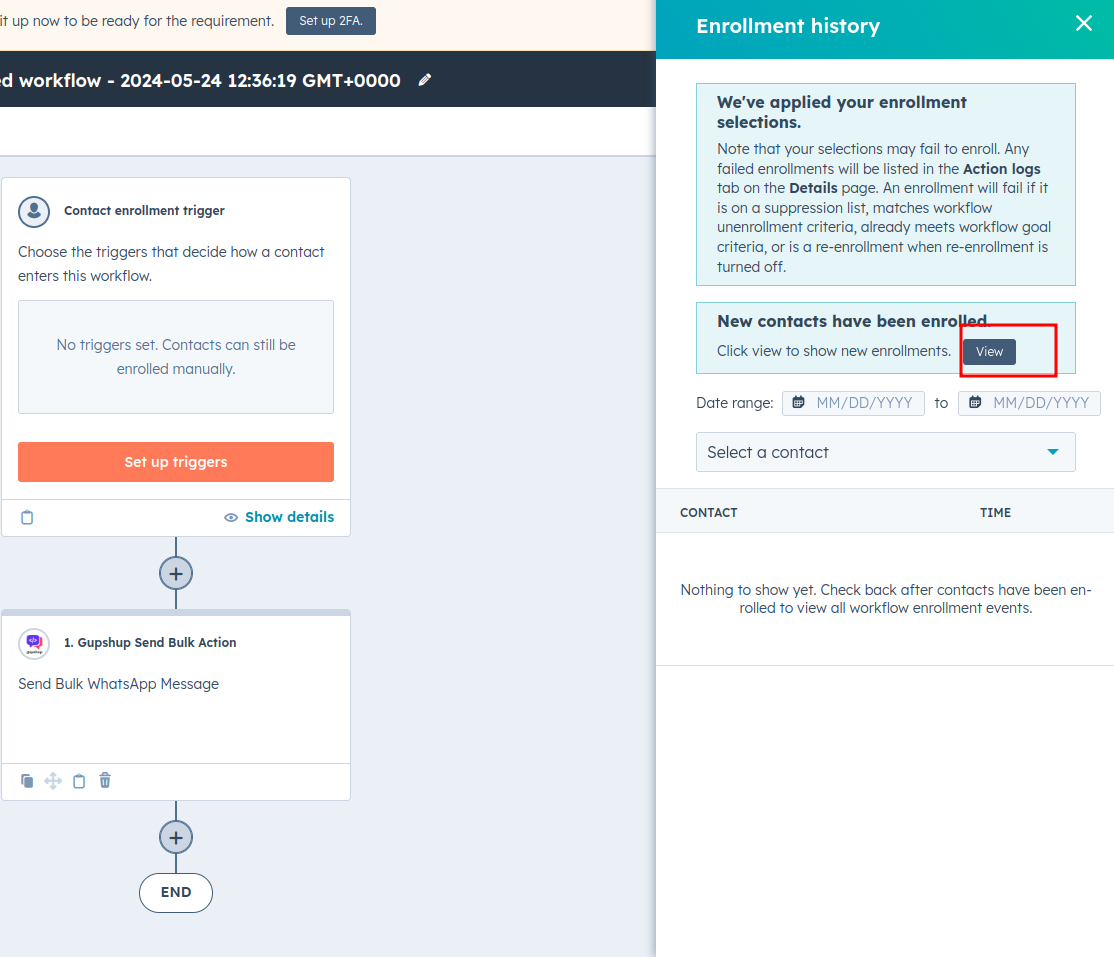
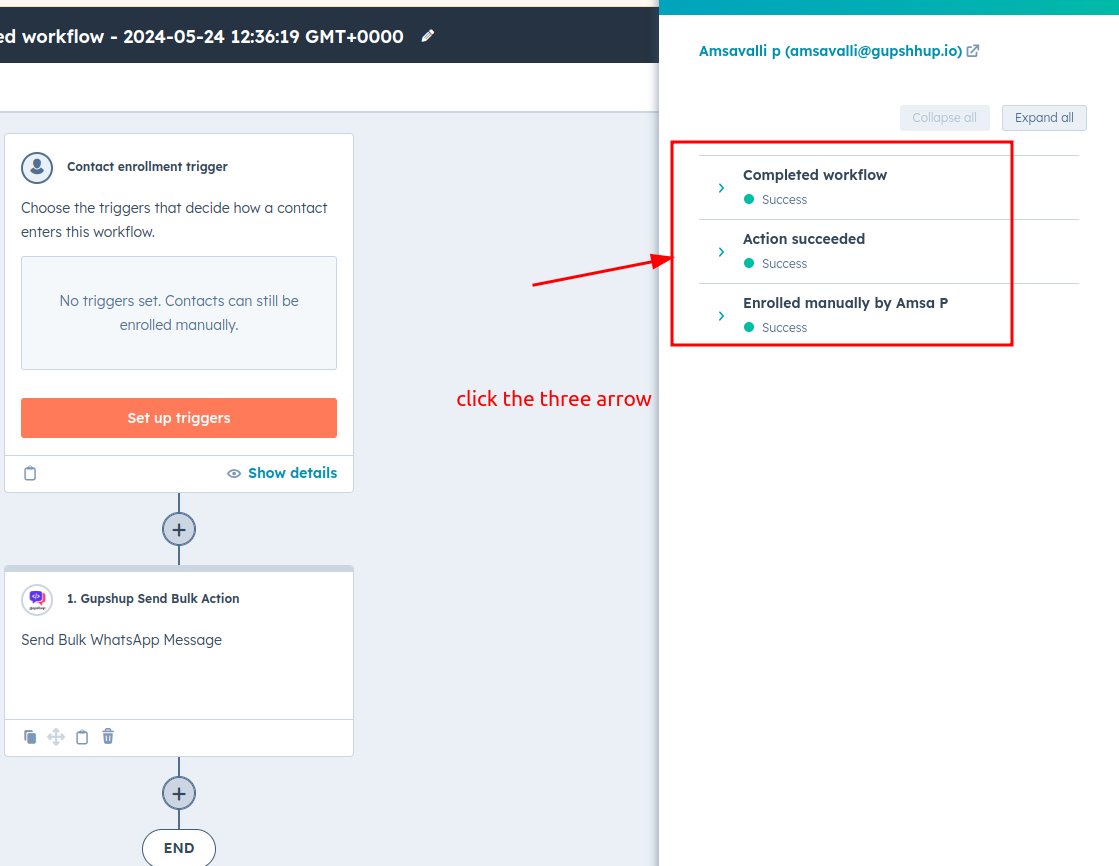
- Click on the contact within the completed workflow that is available.
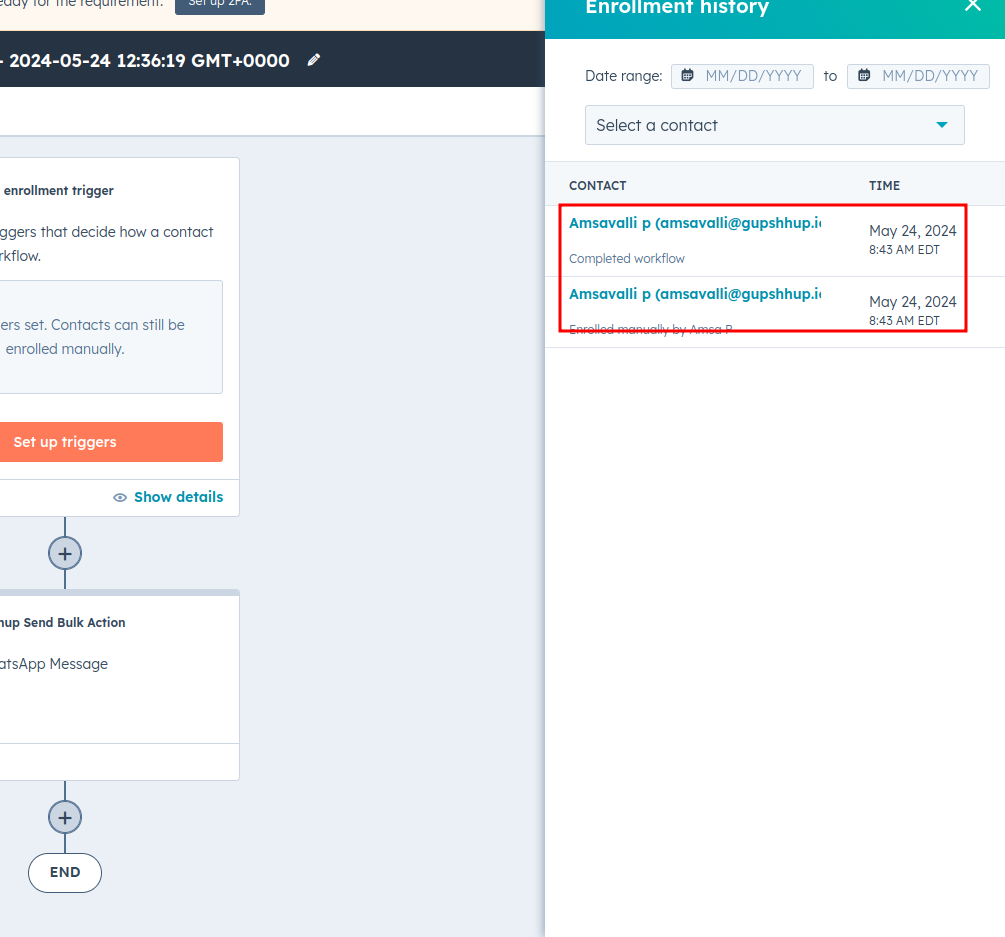
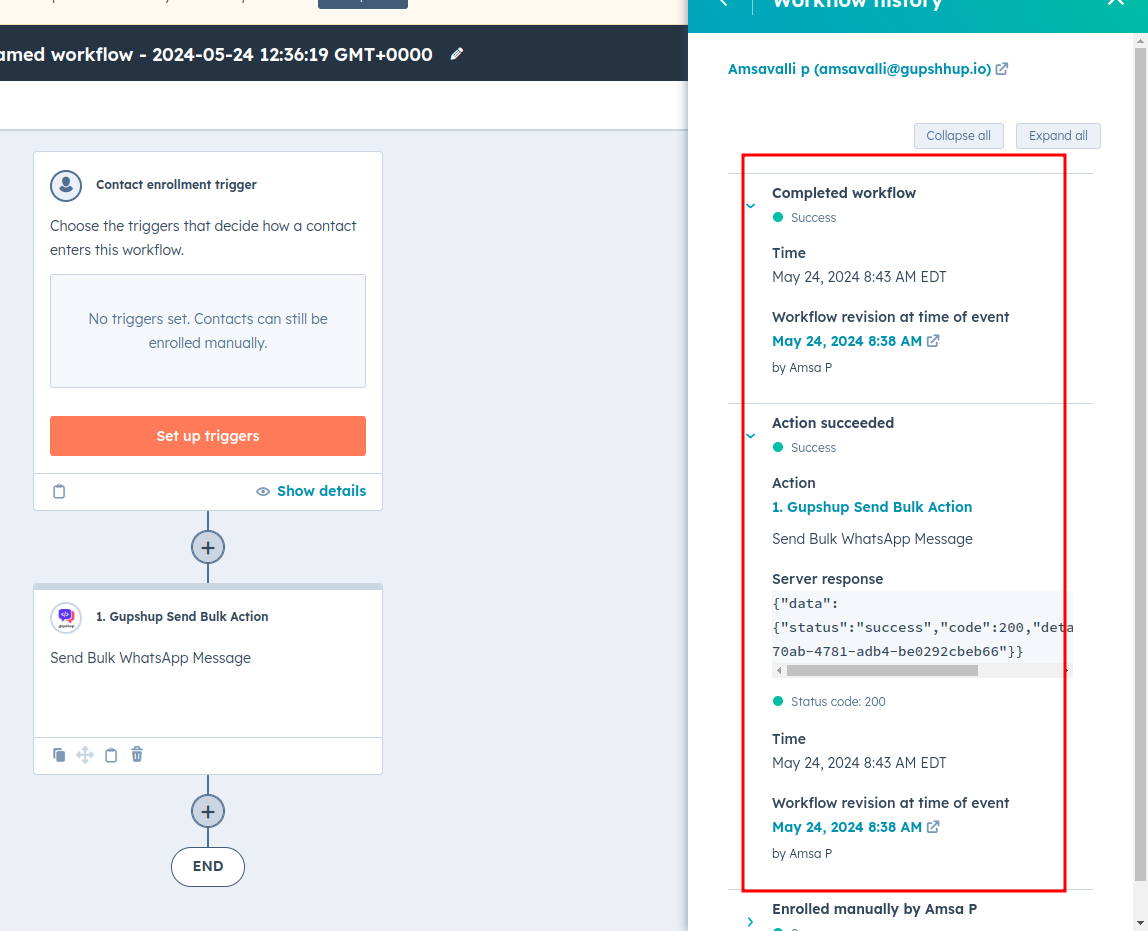
- After completing the workflow, it will retrieve details such as date, time, and server response.e
- The receiver's WhatsApp number is required for receiving workflow messages via text message."
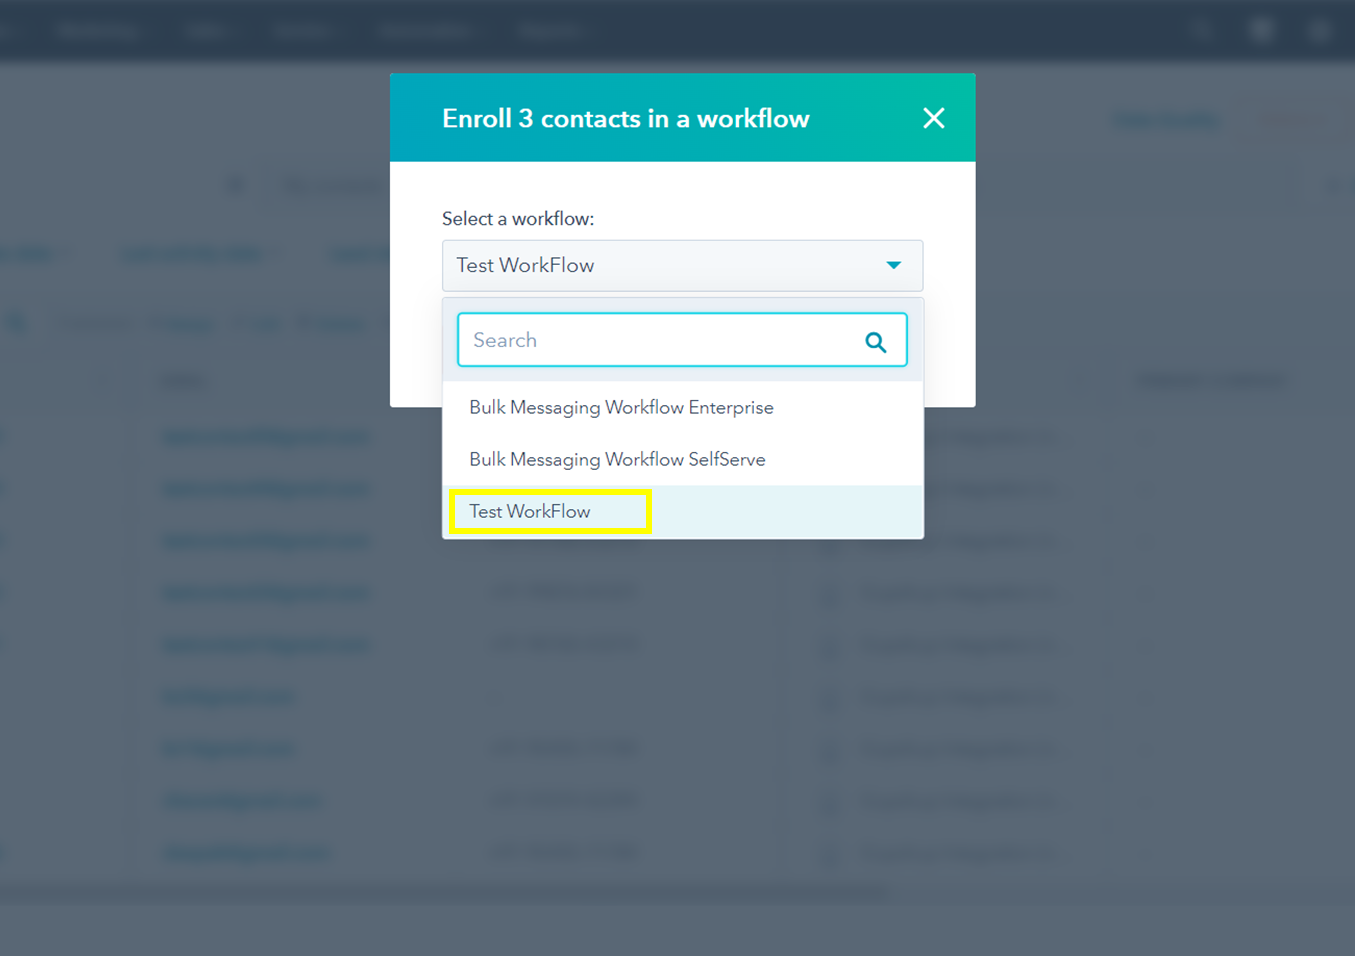
- For using the workflow action, User must go on Contact List and select contact and enroll contacts in Workflow.
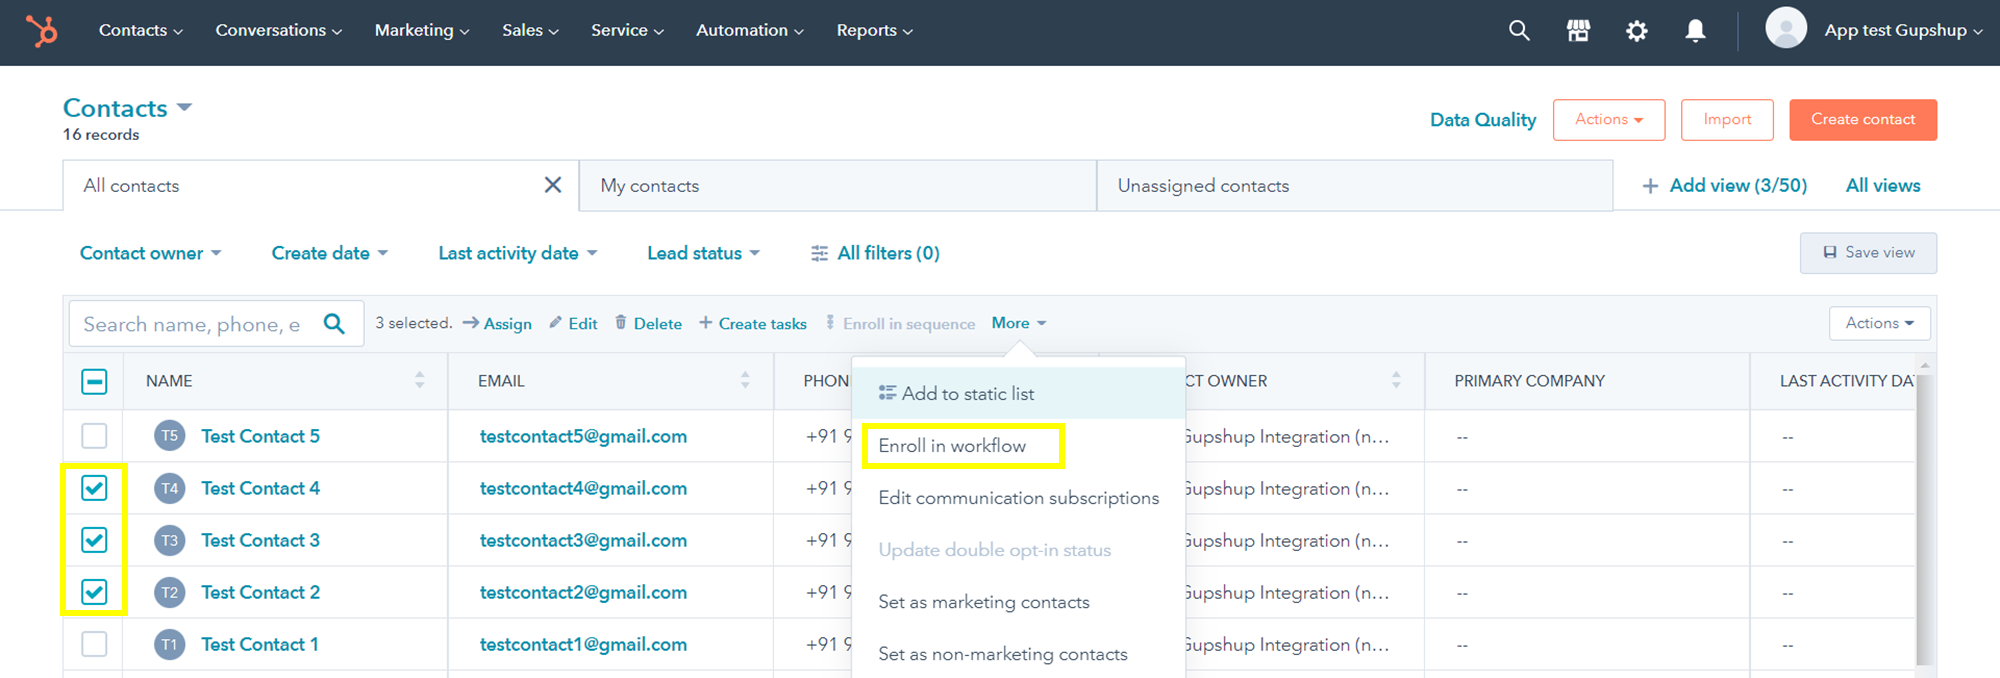
- Select your created Workflow and click on “Enroll” button.
- Your contacts will get enrolled and enrolled contacts will receive WhatsApp messages and timeline event will get created in selected contacts.
Updated 9 months ago