If Else Condition
Achieve an end-to-end flow for your automated workflows using If Else Condition. Actions under the if block or the else block execute depending on the condition gets satisfied or not, respectively.
The If Else Condition executes a journey ensuring that it is not aborted unless there's an invalid input from a user or misinterpreted data passed by one of the actions. The If Else Condition contains two condition blocks where a user has to configure the journey action. If the specified condition is met, the Ifblock gets executed; else the journey will perform the action(s) present in the Else block. The functioning is quite similar to the If Condition action offering a guaranteed end-to-end flow of the automation.
To understand its operation in an easy way, let's assume a simple use case and build a journey accordingly.
Use case
Whenever a new event is created in Eventbrite, check the name of the event. If the event name contains Birthday, then save its record in a specific row of Google Sheets; else save it in a miscellaneous row of Google Sheets.
- Trigger: Eventbrite - New event created
- Condition: If Else
- Action: Google Sheets - Add row
Let's create a journey step by step by breaking the use case statement.
Configuring the Eventbrite trigger
To set up the Eventbrite trigger "Whenever a new event is created in Eventbrite", follow these steps:
- Under the Event section, search for the Eventbrite app and click on it. Then select the trigger event, New event, from the Triggers list.
- To authorize Eventbrite, select an existing connection from the drop-down or create a new connection. To create a new one, enter the connection name of your choice and click the Link an account button. Log in to your Eventbrite account and allow the permissions for the scopes to be accessed by the Gupshup Integration Platform.
- Select the organization in the Organization field for which you want to listen to a new event:
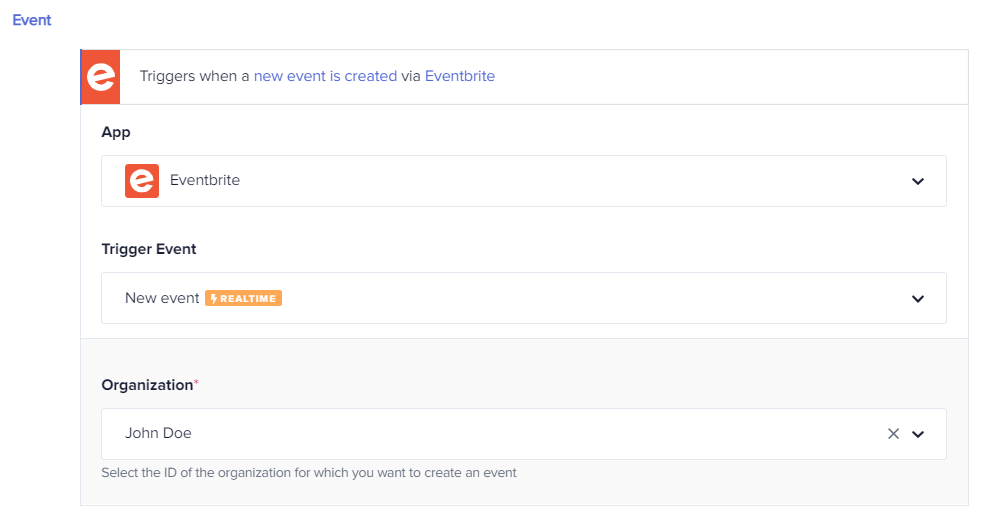
Figure 1: Configuring the Eventbrite trigger
Configuring the actions in the If Else Condition block
Now, let's use the If Else Condition feature. Under the Steps section, click the Business Logic option and select If Else Condition:
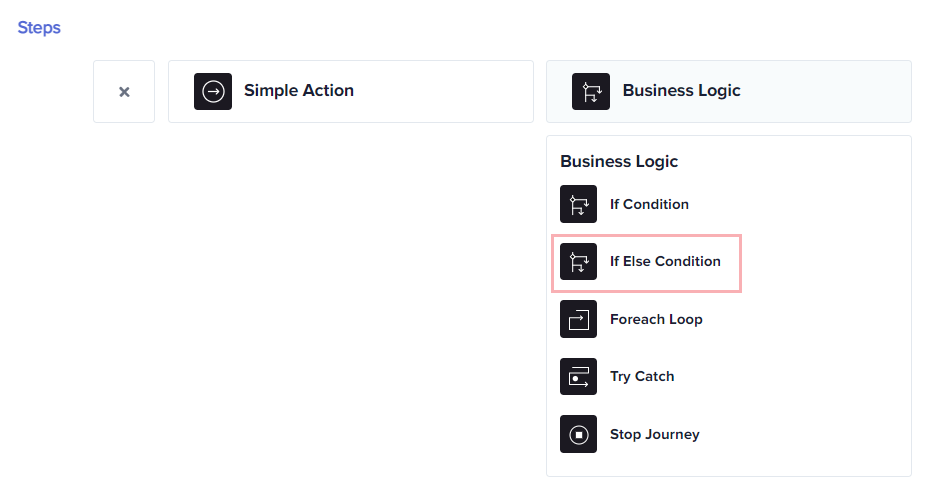
Figure 2: The If Else Condition
The If Else Condition block will appear with the pre-indented action bars as illustrated here:
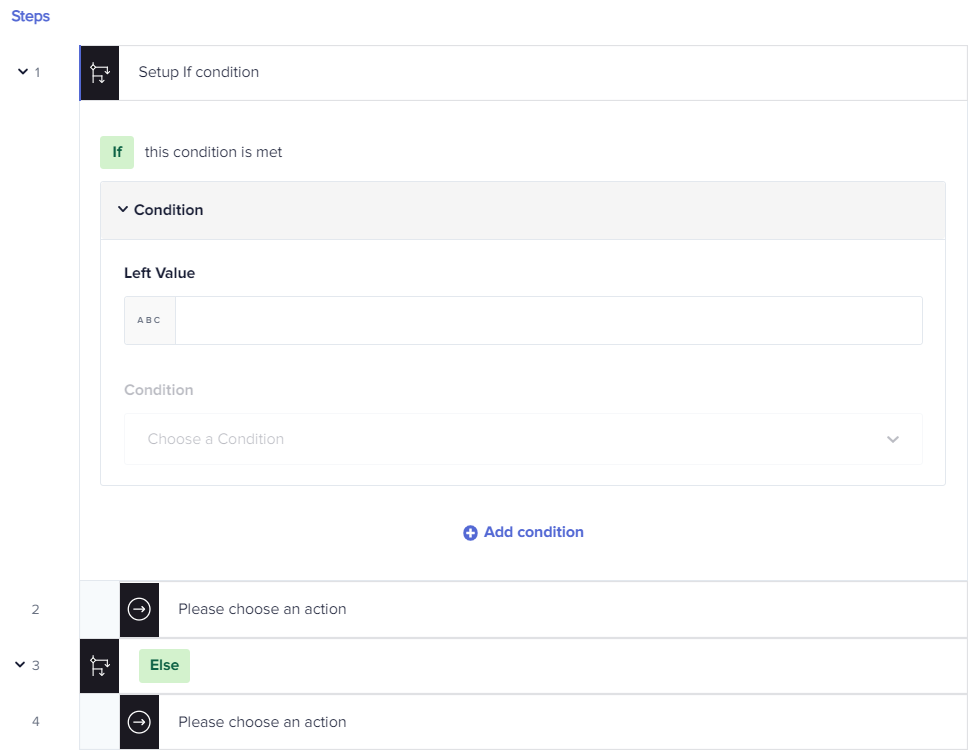
Figure 3: The structure of If Else Condition
Specifying the journey condition
To configure the If the event name contains Birthday, go to the Setup If condition block.
In the Left Value field, pass the Eventbrite !alt text data pill by clicking from the New event Trigger response under the Data Tree Output located on the right-hand side of the journey builder. Select the Contains condition from the drop-down menu in the Condition field. In the Right Value field, enter Birthday as the keyword. Once successfully done, your If Condition block will look like the following screenshot with a heading If name contains Birthday:
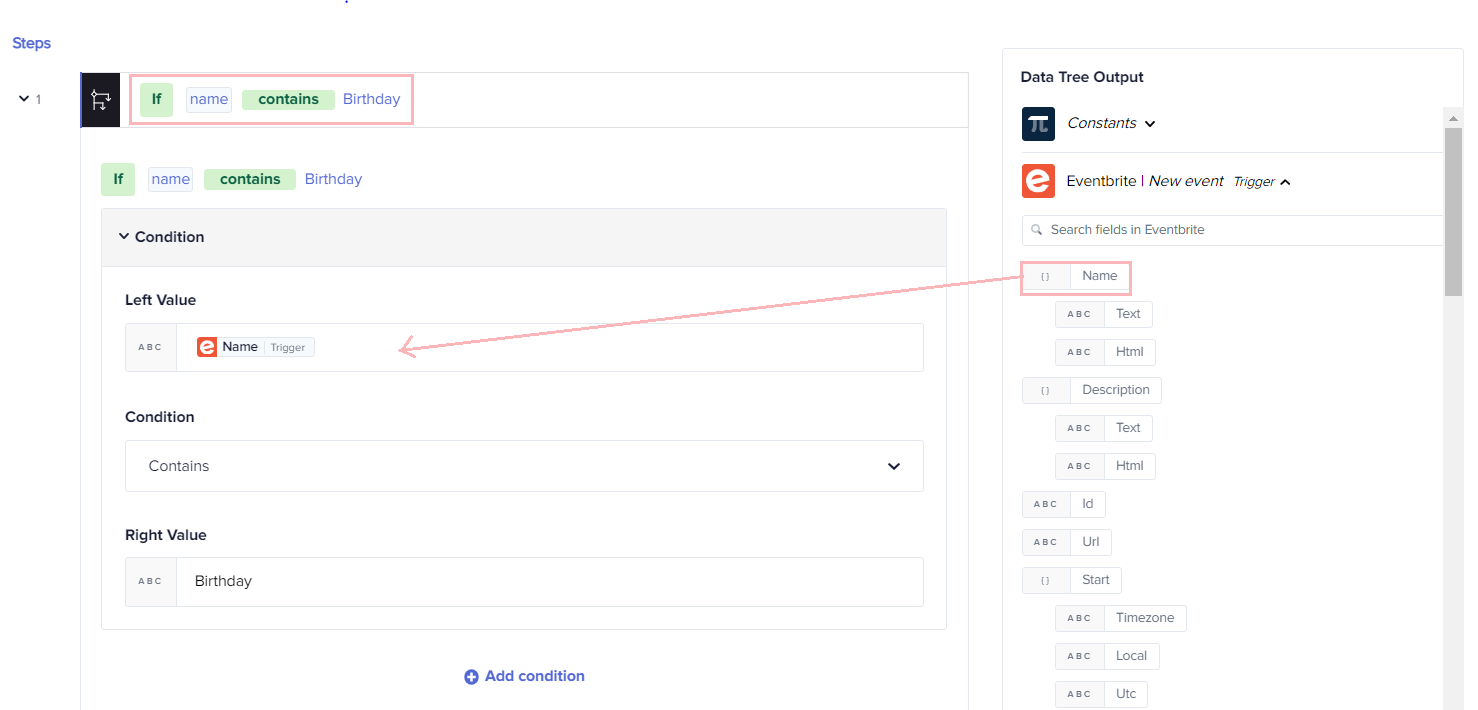
Figure 4: Configuring the If Condition
Configuring an action under the If Condition block
Now, let's configure the Google Sheets - Add row action under the If Condition complying with the use case statement " thensave its record in a specific row of Google Sheets".
Before that, let's create a Google Sheets spreadsheet where all the triggering data gets saved. Name the sheet as Eventbrite data. Create two column headers, say Party Specific and Others. The event name containing Birthday as a keyword should get saved under the "Party Specific" column, and the rest of the events should get saved under the "Others" column:
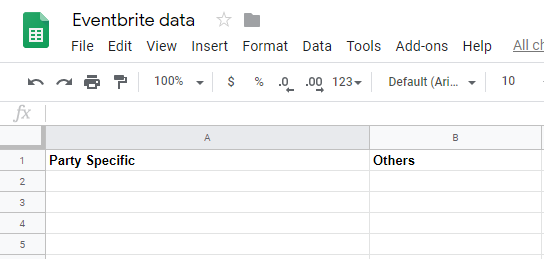
Figure 5: Eventbrite data spreadsheet
Column headers created with a specific name in the spreadsheet get reflected automatically as an input field in the Google Sheets actions.
Now, return to the journey configuration window. Click on the Please choose an action bar under the If block and follow these steps to configure the action:
- Choose the Google Sheets app from the drop-down menu in the App field.
- Select the action, Add row (new version), from the drop-down menu in the Actions field.
- Connect the Google account using which you have created the above (Eventbrite data) spreadsheet.
- Once a connection is created, you'll get the input fields of Google Sheets to be specified
1. Spreadsheet: Select the Eventbrite data spreadsheet from the drop-down menu.
2. Sheet: Select the sheet in which the Eventbrite data spreadsheet is created. It is Sheet1 in this case.
3. Party Specific: This is the first column header we had created in the spreadsheet. As per the use case, we want the data to get saved under this column. Pass the Eventbrite trigger response data pills such as
Name , Start , and End as shown in the following image:

Figure 6: Passing trigger response data pills to the input field
   4. **Others**: This is the second column header we had created in the
               spreadsheet. As per the use case, we don't want any data to get saved
               under this column if the condition is satisfied. Keep this field empty.
Here's how the action looks after successful configuration:
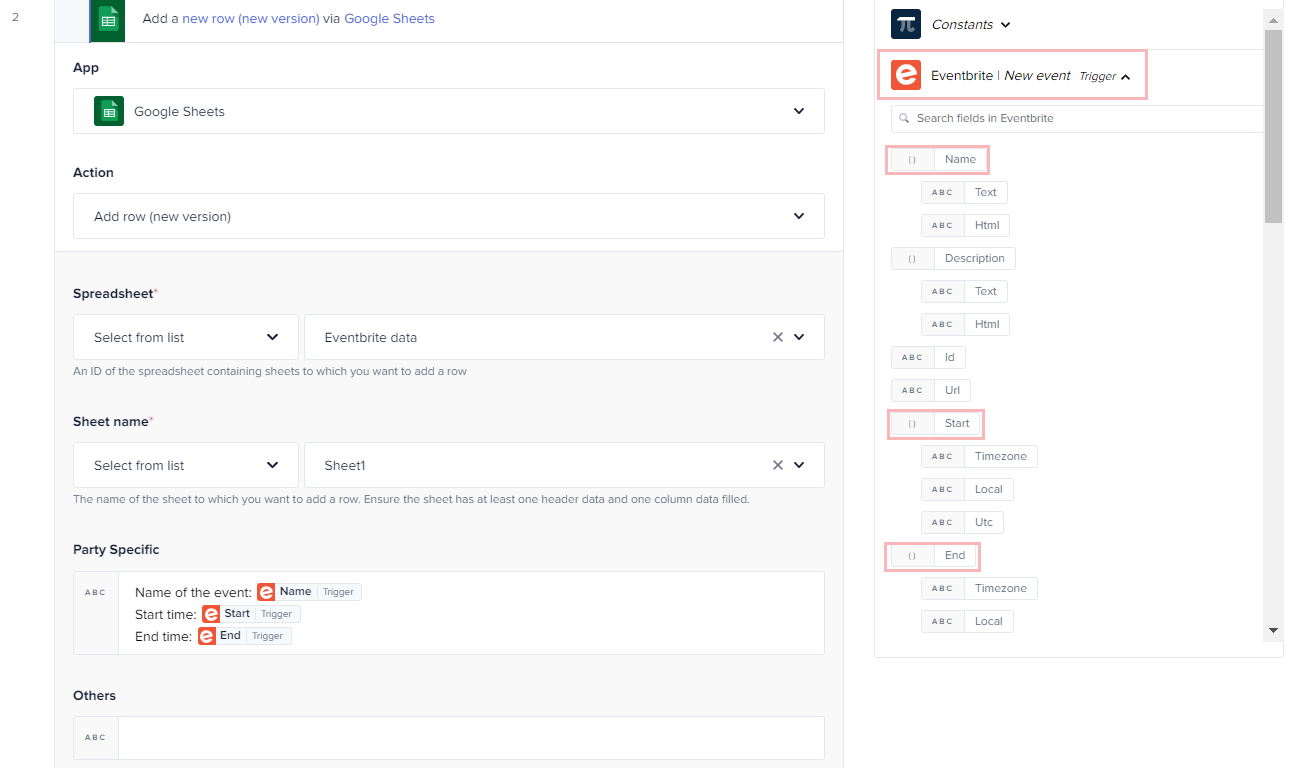
Figure 7: Configuring the Add row action under the If Condition
Configuring an action under the Else condition
Let's configure another Google Sheets - Add row action complying with the last statement of the use case " elsesave it in a miscellaneousrow of Google Sheets".
The configuration steps for the Google Sheets - Add row action are almost the same as discussed in the previous section.
However, there's a minor change for specifying trigger response data pills in the input fields.
As per the last statement of the use case, specify the Eventbrite trigger output data in the Others column header field and keep the Party Specific field empty. Refer to the following screenshot:
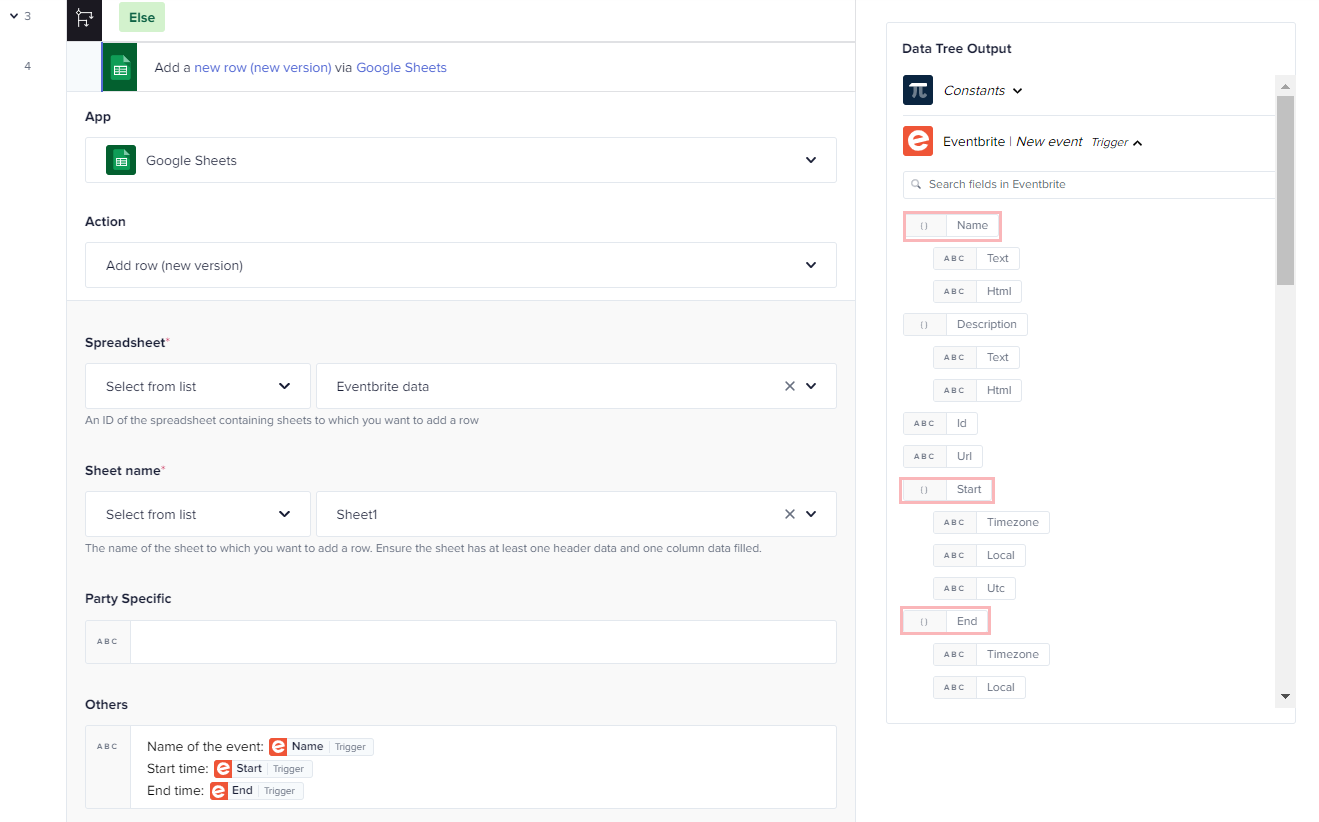
Figure 8: Configuring the Google Sheets-Add row action under the Else block
Executing the journey
Once your trigger and action get successfully configured, click on the Save Changes button to save your journey. Then, click the Save & Start button to execute your journey. Now, whenever a new event is created in Eventbrite, the journey will first check whether the event name contains the keyword Birthday or not. If yes, then its details such as name, start time, and end time will get saved in a row under the Party Specific column of the Eventbrite data spreadsheet. If not, then the details will get saved in a row under the Others column of the Eventbrite data spreadsheet. Here's the output:
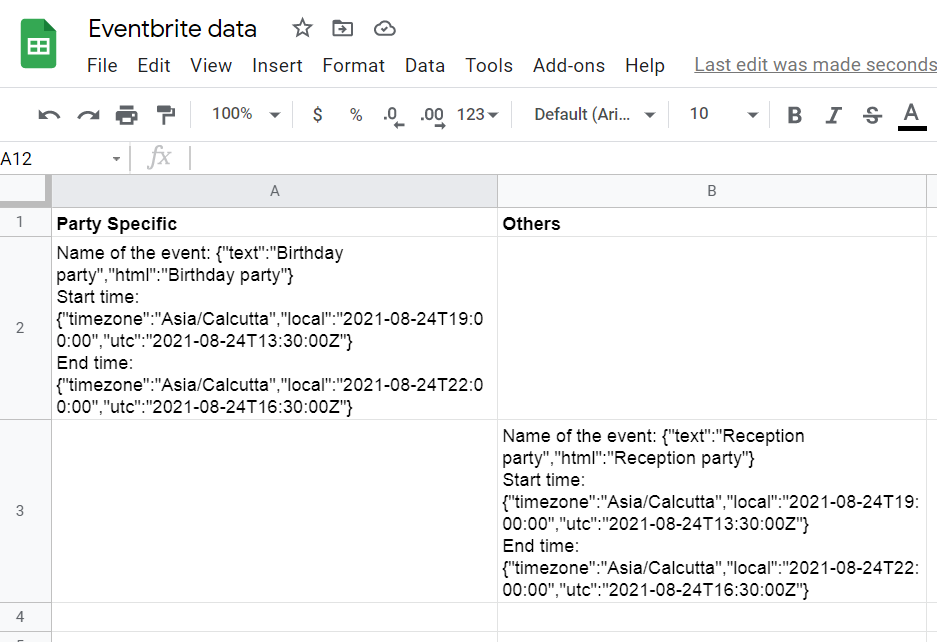
Figure 9: Journey output
You can get granularity in the journey output by specifying more trigger response data in the action fields.
This is one of the quickest ways that the Gupshup Integration Platform offers to deal with complex journeys. You can create more conditioning journeys such as:
"Whenever a new case is created in Salesforce, check its status. If the status is Escalated, then forward the case details to the CEO of the company else, send it to the support team to maintain records."
OR
"Whenever a competitor publishes a new post on Facebook containing the keywords IoT, journeys, or automation, email the details of the post automatically to your Manager else, save its details with you."
Updated 3 months ago
