Updating Default Scheduler Time in Gupshup Salesforce App
Updating Default Scheduler Time in Gupshup Salesforce App
To adjust the default scheduler time to poll inbound messages in the Gupshup Salesforce app, follow these instructions to update the Inbound_Polling_Scheduling_Time Custom Label. This process involves adding a local translation to set the scheduler time.
Steps to Update the Scheduler Time
-
Access Salesforce Setup
- Log in to Salesforce.
- Navigate to Setup:
- Click on the gear icon located in the top-right corner of the Salesforce interface.
- Select Setup from the dropdown menu.
-
Locate Custom Labels
- Search for Custom Labels:
- In the Quick Find box on the left-hand side of the Setup page, type Custom Labels.
- Click on Custom Labels from the search results.
- Search for Custom Labels:
-
Select the Relevant Custom Label
- Find and Select the Custom Label:
- In the Custom Labels list, look for Inbound_Polling_Scheduling_Time.
- Click on the label name to open its details.
- Find and Select the Custom Label:
-
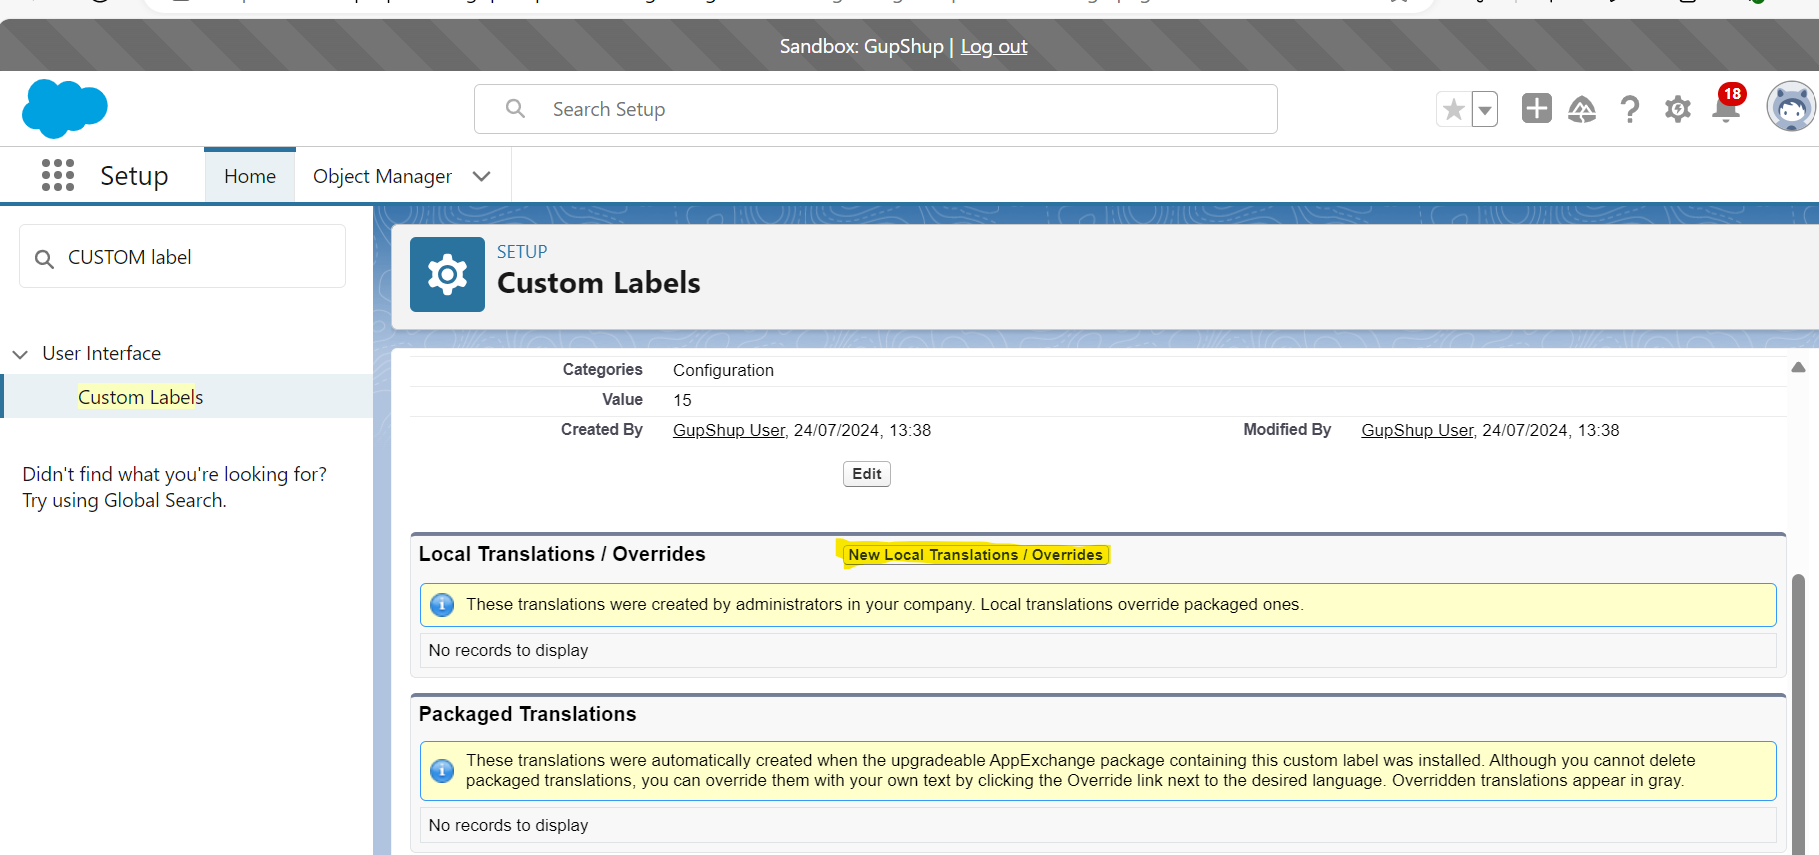
Add New Local Translation
- Create New Local Translation:
- Under the Inbound_Polling_Scheduling_Time Custom Label details, click on New Local Translations/Overrides.
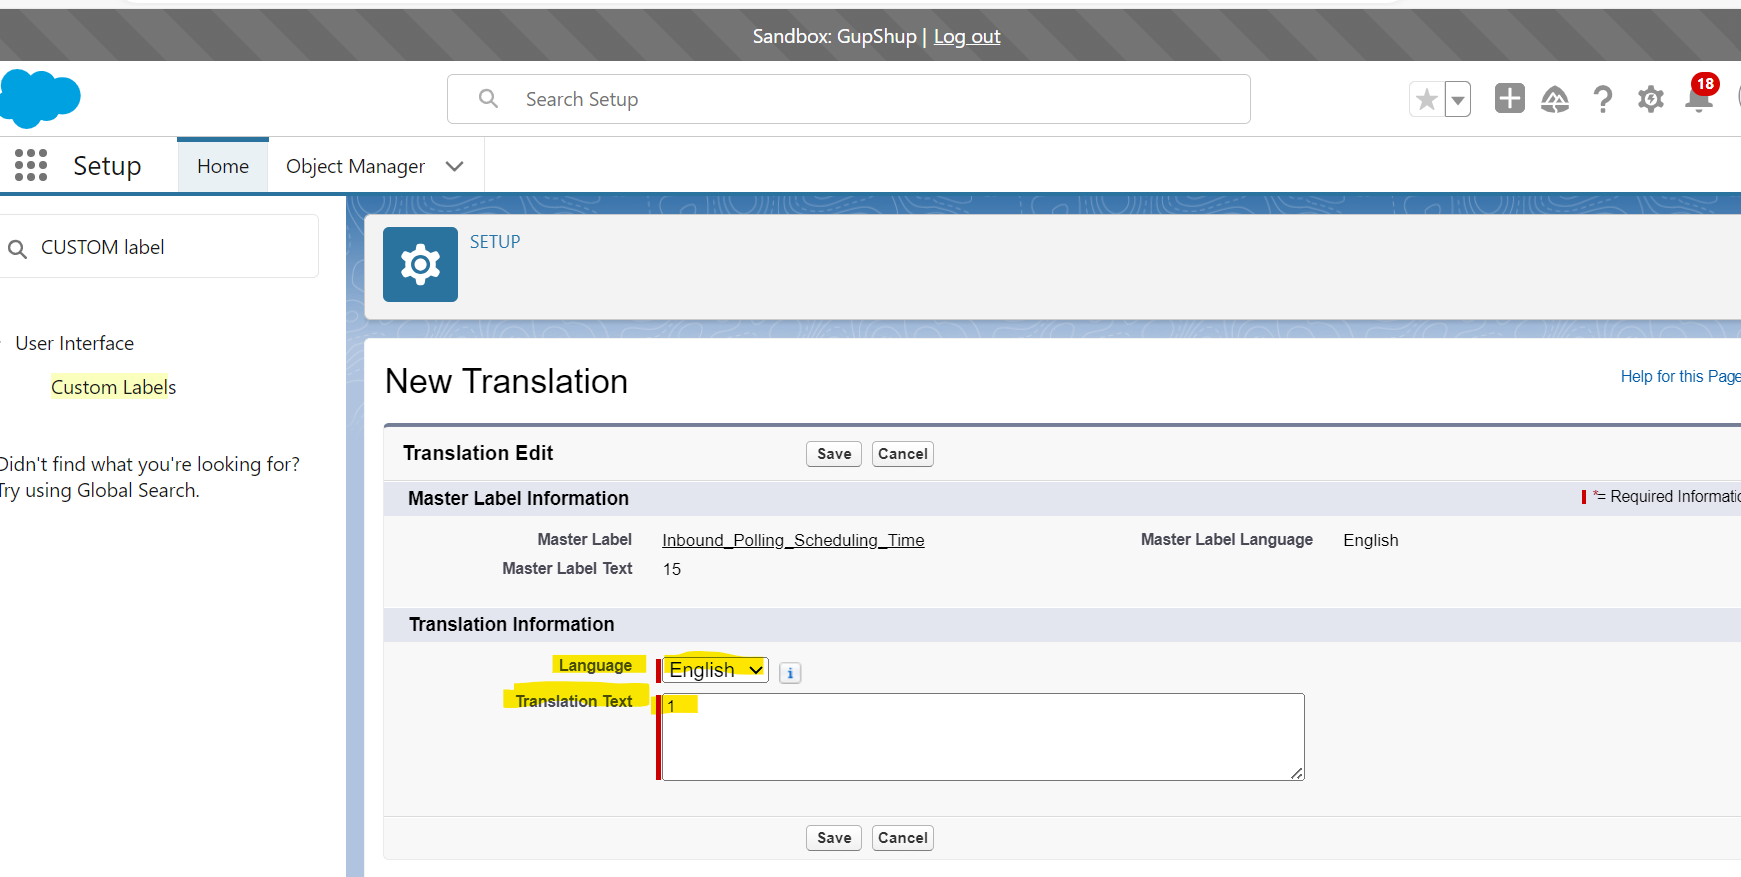
- Enter Translation Details:
- Select Language: Choose the language for which you want to set the translation. If you are making changes for all users regardless of their language, select the default language or your specific target language.
- Set Translation Text: Enter "1" in the Translation Text field to set the scheduler time.
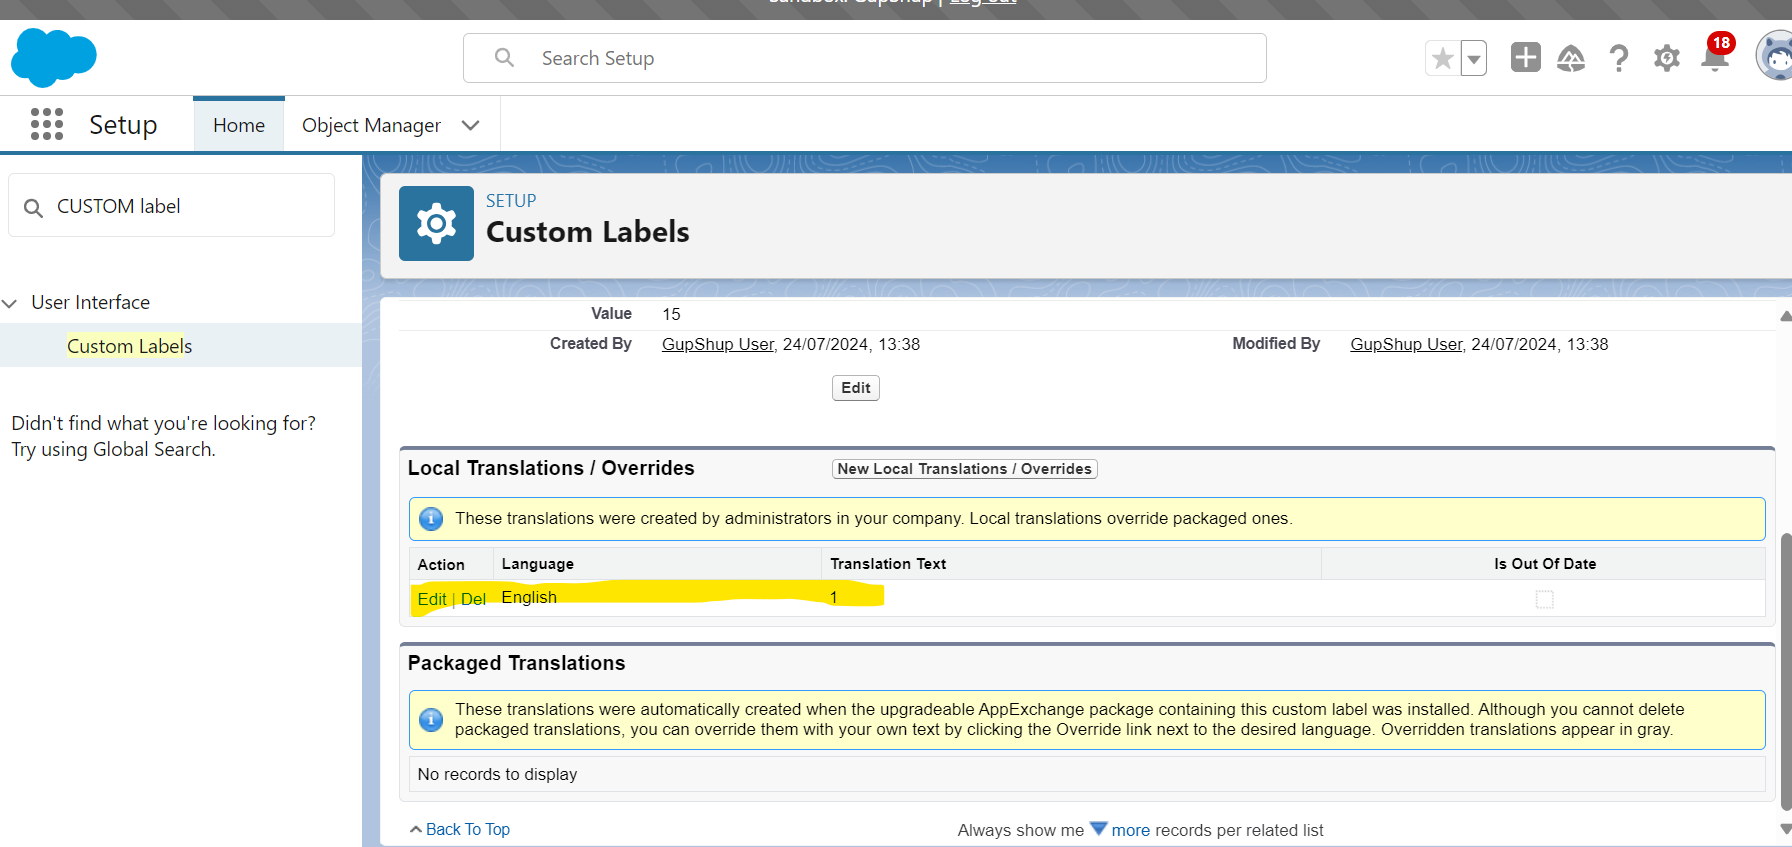
- Save Your Changes:
- Click Save to apply the new local translation.\
- Click Save to apply the new local translation.\
- Create New Local Translation:
In the new local translation, select the language and set the translation text as "1" .
Once you have provided the language and translation test, save it.
Updated 9 months ago
Did this page help you?