Step 1: Create a Folder
Organize your workflows in Gupshup Integrations. Create a folder to store them so that the workflows remain distinguished and easy to search. You can also rename or delete a folder as per your business needs.
Folders are virtual storage locations in which multiple user-created journeys are stored in a well-organized manner. A folder stores all your configured journeys in one place. In case you have journeys that are related and can be grouped together, you can create a folder with a unique group name and save the journeys in that folder. The configuration-related information of each journey gets automatically saved in its respective folder.
Let's drive through this document and understand how to create, edit, or delete a folder.
Depending on the user level, i.e. a new or an existing user, creating a folder has a common procedure to deal with, except a variation in the UI.
- When no folders are present
- When multiple folders are present
When no folders are present
If you are a new user and you are yet to create your first folder, you will see the following screen under the Folders tab as soon as you log into your account:

To get started, click on the Create Journey button as highlighted in the above screenshot. You will be prompted up with a window asking you to enter the name of the folder you want to create, say Task.
Click Next:
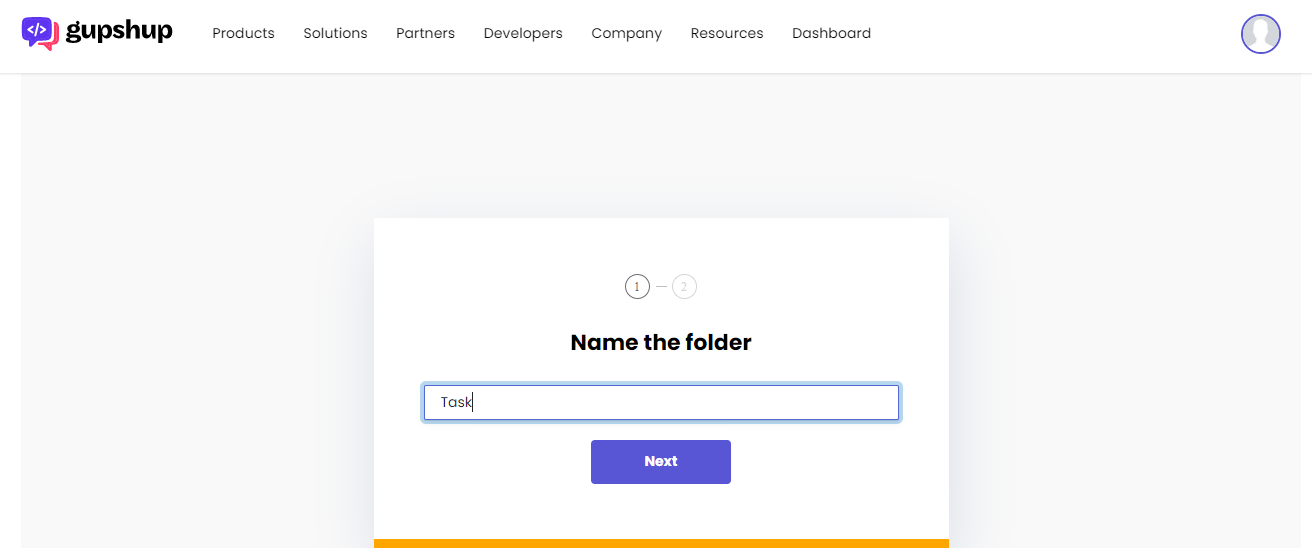
In the Accessibility window, you can decide whether you want your newly created folder to be public or private. Select the option accordingly:
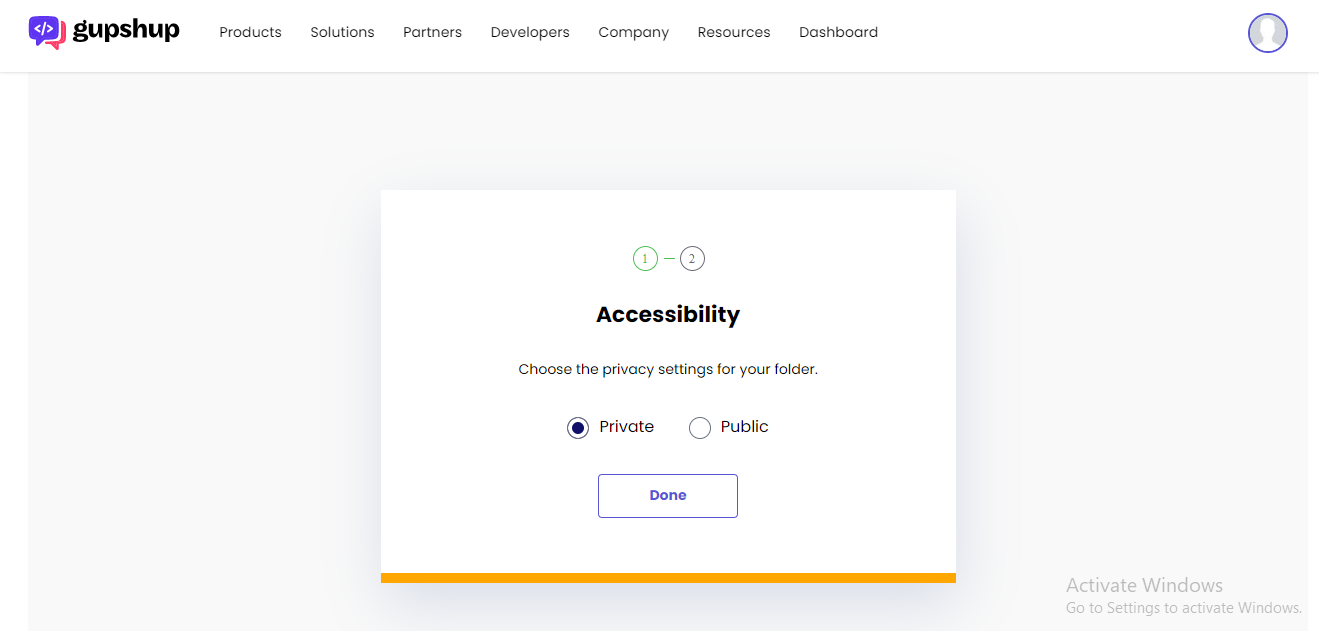
Then, click on the Done button. You’ll get a confirmation screen stating you have created a new folder:
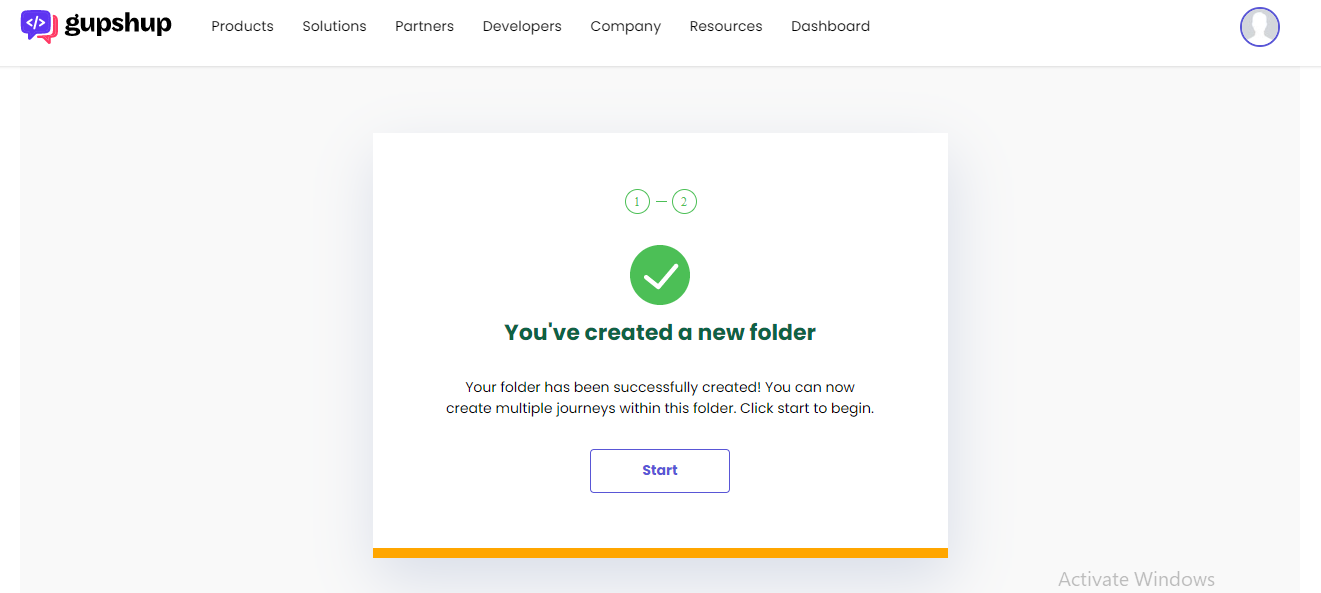
Now, click on Start to create your first journey in this folder.
When multiple folders are present
The platform's user interface for the users who had already created some folders. The moment you'll log in to Integration, you will see the folders list under the Folders tab. It is illustrated in the following screenshot:
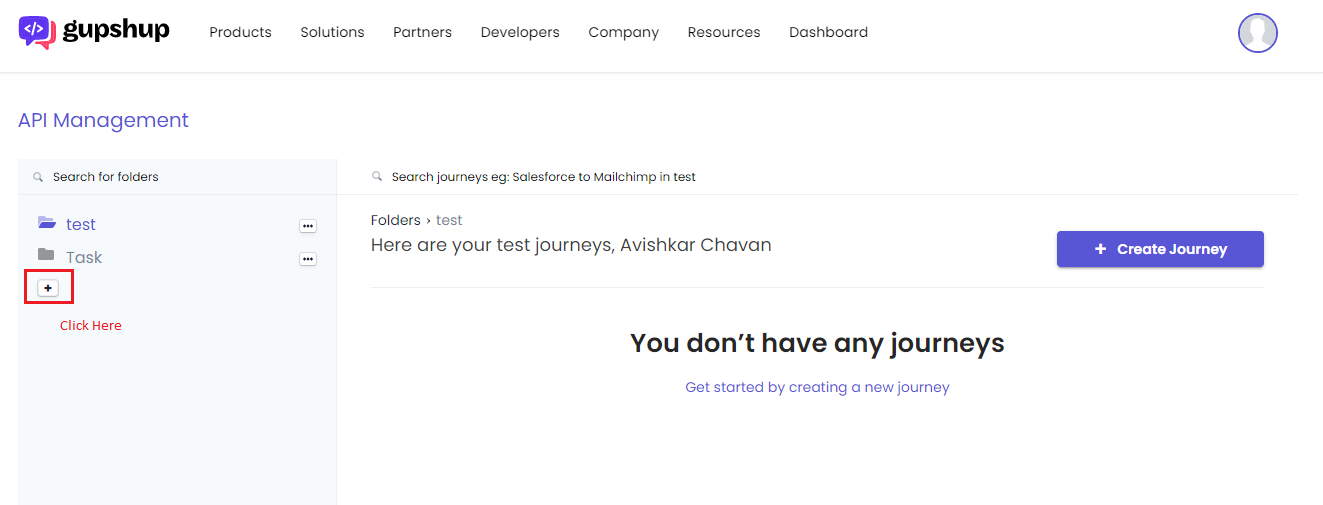
In the Folders window, you'll get a list of folders on the left-hand side panel and journeys built within those folders on the right-hand side. Clicking on each folder will give you a list of associated journeys in the Journey list as shown in the above screenshot.
The Task folder has a journey built-in. To create another folder in such a scenario, click the + icon located below the folders created. You'll get similar screens as shown in Figures 2, 3, and 4, asking you to enter the details for creating a new folder.
To create a new journey within a folder, click the + Create Journey button located at the top right-hand side corner of the screen.
Renaming a folder
To rename the folder, Task, click on the three horizontal ellipses and select the Rename option:
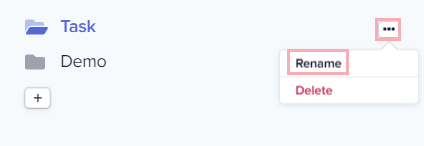
The Rename Folder window pops up allowing you to enter a new name for the folder e.g., Sample folder:
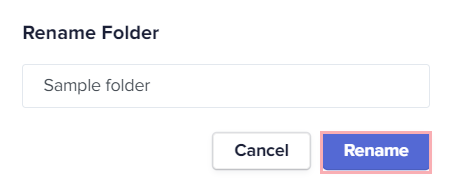
Once entered, click the Rename button. The folder will get renamed.
Deleting a folder
To delete a folder, select the Delete option by clicking on the three horizontal ellipses. The illustration is shown here:

A confirmation screen will appear on the same instance asking you whether you want to delete the folder or not:
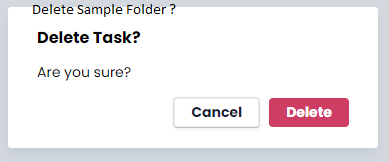
Clicking on the Delete option will delete your folder.
Updated 4 months ago
Now that you have created a folder, It's time to create your first journey!
