Setup Configuration
Don't have a Gupshup Account yet?
Get Started today: https://www.gupshup.io/contact-us
Already using Gupshup?
- At Gupshup, we onboard our clients on 2 kinds of Accounts, based on their needs and use cases. They are:
1. Self-Serve
2. Enterprise
*NOTE: If you are not aware of the type of Gupshup account you are using, please check out the following documentation: https://docs.gupshup.io/docs/integration-configuration-assistant
Now that you might be aware of the type of account you are using, let's move forward. - To send WhatsApp messages, click on Contacts/Lead in the left navigation. After clicking, it will redirect to the contact list page.
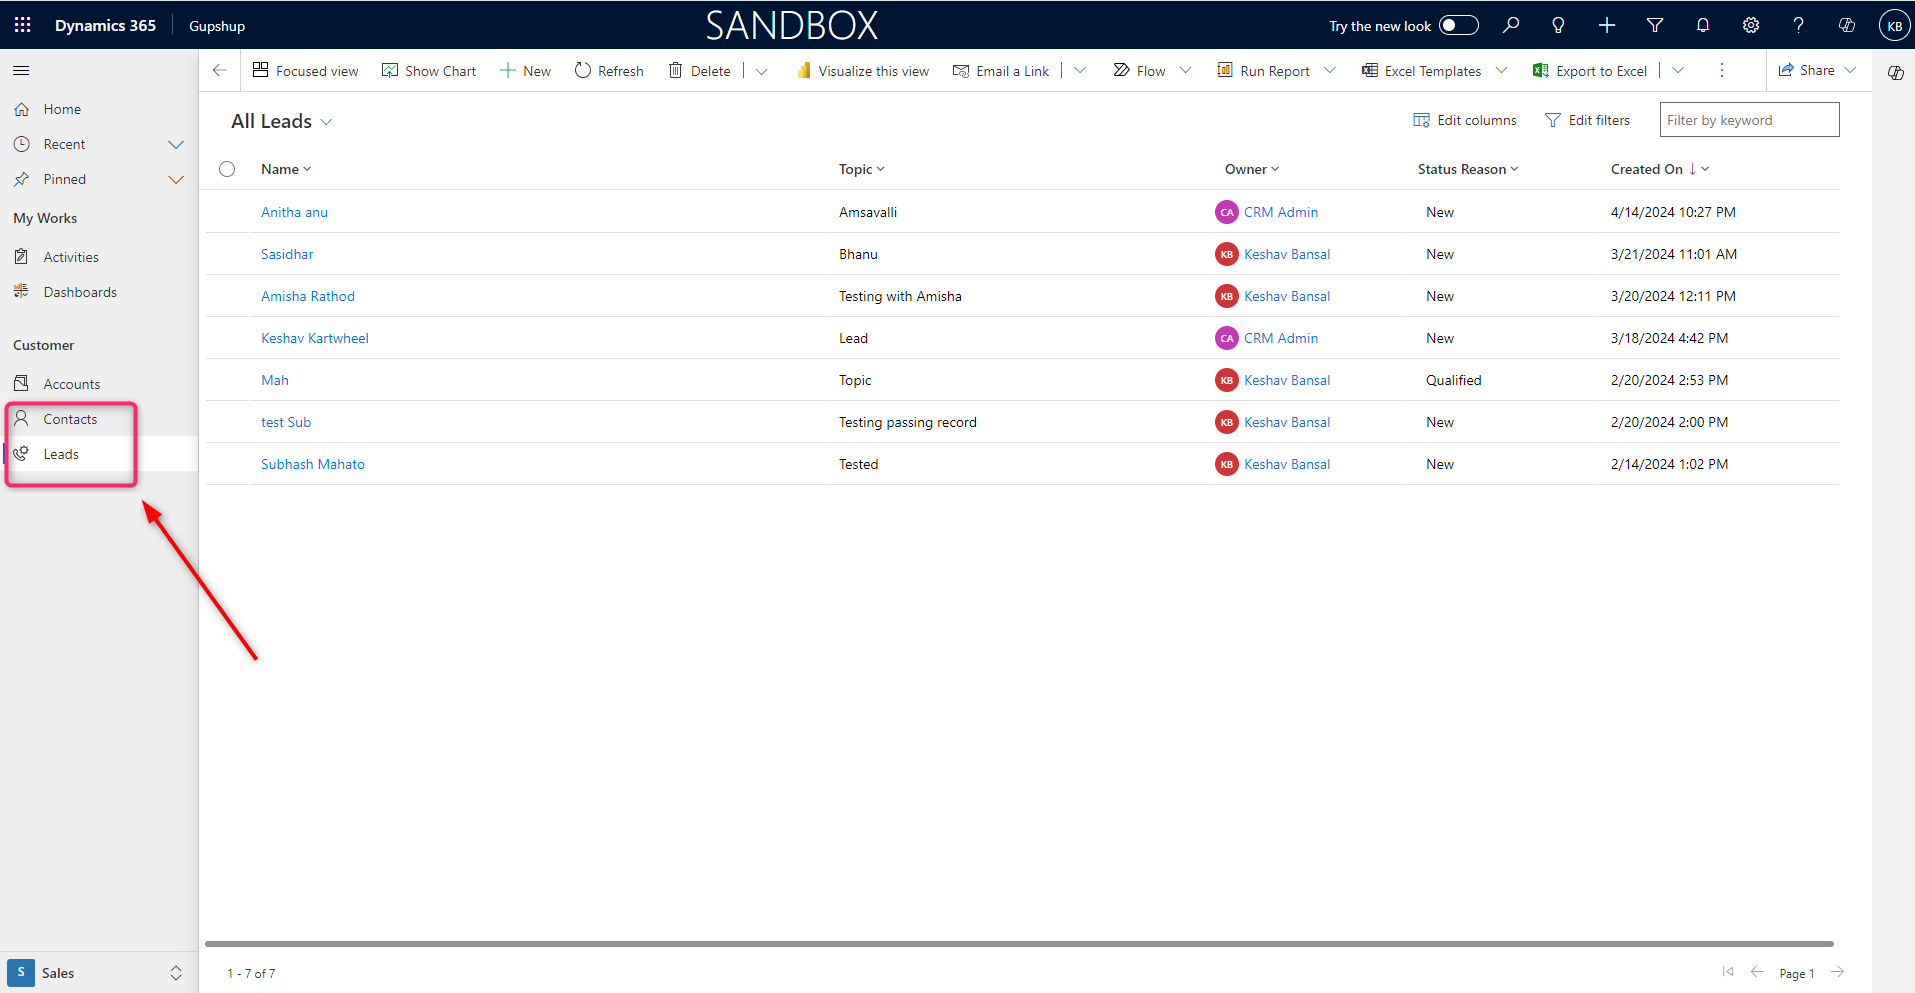
Click on the lead module where the option to send a WhatsApp message is visible.
Set Security Role in D365:
While logging in for the first time you will not have access to the App in CRM, and you will receive the below message.
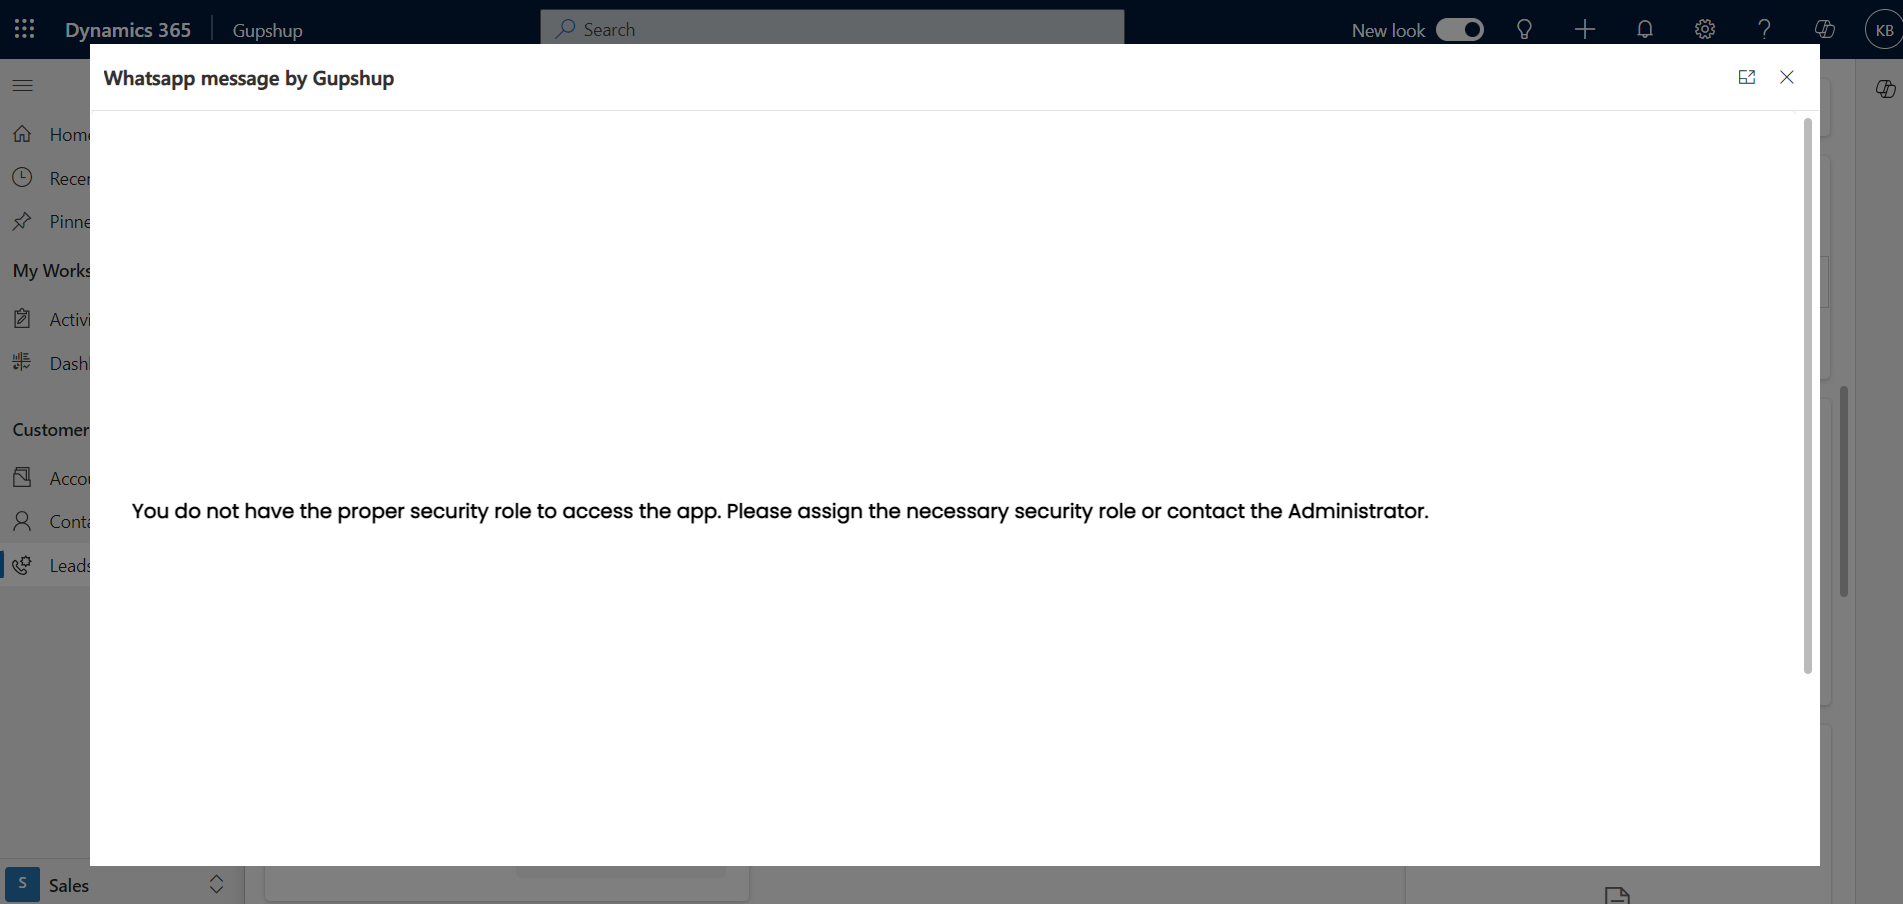
- To access the app in d365 you have 3 different security roles, any security role needs to be assigned to the user over the existing security role.
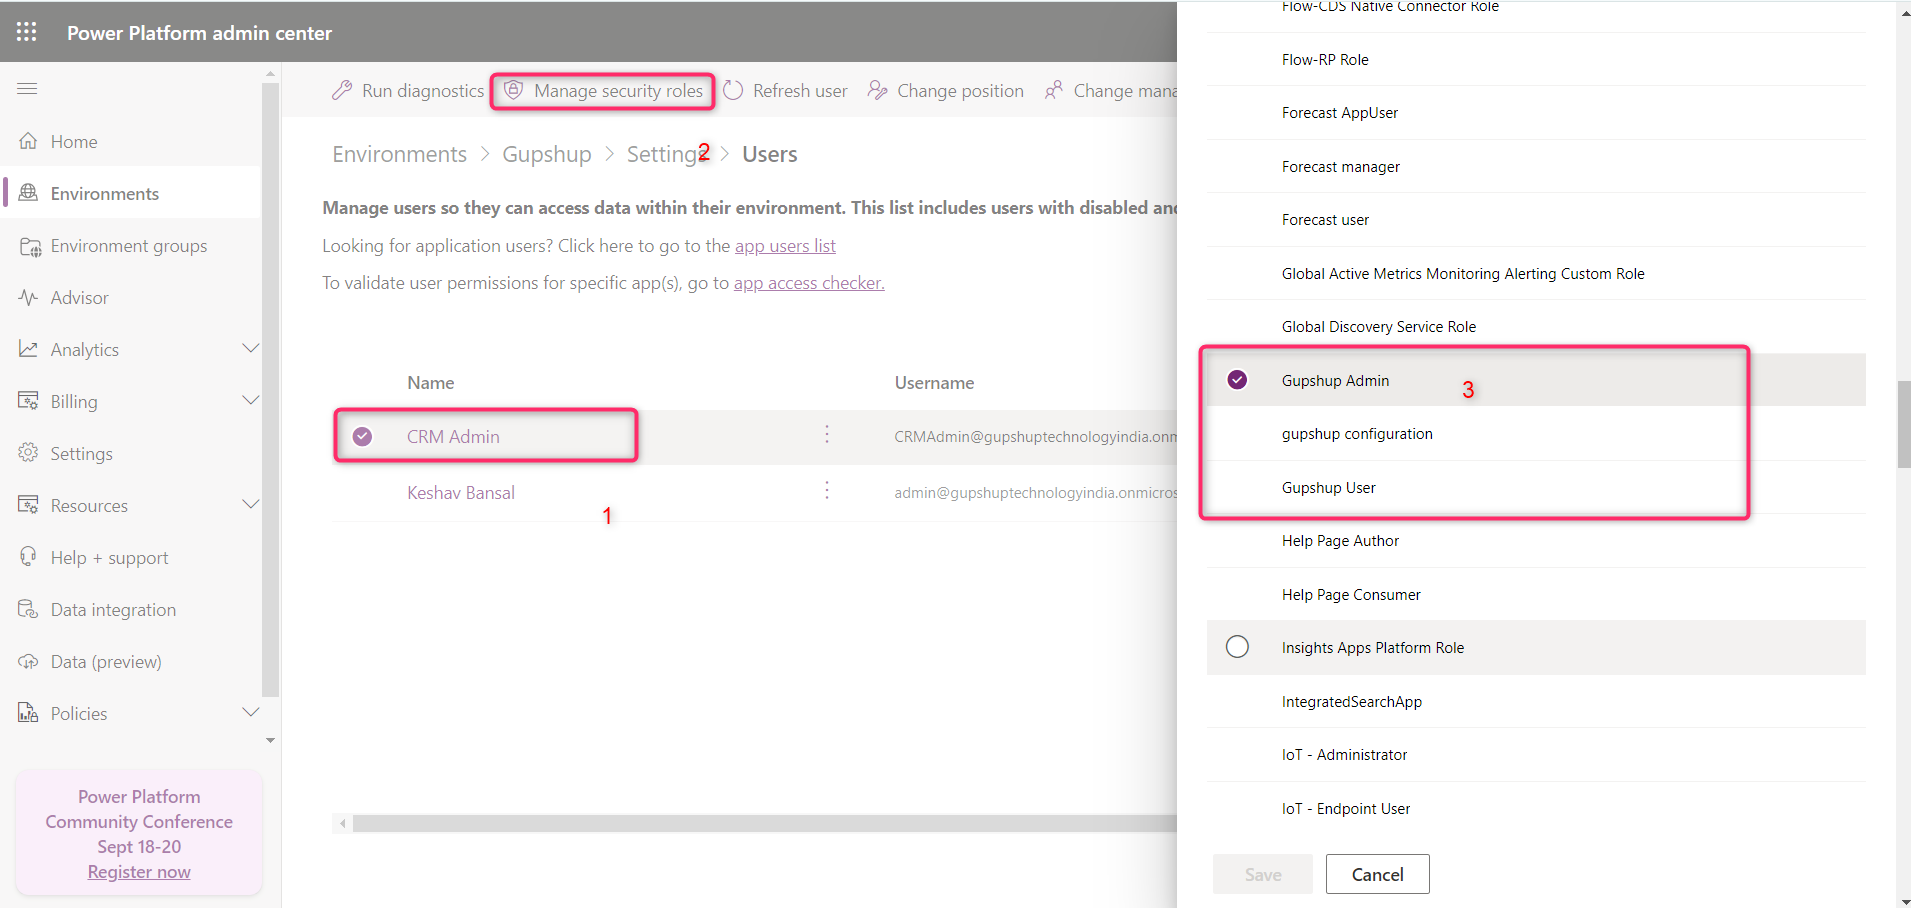
Gupshup Admin:
Gupshup admin has access to perform tasks like configuration of channel, sending template messaging, and Session Messaging (live chat).
Gupshup Configuration:
- This user has only access to the configuration tab and this user will not be able to send template messages or session messages.
Gupshup User:
This user will be able to send template messages and session messages.
Assign Security role:
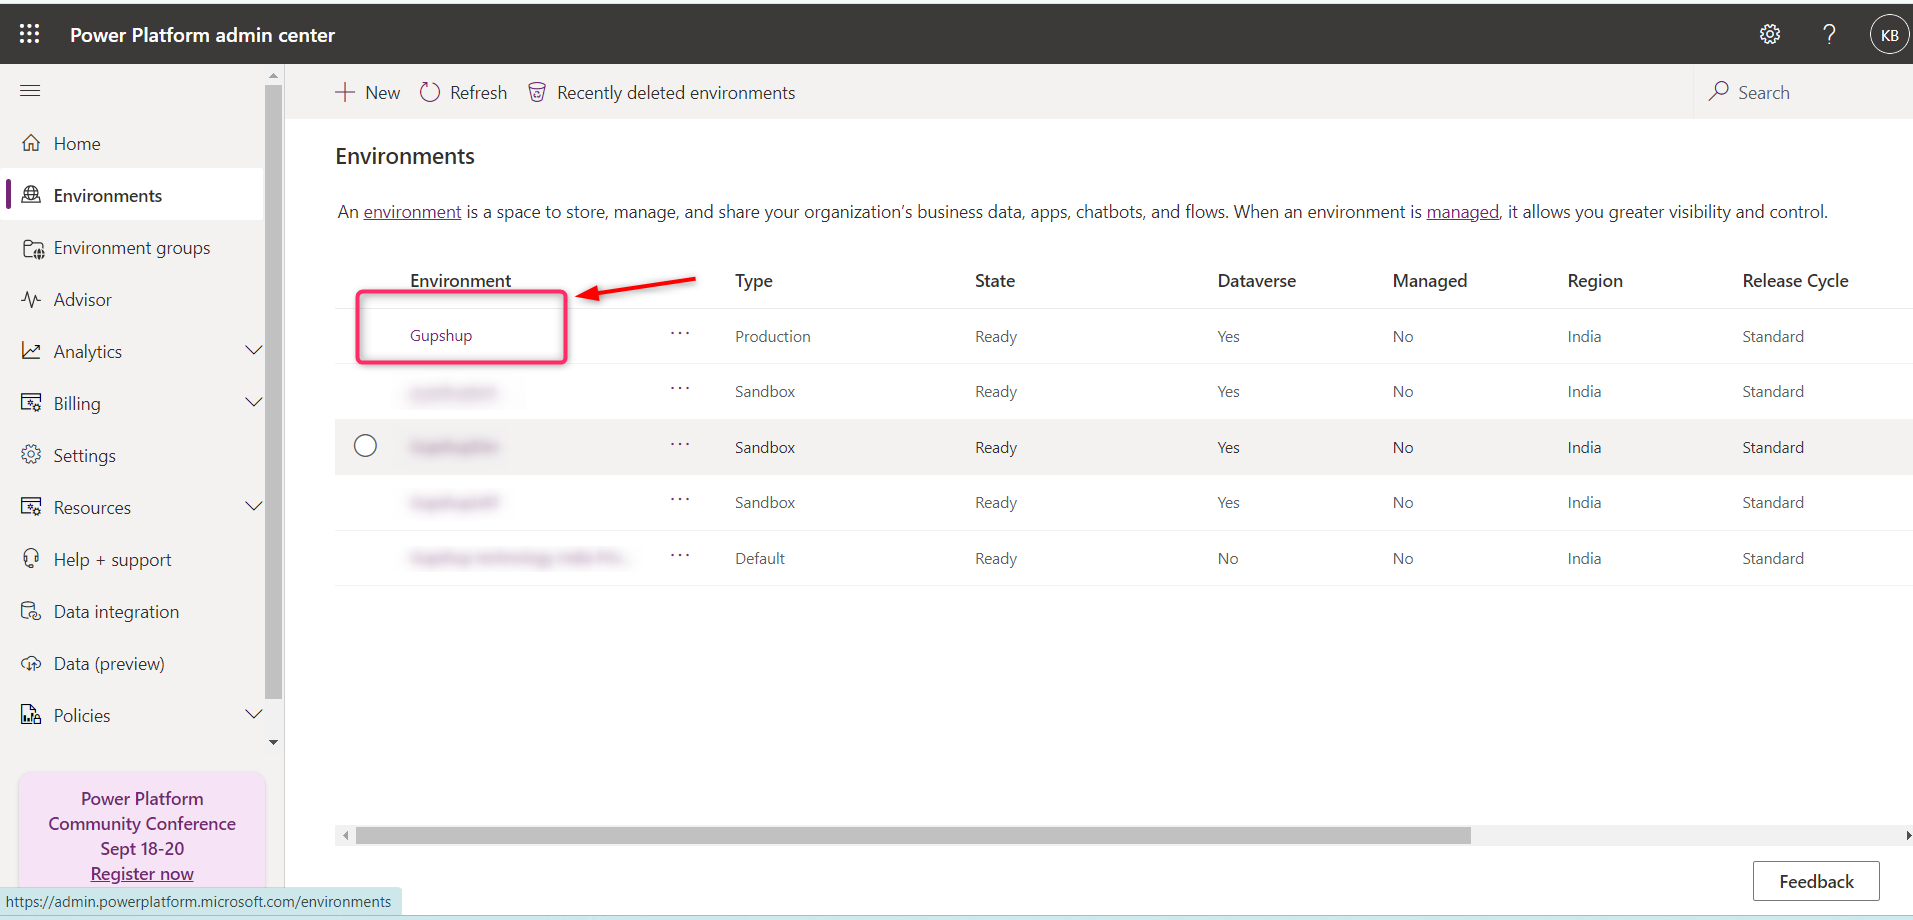
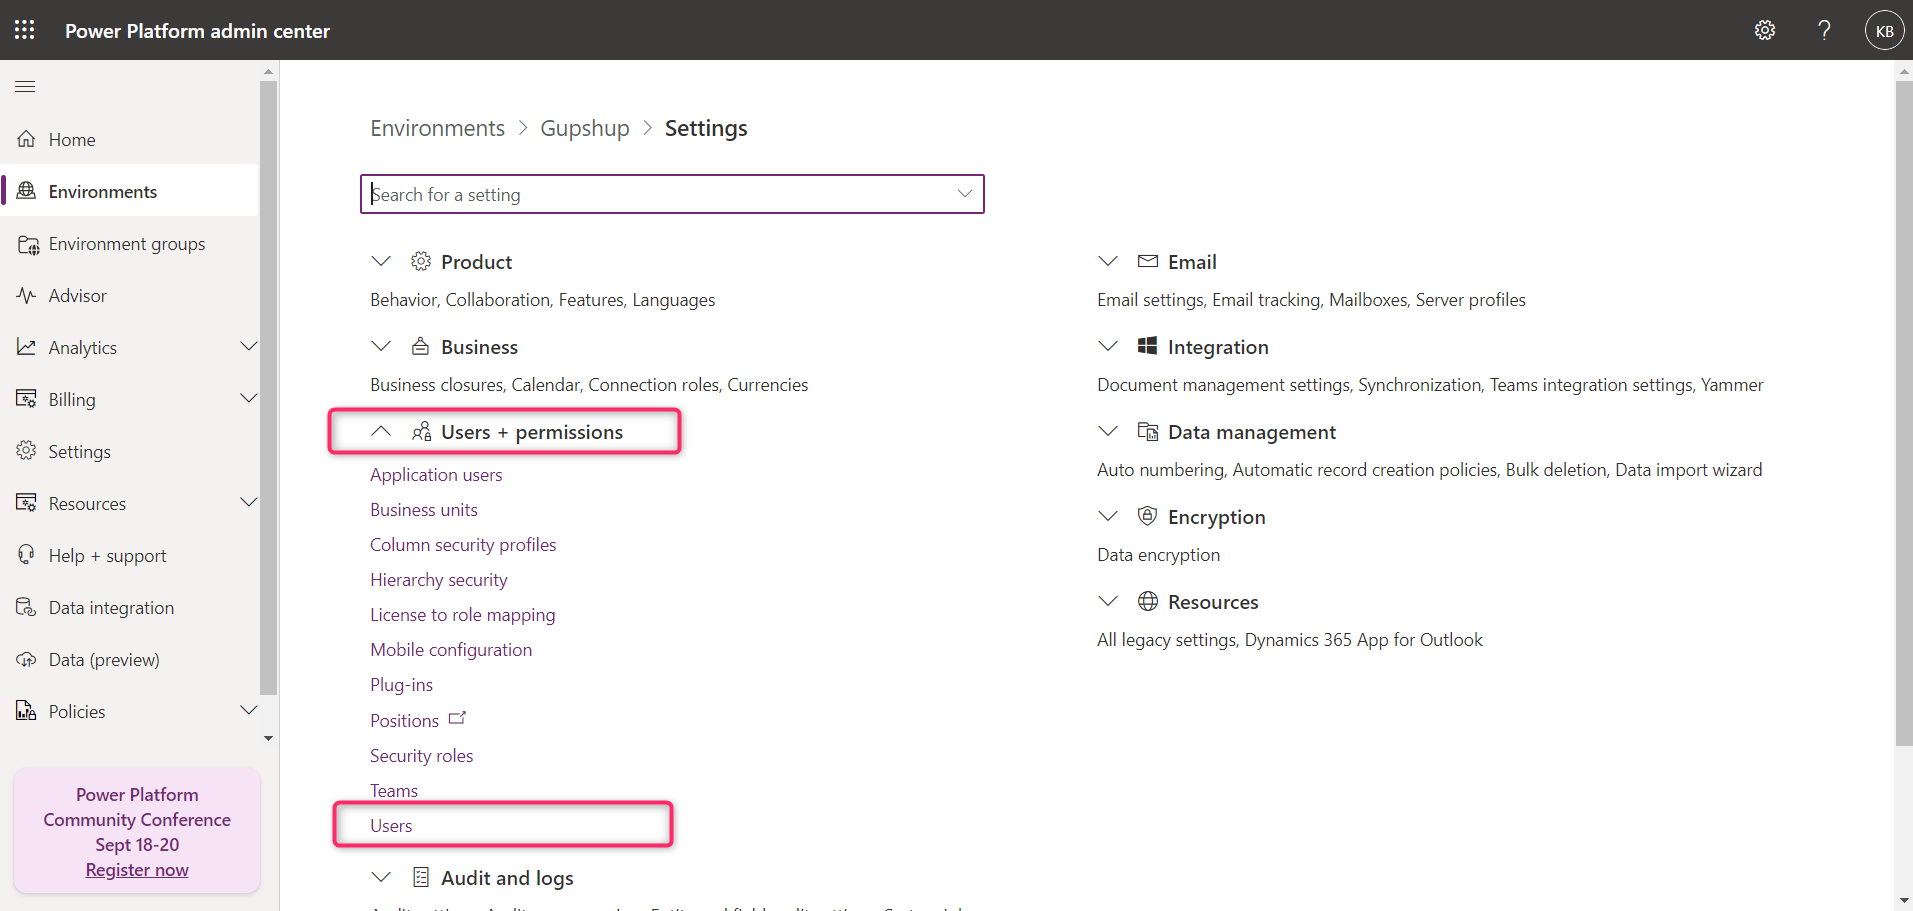
To have access to the app you need to assign the security role and that can be as follows, navigate to link: https://admin.powerplatform.microsoft.com select your environment, and open it
Now click on the setting.
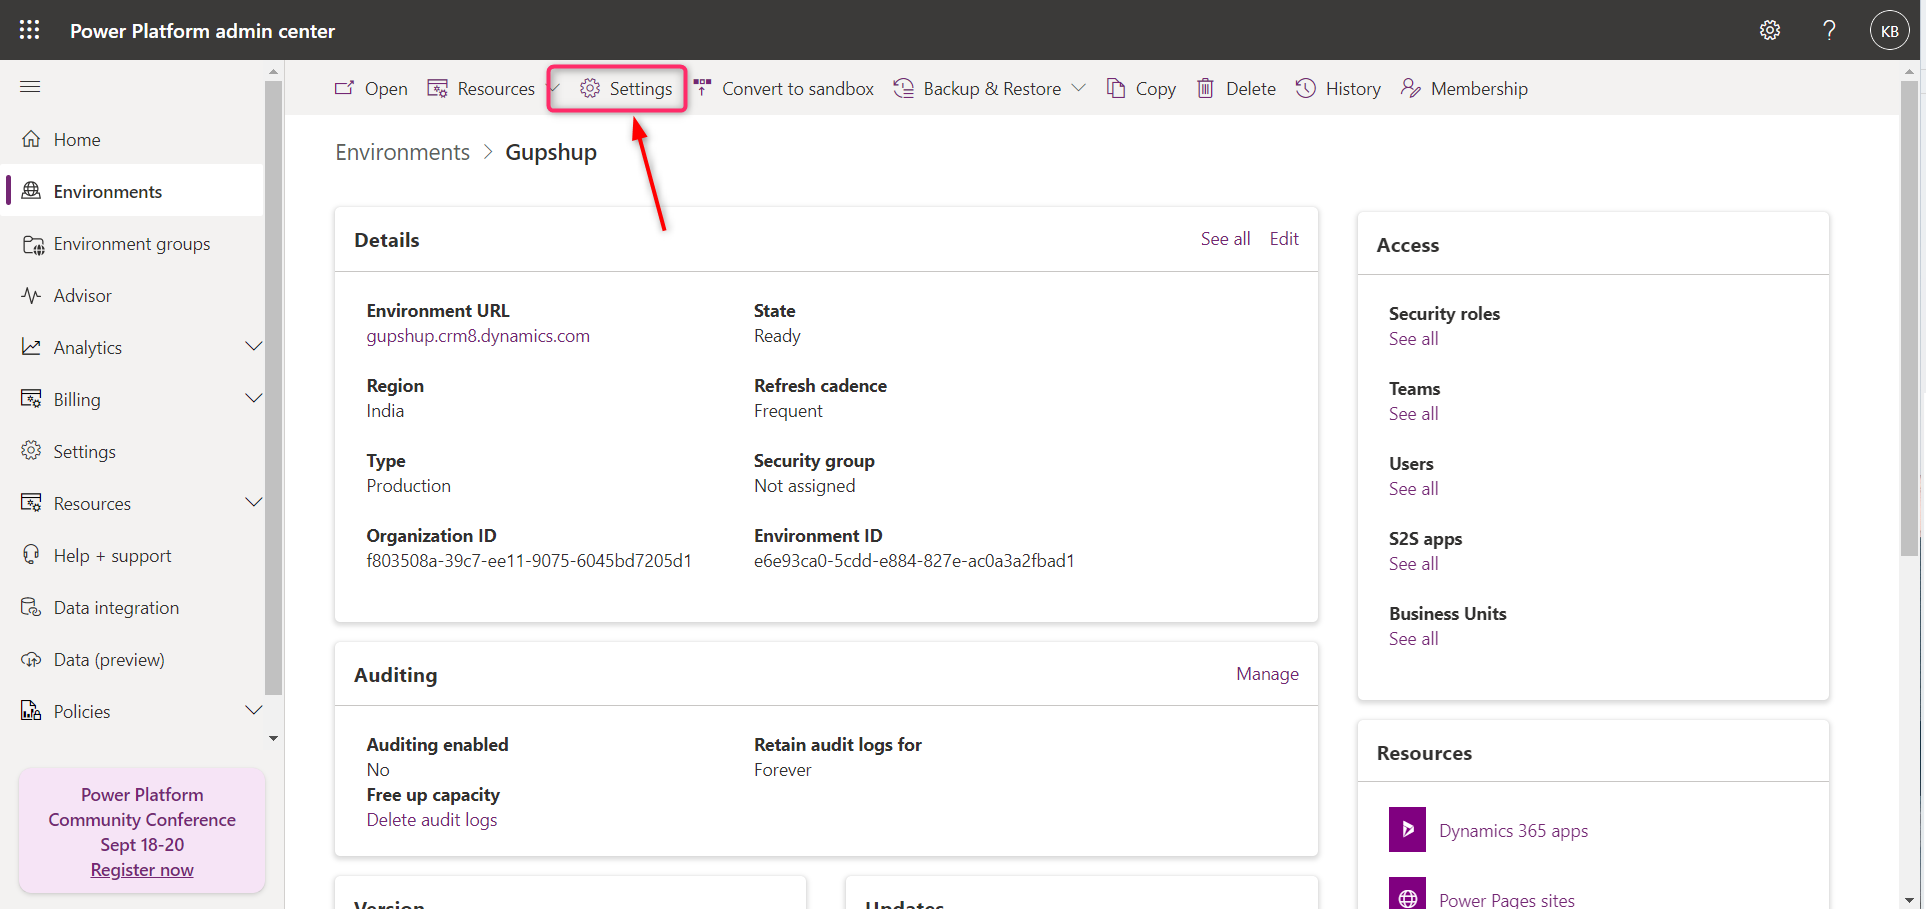
Select the user + Permissions select users as shown below.
-
Select the user to whom you want to give security access, click on “manage security roles” and assign any one security role as per the position of a user.
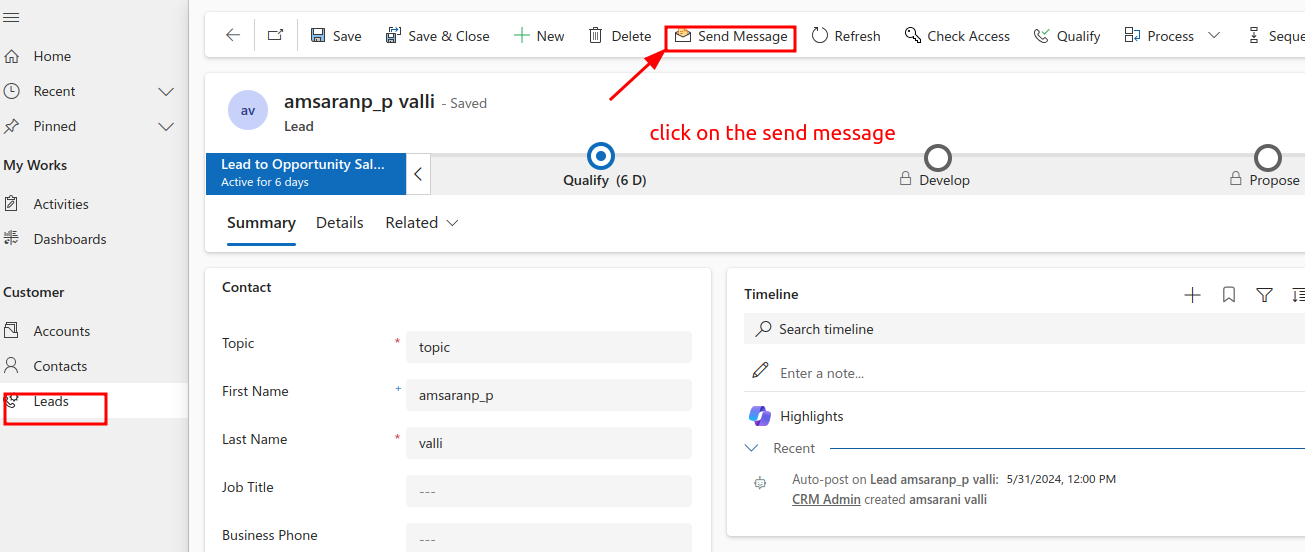
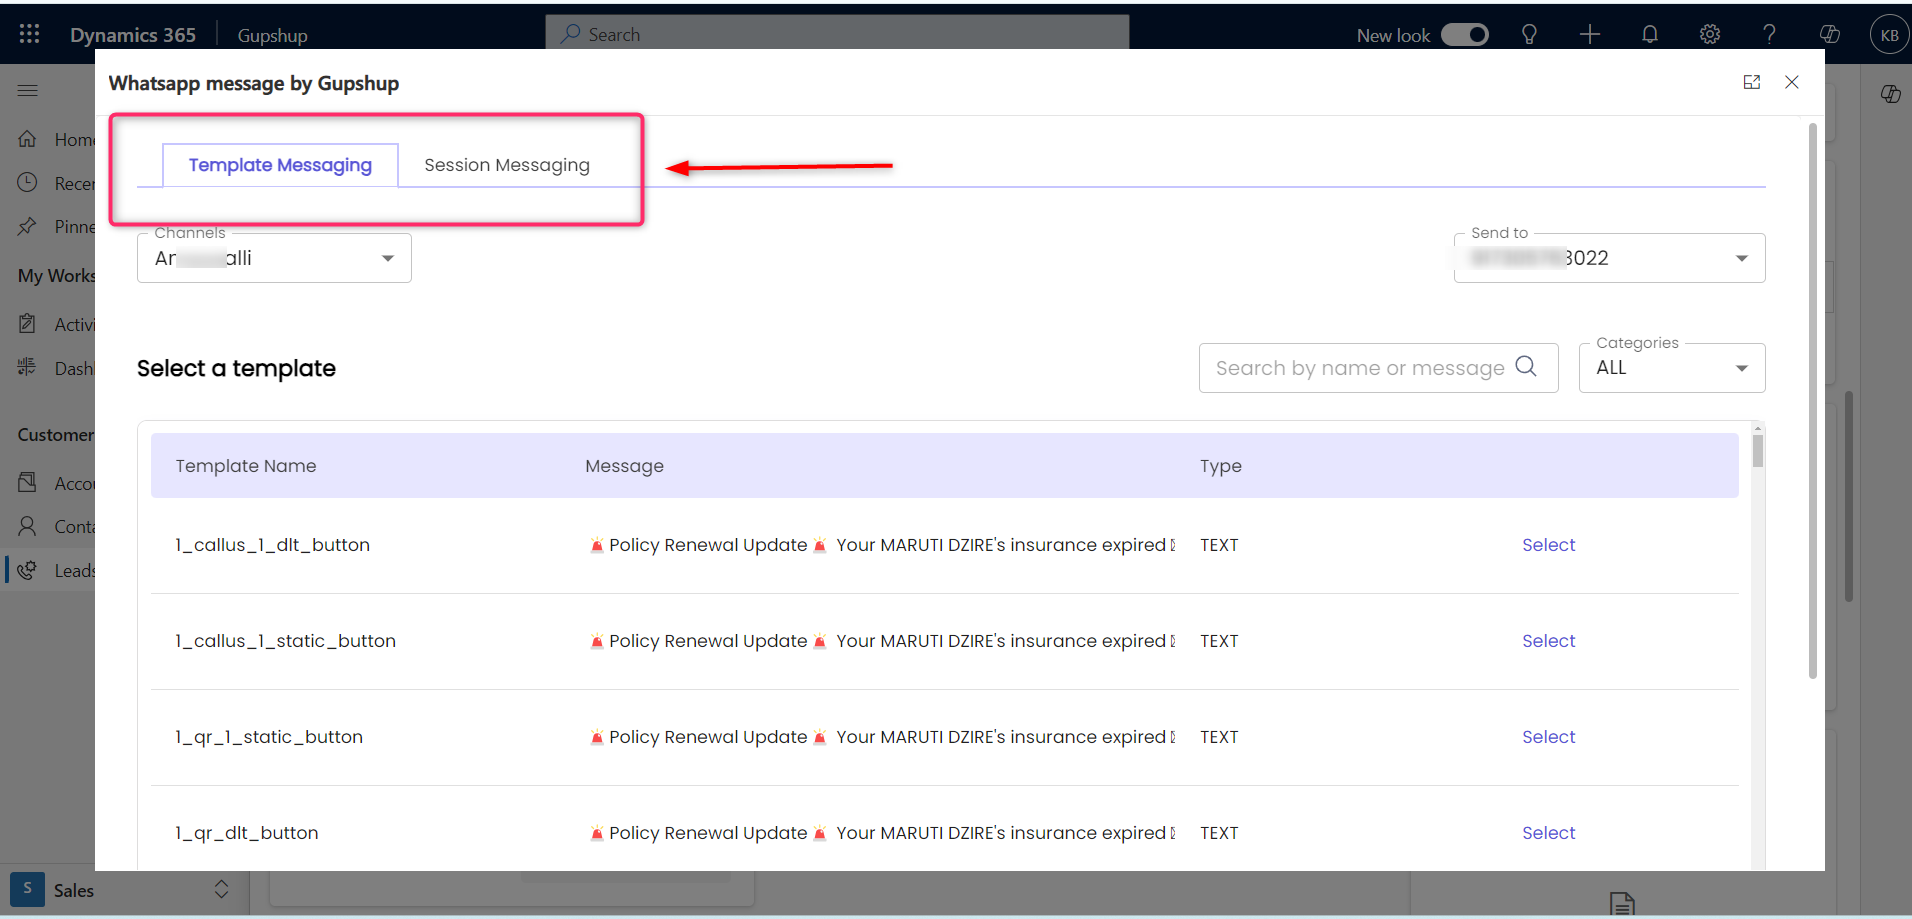
Send Message
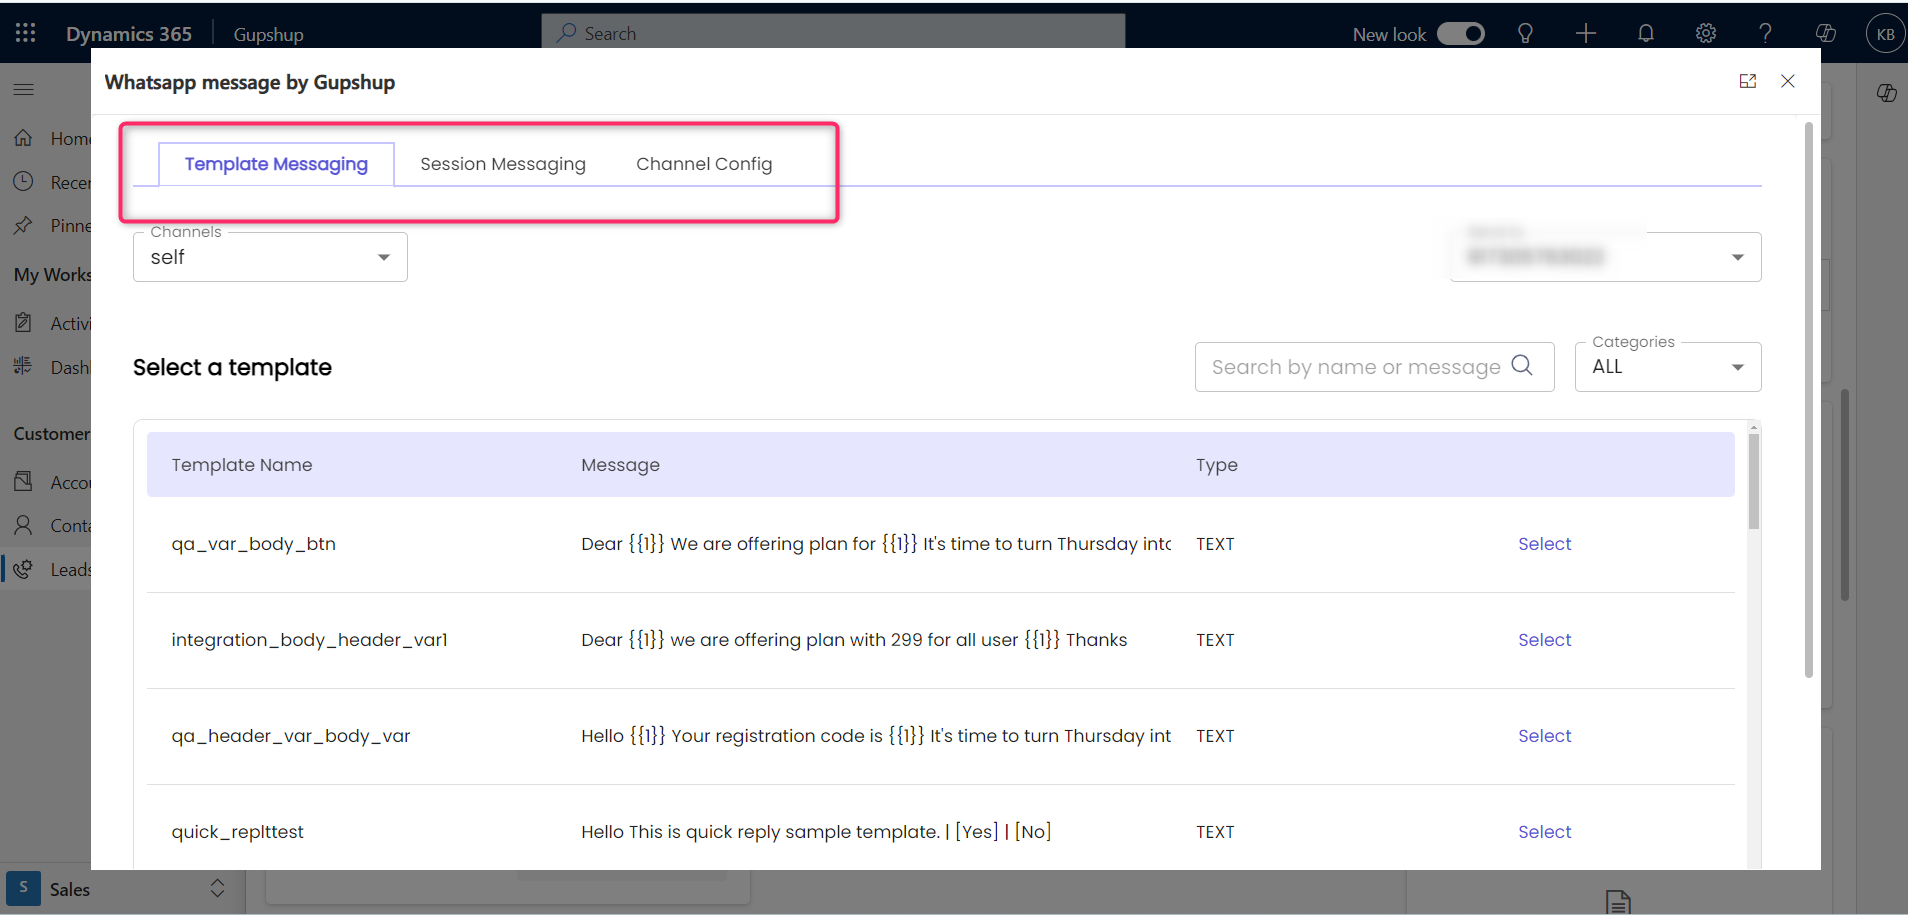
After clicking "Send Message," a popup window will display three tabs:
- Template Messaging -Template Messaging refers to pre-approved message templates that can be used to send consistent and standardized messages to users.
- Session Messaging - Session Messaging involves real-time, interactive conversations between a user and a business within a specific time frame.
- Channel Configuration -Channel Configuration refers to the setup and management of communication channels used for messaging.
Click on the "Add channel" textbox and input the necessary information to proceed with adding a new channel
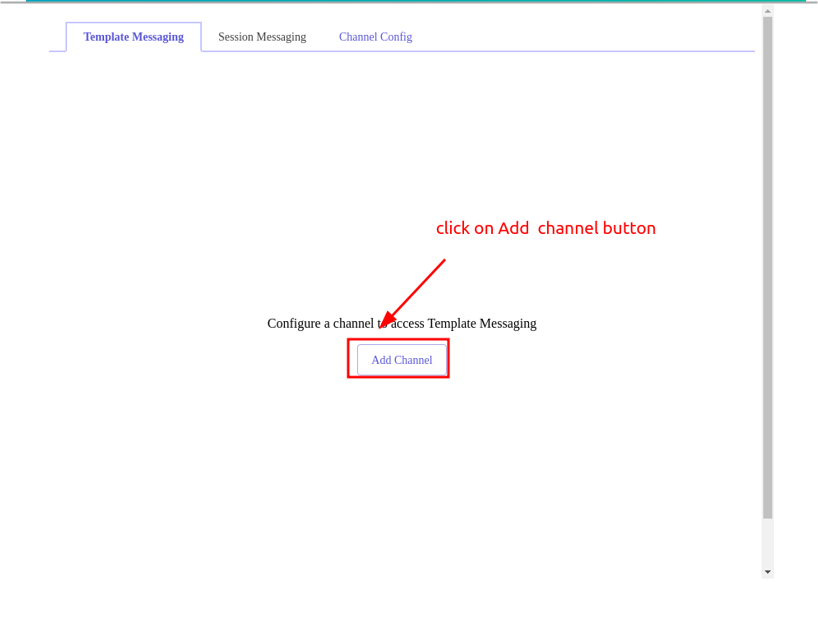
- After opening the configuration screen, you can proceed with entering the necessary channel details.
.• If your channel hasn't been configured yet, you'll be directed to the Channel Configuration screen.
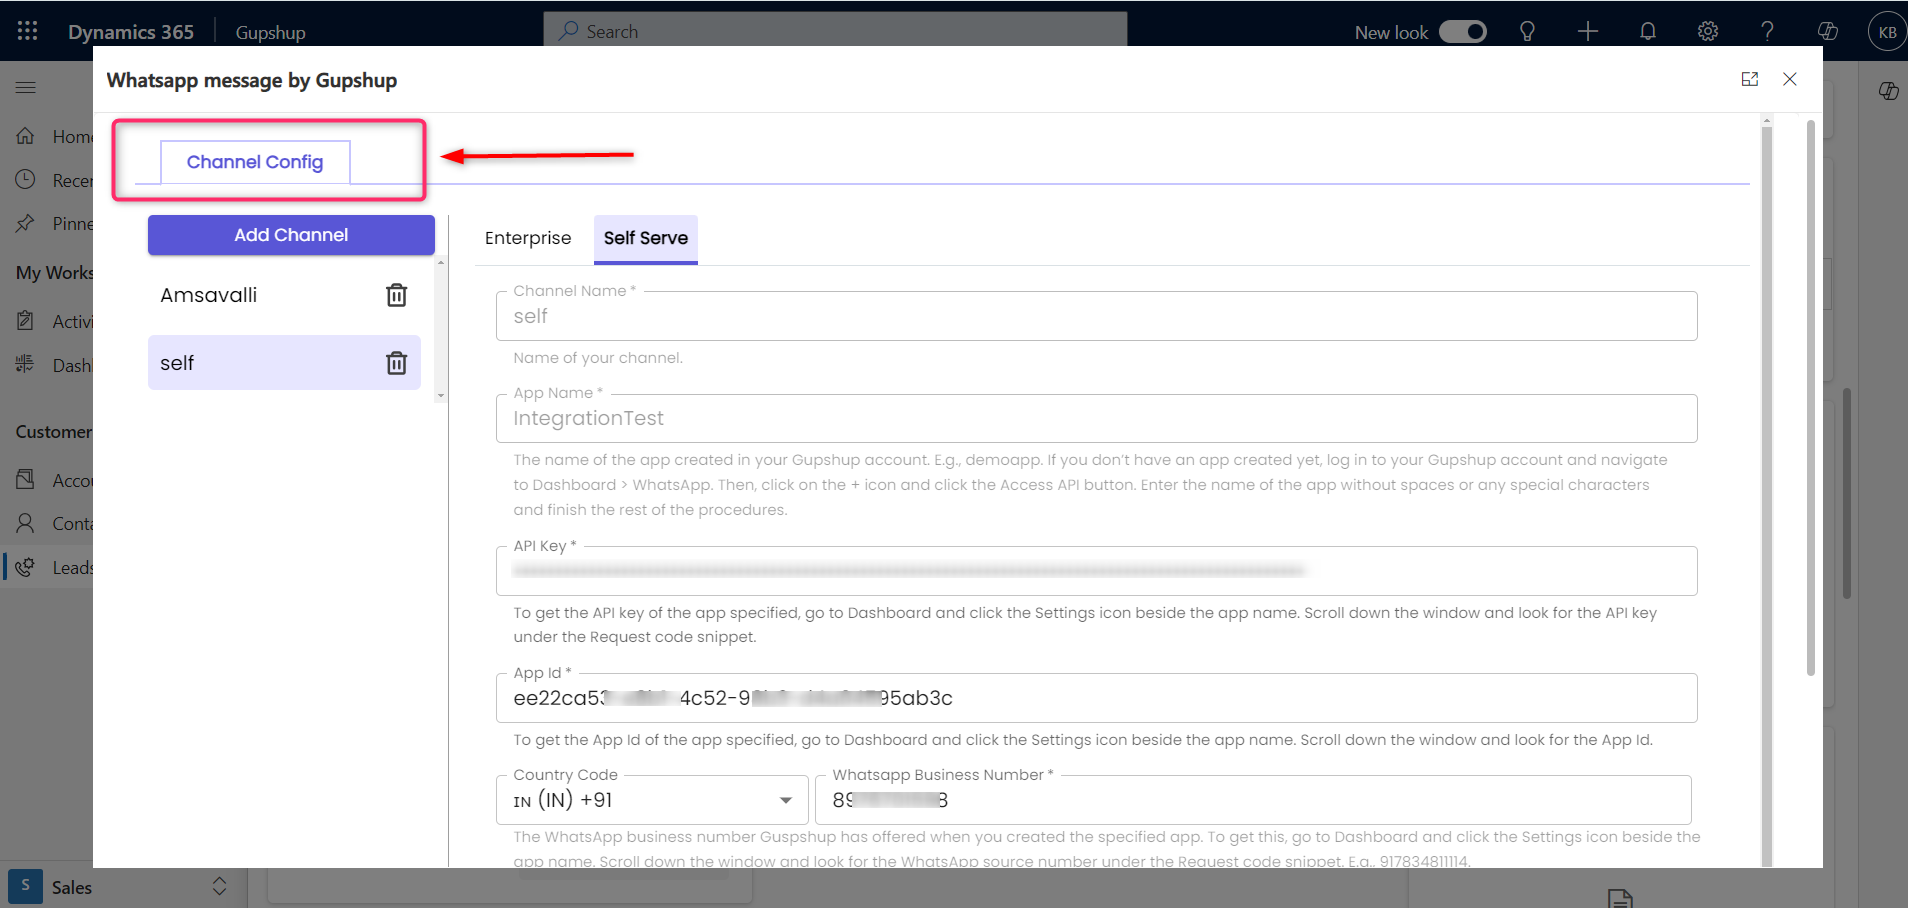
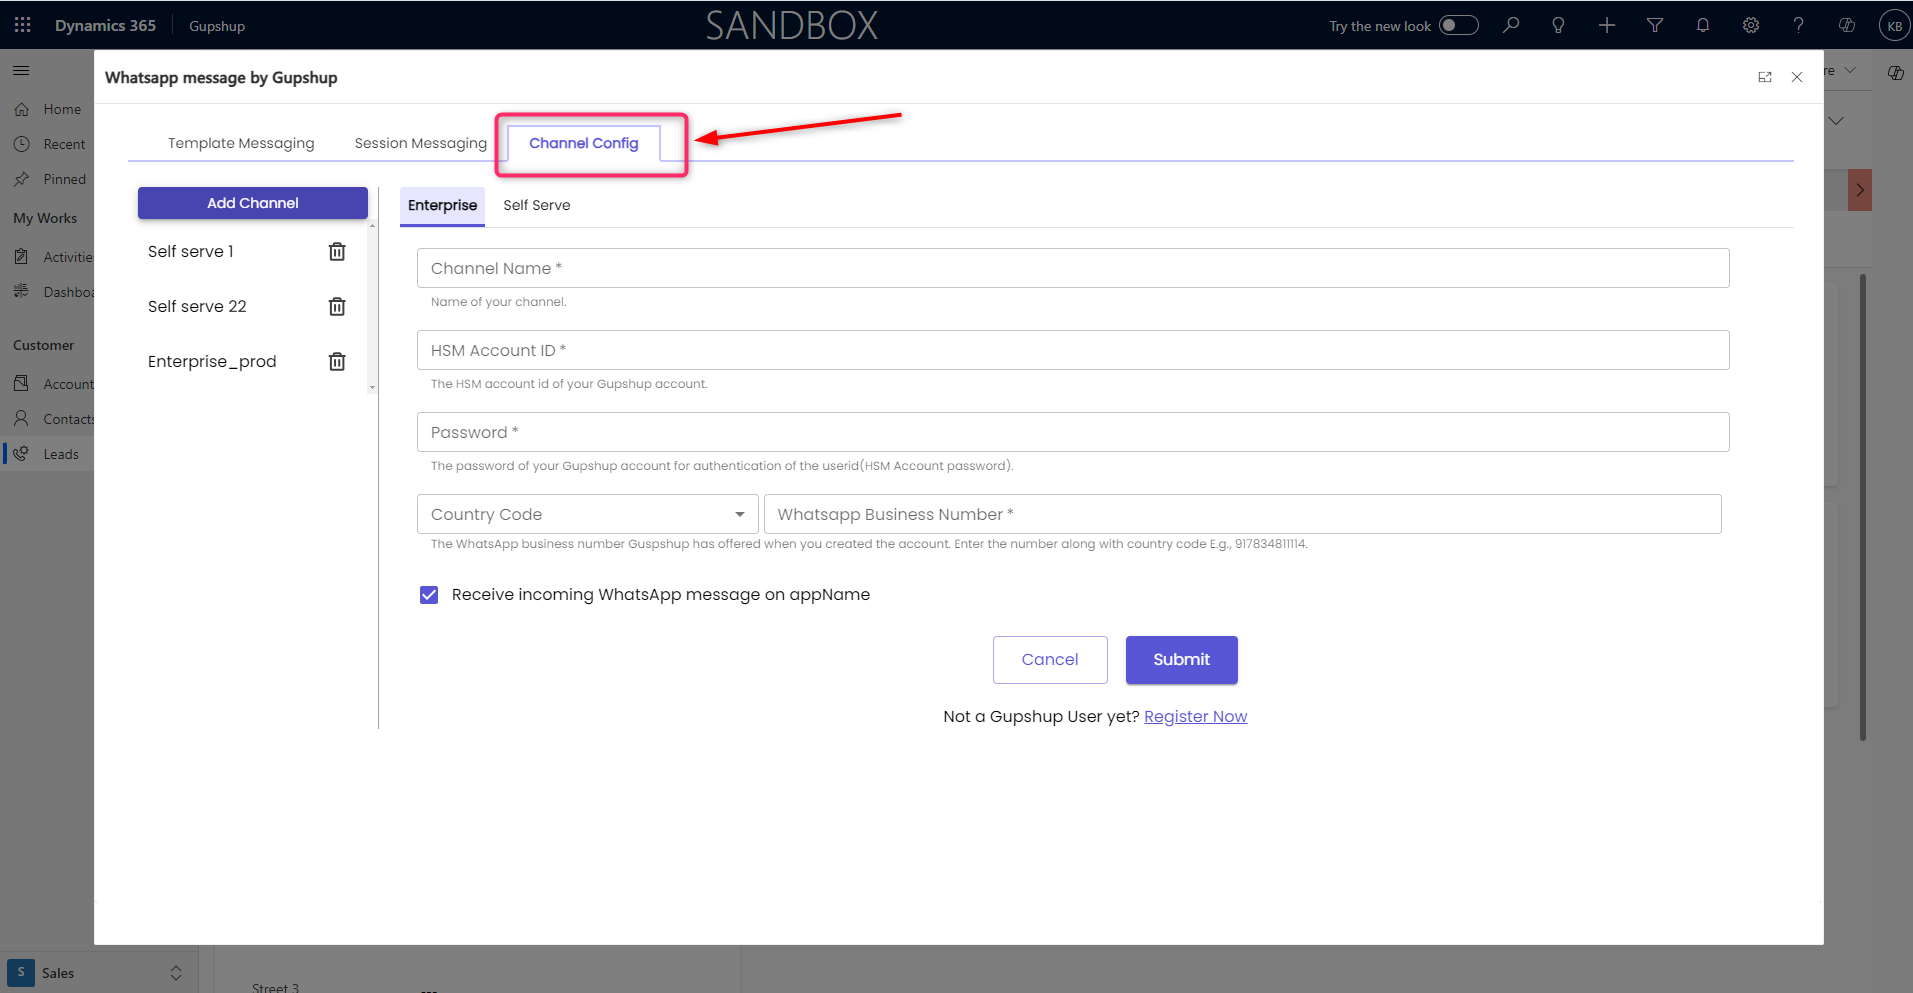
• In this documentation, we'll center our attention on the Channel Configuration tab. Click on this tab to proceed with configuring your Gupshup WhatsApp Business account.
Don't have a Gupshup Account yet?
• Get Started today:https://www.gupshup.io/contact-us
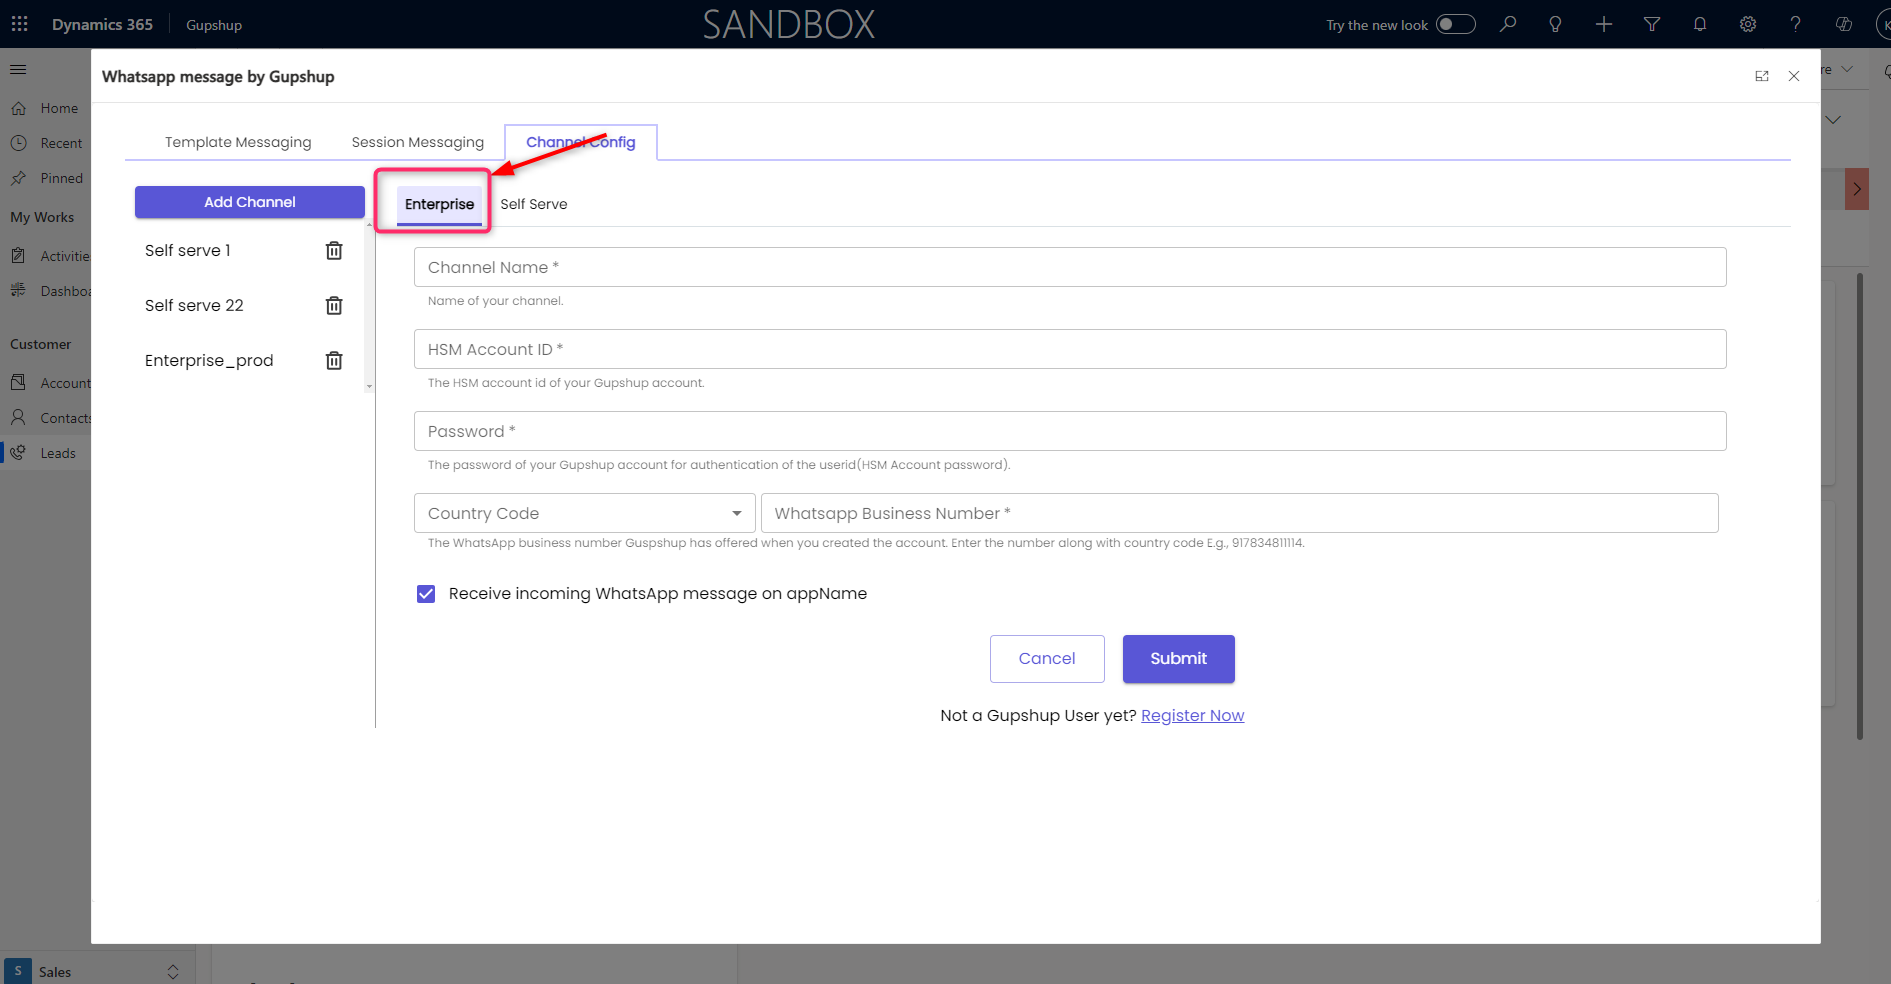
Configure a Gupshup Enterprise
- If you have a Gupshup Enterprise account, please head over to the Channel config page and begin creating a channel first.
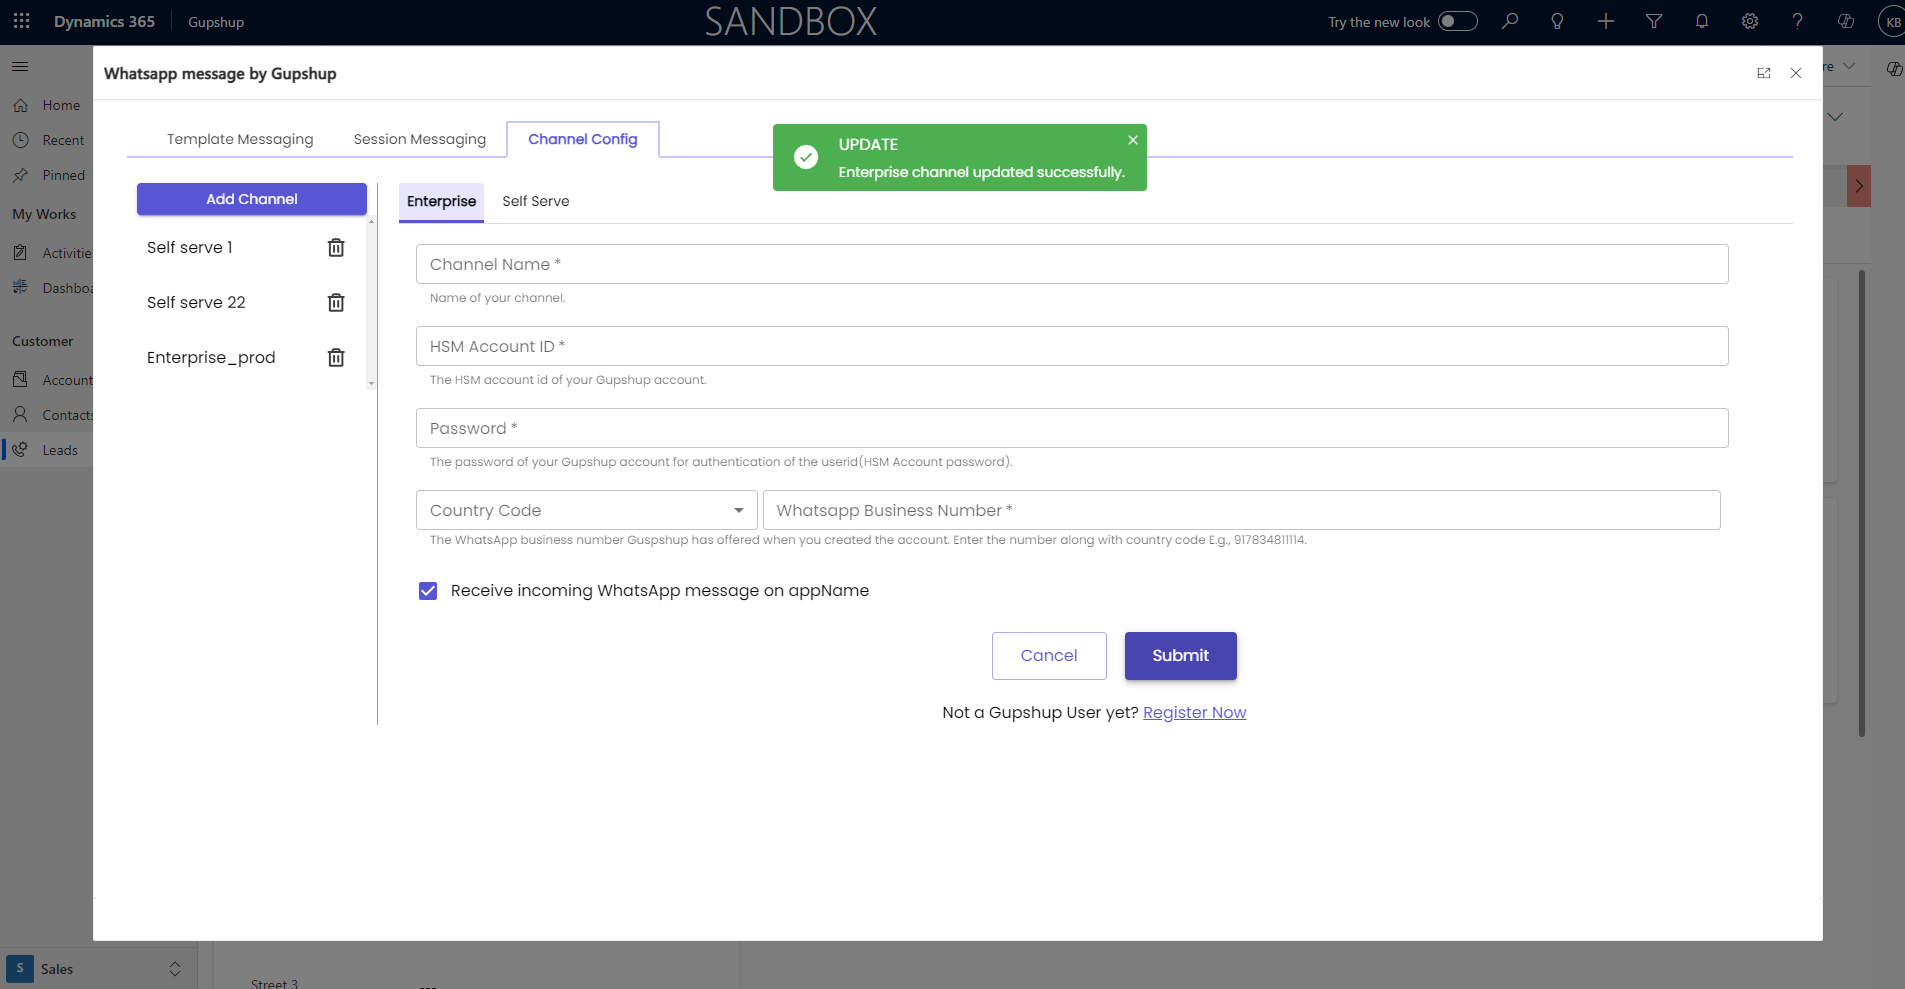
On clicking the Enterprise button in the Channel config screen, we will get to see the following fields which we need to fill up correctly:
- Channel Name: Give a meaningful name to your channel
- Username: Use the HSM Account ID shared by the Gupshup team over email during account activation.
- Password: Use the HSM Account Password shared by the Gupshup team over email during account activation.
- country code: Use the based on the country code field.
- Business No: A Verified Business Phone Number, to test the sending of messages, you must have a Verified Business Phone Number linked to your account.
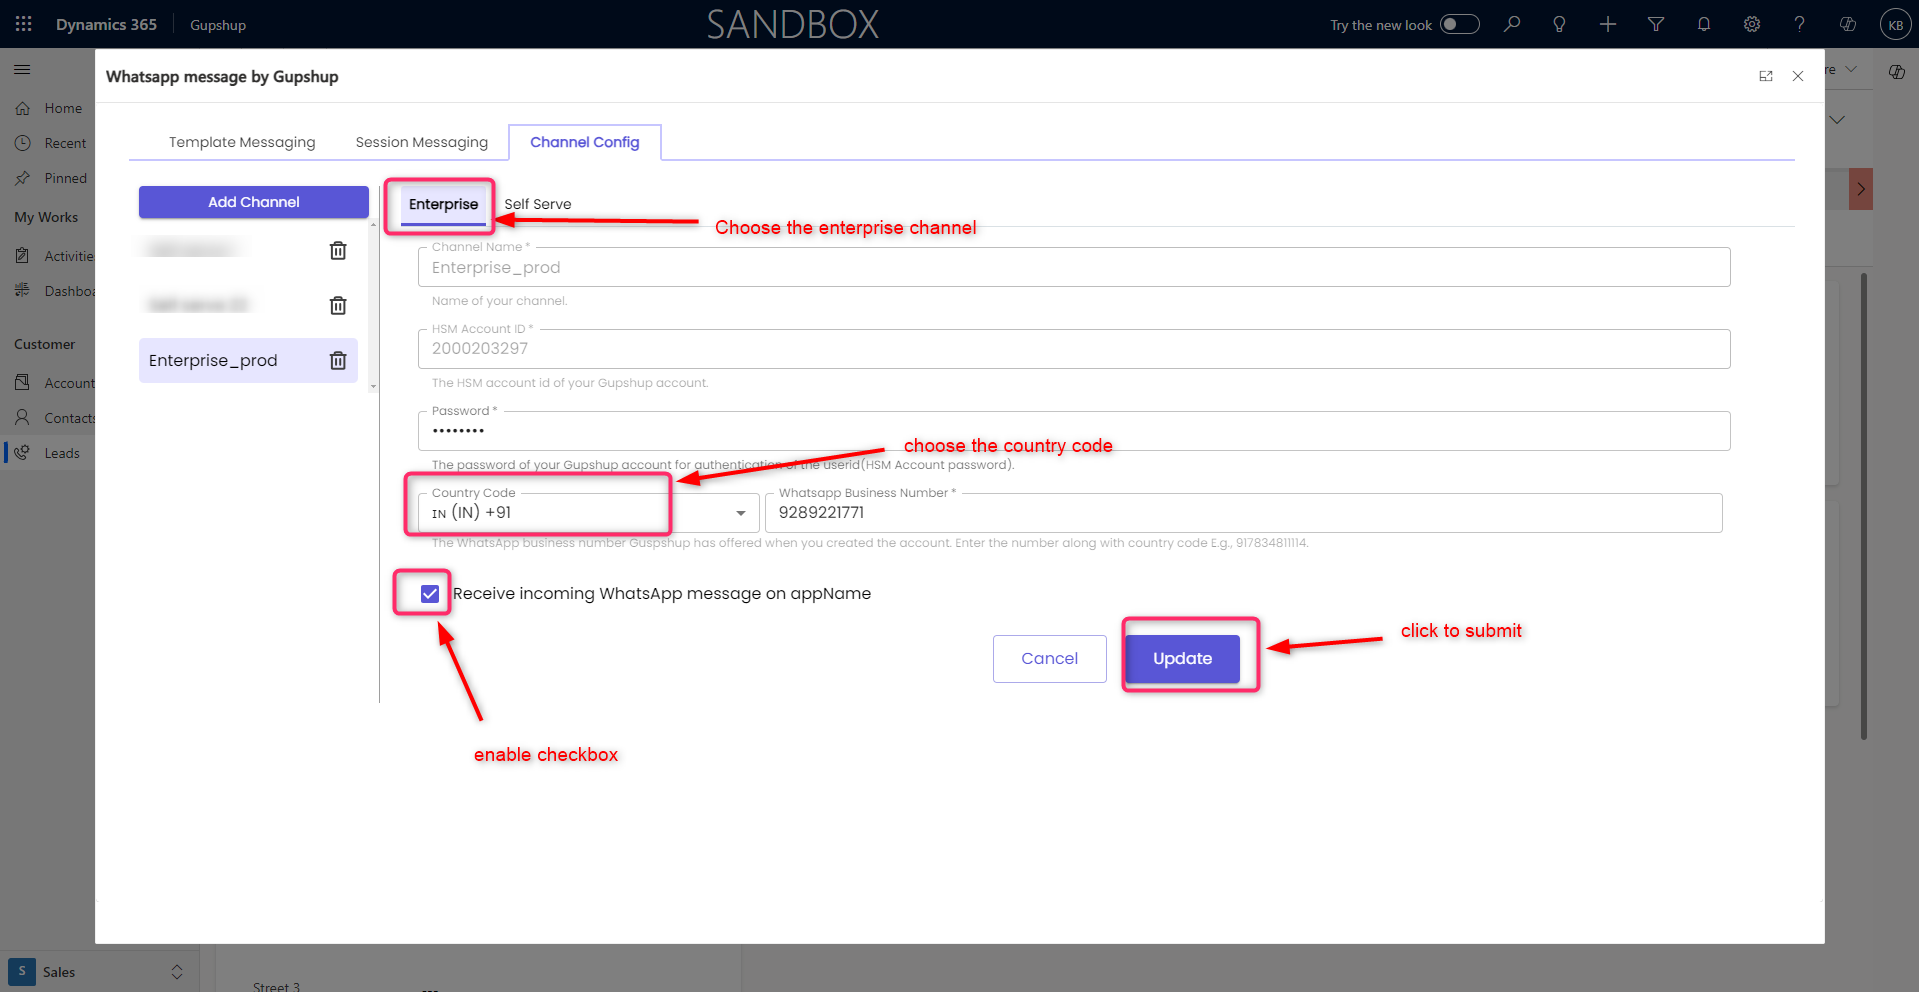
- Once you've entered the required details mentioned above, choose the features you wish to activate by selecting their respective checkboxes. We'll provide detailed information about these features in the Features document. Finally, click the Submit button to save your configuration settings.
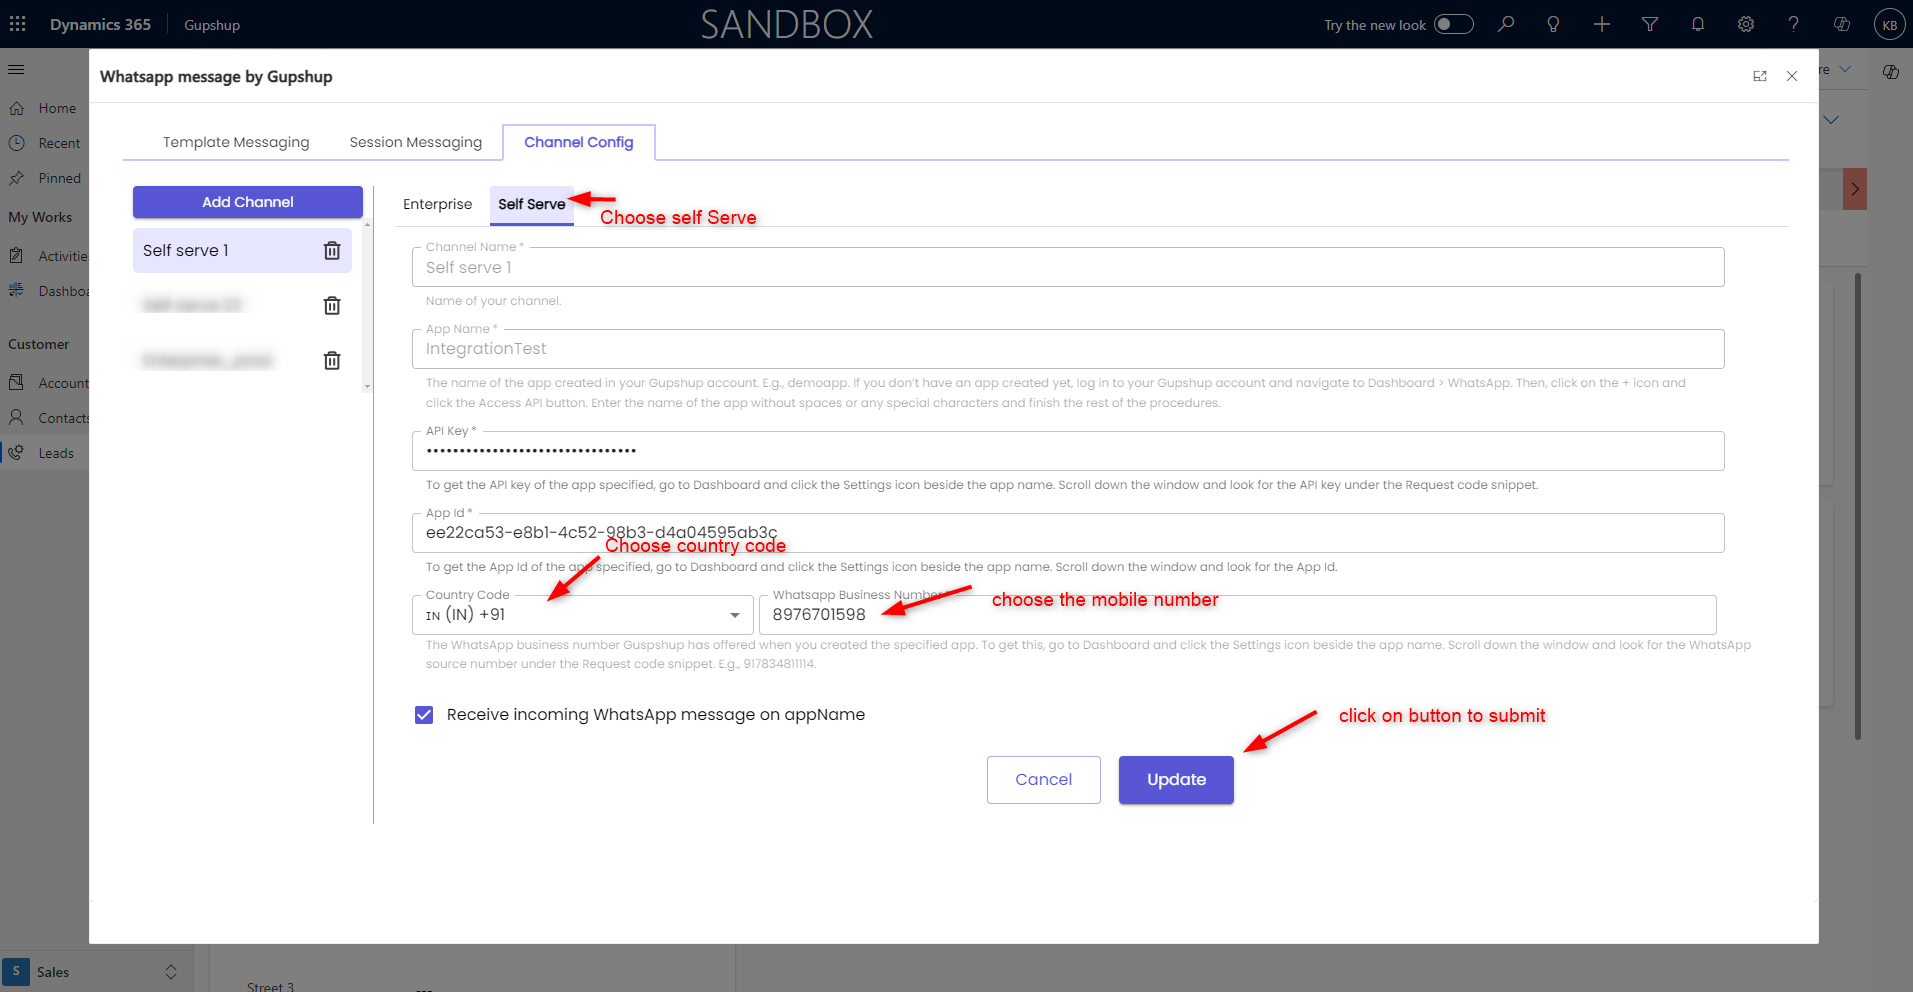
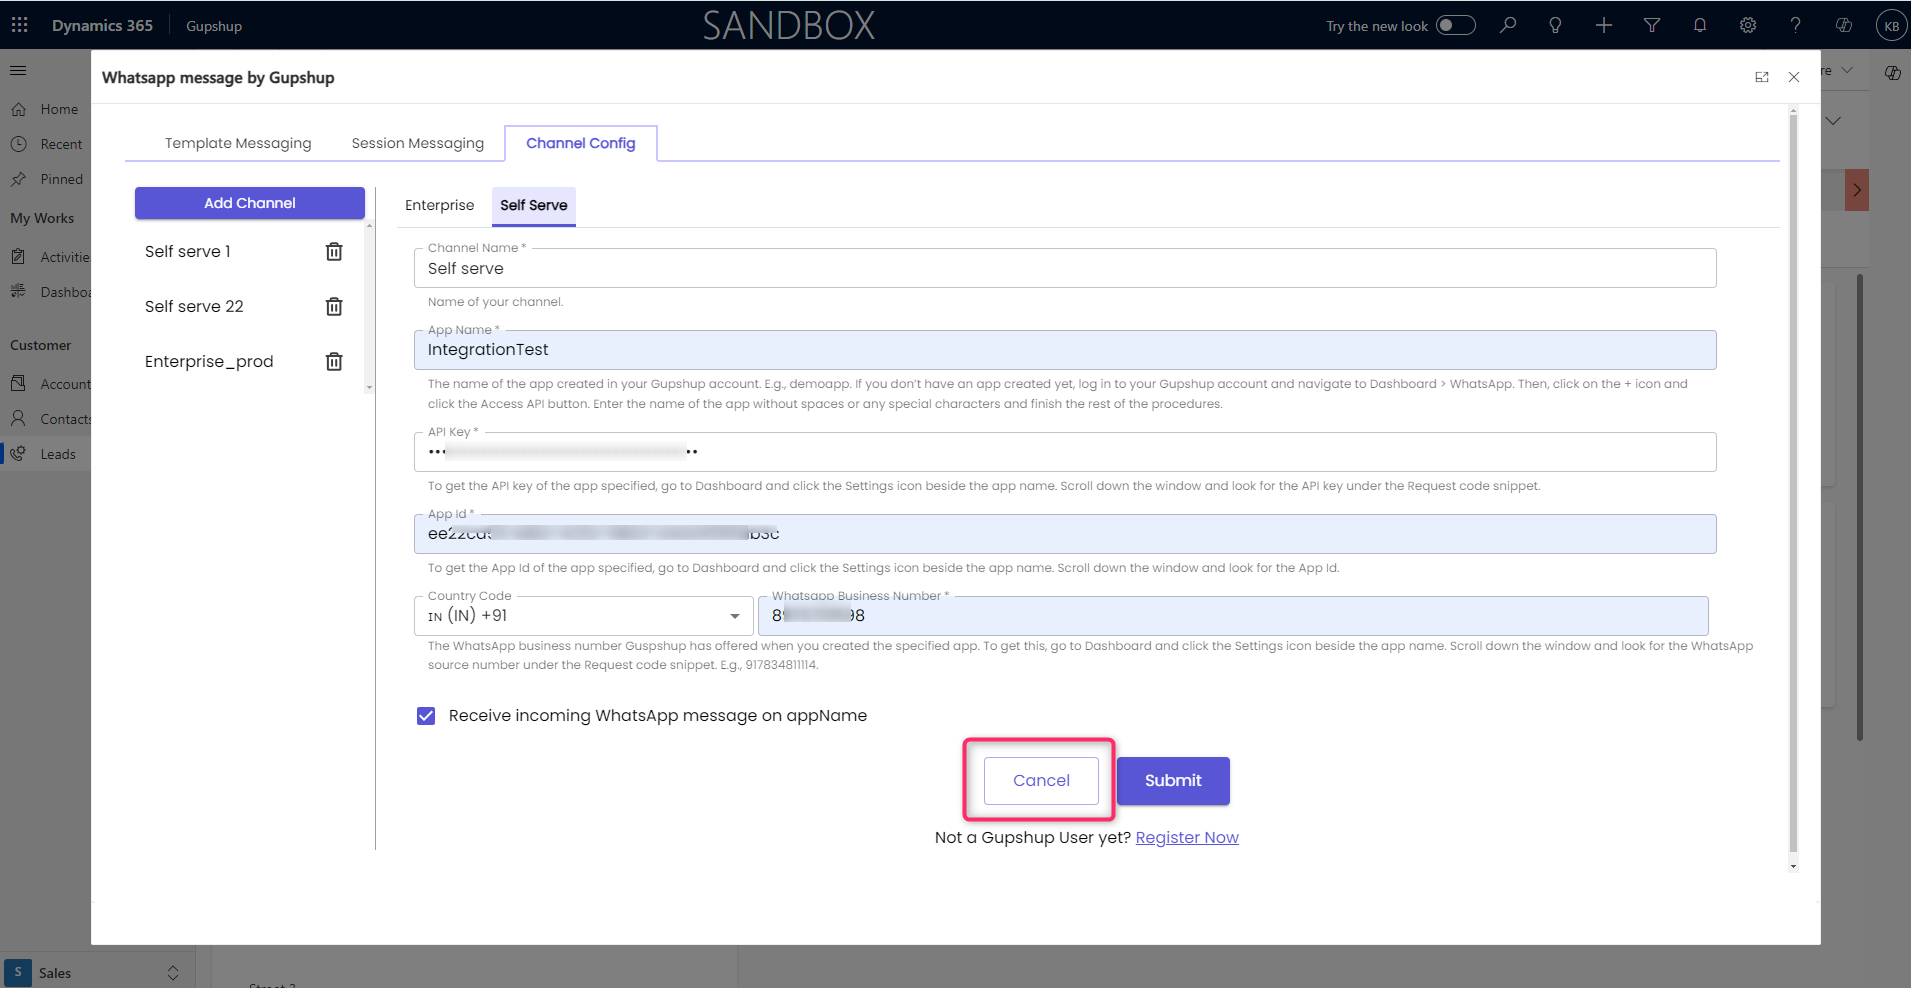
Configure Gupshup Self-Serve
- if you have a Gupshup Self-Serve account, please enter the following details and click the submit button to save the configuration. You need to choose the "channel config " tab for configuring the integration.
- After opening the configuration screen, you can proceed with entering the necessary channel details.
- The following details are needed to configure the extension to use a Self-Serve account.
- channel name
- App Name
- App ID (WABA ID)
- API Key
- country code
- Business WhatsApp Number (WABA number)
In case you are facing trouble in retrieving these details, please follow the documentation below:
- Self-Serve Account: https://docs.gupshup.io/docs/configure-self-serve-integration
On clicking a self-serve button in the Channel config screen, we will get to see the following fields which we need to fill up correctly :
Enable to receive inbound messages in CRM:
Enable this checkbox to receive incoming messages on the Waba number.
1. Once done with the configuration of Self Serve WABA
2. Click on the Callback URL
3. Now we are all set to experience the benefits of having two-way communication with our Clients in D365 CRM Gupshup App Extension by:
4. Initializing the conversation by sending a template message from D365 CRM Gupshup App Extension.
5. After we receive the first reply from the Client's end, we can then be able to have a two-way chat.
- When you click on the "Cancel" button, all input field data will be cleared. [**selfserve**].
Add one more selfserve:
- We have already created a self-serve channel. Now, I am creating another channel for self-serve.
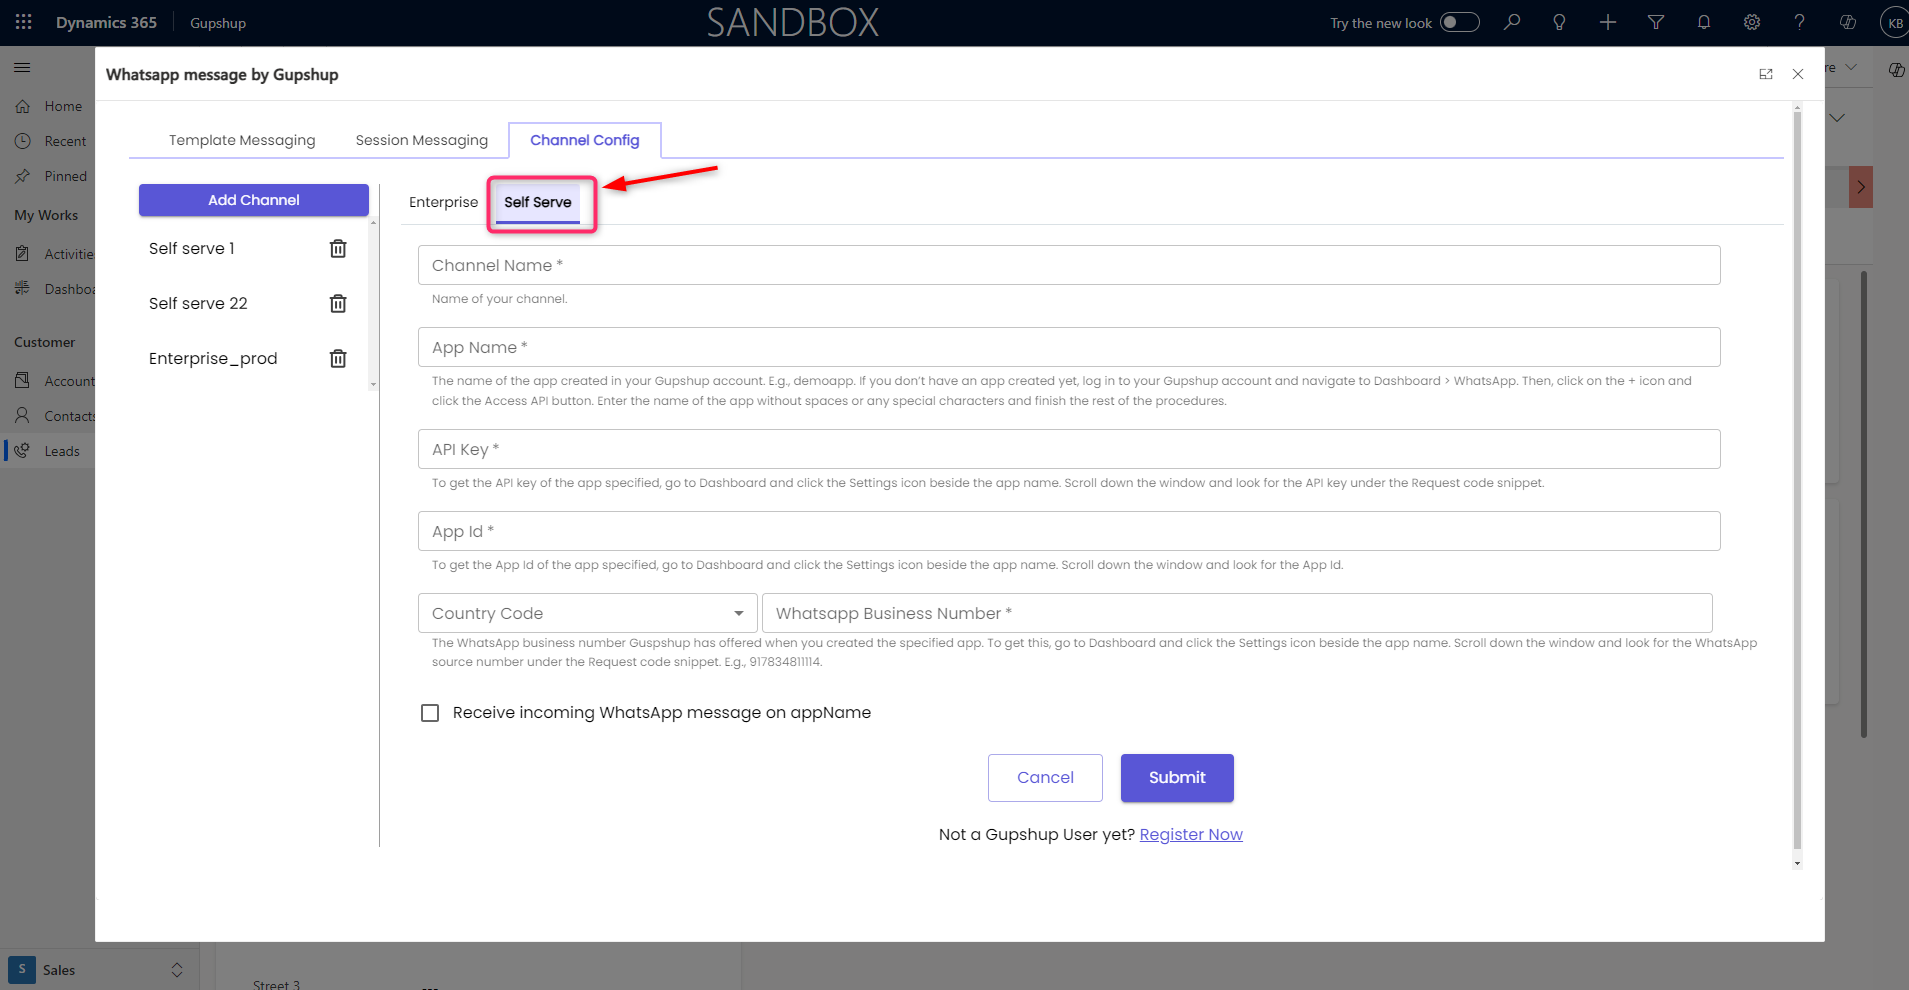
- Provide the necessary details
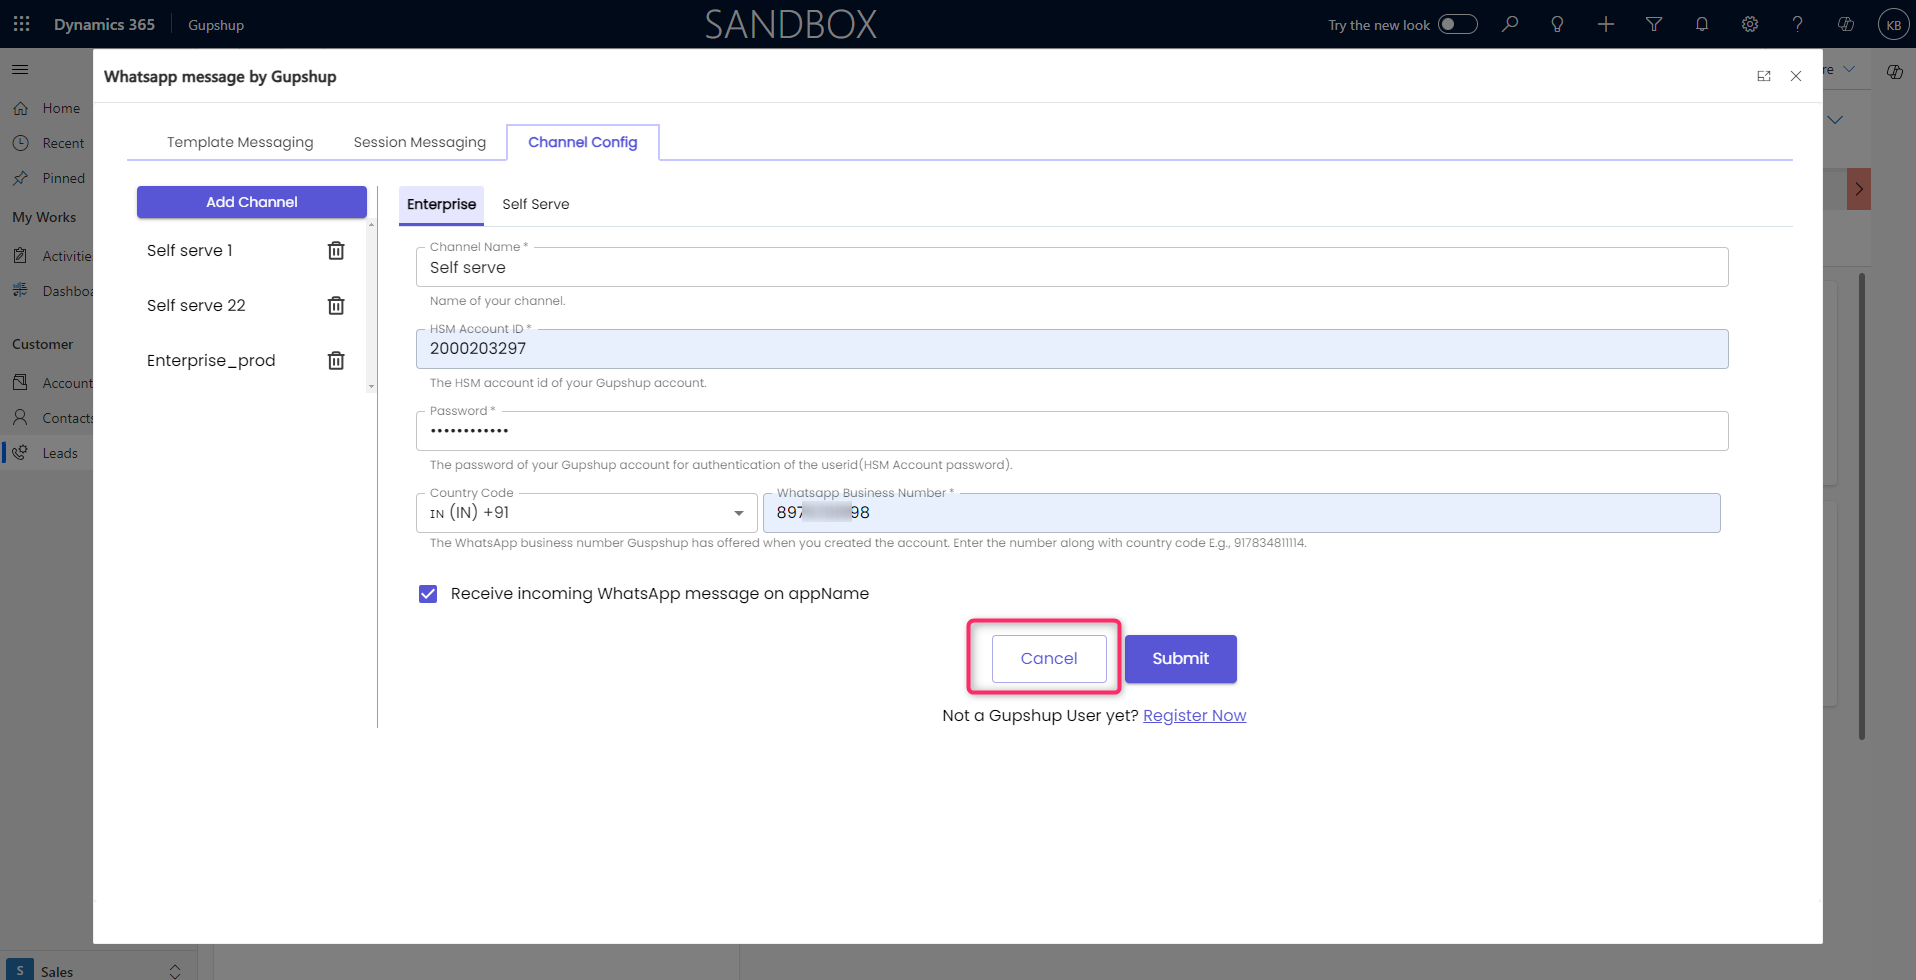
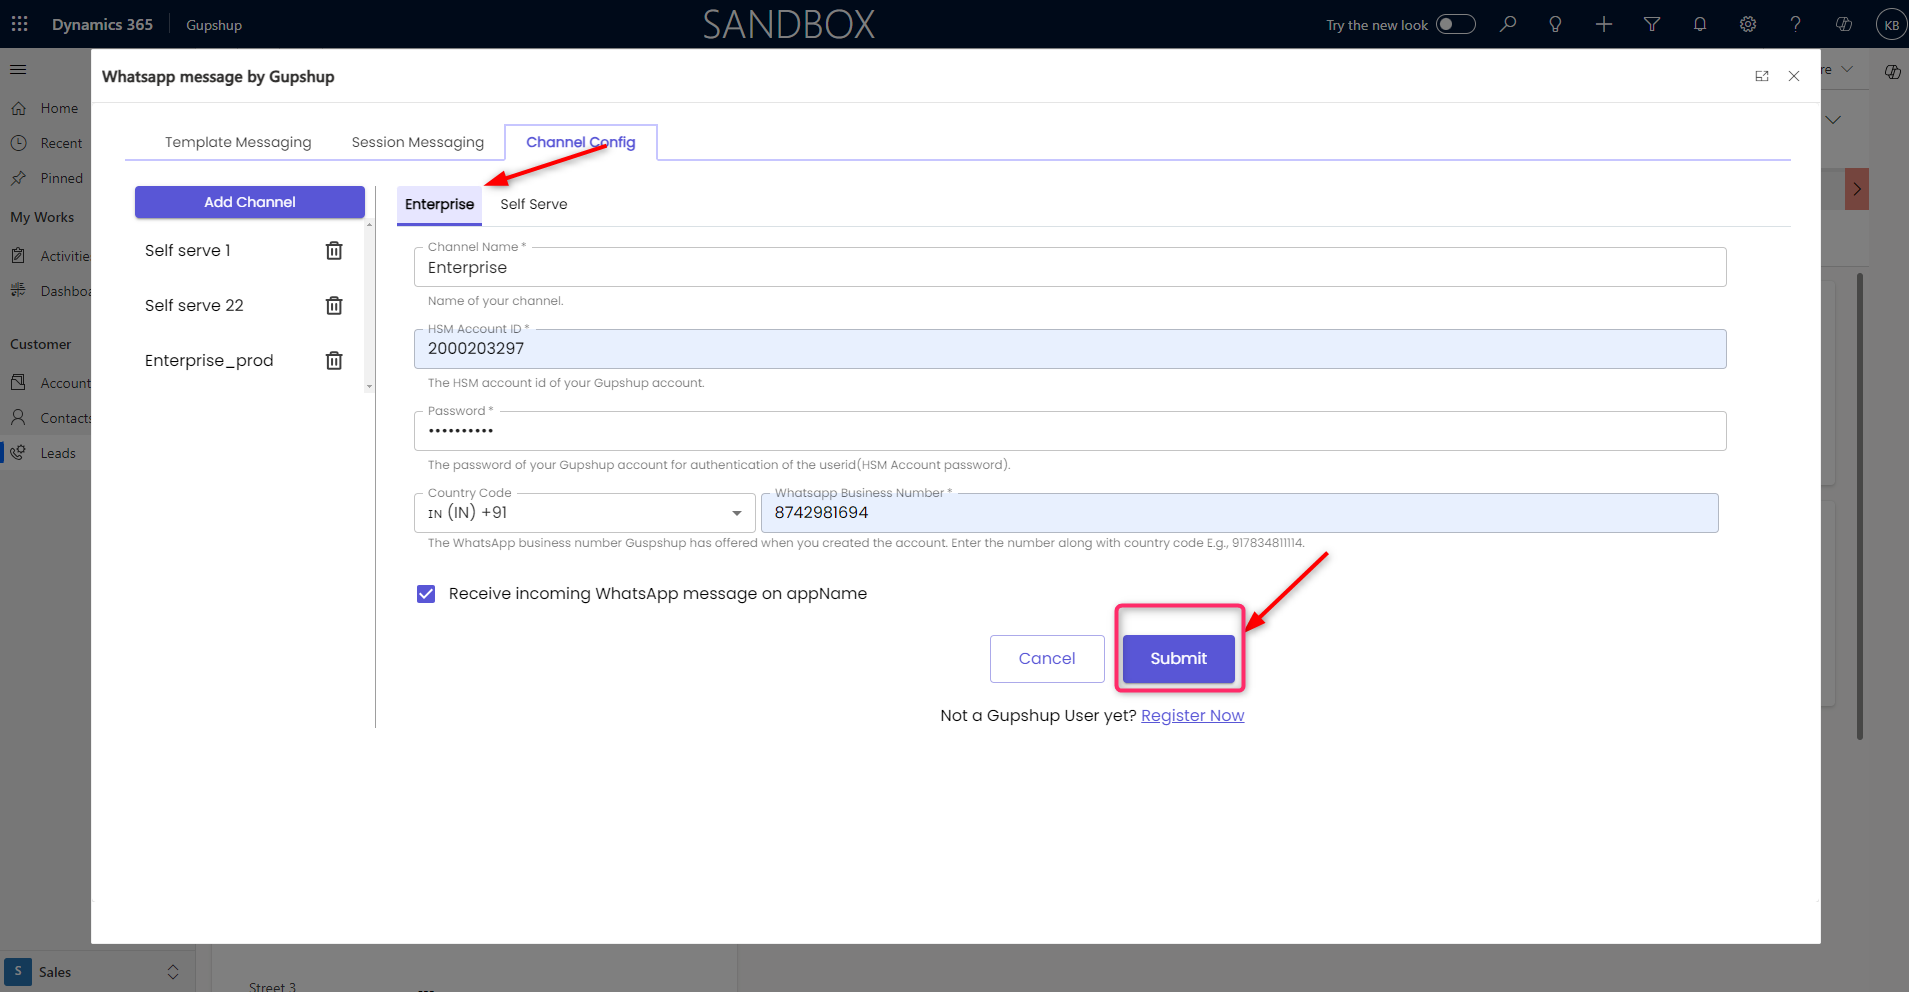
Add one more enterprise:
• We have already created an enterprise channel. Now, I am creating another channel for the enterprise.
• You need to choose the Enterprise tab to configure the integration.
Channel Name: Assign a unique name for your account to identify it.
HSM Account ID: Use the HSM Account ID shared by the Gupshup team over Email during account activation.
Password / HSM Account Password: Use the HSM Account Password shared by the Gupshup team over Email during account activation.
country code: Use the based on the country code field.
WhatsApp Business No: A Verified Business Phone Number to test sending messages. You must have a Verified Business Phone Number linked to your account.
• After entering the details, click Submit to save the configuration.
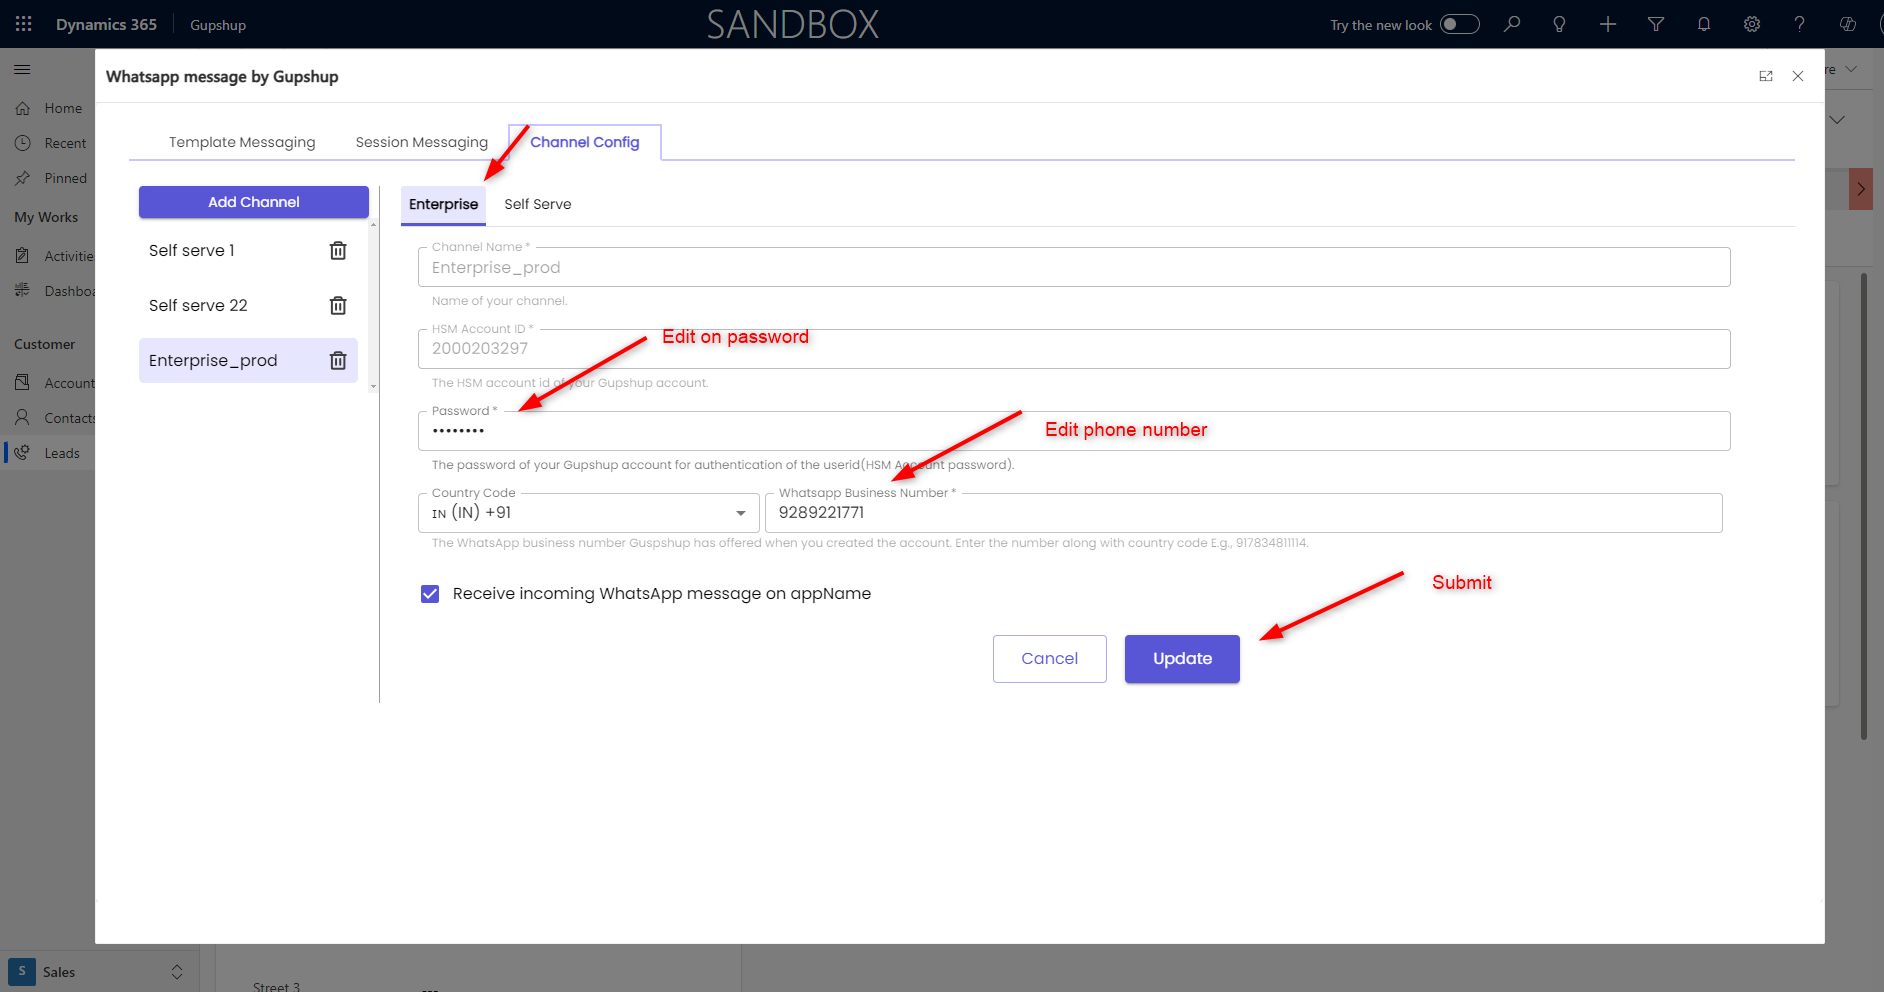
Edit field for enterprise:
We have already created an enterprise channel. I need to make changes to the password and mobile number, please click on the respective fields and make the changes.

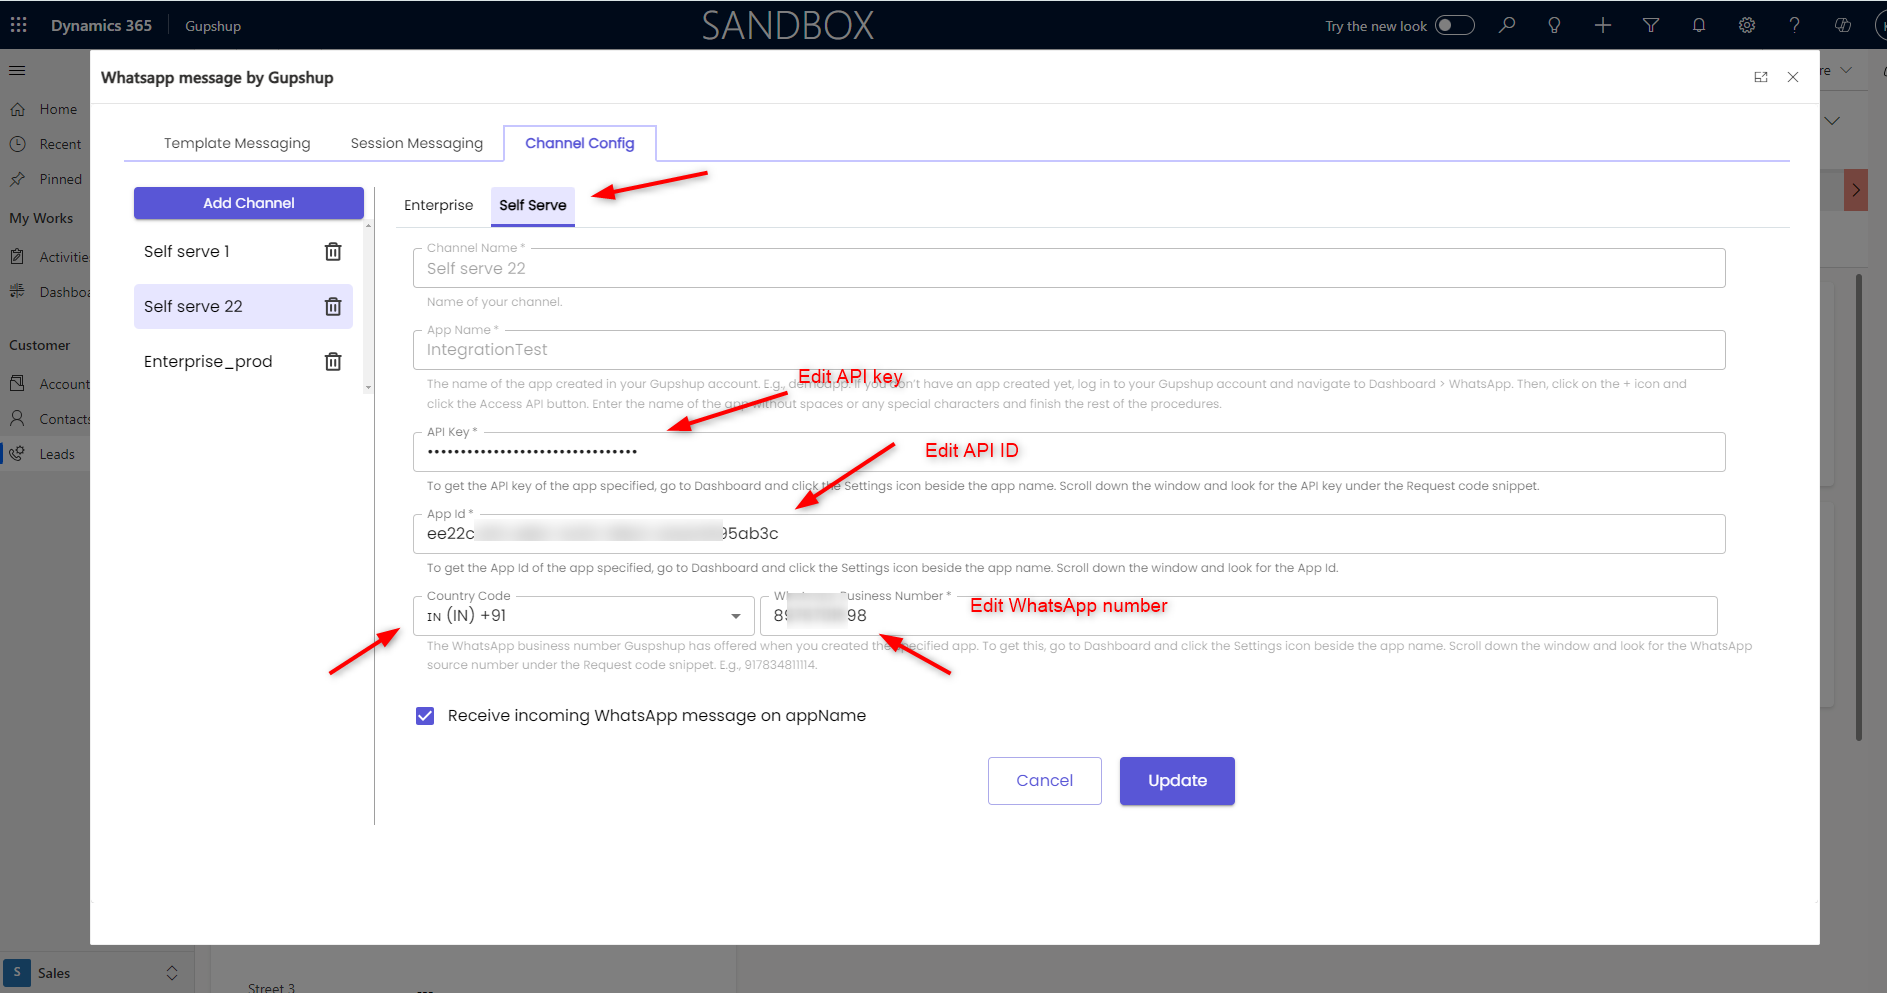
Edit field for selfserve.
We have already created a self-serve channel. I need to make changes to the API key, app ID, and phone number. Please click on the respective fields and make the changes.
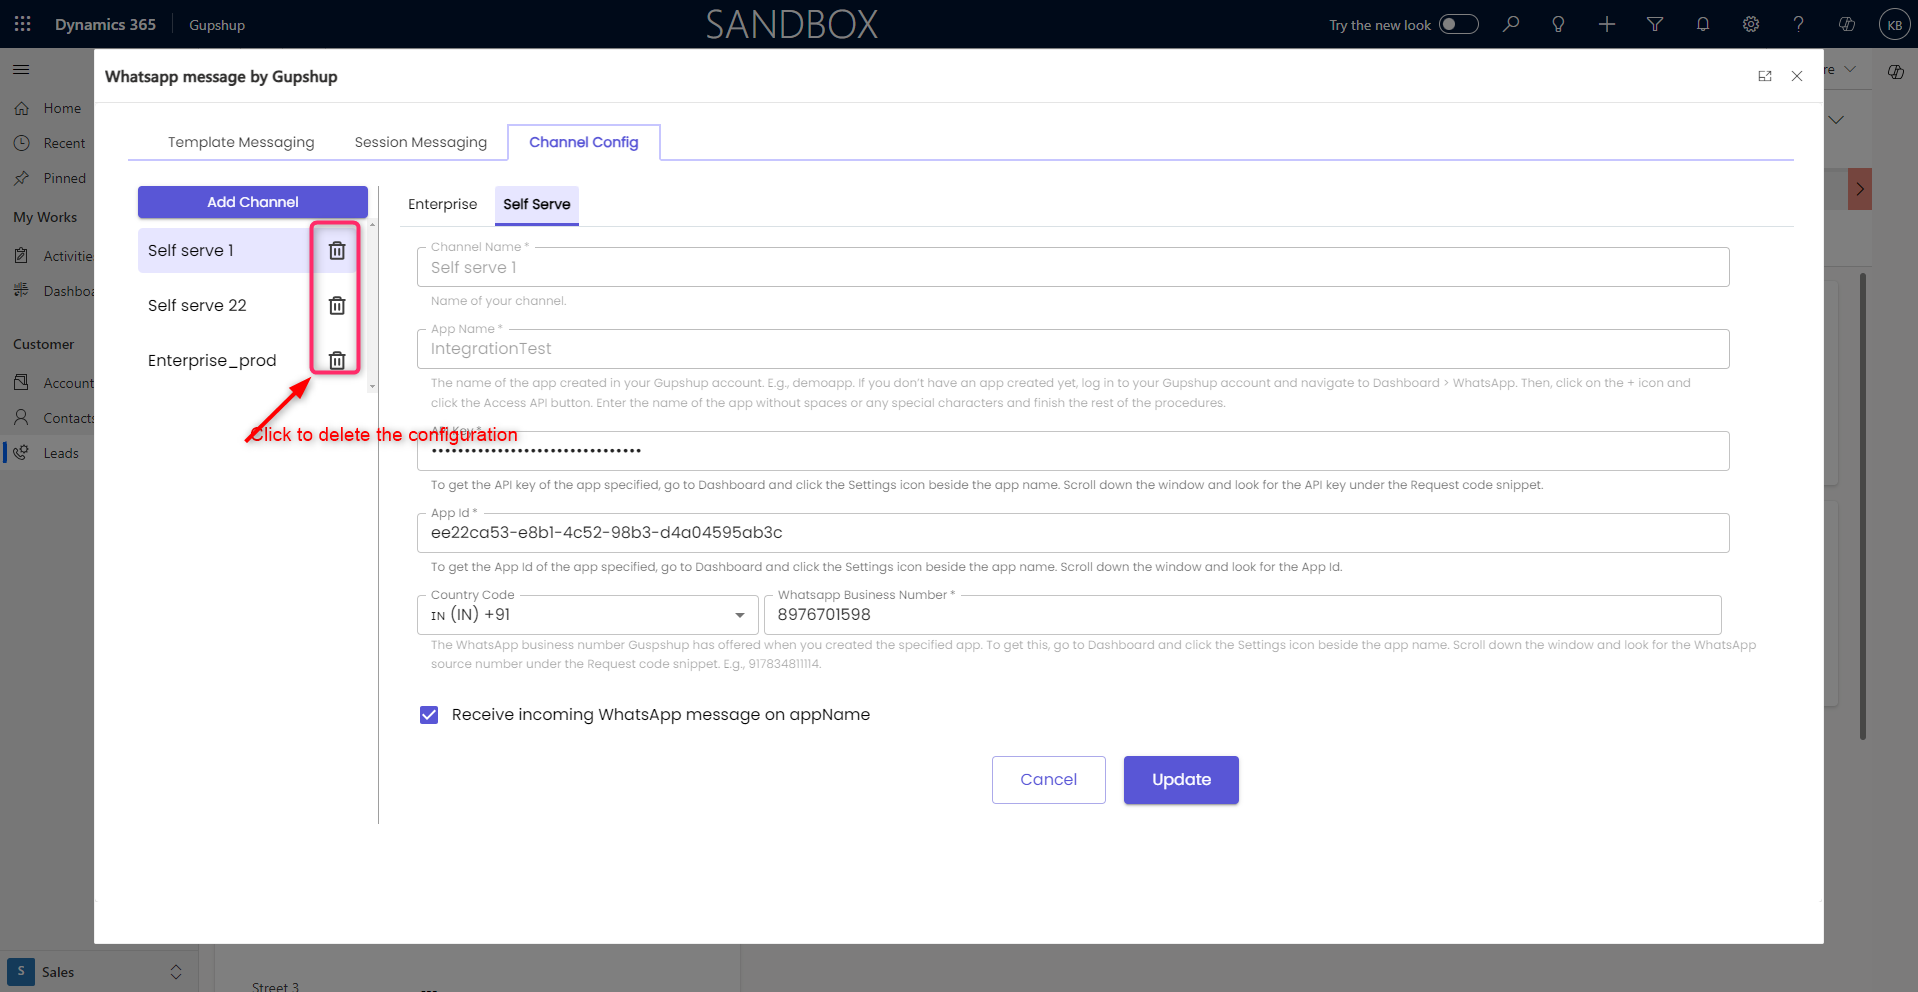
Click the delete button enterprise & selfserve
- We have already set up a selfserve channel to facilitate communication within our organization. However, due to certain changes or reasons, now need to remove this channel from our system
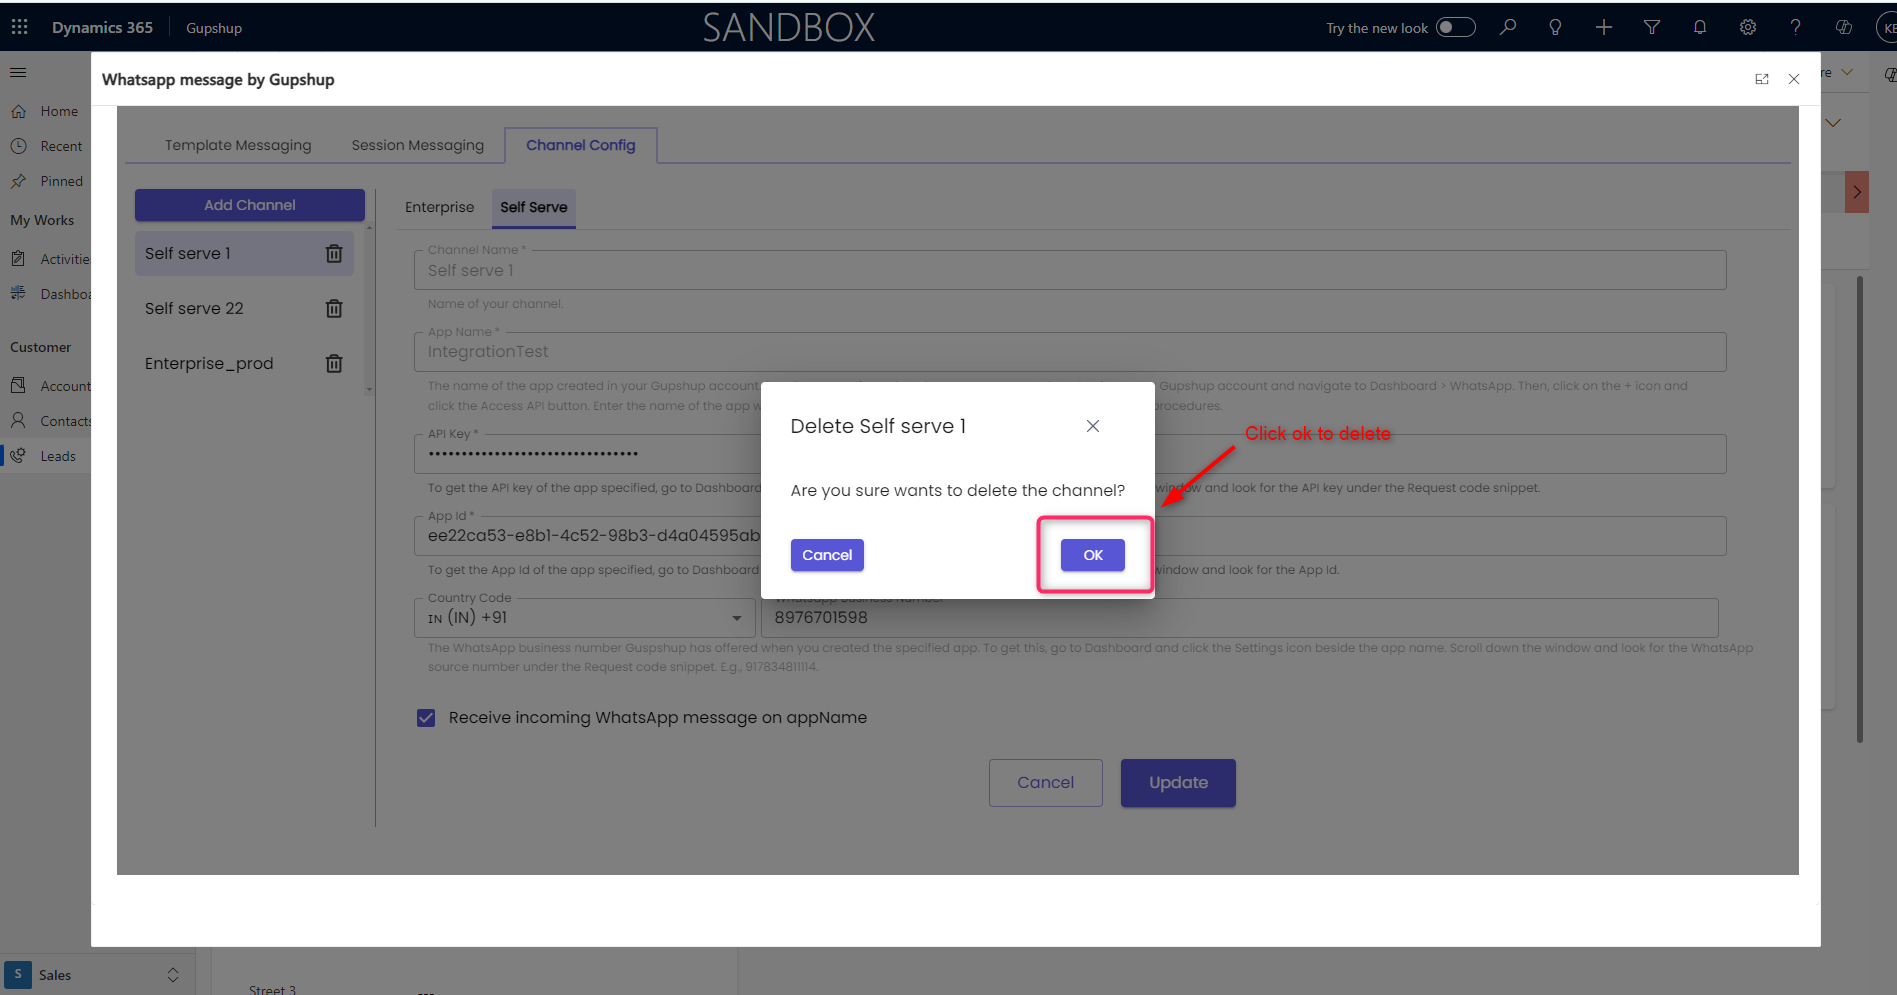
- When you click the "OK" button, the specific channel will be available for deletion on the configuration page.
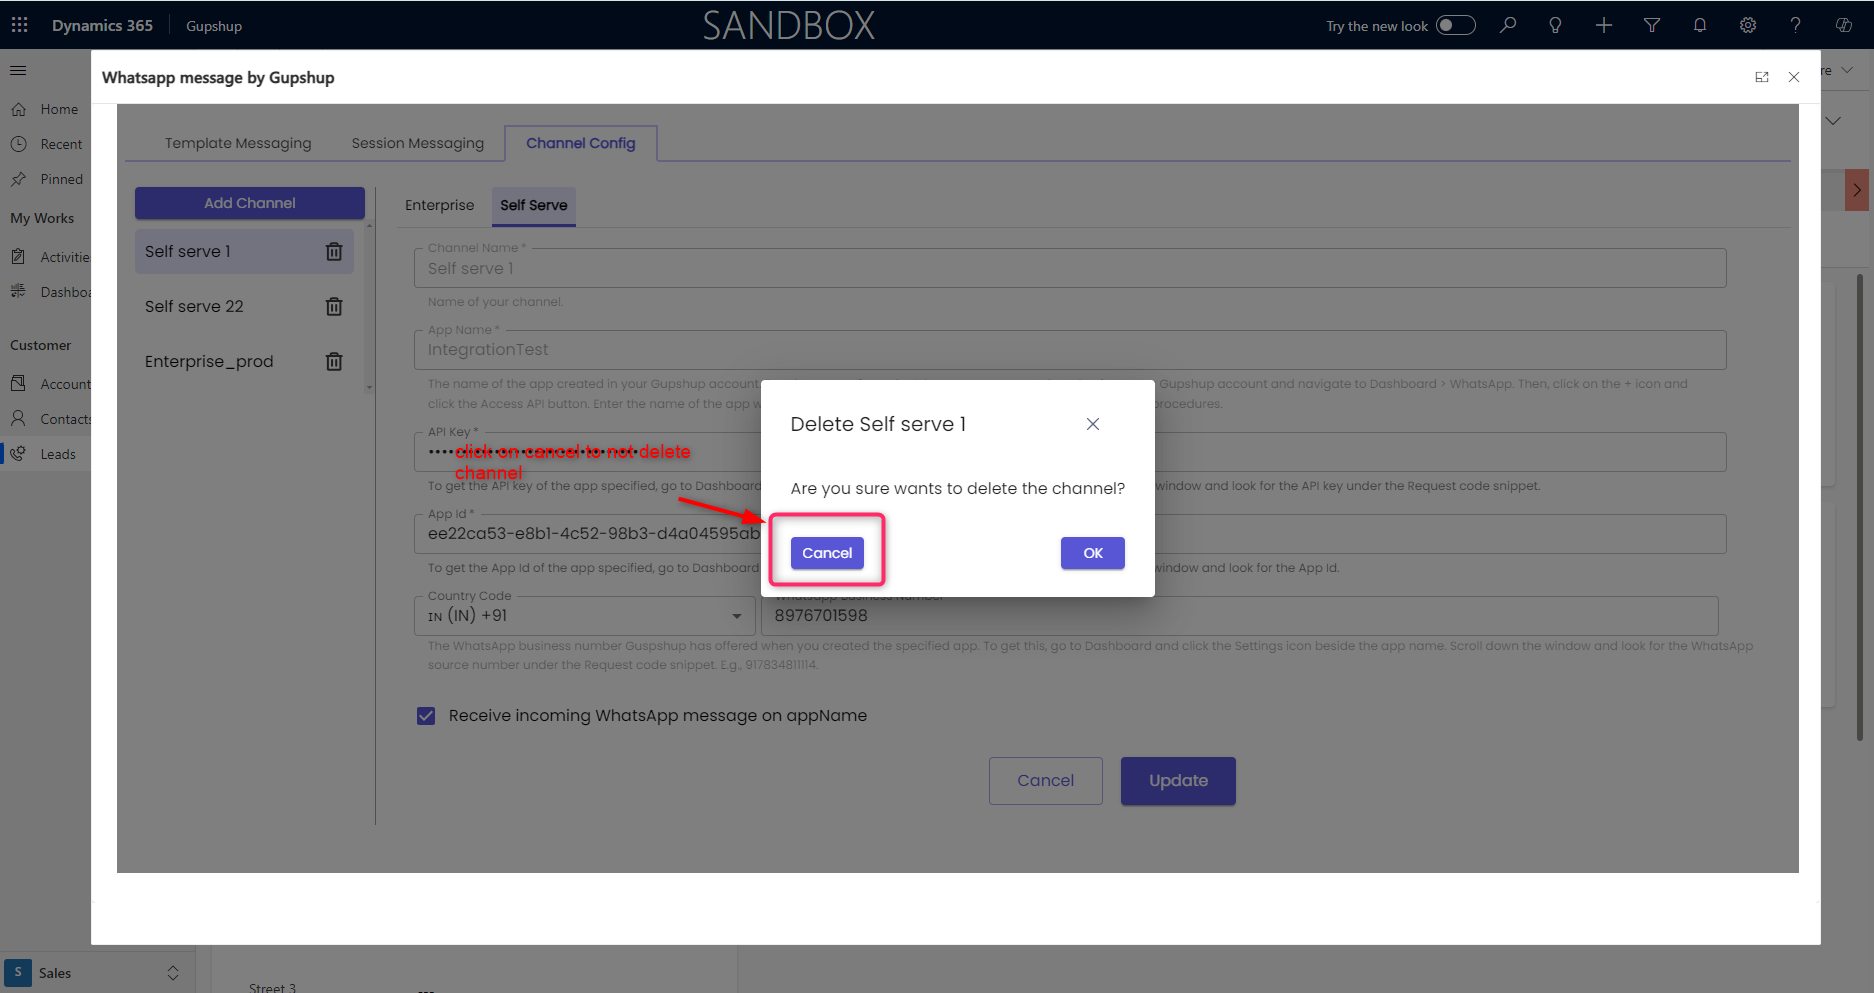
- When you click the "Cancel" button, that particular channel will not be deleted and the channel will be available in the future.
When you click the "UPDATE" button, the specific channel will be updated
Updated 8 months ago