Publish your bot on Messenger
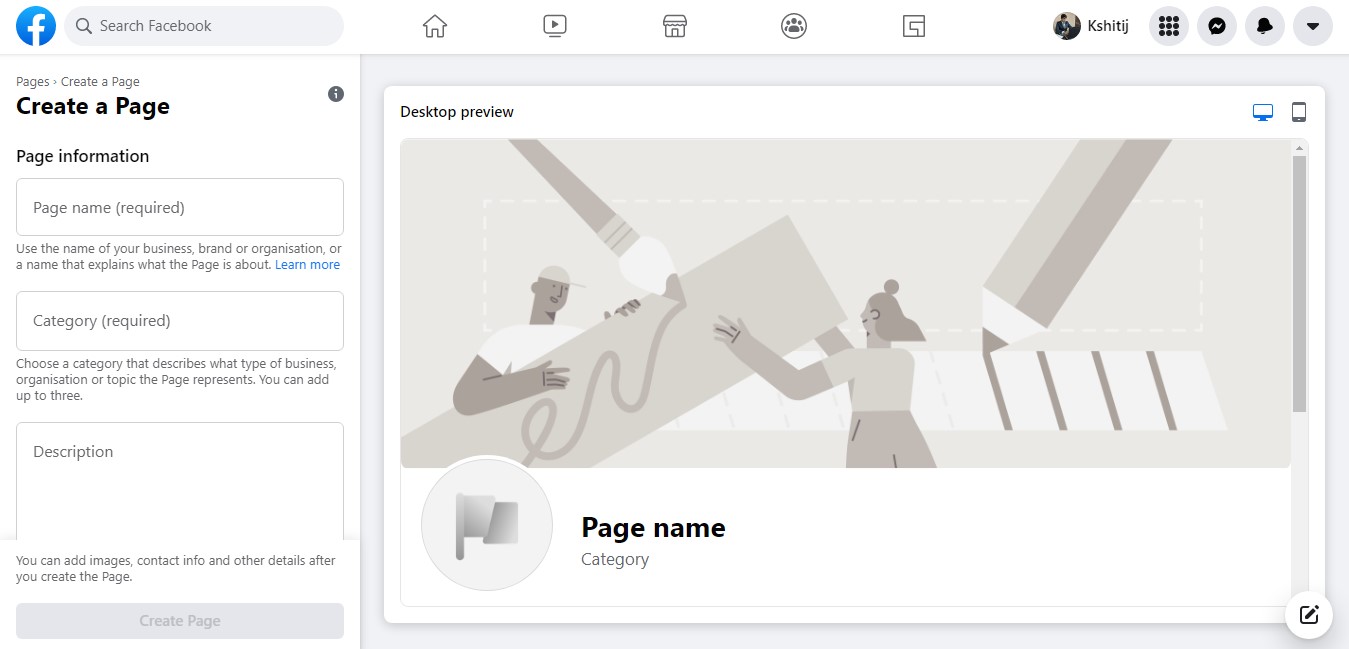
Create a Facebook Page
- To create a new Page, visit https://www.facebook.com/pages/create
- Enter a Page name, Category, and Description.
- Click the Create Page button.
- Select a profile photo for your bot.
Register as a Facebook Developer
- While logged into your Facebook account, go to the Facebook for Developers website and click Get Started.
- Agree to the Terms and Conditions.
- Verify your account using a confirmation code sent to the phone number and email address.
- Select your occupation.
Create a new Facebook Developer App
- Log in to your Facebook for Developers account.
- Click on My Apps.
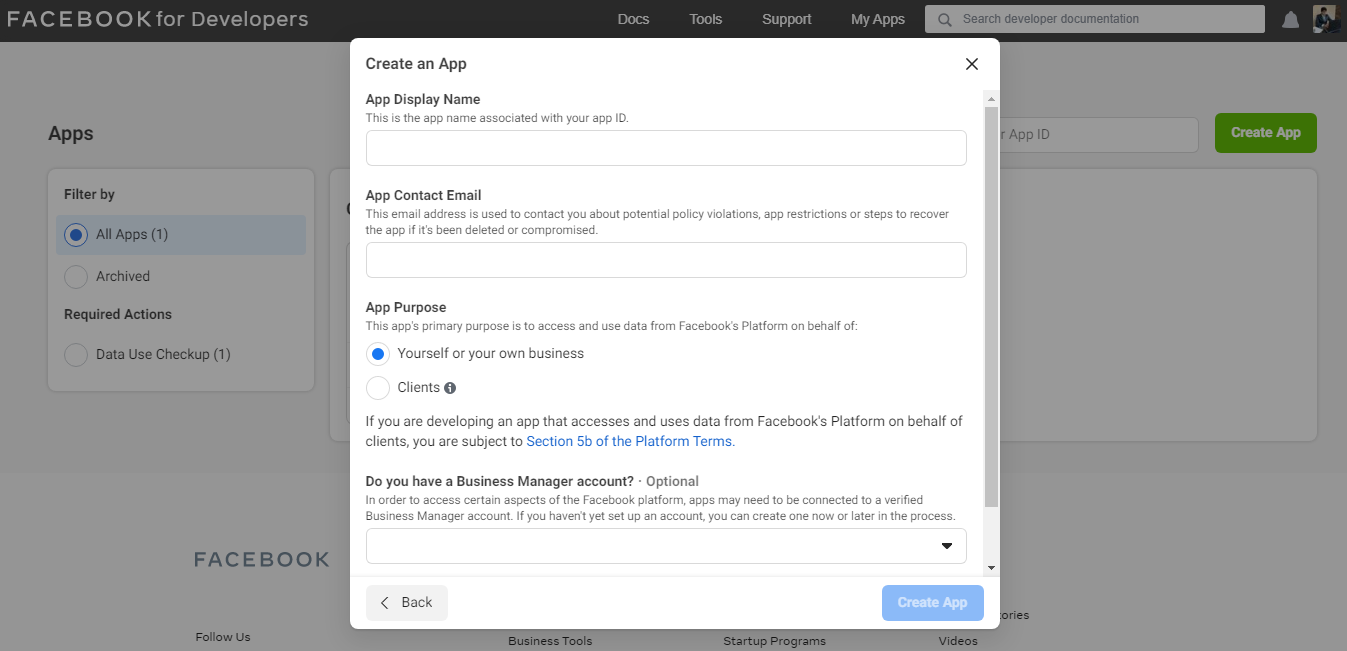
- Click on the Create App button.
- Choose Business as the app type.
- Enter the App Display Name and App Contact Email.
- Select App Purpose as Yourself or your own business.
- Click on the Create App button.
Add Messenger as a Product in your App
- Log in to your Facebook for Developers account.
- Click on My Apps.
- Select the App which you have created for your bot.
- Scroll down to the Add Products to Your App section.
- Find the Messenger tile and click the Set Up button on it.
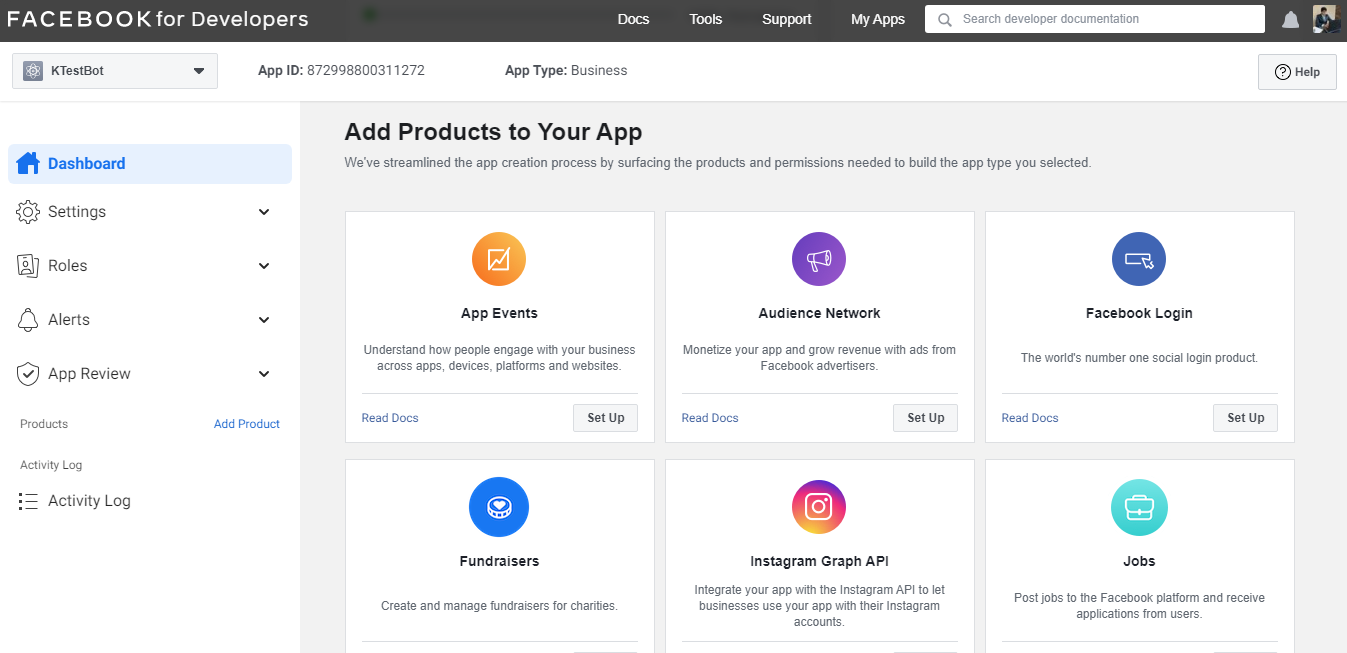
A drop-down menu titled "Messenger" appears in the sidebar.
Get Callback URL and Verify the Token
- Log in to the Gupshup website.
- Go to the Dashboard tab > My Bots section.
- Select the button under the Publish column against the bot you wish to publish.
- A list of channels will appear. Click on the Publish button against Facebook Messenger.
- Scroll down and click Configure the webhook for your app.
- Copy the Callback URL and Verify Token for later use.
Configure the webhook for your App
- In the bot's App, go to Settings under Messenger in the sidebar.
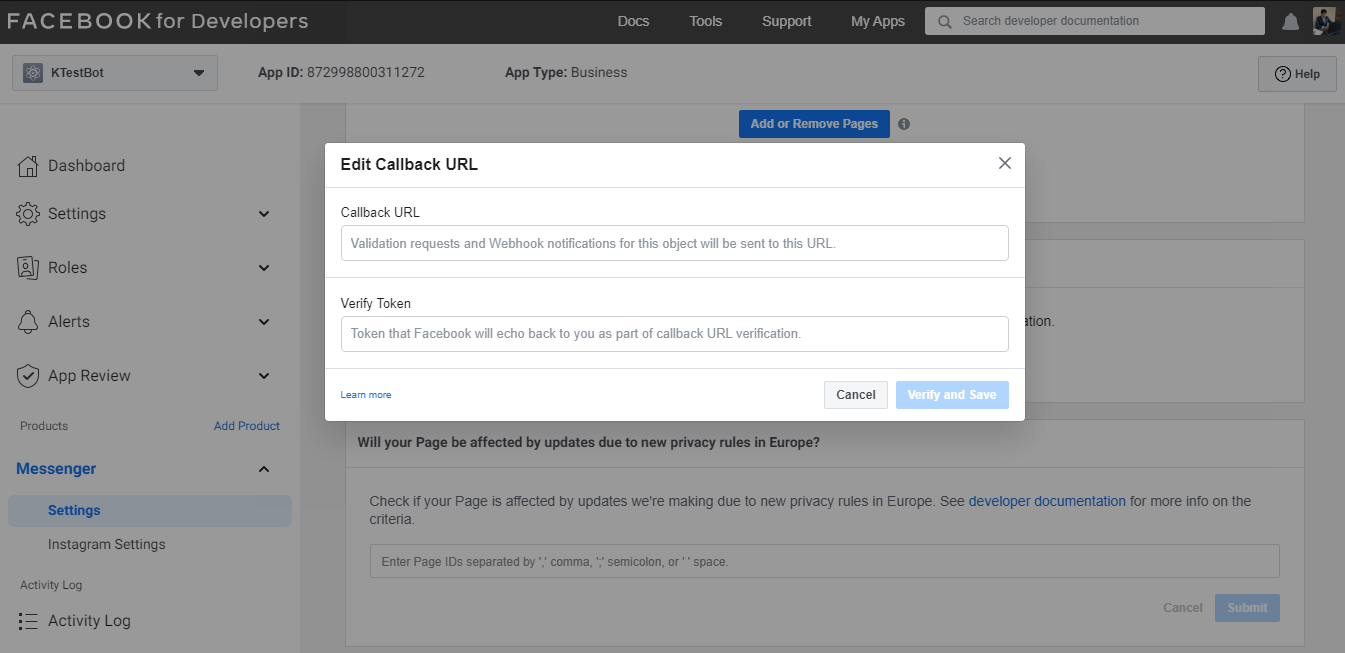
- Scroll down to the Webhooks section and click the Add Callback URL button.
- Enter the Callback URL and Verify the Token copied earlier from the Gupshup website.
- Click the Verify and Save button.
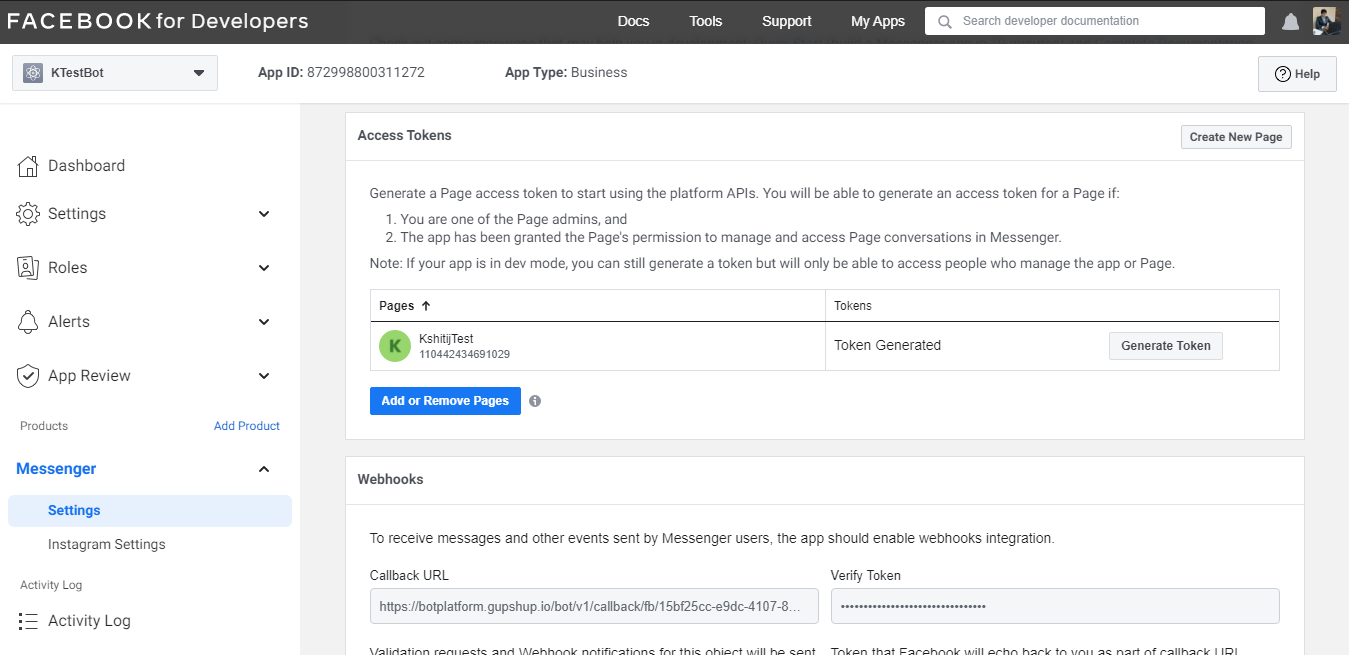
- Click the Add or Remove Pages button.
- Add the Page that you created for the bot earlier.
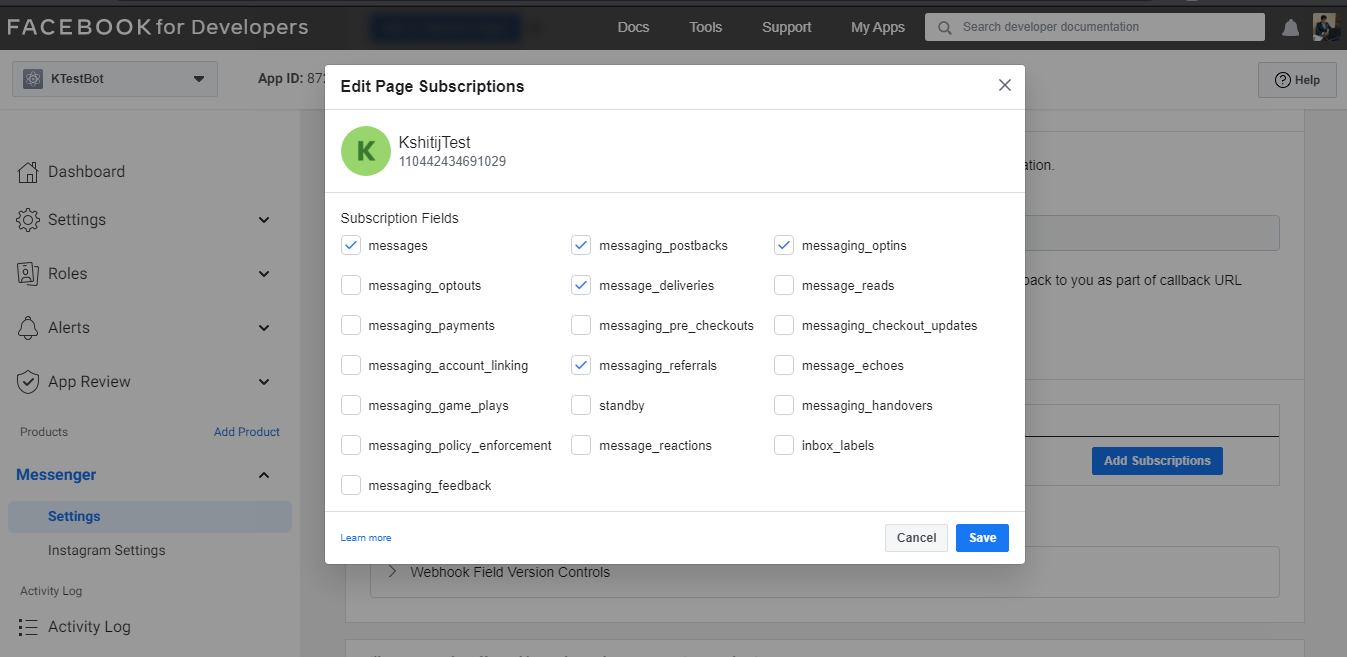
- Click on the Add Subscriptions button.
- Select messages, messaging_postbacks, messaging_optins, message_deliveries and messaging_referrals (These are mandatory whereas others are optional)
- Click Save.
Get the Page Access Token and Page ID
- In Settings under Messenger in the sidebar, go to Access Tokens section.
- Click on the Generate Token button and copy the token for later use.
- Click Done.
- Go to https://www.facebook.com/pages/ and log in to your Facebook account.
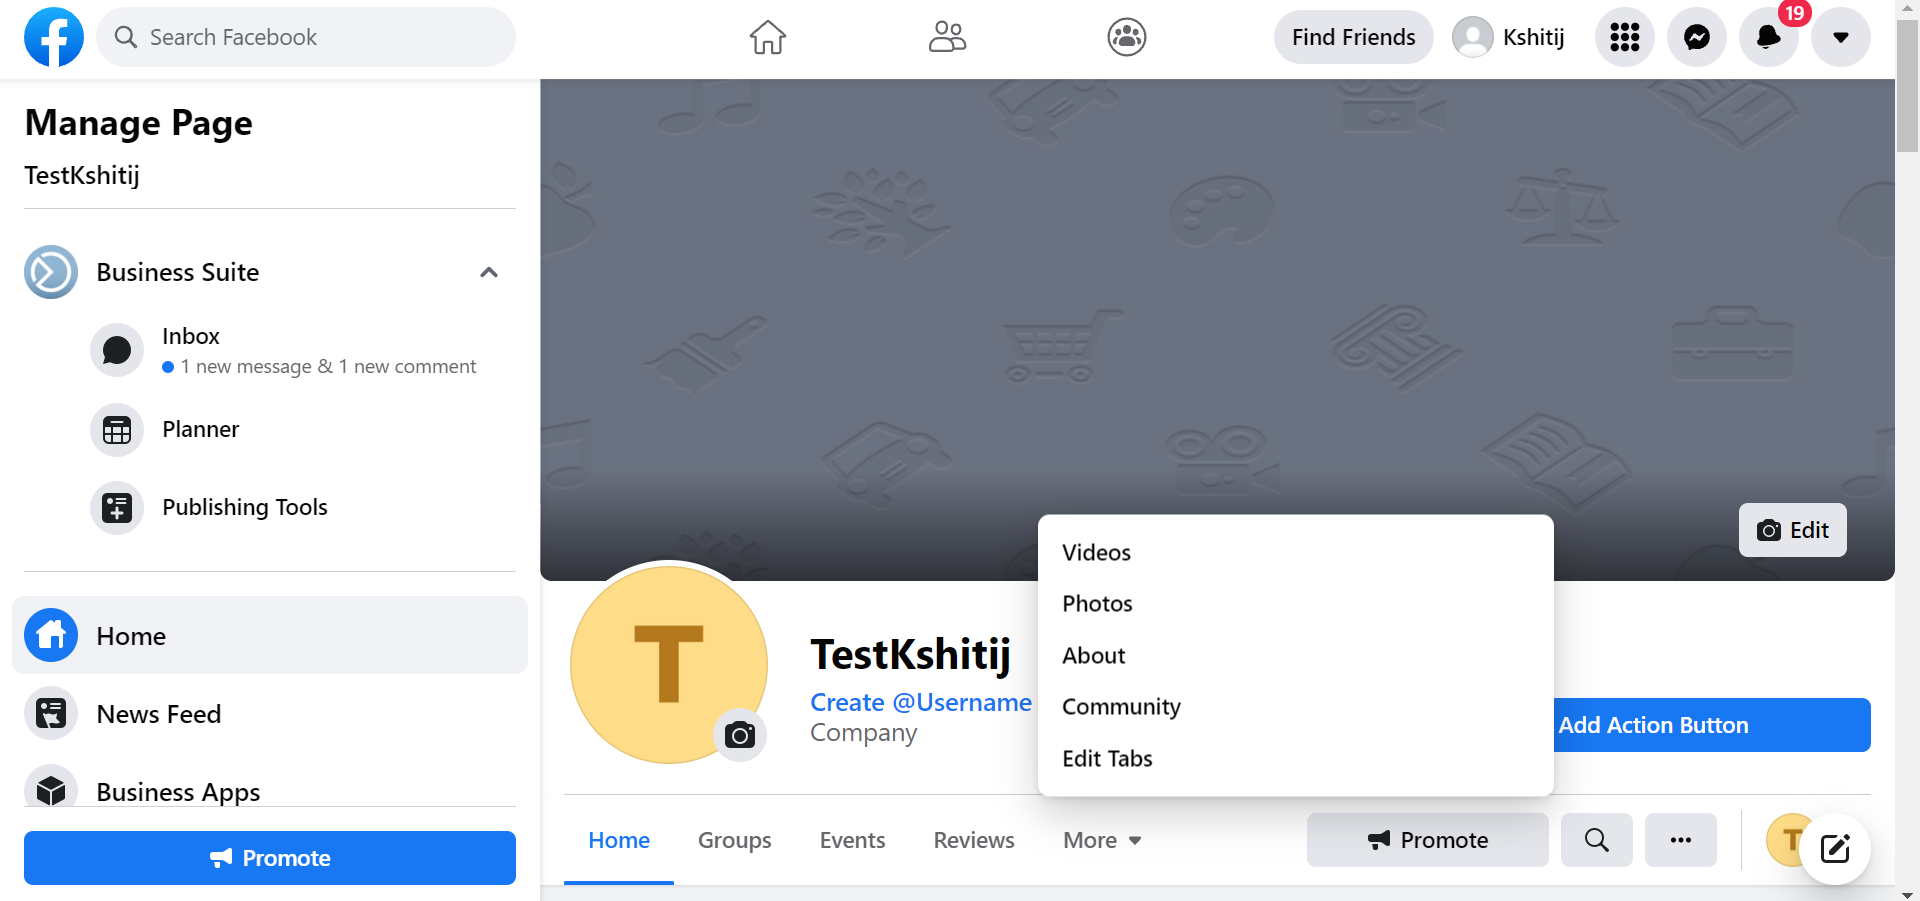
- Click on the Page you have created for the bot.
- Click on More and go to the About tab.
- Scroll down and copy the Page ID mentioned under the More Info section for later use.
Submit credentials
- Log in to the Gupshup website.
- Go to the Dashboard tab > My Bots section.
- Select the button under the Publish column against the bot you wish to publish.
- A list of channels will appear. Click on the Publish button against Facebook Messenger.
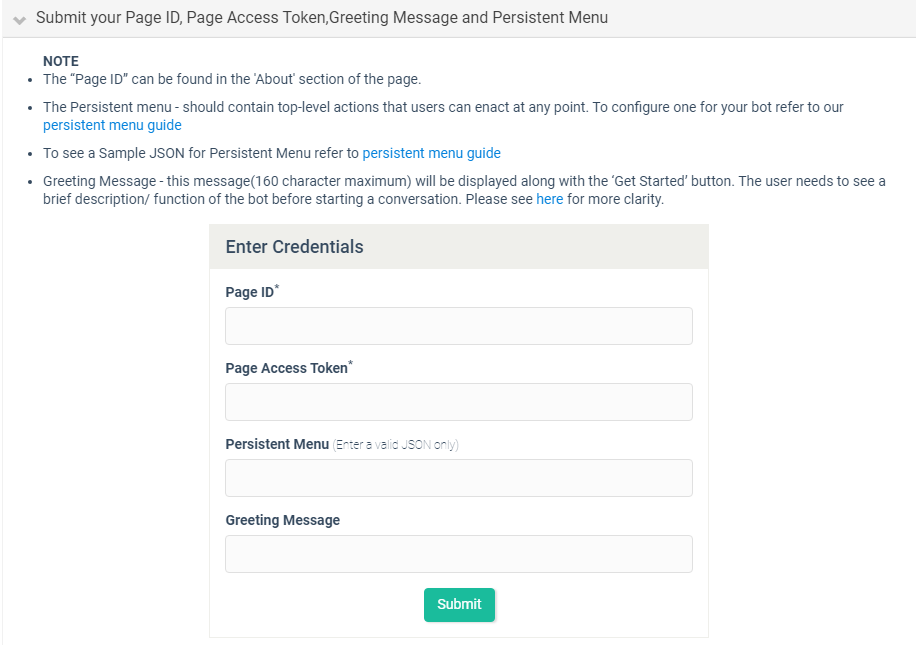
- Scroll down and click Submit your Page ID, Page Access Token, Greeting Message and Persistent Menu.
- Enter the Page ID and the Page Access Token copied earlier.
- Enter a greeting message which must be 160 characters maximum and will be displayed along with the "Get Started" button in Messenger.
- Enter the valid JSON for Persistent Menu which contains top-level actions that users can enact at any point. For example, "Main Menu".
- Click the Submit button.
To configure a persistent menu for your bot, refer to Gupshup's persistent menu guide.
Updated 4 months ago
