Logger
Record all the trigger and actions data of a workflow. It helps in debugging the pain points and backtracking to the previous point so that users can re-execute with a proper set of inputs.
Logger allows you to record the output of triggers and actions while a journey is in the execution state. This feature is useful to visualize the complete set of data flowing between each action through which you can debug the journey process, in case of unexpected results. You can also backtrack to each action step where you believe that a small tweak in the inputs would give you better results.
Use case
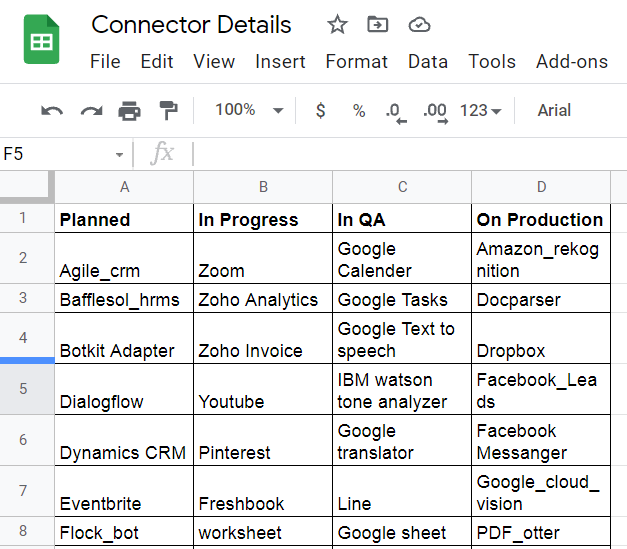
For instance, let's consider a scenario where a company has all your connector's code deployed on the GitHub repository. The developers are working to make them global. At the same time, they are maintaining a Google Sheet containing the life cycle of each connector along with its deployment status i.e. Planned, In Progress, In QA, On Production for all the stages, the connectors are moderated rigorously.
- Trigger: Scheduler by Gupshup integration platform- New scheduled event (just to execute the journey and highlight how the Logger logs messages)
- Actions: Google Sheets-Search cell using query, Logger-Log a Message
Prerequisites
Let's have a Google Sheet named Connector Details that contains a list of connectors with life cycle stages mentioned in the use case:

Figure 1: Google Sheet containing connectors
Configuring the Google Sheets action
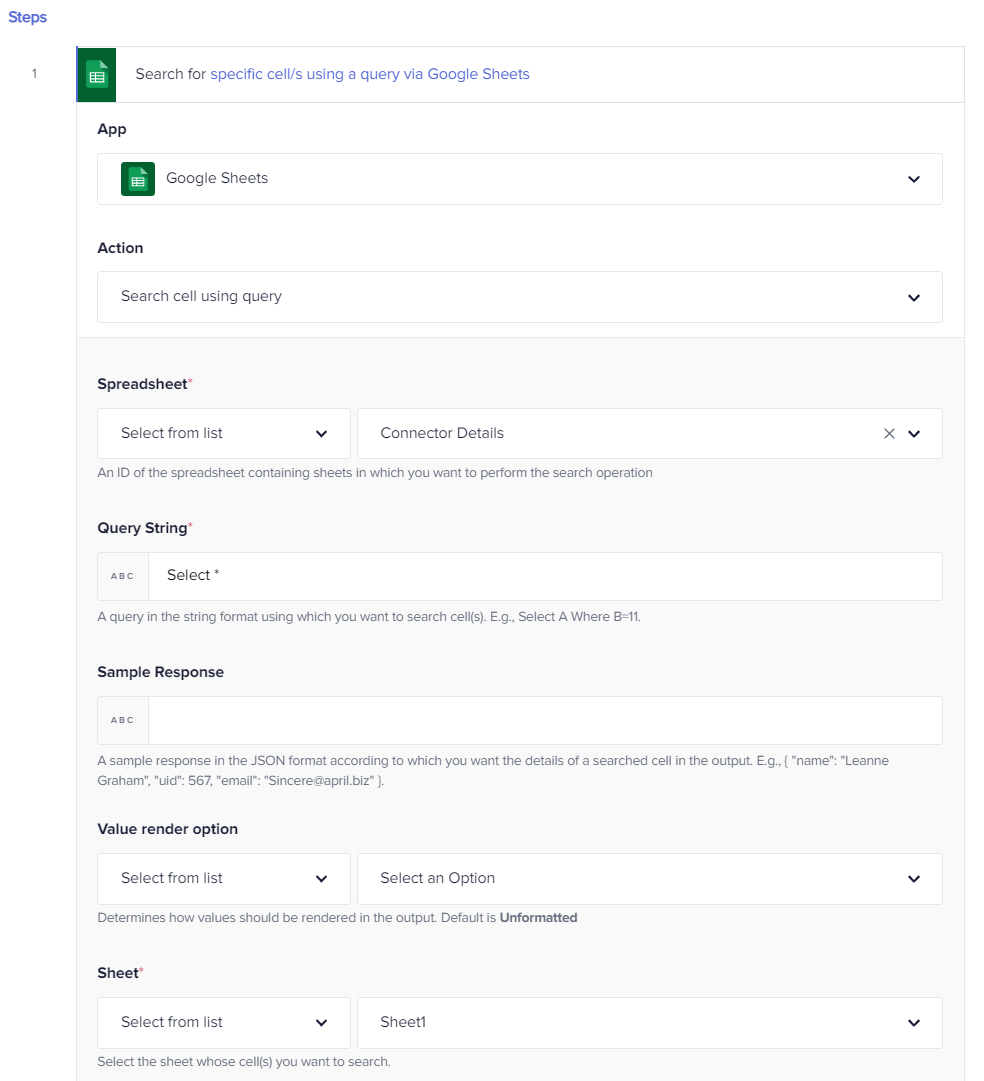
Under the Steps section, click on the Simple Action button and choose the Google Sheets app from the drop-down menu present in the Apps field.
- Select the action, Search cell using query, from the drop-down menu in the Actions field.
- Authorize your Google Sheets account by clicking the Link an account button, selecting the Gmail account that contains the Connector Details spreadsheet, and allowing the set of permissions.
- A set of input fields will open. In the Spreadsheet field, select the Connector Details spreadsheet, which we had created earlier, from the drop-down menu.
- In the Query String field, enter the query as Select*. This query selects all the records in the spreadsheet
- In the Sheet name field, select the sheet that contains the data of the spreadsheet. It is Sheet1 in our case:

Figure 3: Search cell using query
Configuring the Logger action
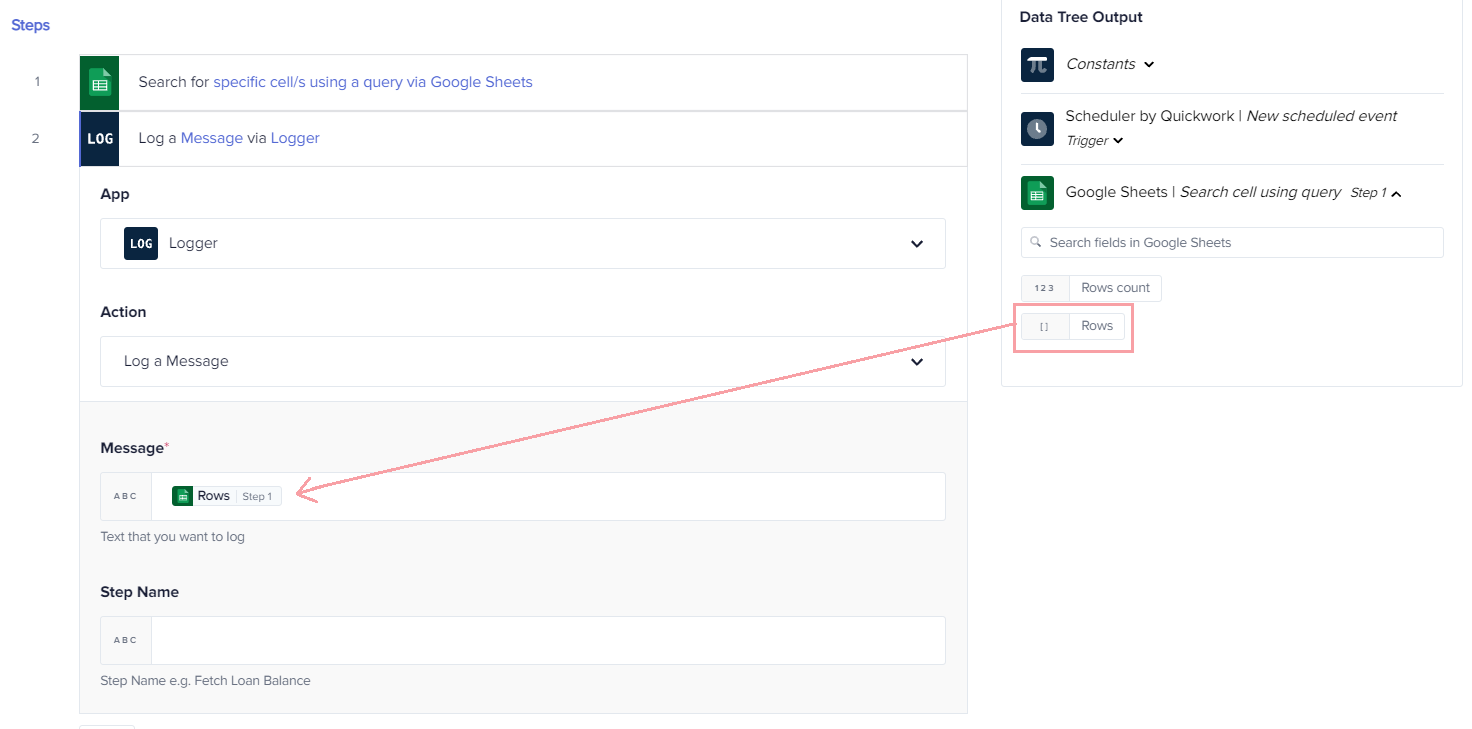
- Under the Steps section, click on the Simple Action button and choose the Logger app from the drop-down menu in the Apps list.
- Select the Log a Message action from the drop-down menu in the Actions list.
- Drag and drop Rows data pill from the Google Sheets | Search cell using query under Data Tree Output to the Message input field:

Figure 4: Log a message action
Executing the journey
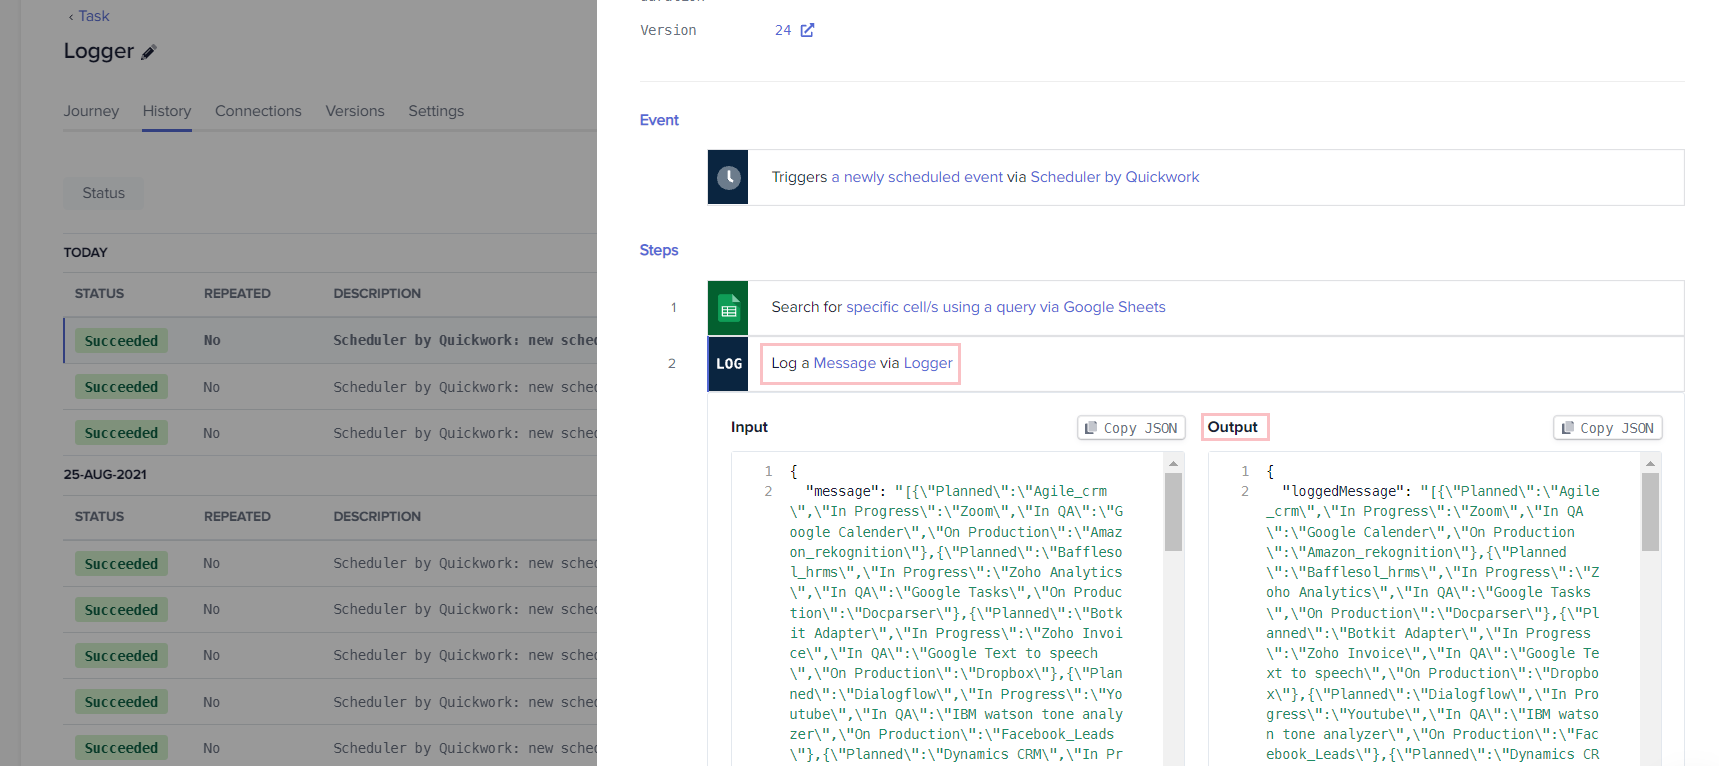
Save the changes of the journey click the Save & Start button. You'll be redirected to the History tab. Click on the succeeded history ID of the journey. Then click the Logger step and see the Output block:

Figure 5: The Logger output
Once the complete message is logged successfully, a user can view it with precision helping him/her to backtrack in case of any errors seem to occur. Moreover, the user can also The data pills of the Logger app can be tweaked using Formula mode to perform complex operations in other actions down the line.
Updated 4 months ago
