Landing Page UI
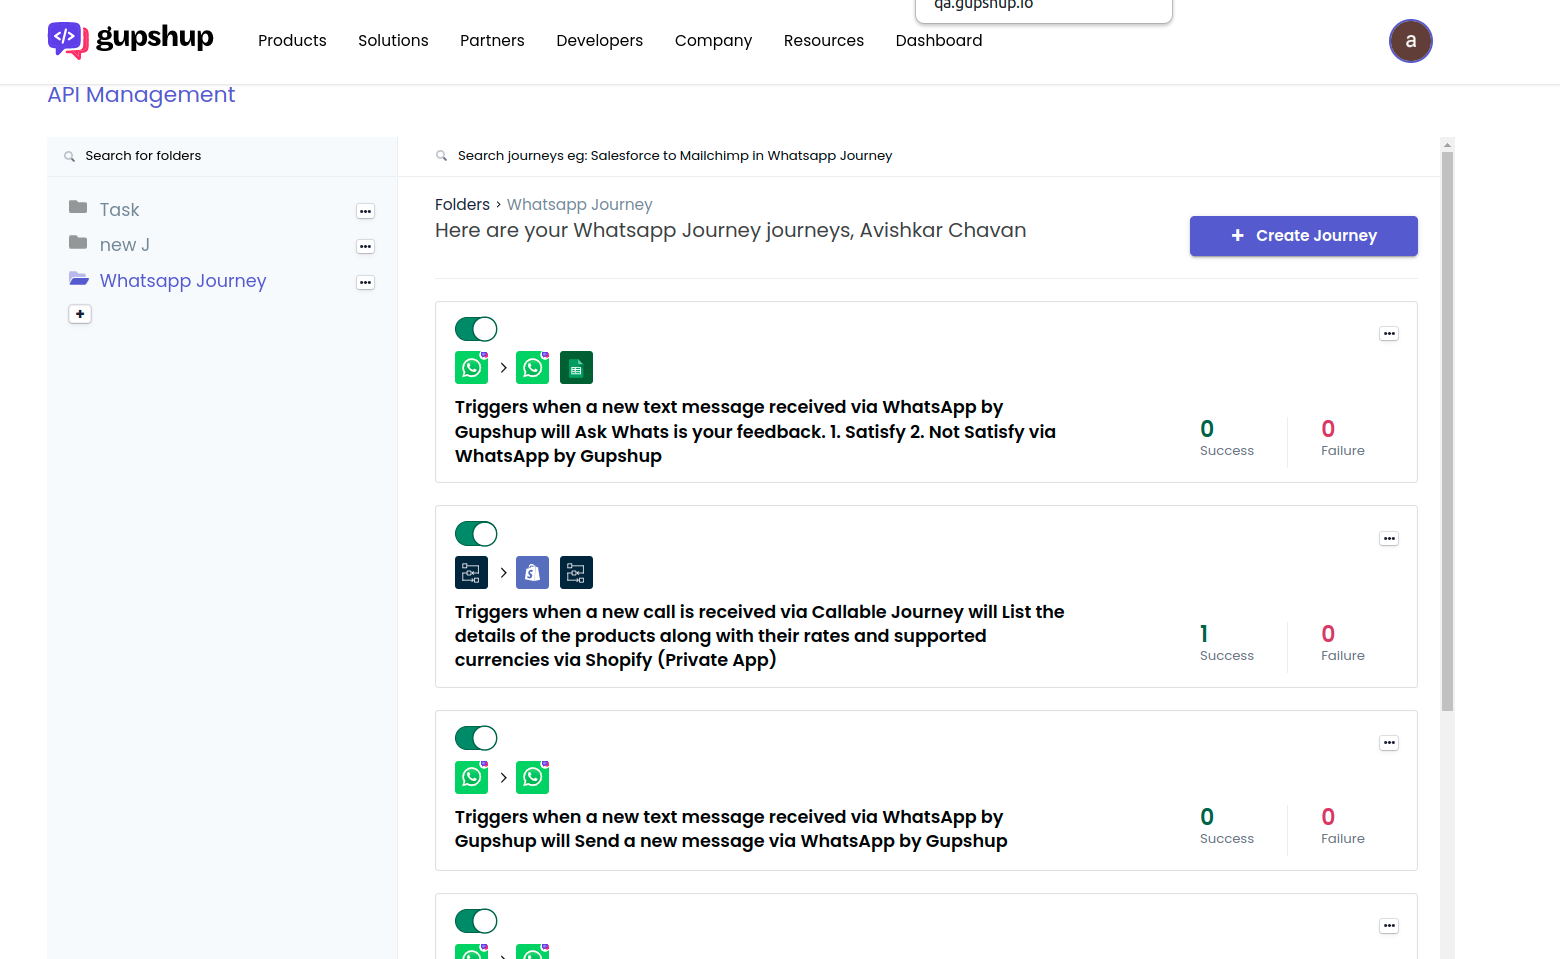
As soon as you log in to Integrations, you will be taken to a window containing the Folders section. Once you have journeys created in your account, their list gets displayed in a 1x1 grid illustration:

Folders Sessions
Now, let us understand each element of the window as highlighted in the above image:
-
Tabs: There are seven tabs for direct access to different windows and features of the products. There are as follows:
1. #Dashboard#: View the audit logs of your account under this tab. Click here to know more. 2. **Folders**: The journey configuration manager opens under the Folders tab. Gupshup obeys a directory hierarchy where a journey is considered as a file that gets saved within a folder. 3. **Docs**: Clicking this tab will land you to the documentation guide of Gupshup in the new tab. You can visit the same by visiting https://docs/gupshup.io 4. **Tools**: This menu holds advanced features and properties such as API Management, Database, Constants, Team, and Conversation Management. 5. **Support center**: Get access to hundreds of app-connection articles and How To's. These articles are ready to help you in case you are stuck while creating a journey. Click here to know more. -
Subscribe button: Clicking this button will take you to the pricing page of Gupshup. The subscription plans are bifurcated into a monthly and annual basis supporting currency rates in INR and USD. From the Free, Starter, and Pro plan to the Business and Enterprise plan, Gupshup covers all the feature benefits that customers could use as per their business requirements.
-
User account: This menu contains two options, Account Settings and Sign out. In the Account Settings window, you can update your profile information, check the transaction credits, raise a request to export or delete the account and see the ongoing subscription plan of your account. When you are added to a team, you can simply switch between the administrator's workspace and your own through this menu.
-
Folders search bar: This search bar allows you to find a specific folder present in your account, say demo.
-
Journeys search bar: This option allows you to find a specific journey present in any folder of your account. E.g., Telegram postback button.
-
Folders section: This section holds a list of folders that has journeys built in it. As you log in, the first folder opens up by default, the Buttons folder in this case, and all its journeys are displayed in the adjacent window.
-
Three horizontal ellipses: Clicking this button gives the following two options:
1. **Rename**: To rename a folder. 2. **Delete**: To delete a folder. -
+ icon: Clicking this icon allows you to create a new folder.
-
Breadcrumbs: This is a path depicting which journeys are getting displayed in the list of a specific folder. E.g., Folders > Buttons.
-
+ Create Journey button: Clicking this button creates a new journey.
-
Start-Stop toggle button: This button is direct access to start or stop the execution of a journey.
-
Three horizontal ellipses: Clicking this button gives the following two options:
1. **Clone**: To create a replica of a journey. 2. **Delete**: To delete a journey from an account. -
Success and failure count: This shows the number of times a journey has been executed successfully or failed.
-
Chat support: You can get in touch with one of the Gupshup representatives for issues related to journey creation-simple or complex, app connections, problems using advanced features of the platform, new app requests, etc.
Updated 3 months ago
