Step 1: Installation
PREREQUISITES
Before installing the managed package, it is important for the system administrator to confirm that the List Custom Settings feature is enabled in the Salesforce org. This feature is utilized by the app to store its configuration data.
To verify the status of the "Manage List Custom Settings Type" feature in Salesforce Lightning, follow these steps:
- Open Salesforce Lightning and click on the "App Launcher" icon located in the top-left corner.
- Select "Setup" from the available options to access the Setup menu.
- On the Setup page, scroll down and locate the "Home" tab under the "Platform Tools" section. Click on it.
- In the left sidebar menu, find and click on the "Data" section.
- From the "Data" menu, choose "Schema Settings" to navigate to the schema settings page.
- Once on the Schema Settings page, check if the "Manage List Custom Settings Type" option is enabled.
- If the option is already enabled, no further action is needed.
- If the option is not enabled, click on the "Edit" button next to it.
- In the "Manage List Custom Settings Type" section, toggle the switch to enable the feature.
- Save the changes by clicking on the "Save" button.
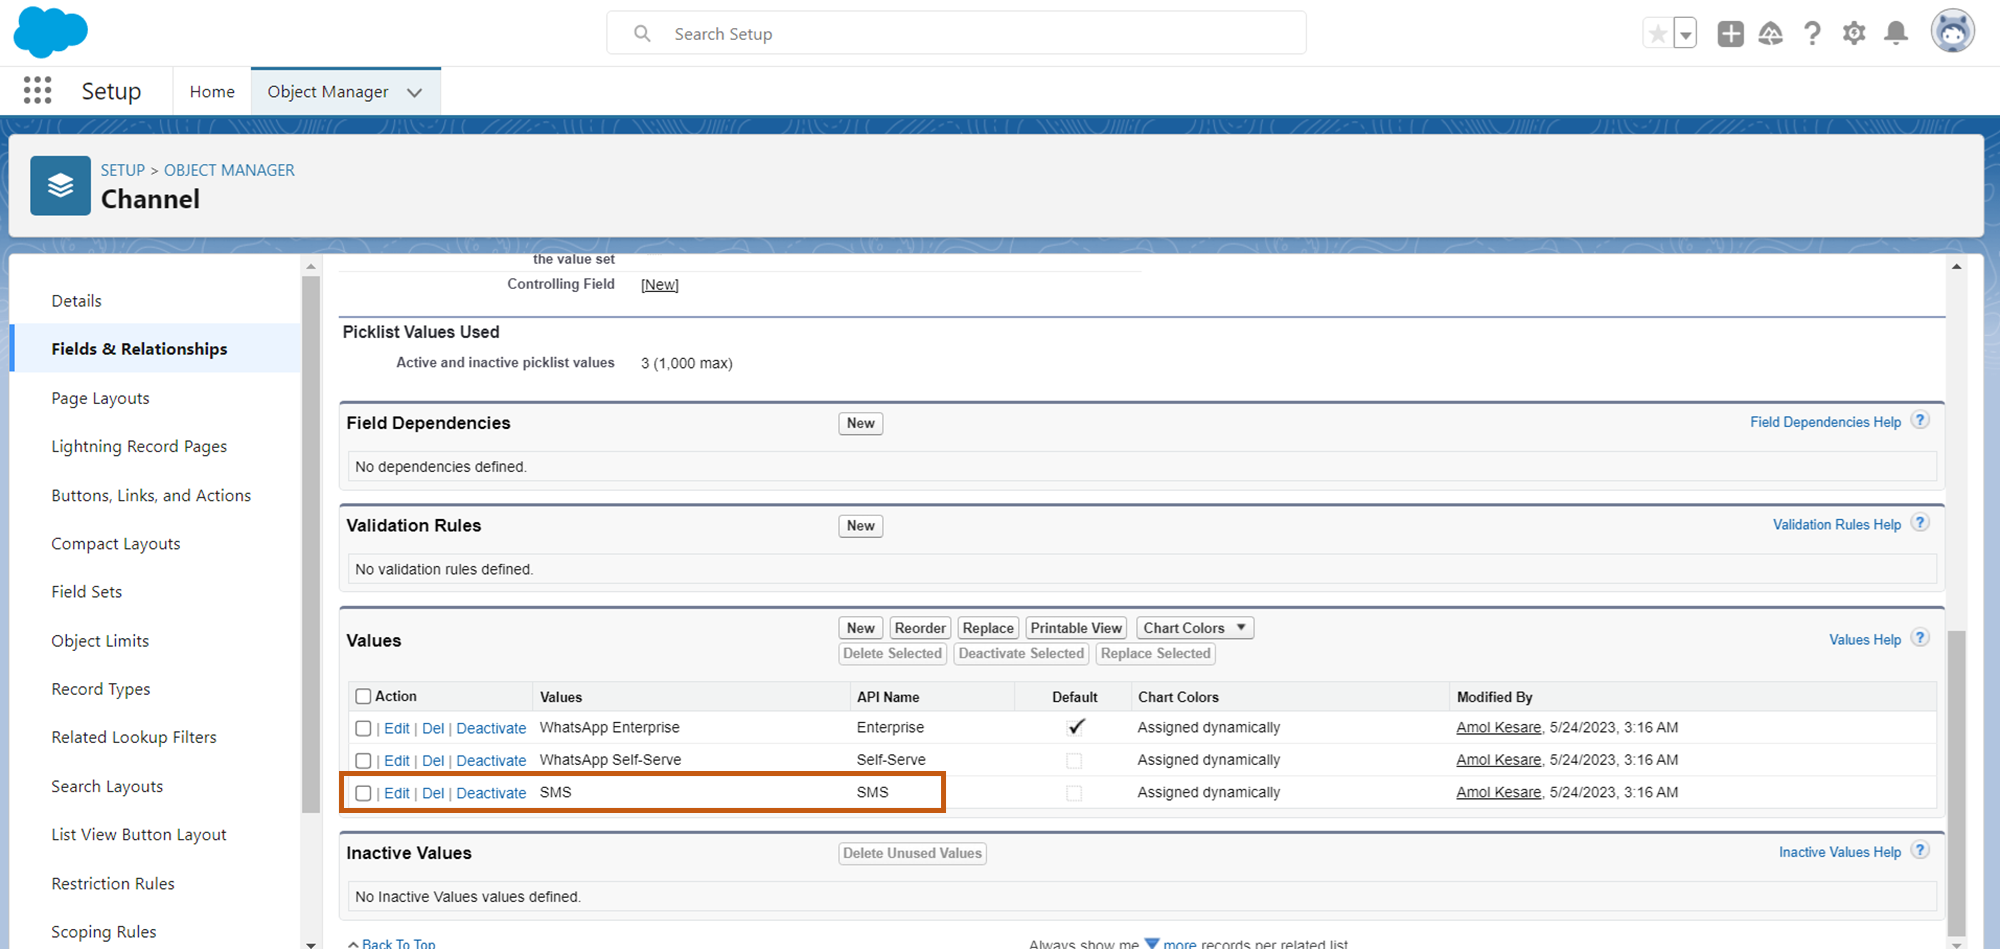
Here are the steps for users upgrading from a previous version (i.e. below 1.6) to add the SMS channel in Salesforce:
By following these steps, users upgrading from a previous version (below 1.6) can add the "SMS" channel to their Salesforce environment.
- Click on the gear icon located in the top-right corner of the page and select "Setup" from the dropdown menu.
- In the Setup menu, click on the "Object Manager" tab.
- In the Object Manager tab, search for the object named "Channel" and click on it.
- Within the "Channel" object, click on the "Field & Relationships" section.
- Locate the "Channel Type" field and open it for editing.
- Add SMS as a picklist value to the "Channel Type" field.
- Save the changes to update the "Channel Type" field.
-
Install the Package
To initiate the installation process, you will be provided with a URL to install the app into your Salesforce environment. Please use the following URL to proceed with the installation:
Click on the provided link to begin the installation of the package in your Salesforce organization.
Install package in Sandbox account
If you are installing the app into a sandbox organization, please make sure to use the below URL
Steps to Install the Package:
-
Access the installation URL provided. This will redirect you to the Salesforce login page.
-
Once Salesforce Login Page opens, user needs to enter his/her Salesforce credentials of the Salesforce org in which this application needs to be installed.
-
On the Salesforce login page, enter your Salesforce credentials for the organization where you want to install the application.
-
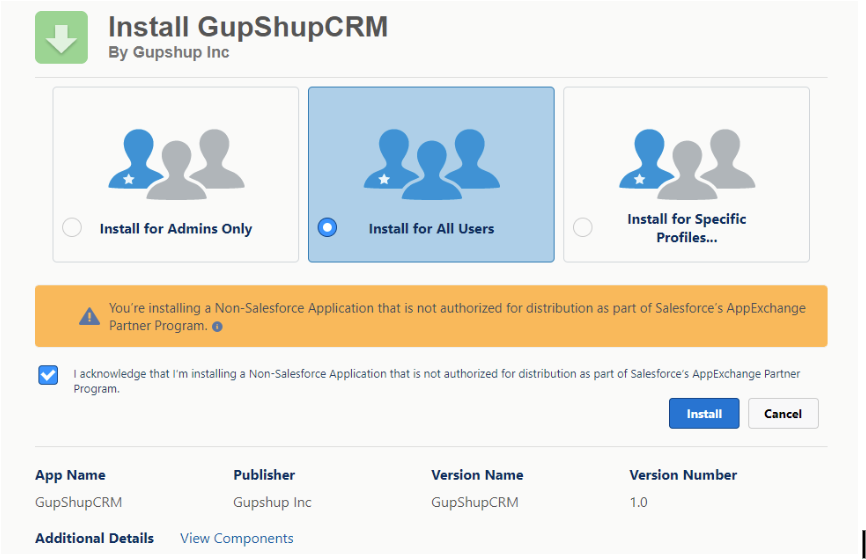
After logging in, you will be presented with installation options. Choose the "Install for all Users" option to grant access to the Gupshup CRM Application for all users in the organization.
-
Make sure to mark the checkbox indicating your consent to grant access to the application.
-
Finally, click on the "Install" button to initiate the installation process.
Install app
- After initiating the installation process, you may encounter a popup titled "Approve Third-Party Access."
- In this popup, please ensure that the required remote site settings are confirmed by enabling the checkboxes. These checkboxes allow the application to establish communication with the Gupshup API.
- It is important to note that if the "third-party access grant" checkbox is not checked, the package installation will not proceed. Granting access permission to the Gupshup API is necessary for successful installation.
- To proceed with the package installation, make sure to check the "third-party access grant" checkbox.
- By granting access permission, you are enabling the application to communicate with the Gupshup API effectively, ensuring the proper functionality of the package.
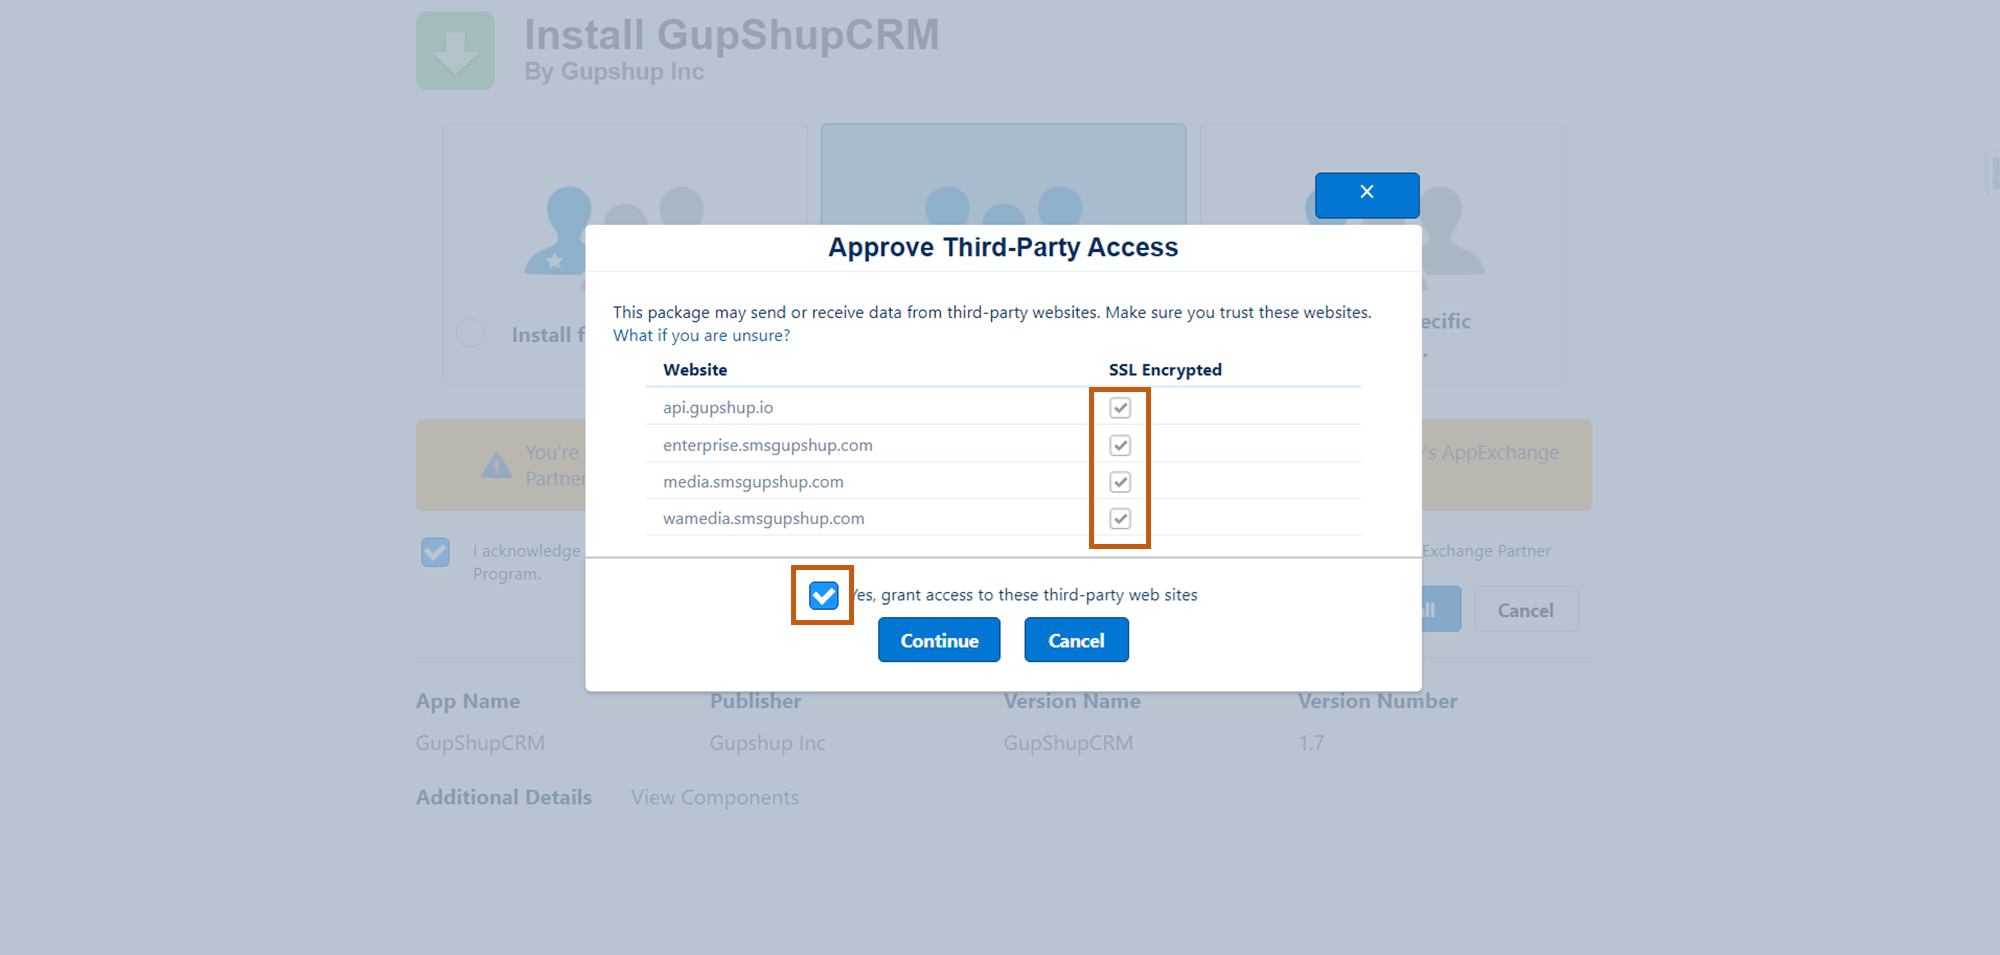
Grant access to third-party websites
After clicking on the "Continue" button, please note that the package installation process may take some time, typically ranging from 15 to 30 minutes (approximately). The actual duration may vary depending on factors such as the size of the package and the current load on the Salesforce servers.
During this time, it is advisable to avoid navigating away from the installation page or refreshing the page to ensure a smooth installation process. It is normal for the installation to take some time, so please be patient and allow the process to complete.
Once the installation is finished, you will receive a notification indicating the successful installation of the package. At that point, you can proceed with any additional configuration or setup required for the application.
Updated 8 months ago