Custom Connectivity.
Automation (Cloudflow/Power Automate)
- To create a Power Automate to send template messages Go to https://make.powerapps.com/ and select the environment where you want to create the flow
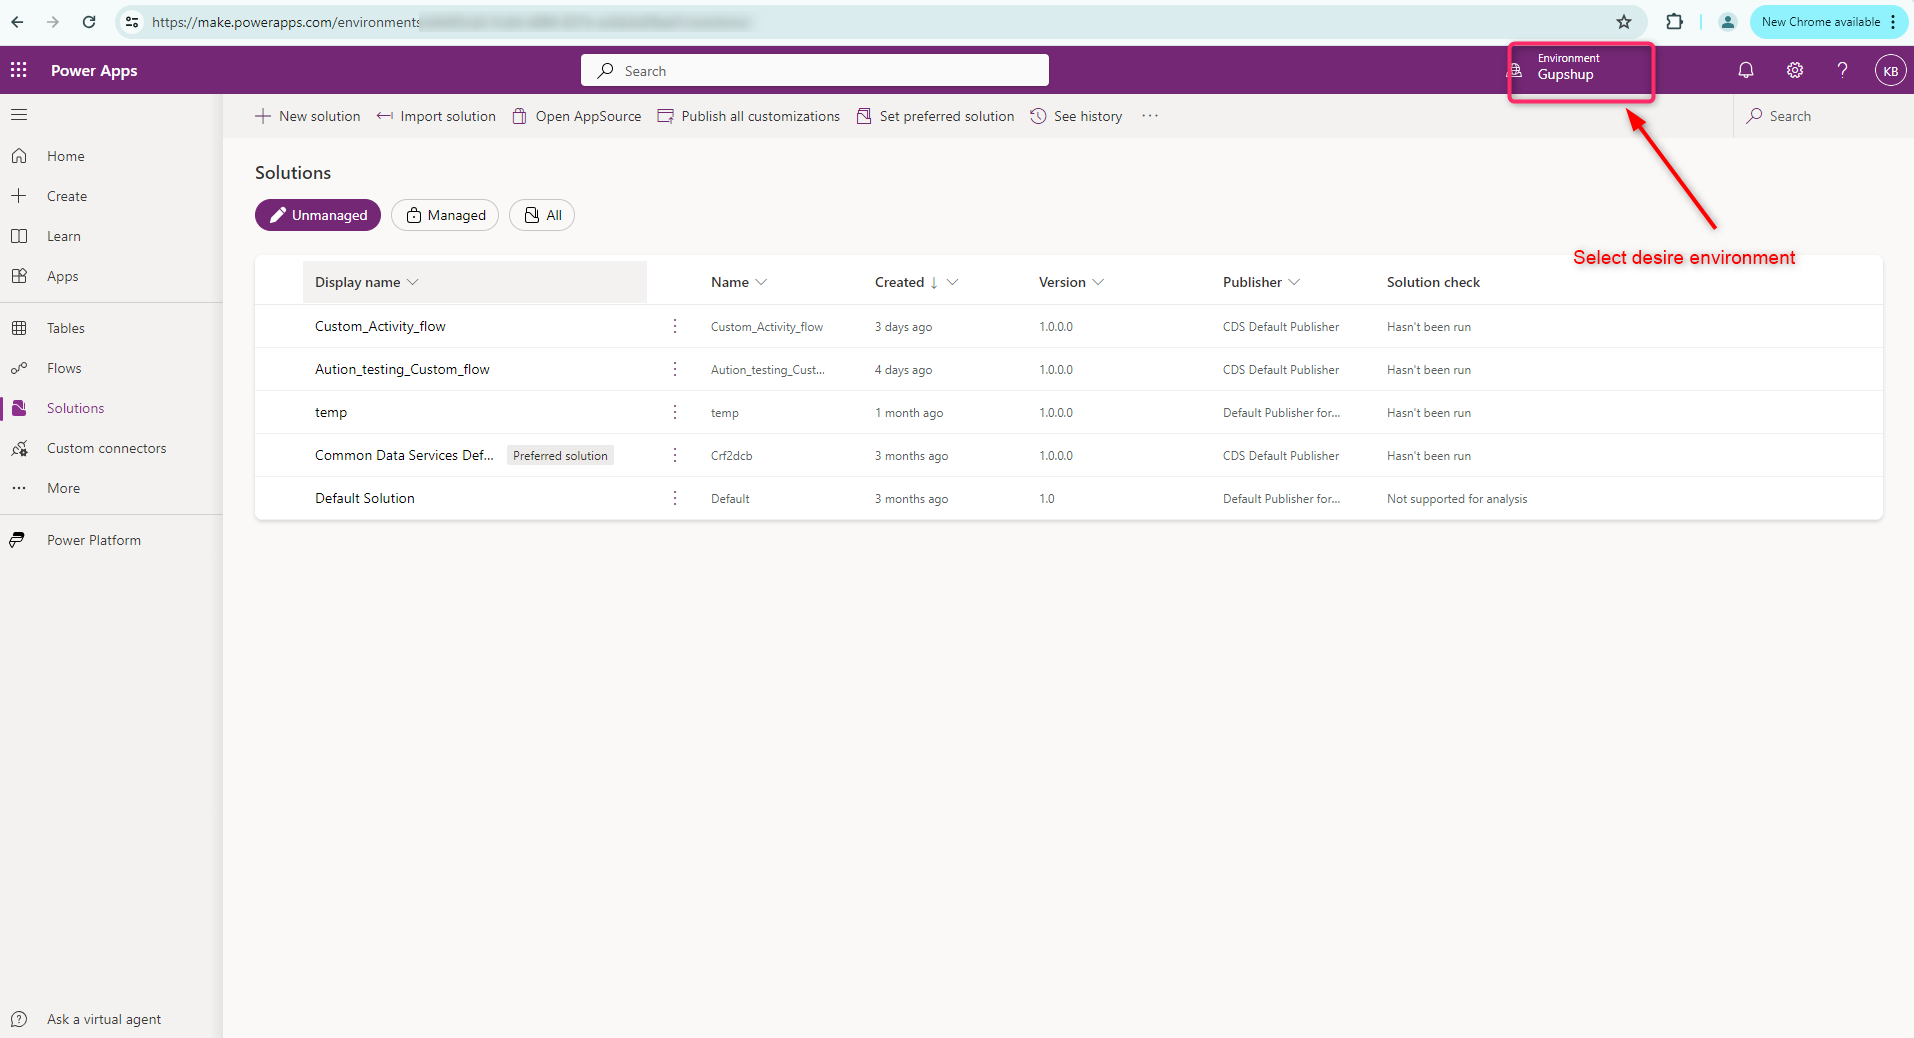
Note: While creating any power Automate it is needed to be part of a solution, else you will need to put the orgID manually.
Inside the solution, you can create the Power Automate.
There are different types of Power Automate, you can create any type of Power Automate to send text messages.
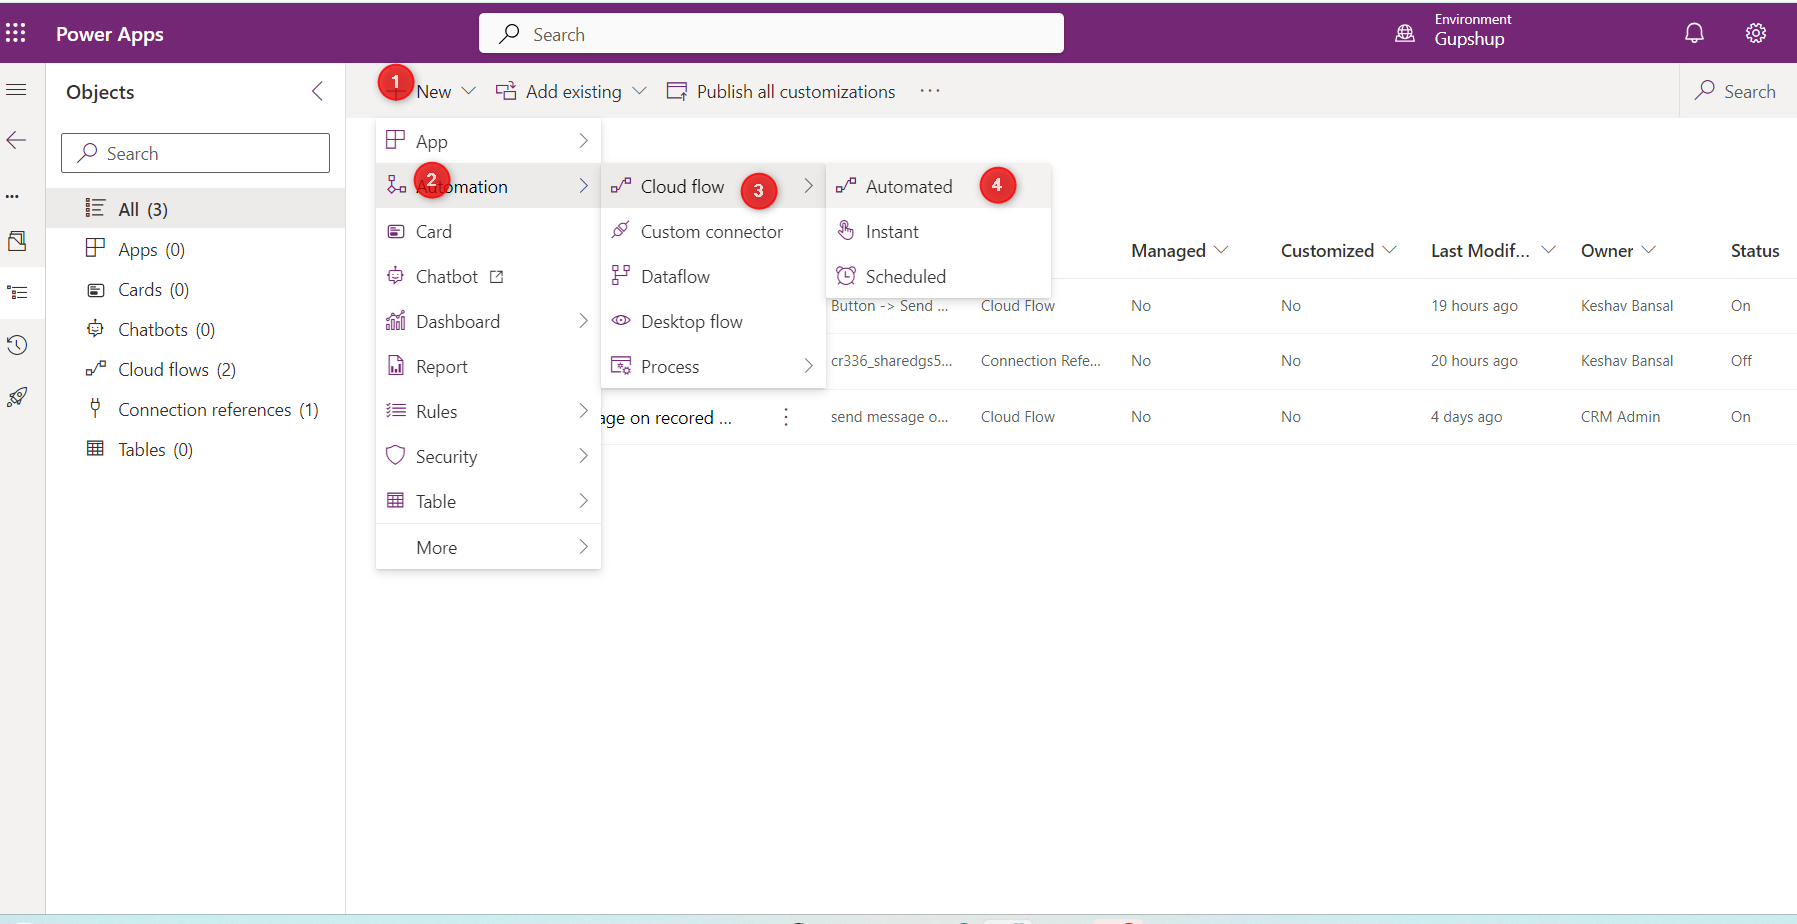
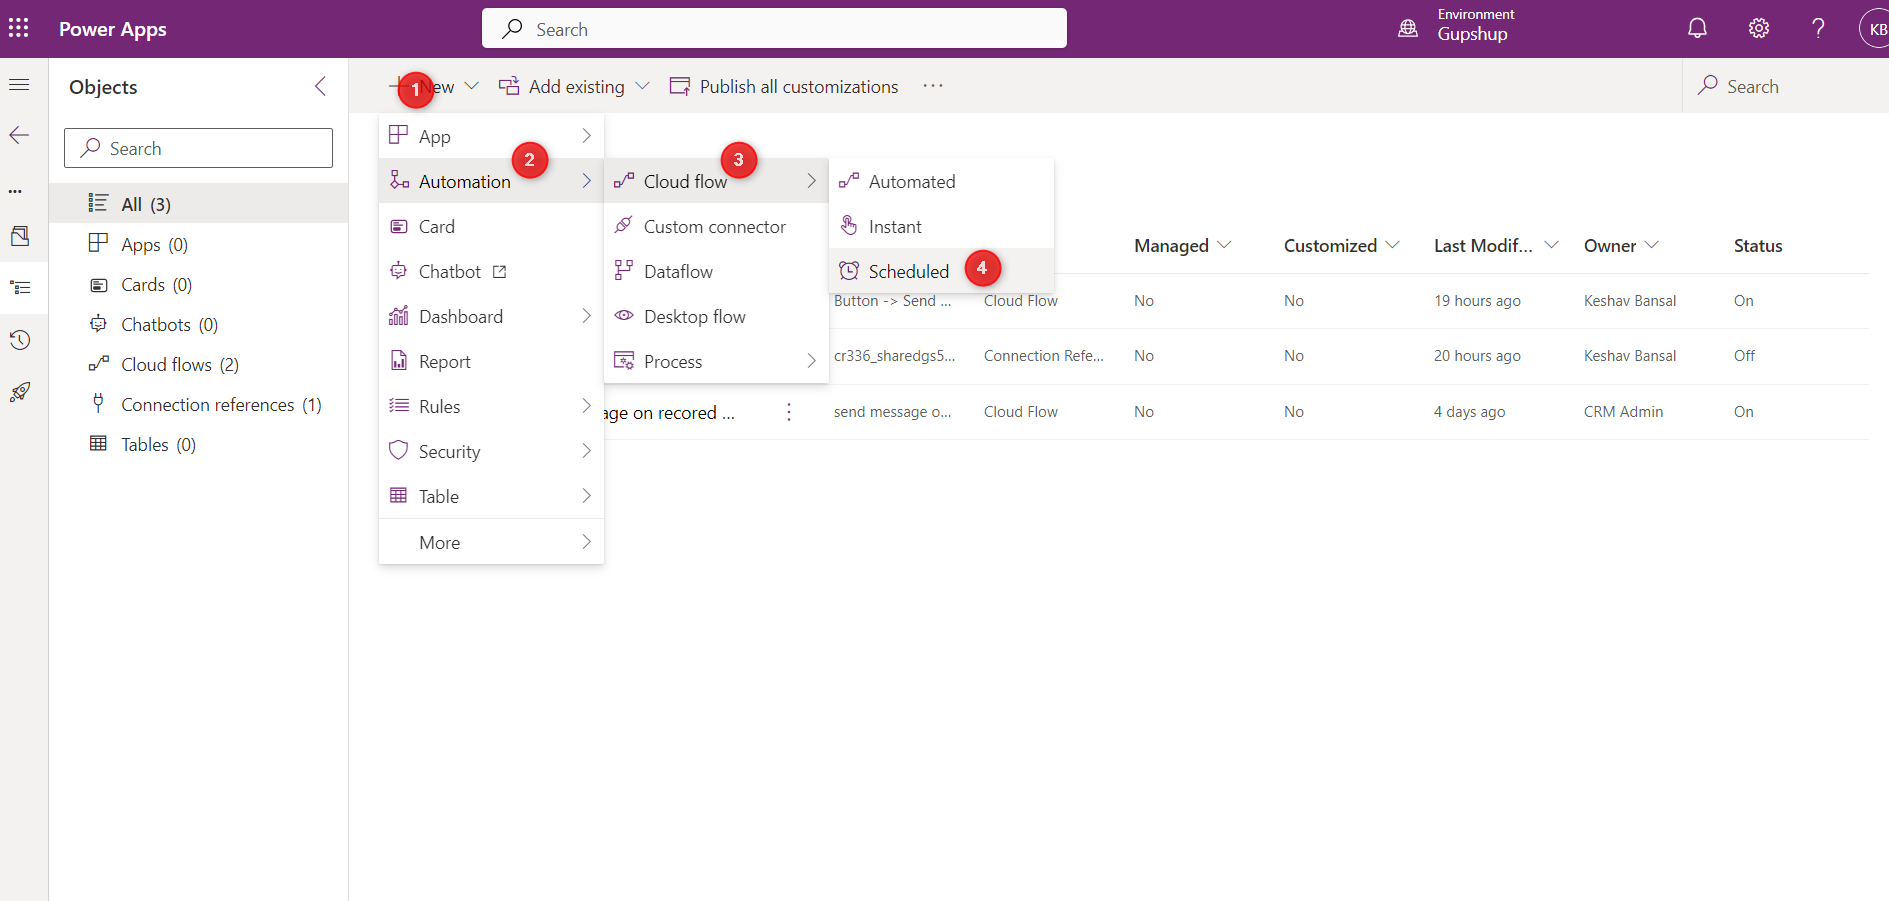
Automated: triggered on specific conditions.
◦ Instant: This is triggered manually.
◦ Schedule: This is scheduled to run at a specific time.
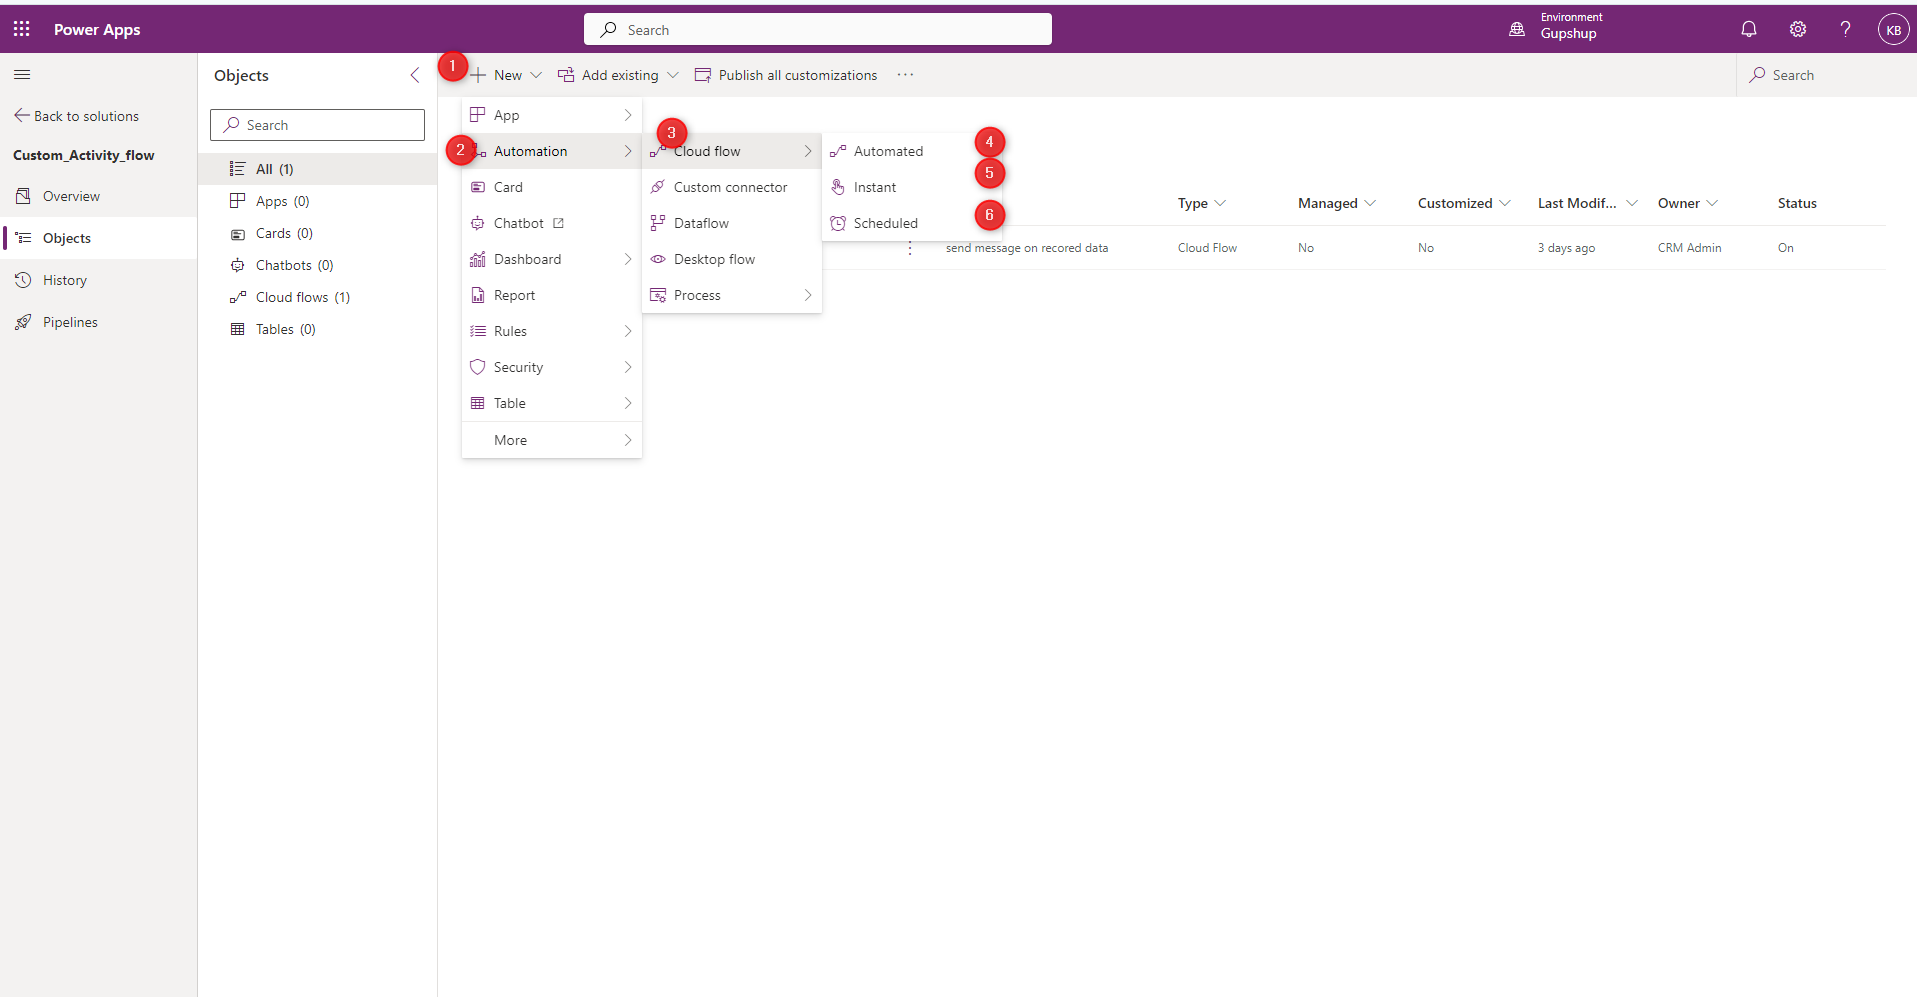
Common steps:
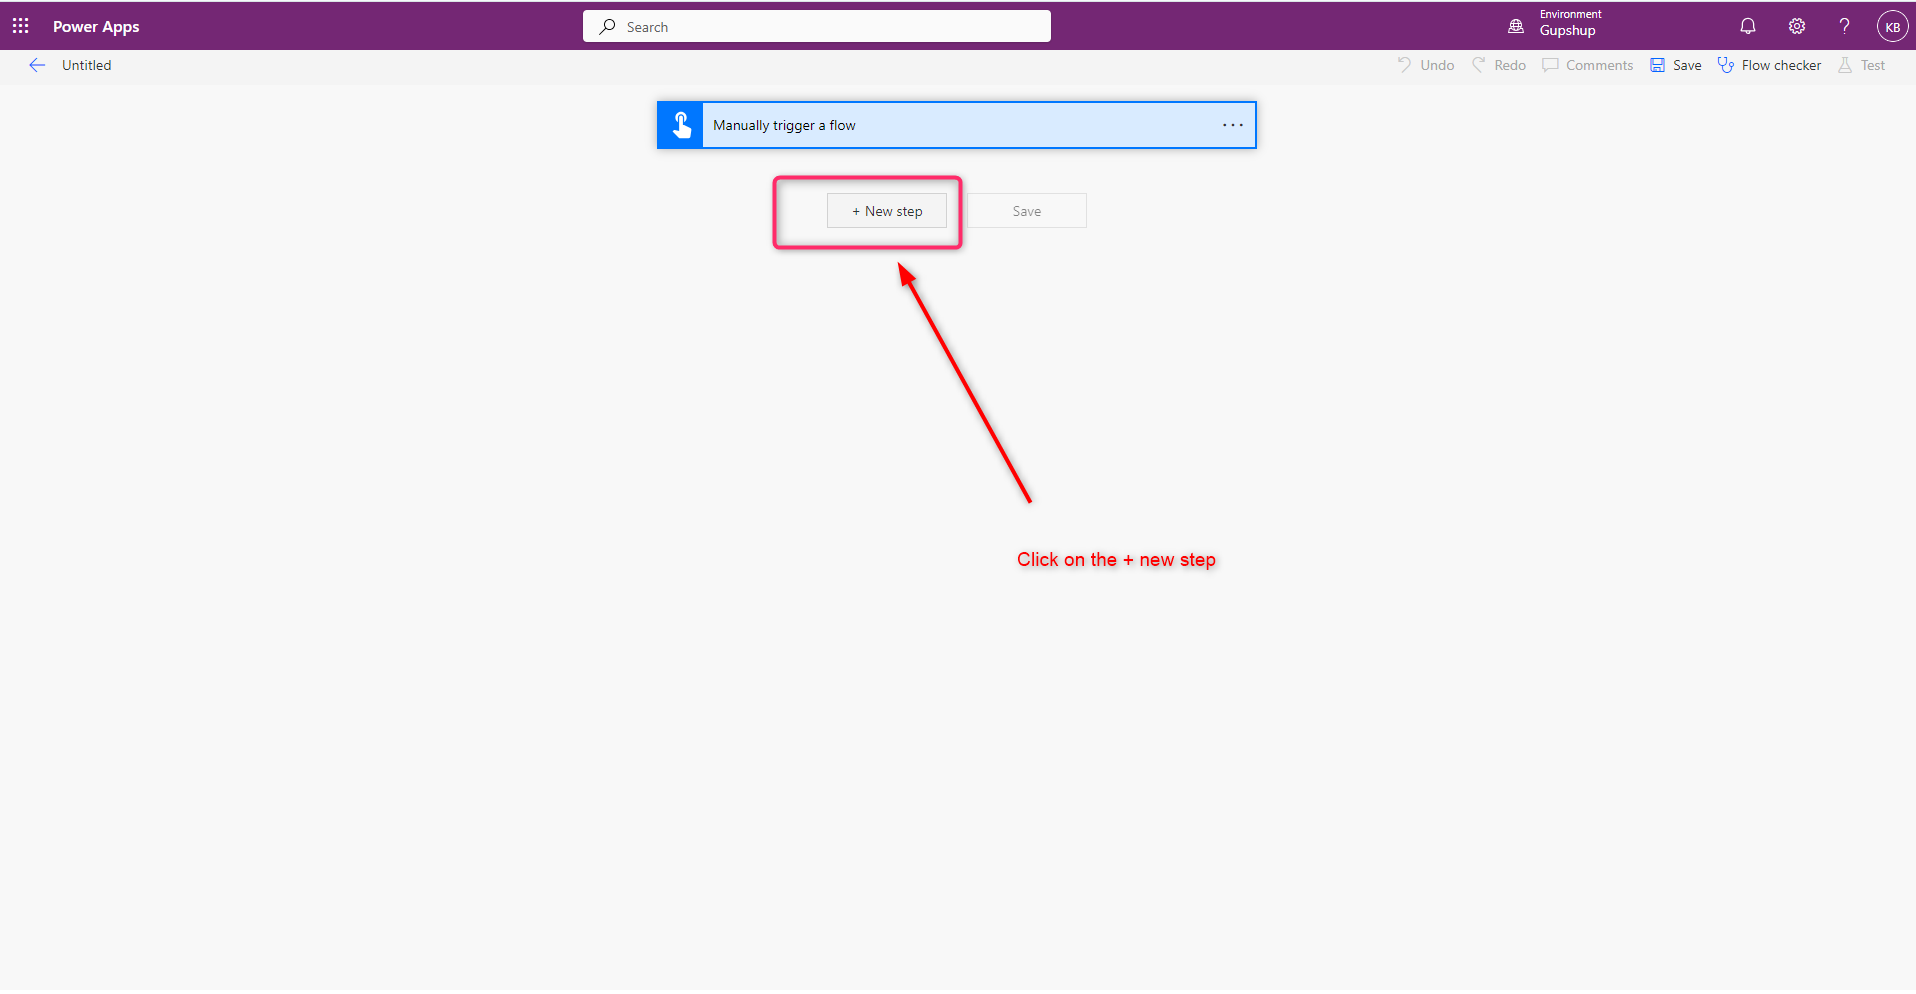
1.Here I am creating a Manual Power Automate.
2.Click on the +New Step and select the Gupshup
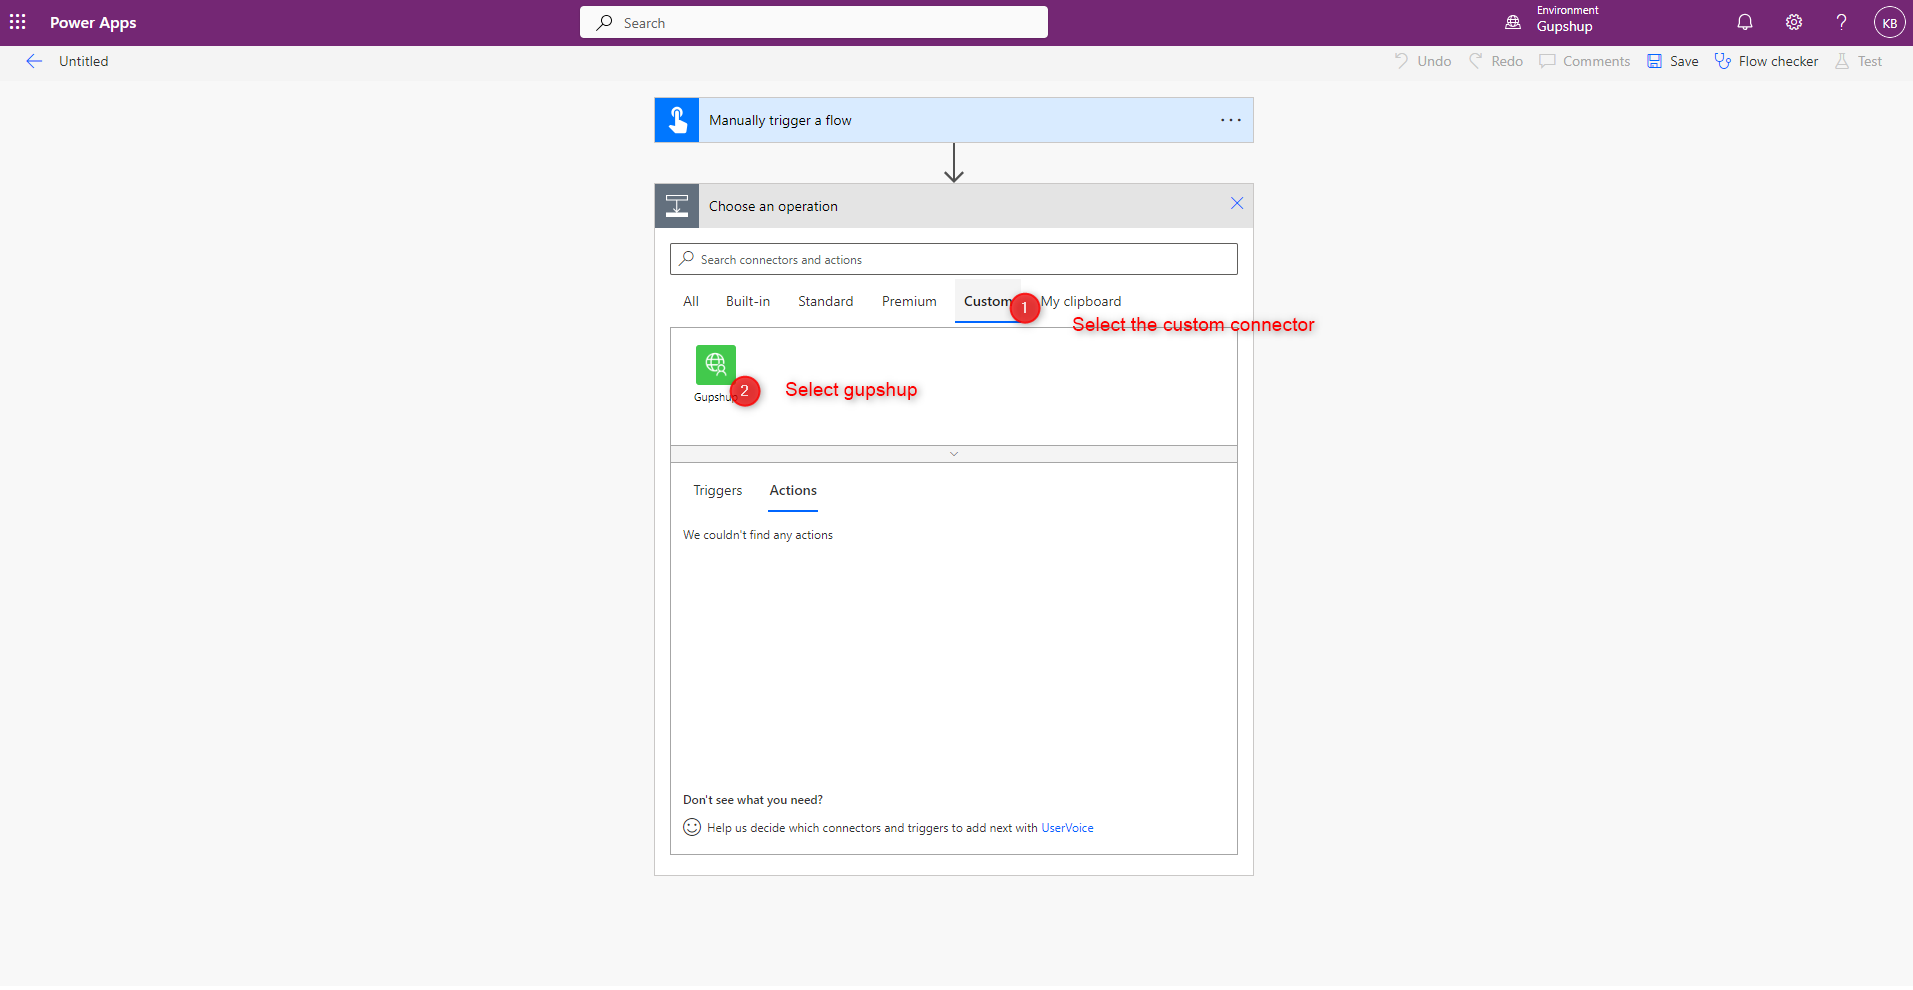
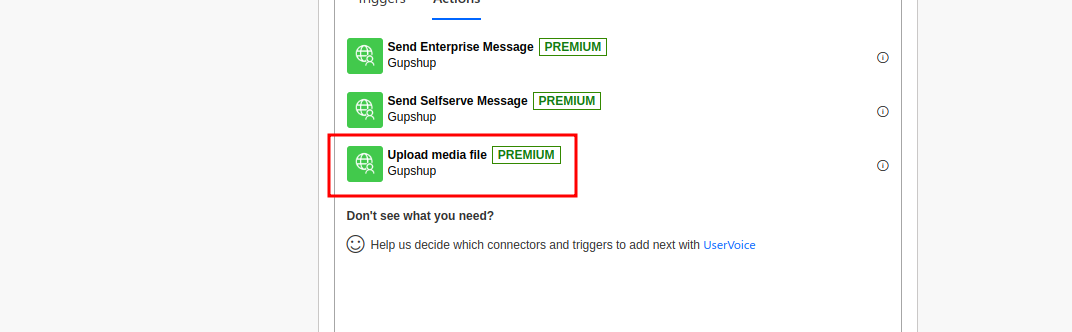
3.You will be able to see the below list of actions that can be performed
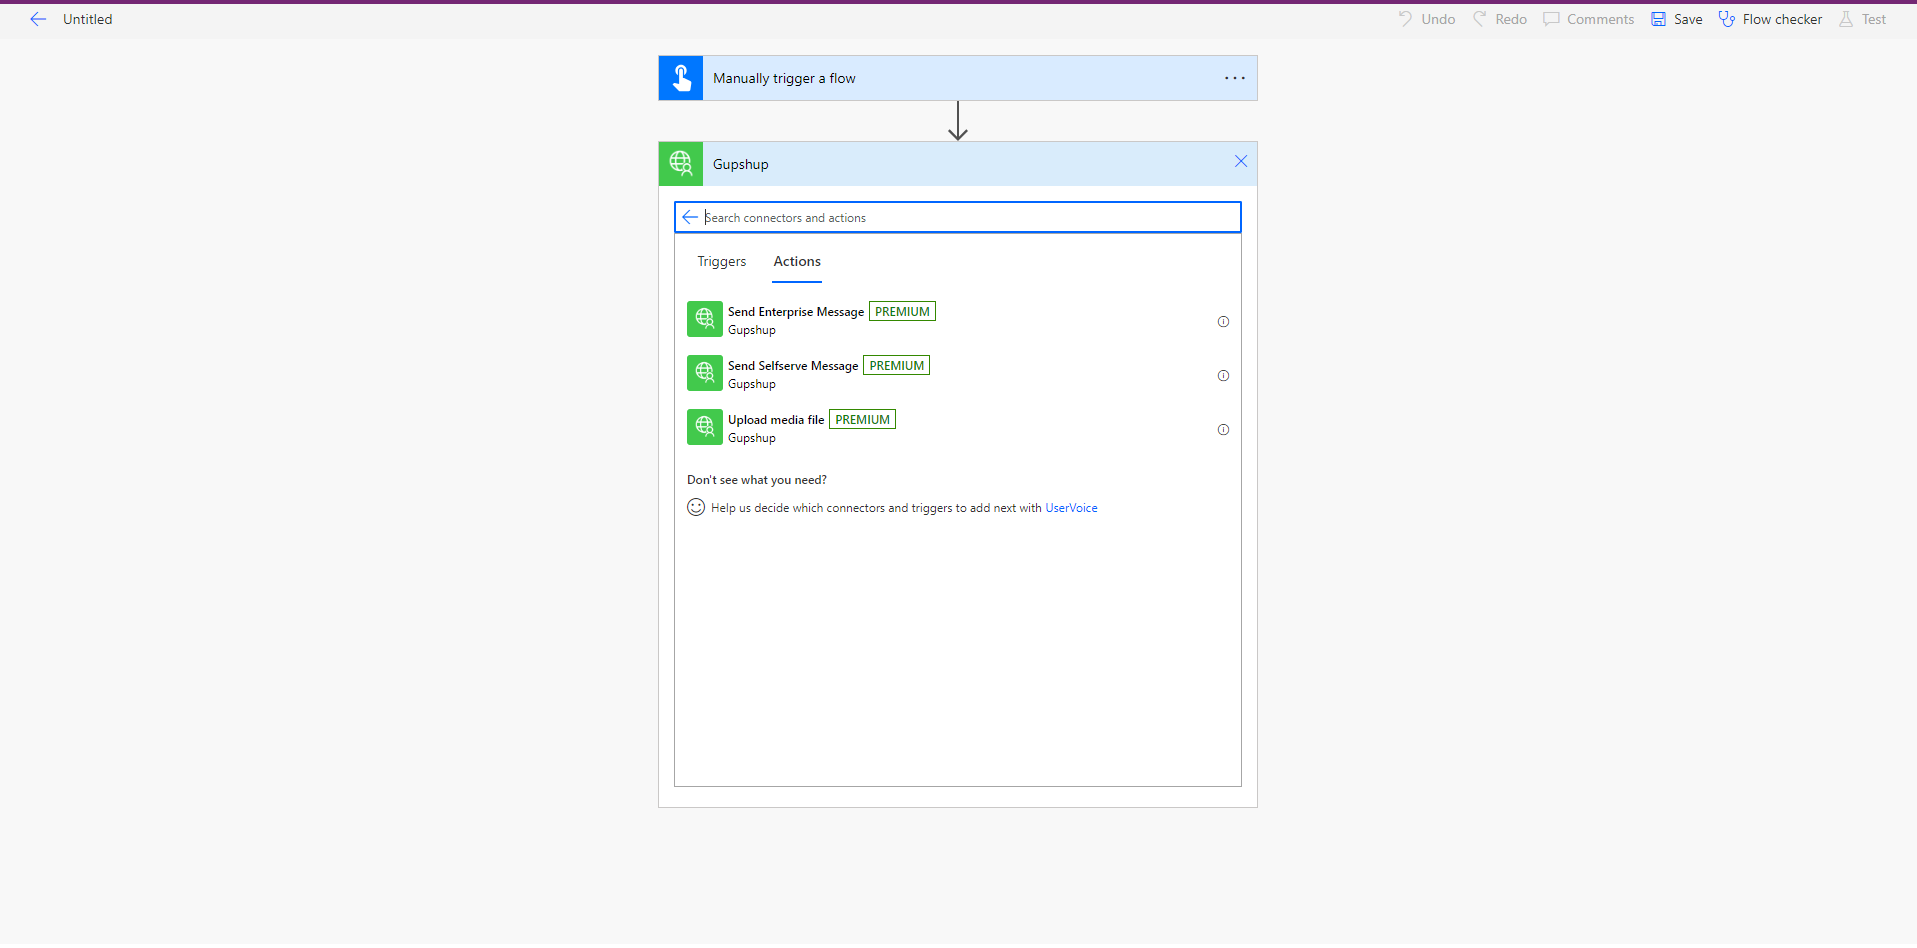
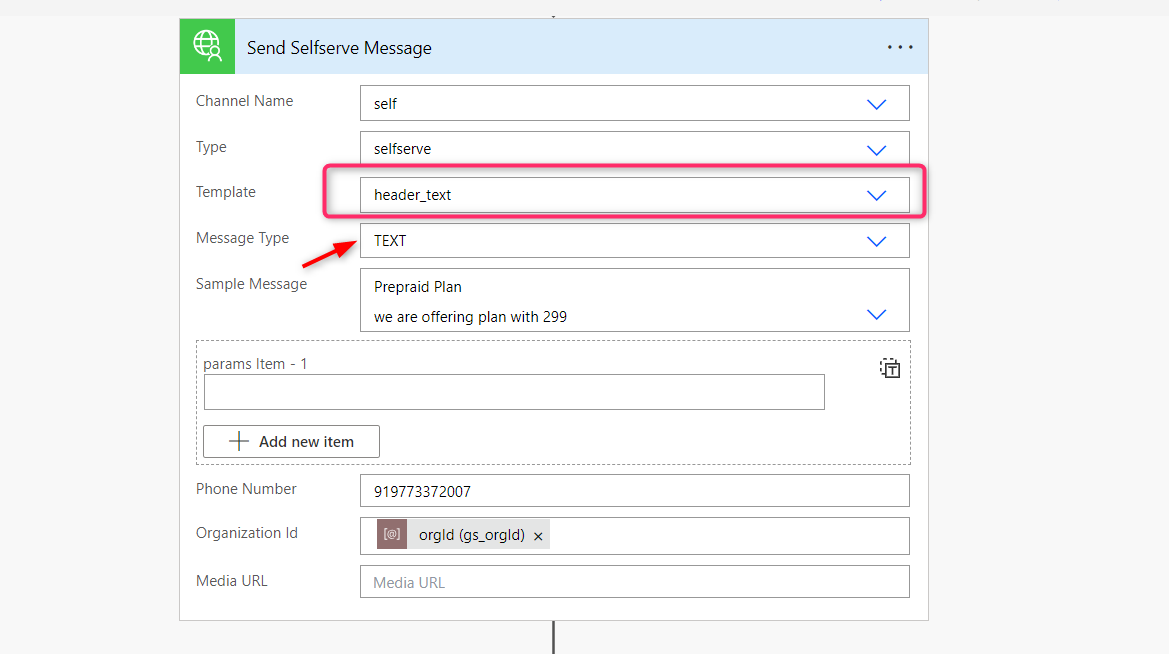
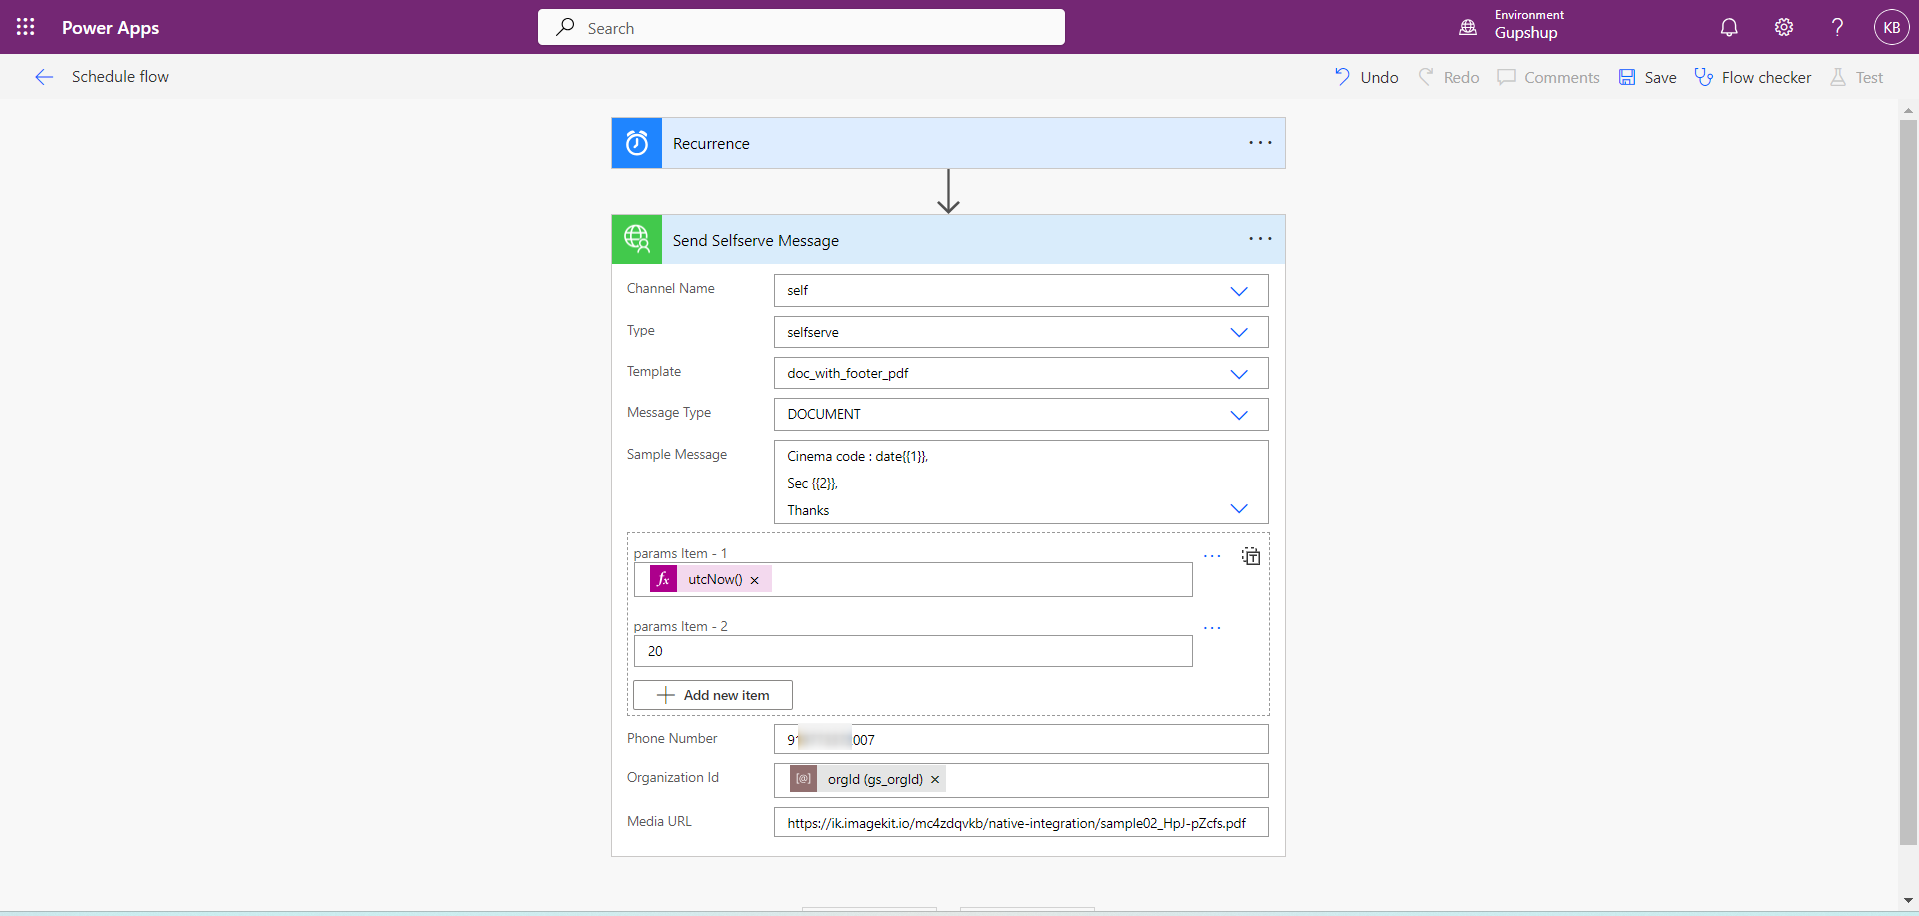
4.Select the Send Selfserve Message/Send Enterprise Message, and you will be able to see the following parameter that needs to be filled
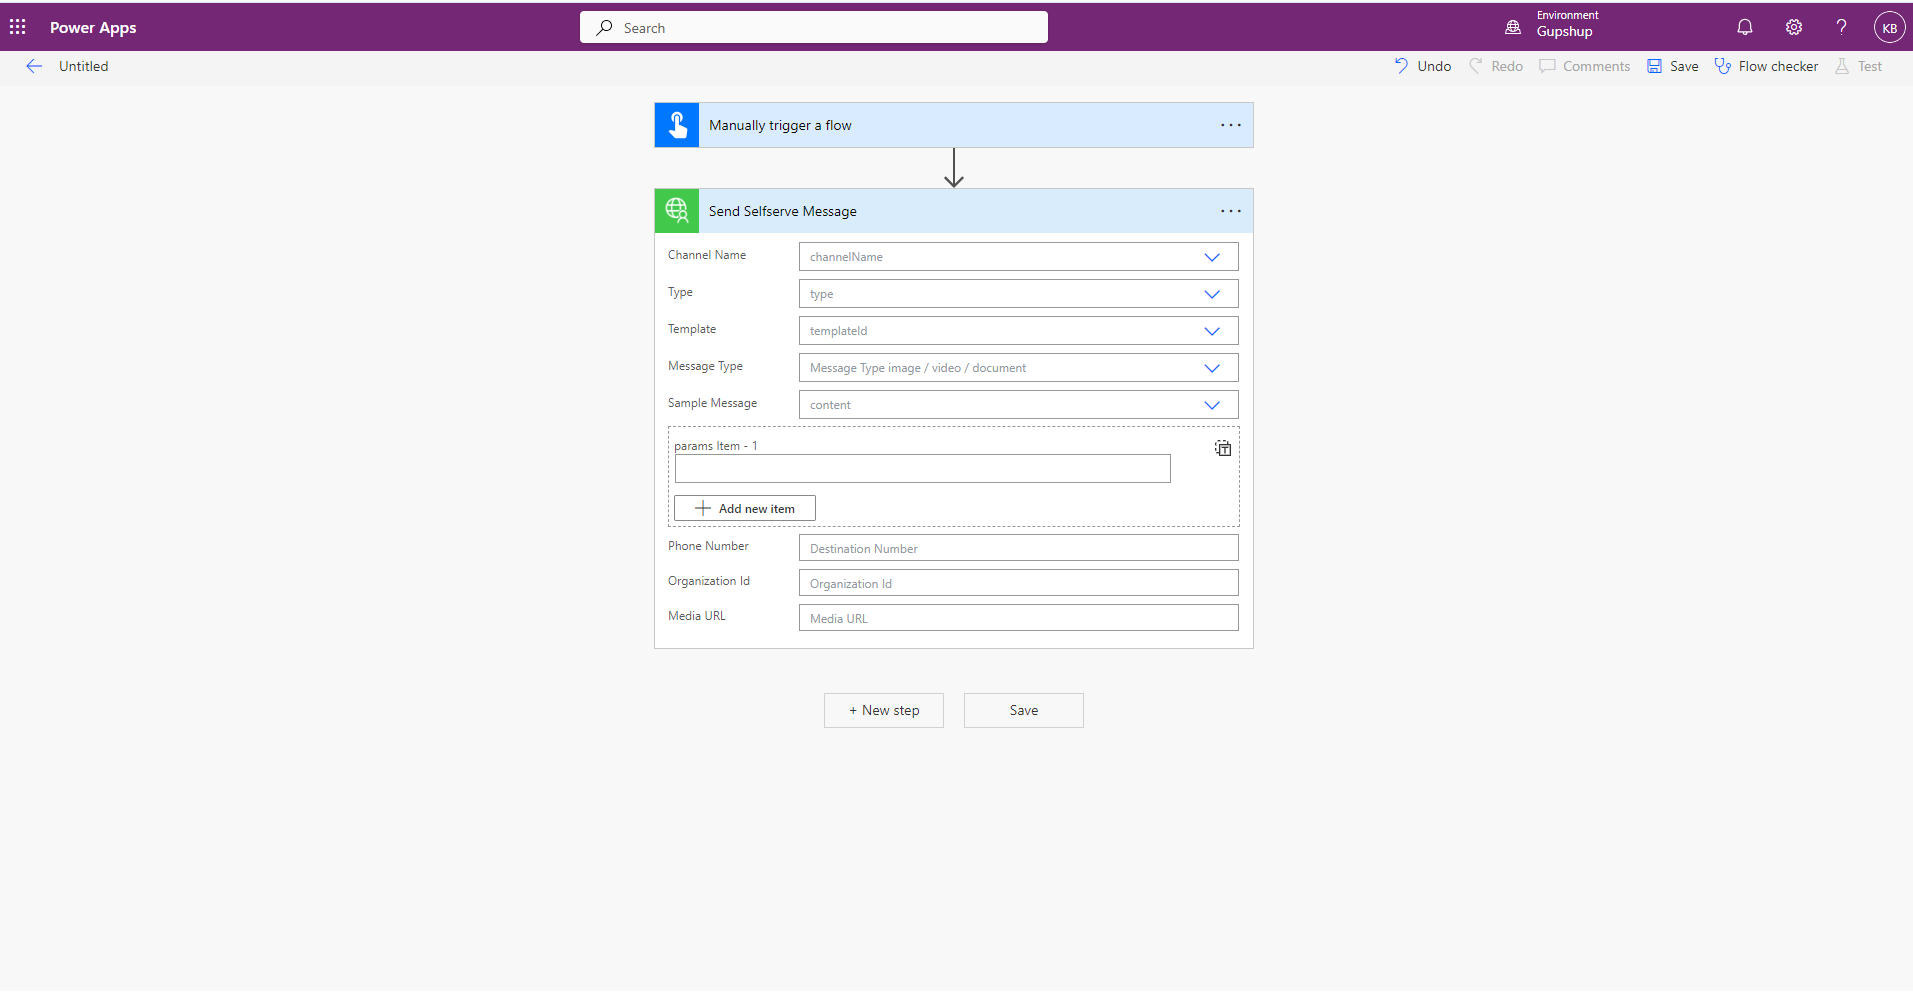
- Channel name: Need to select the channel that has been created while sending the message in UI.
- Type: Chhanel Type (selfserve)
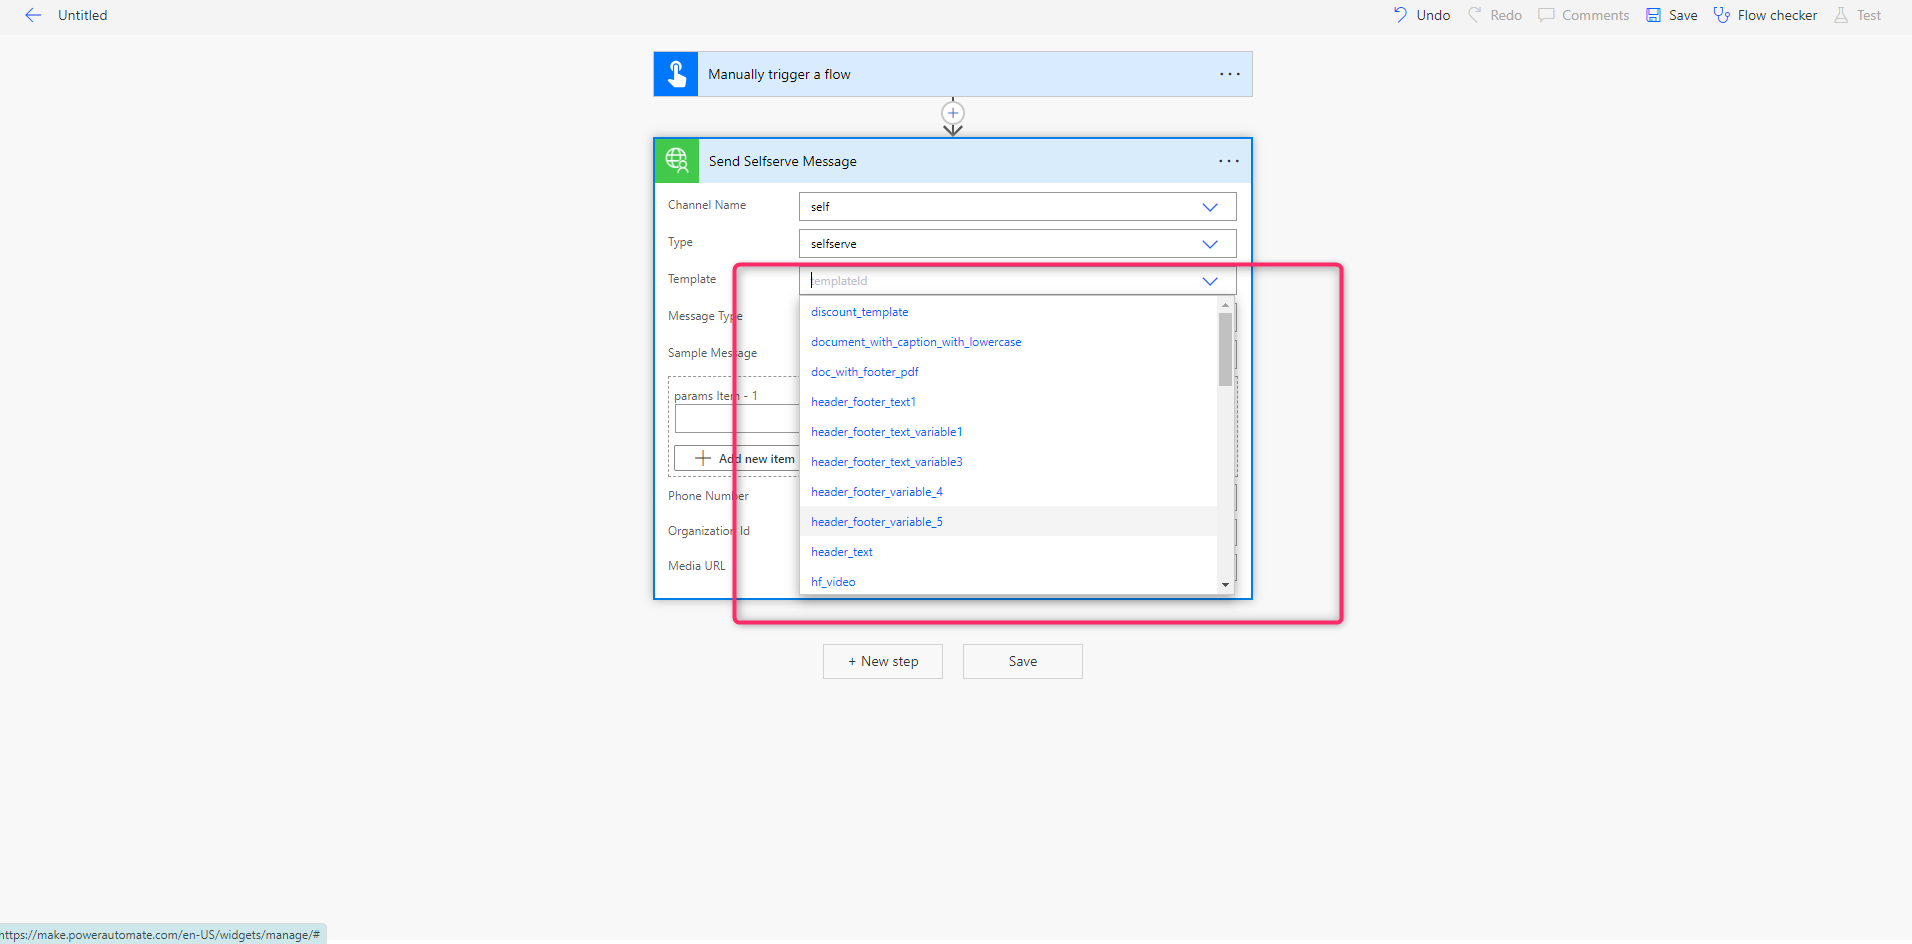
- Template: It will list down all the templates associated with the given channel
- Message Type: Select from the available option
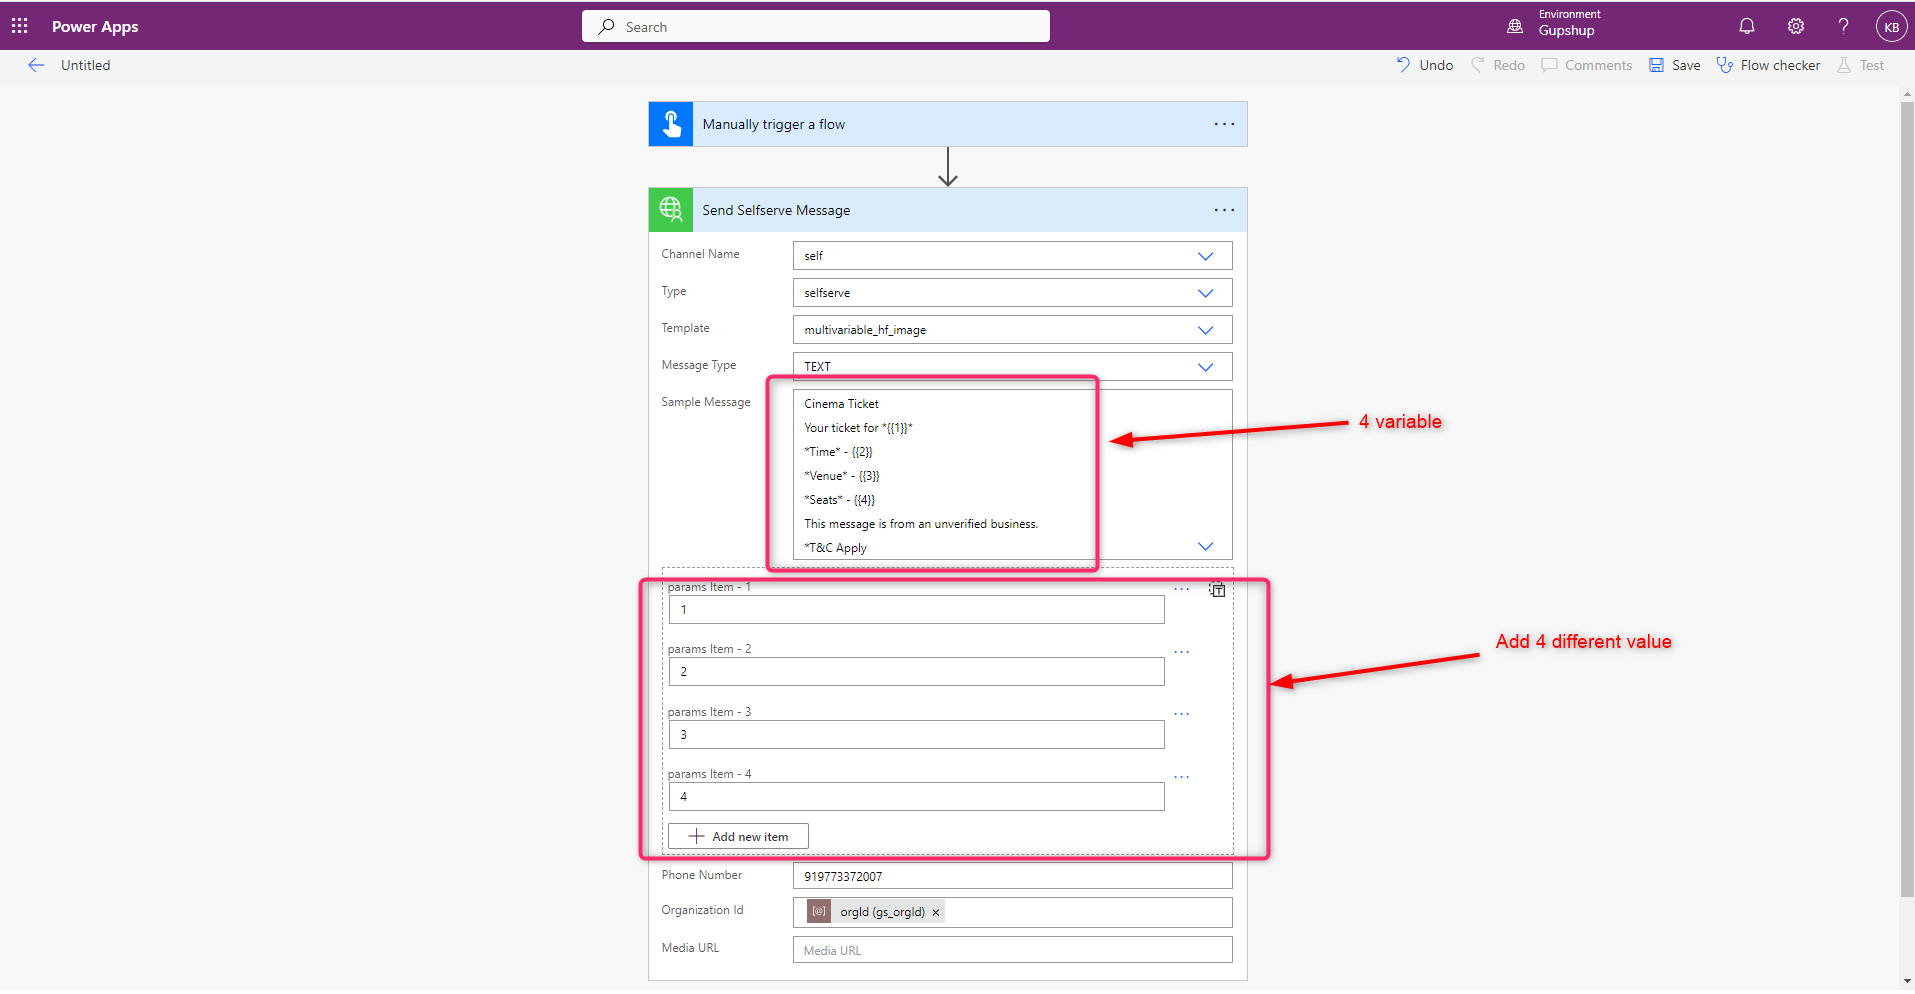
- Sample Message: This shows how a message will look while sending to the client.
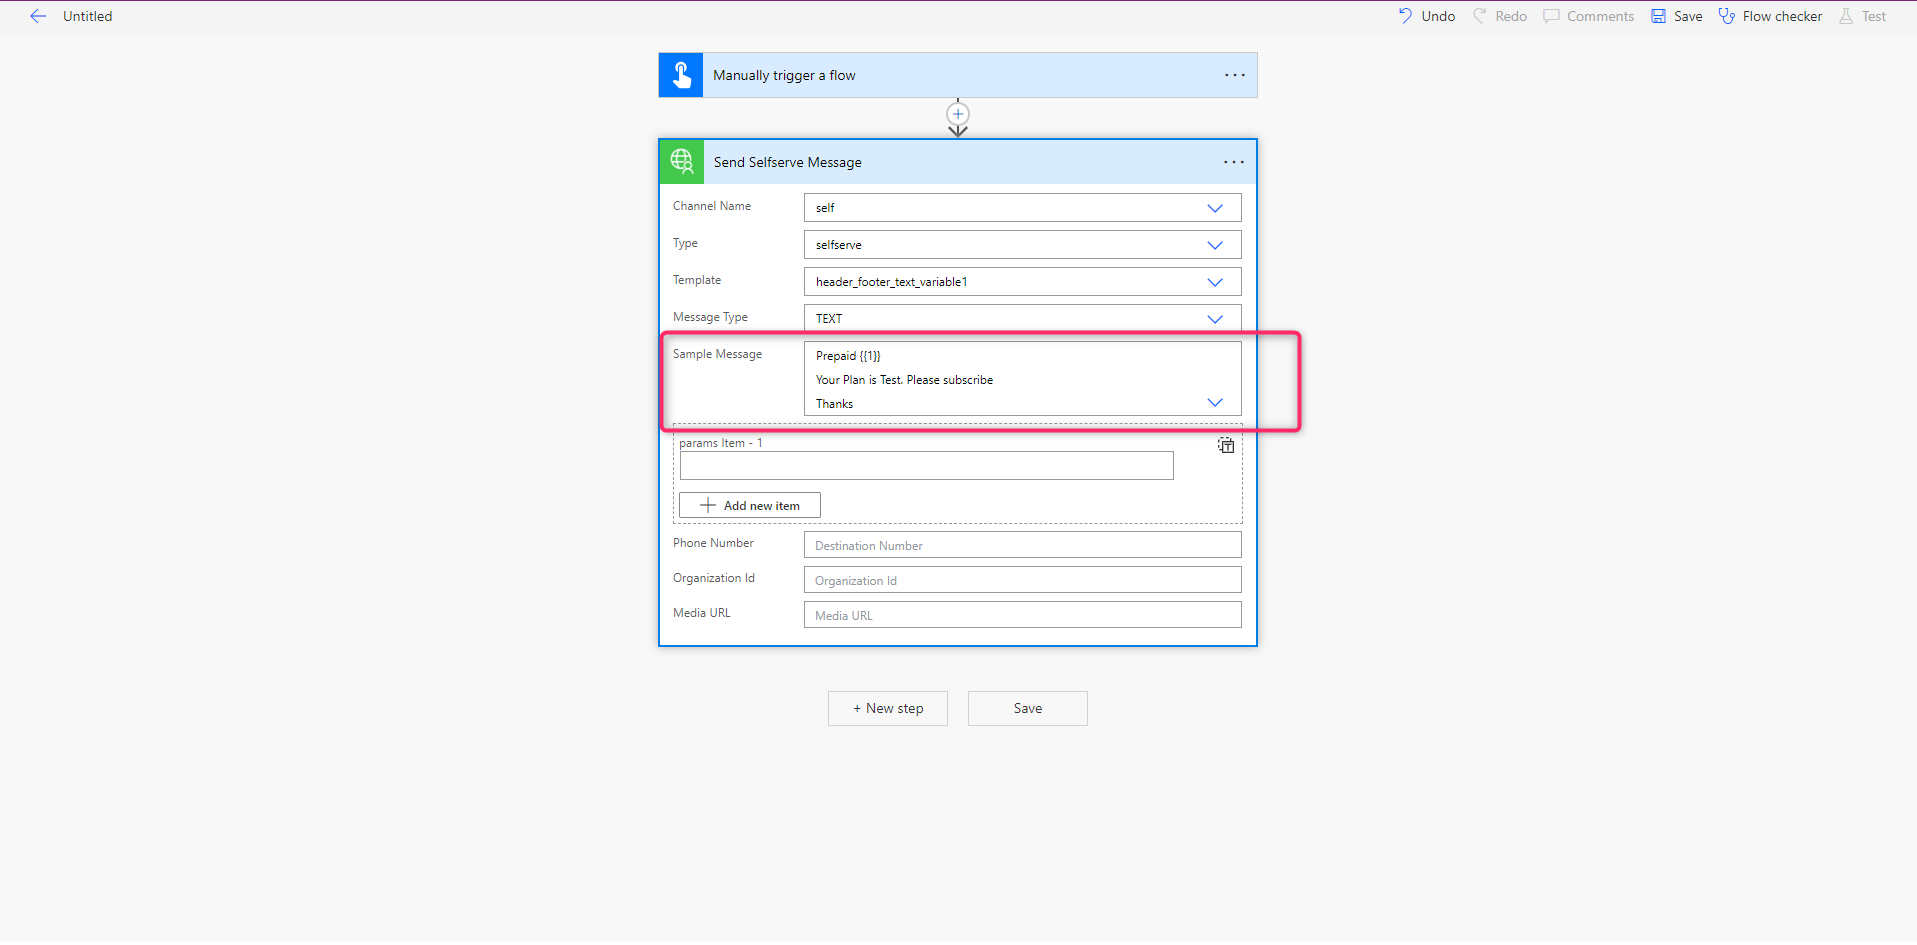
Params
Based on the parameters you need to add the more parameter
Single VariablePass the required value since it has only one, need to create only one param
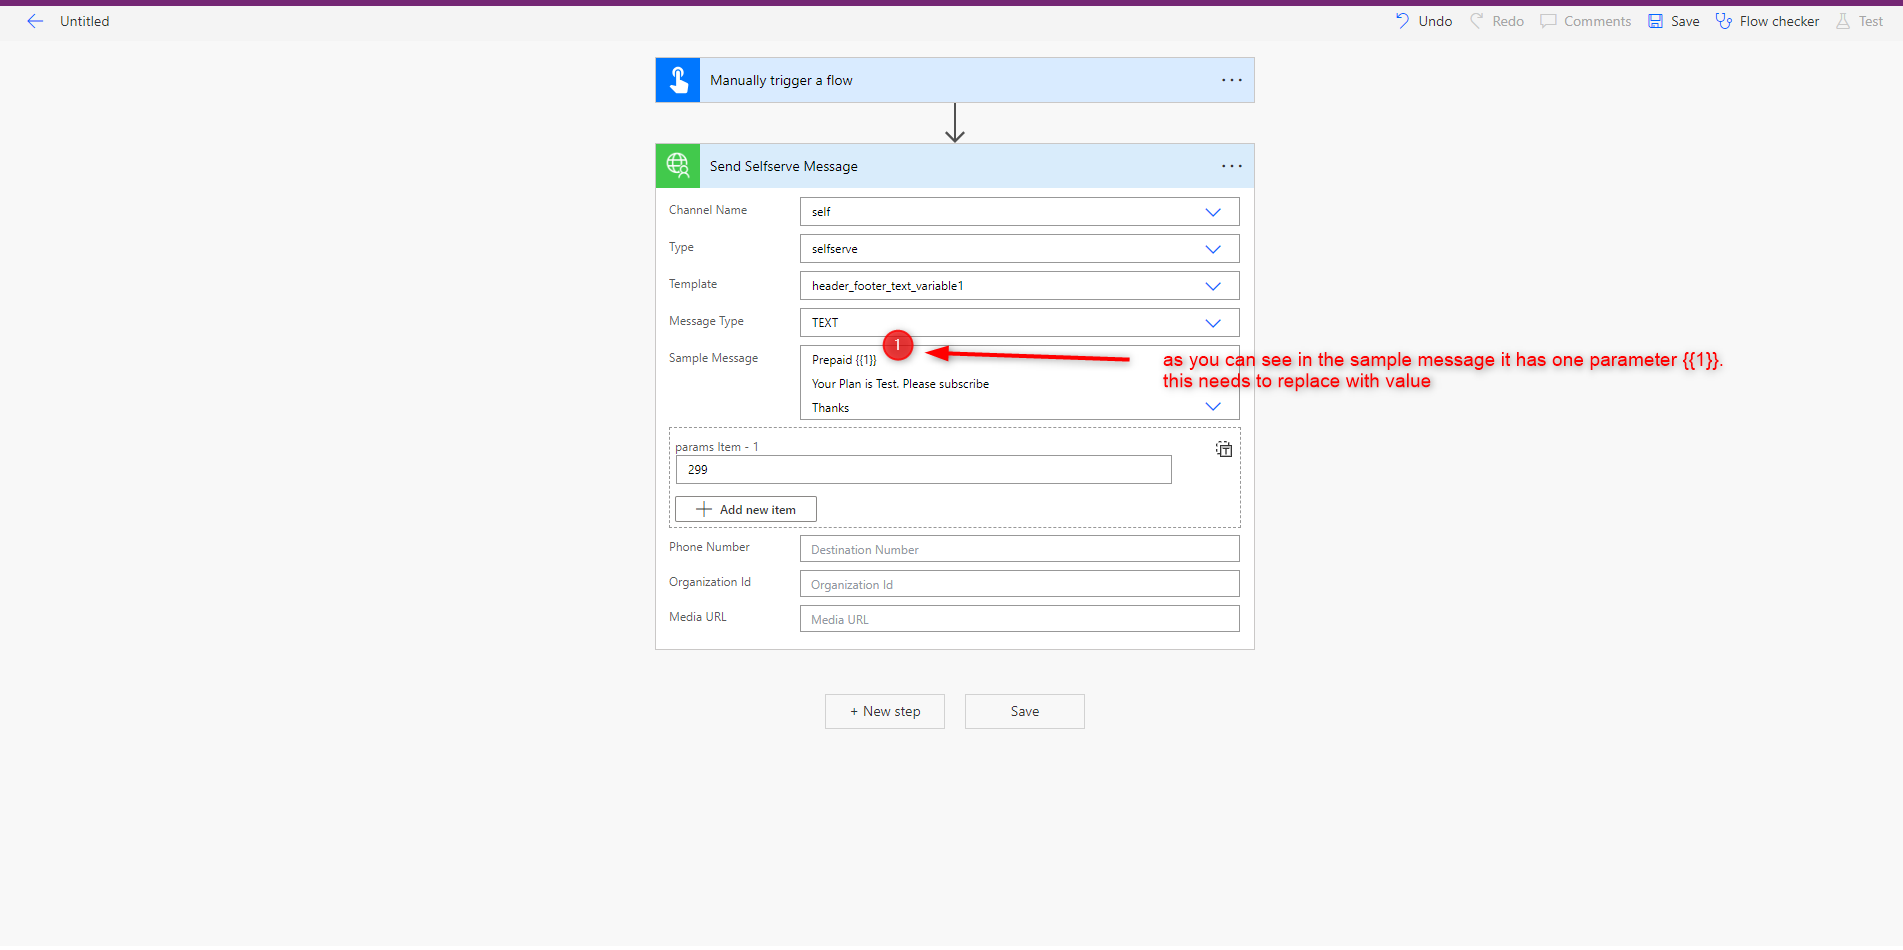
Pass the required value since it has only one, need to create only one param
Multiple Variable
It has four different variables so need to add 4 different values
Phone number
1.static
“Static means that the value is hard-coded value in mobile field
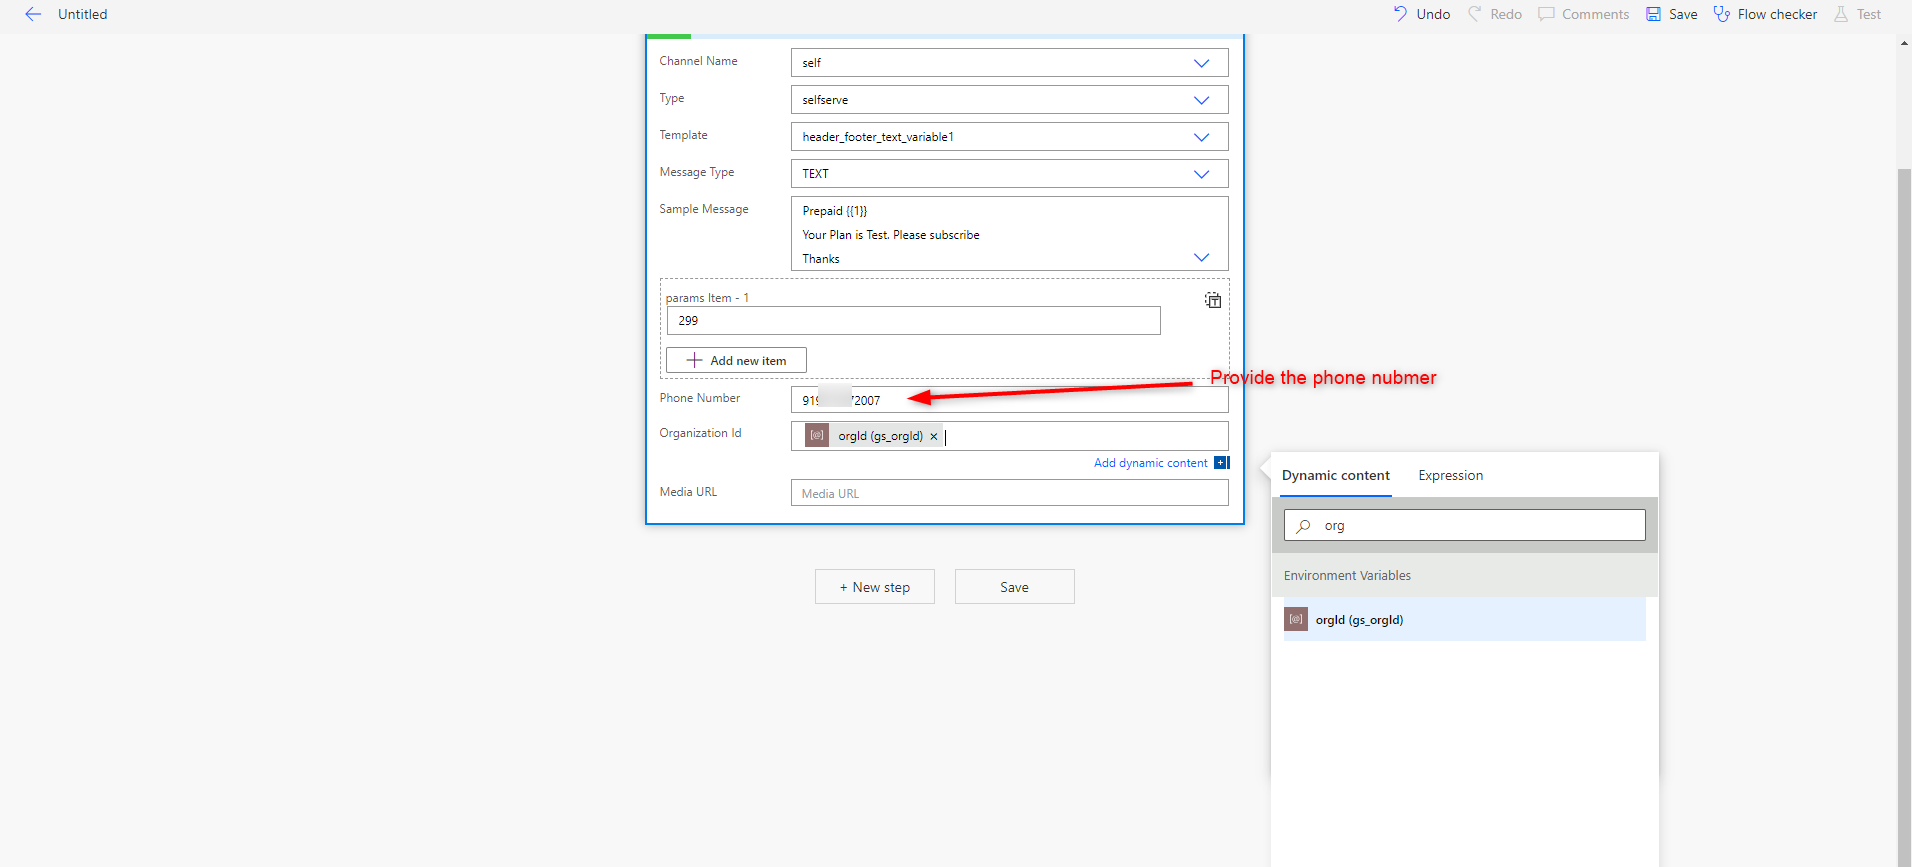
2.dynamic mobile number
"We can enter the mobile number in the text box field."
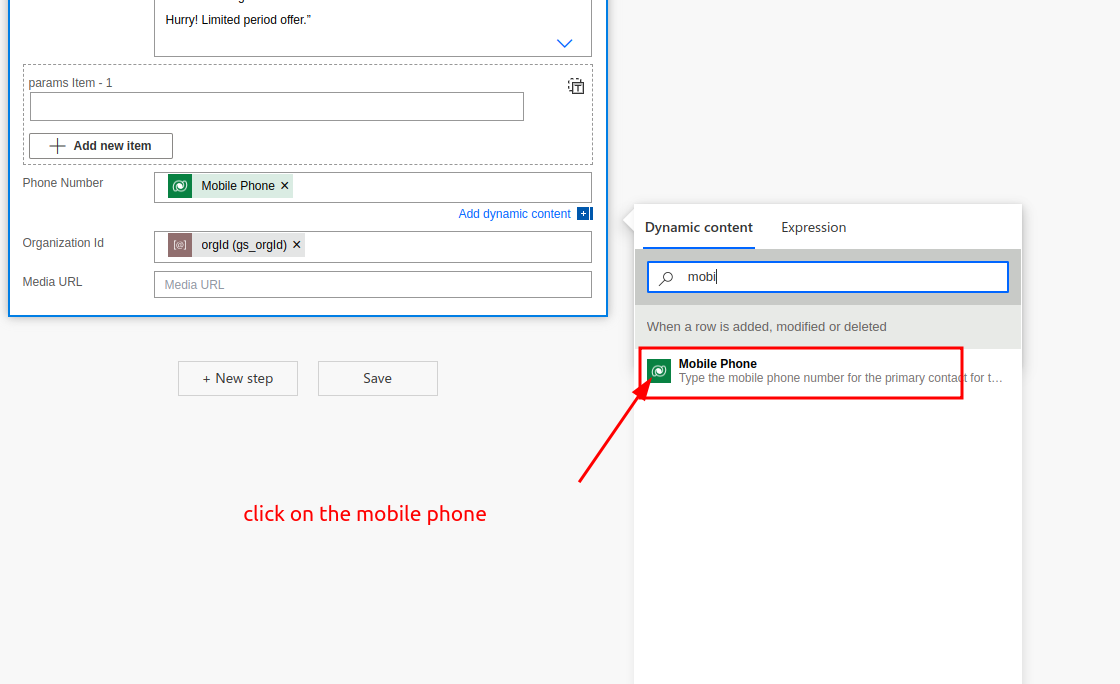
Organization Id
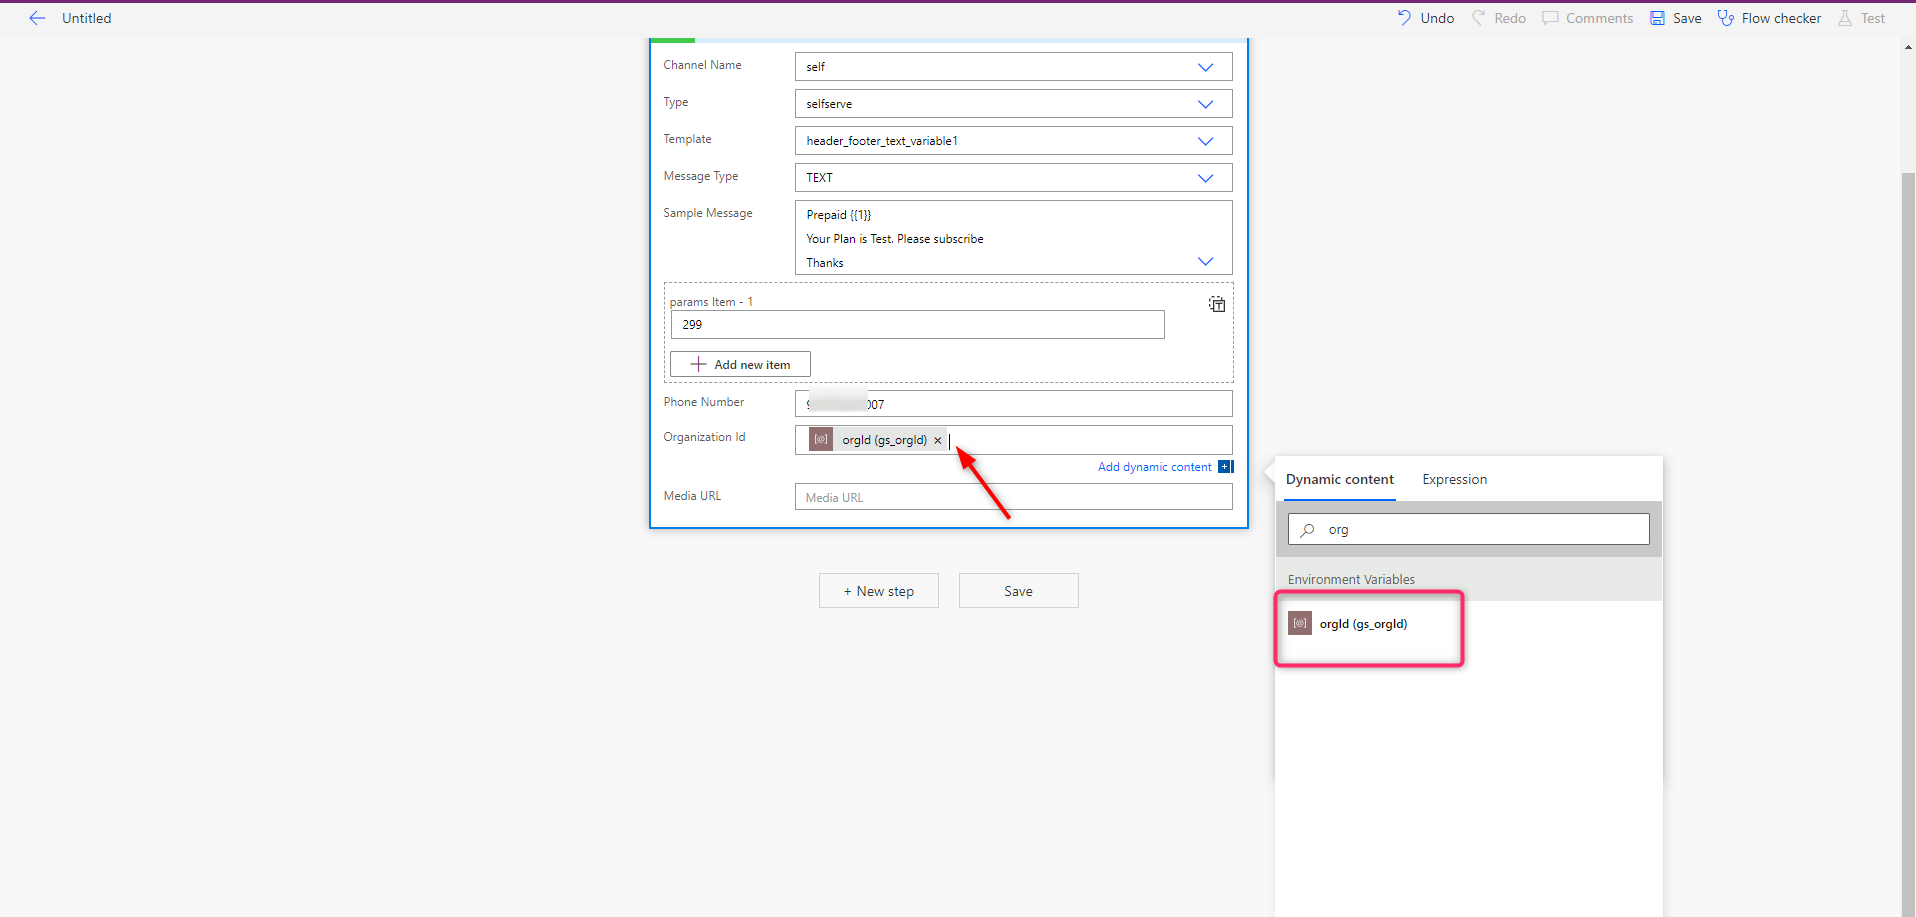
Media URL: This is optional and needs to pass only when the selected template is of type media/document.
Send Template message (Text)
To send the text message select the template which is of type text
Send Template message (Image)/Send Template message (Video)/Send Template message (Document)
- To send a message with an image/video/document few more steps are involved. If you want to send a template message and your *image/video/document is present inside the CRM, you need to follow the below steps
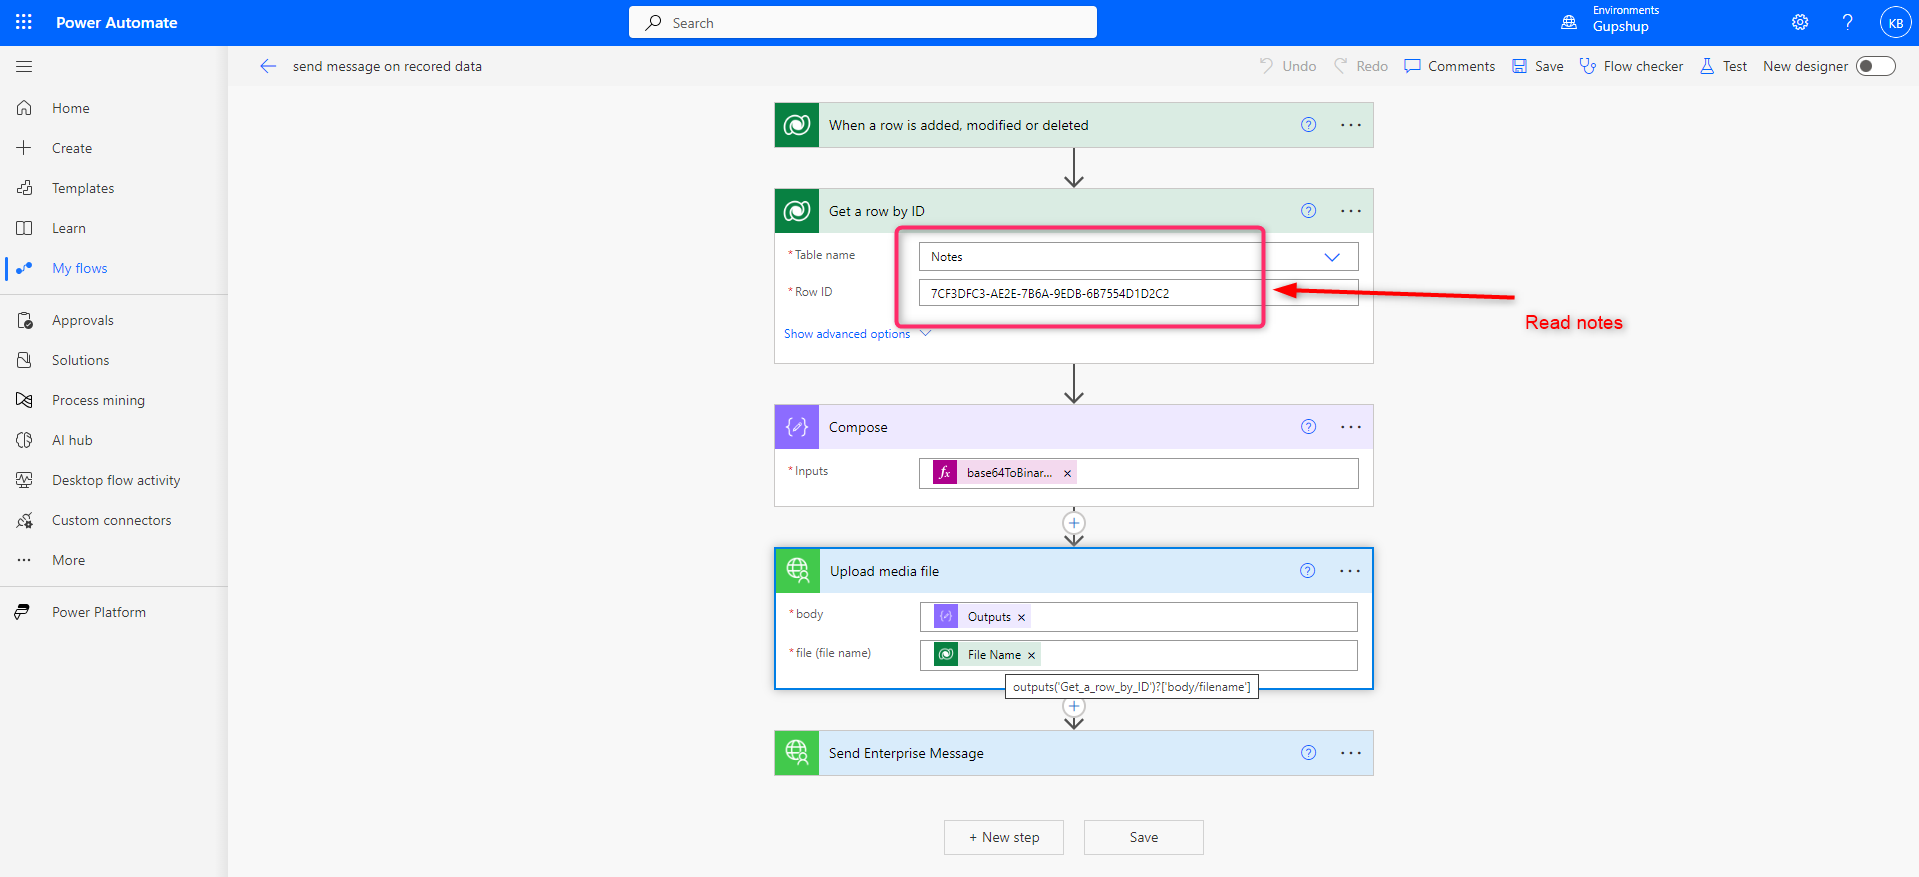
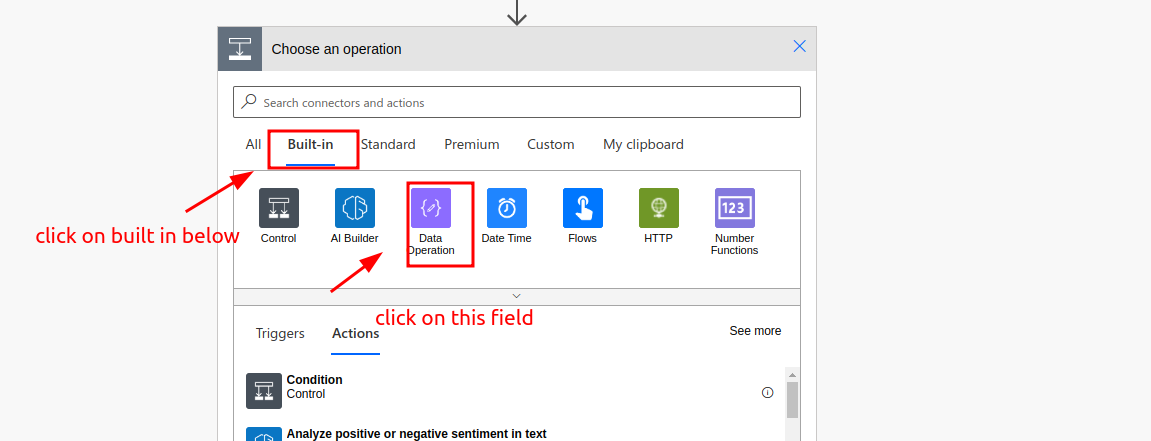
1. Read the image.
2. Compose the image to base64.
3. Create an Image URL for WhatsApp.
We have stored the Image in the notes of a contact/lead.
Read Image
Here, I have stored the image in a note entity and used GUID to read it. This image can be read dynamically based on your requirements. Again, this image can be stored anywhere and needs to be in the expected forma
notes
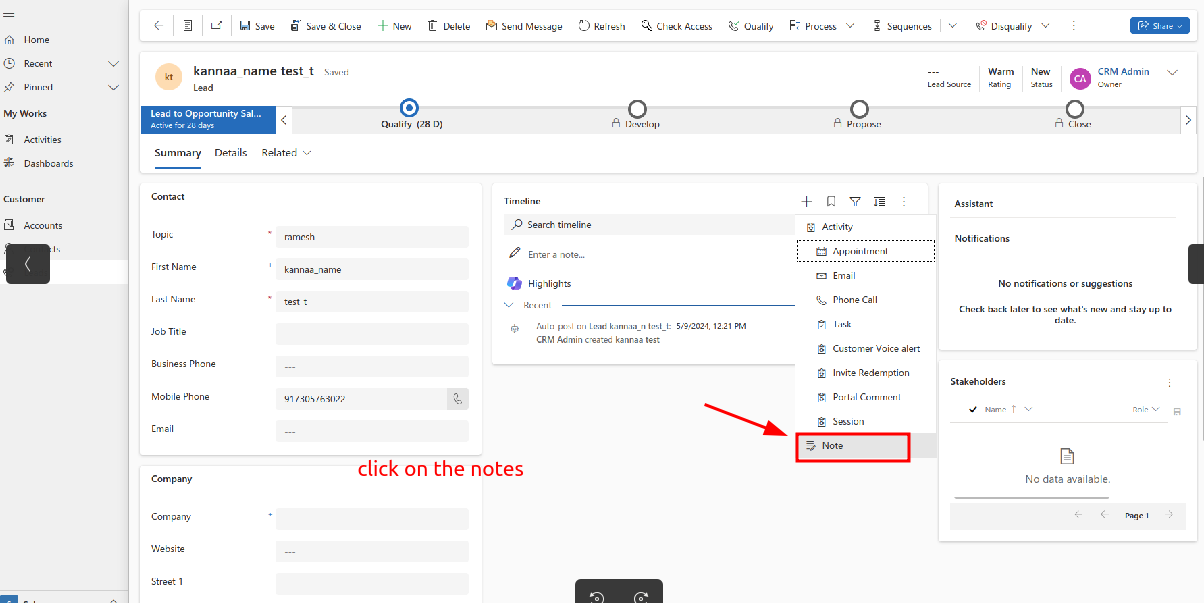
- Just click on the lead module. It will display the 'Send WhatsApp Message' option below, and a plus icon symbol will be visibleol
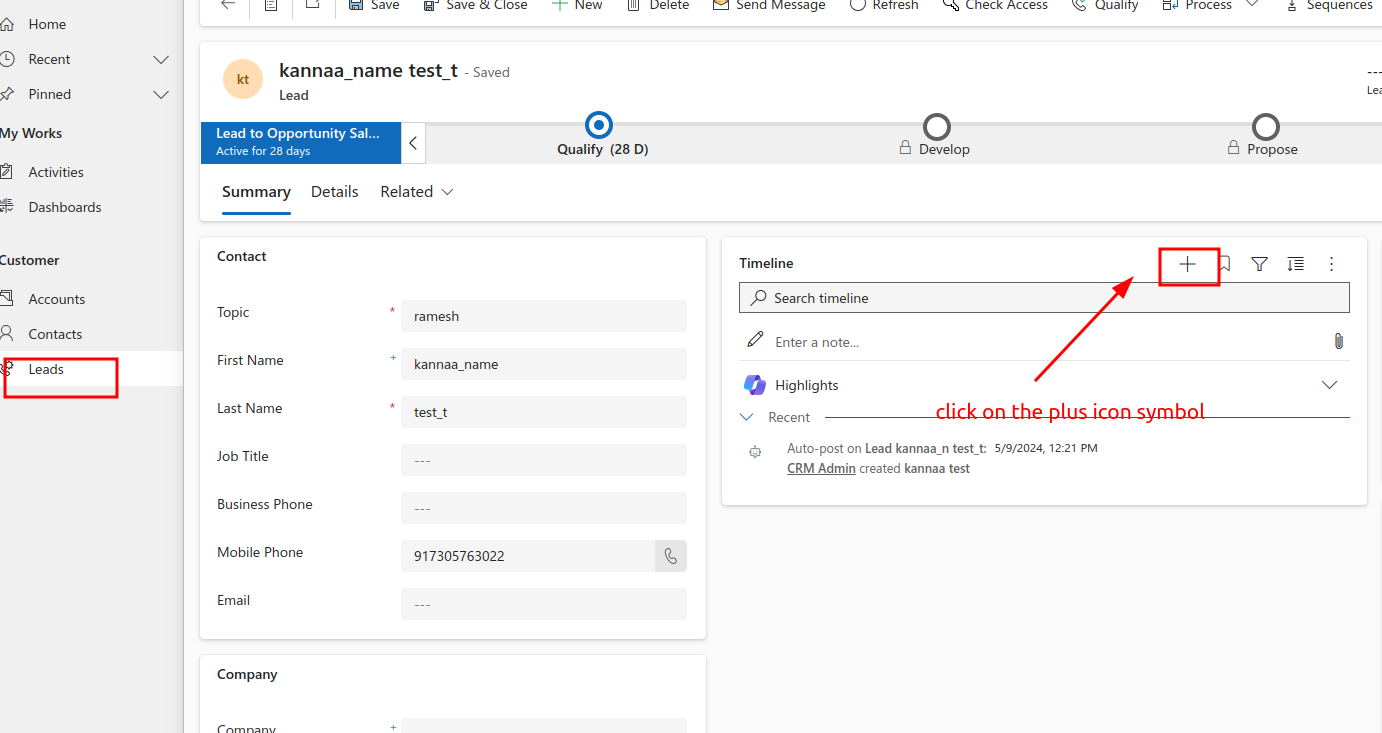
click on the notes
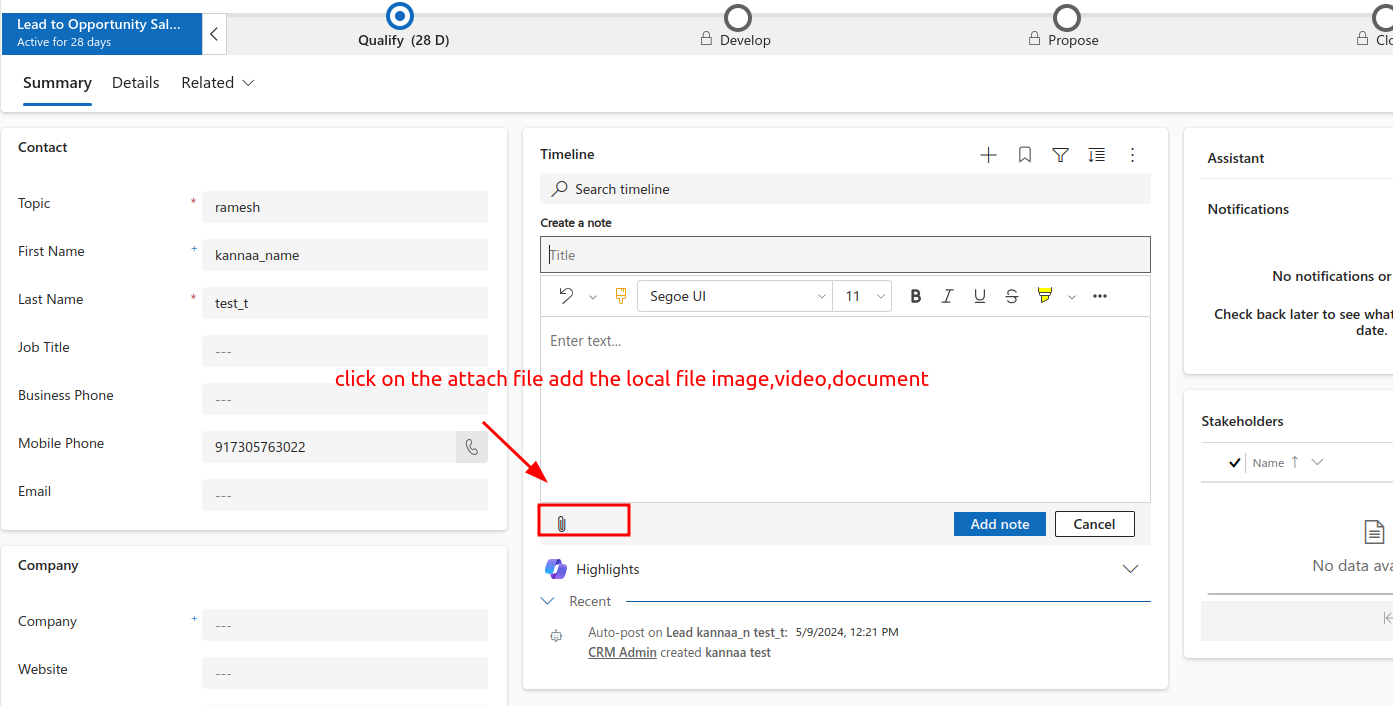
upload the file
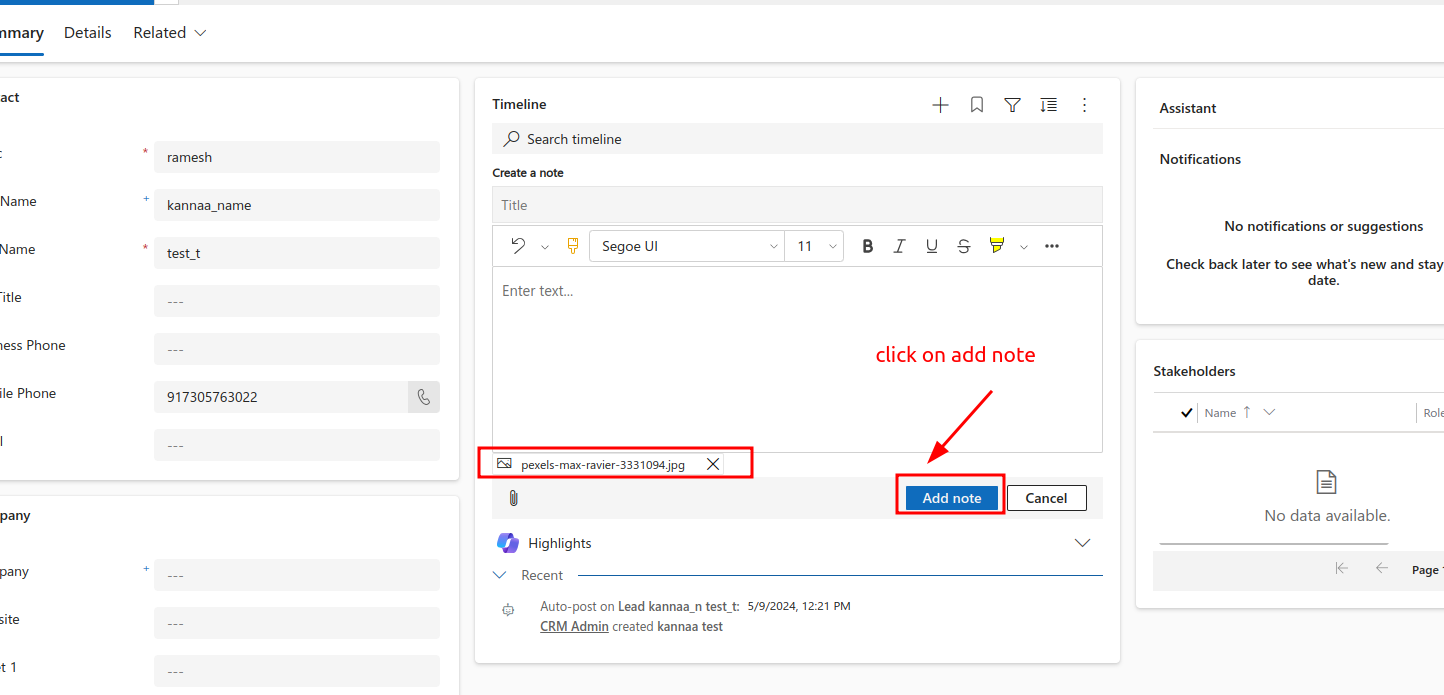
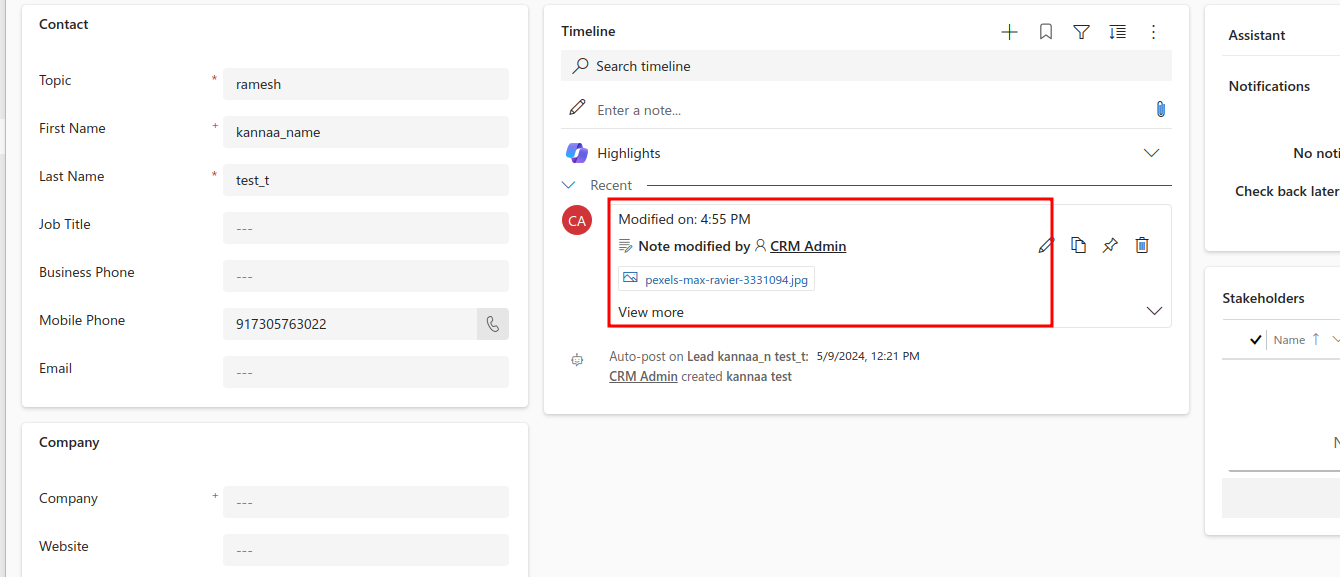
After uploading, see this page. It should show the date and file as well.
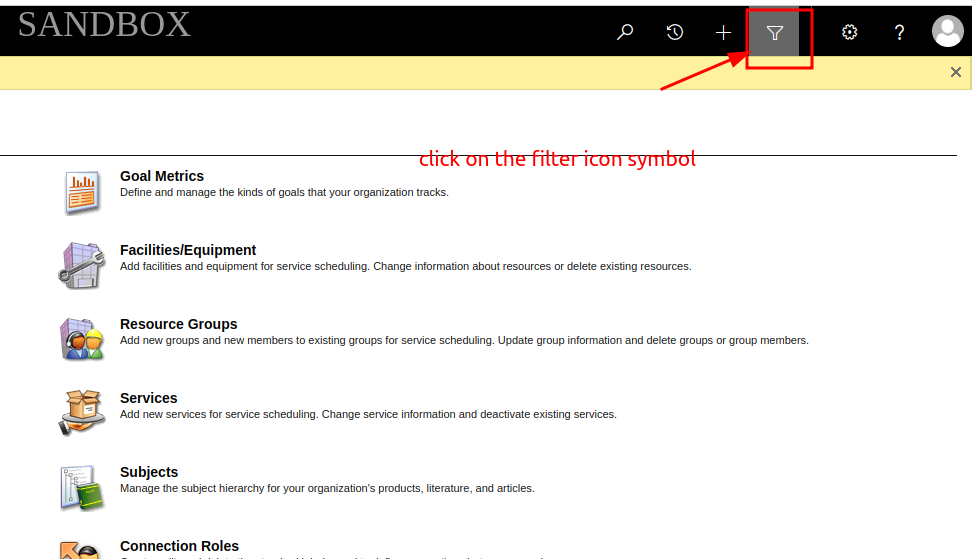
- Afterward, navigate to the settings icon and click on 'Advanced Settings
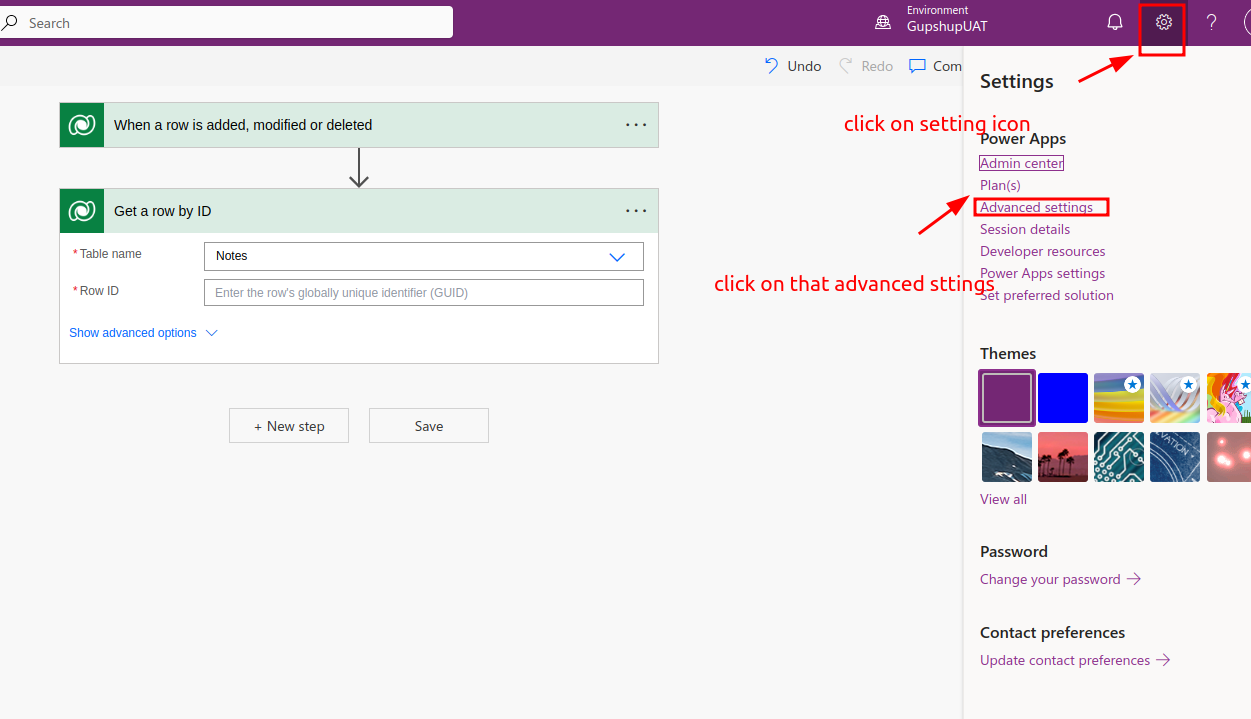
click on that filter icon button
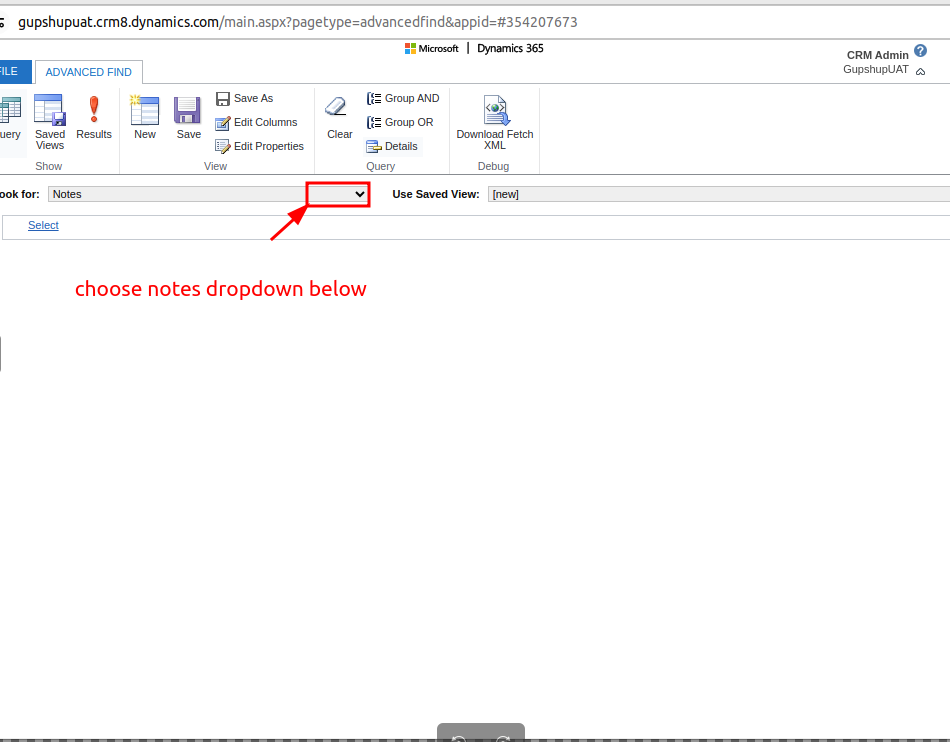
- "After that, open a new window, click on the arrow icon, and select 'Choose the Note'."
- Clicking on that result table will display notes filed inside, including documents, images, and videos that I added.
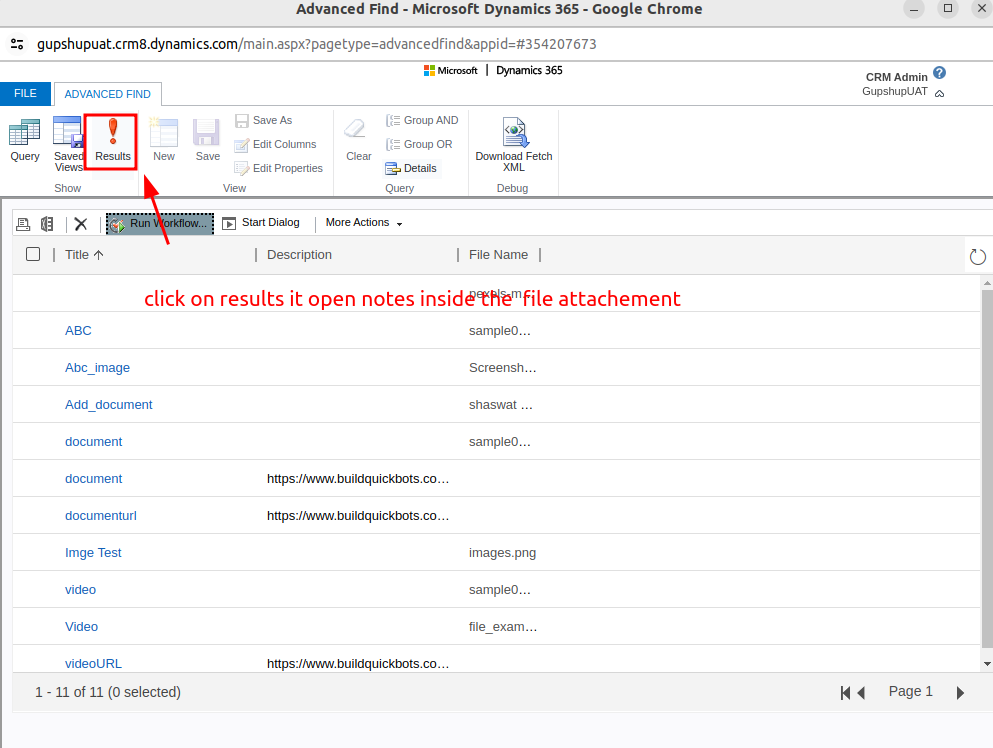
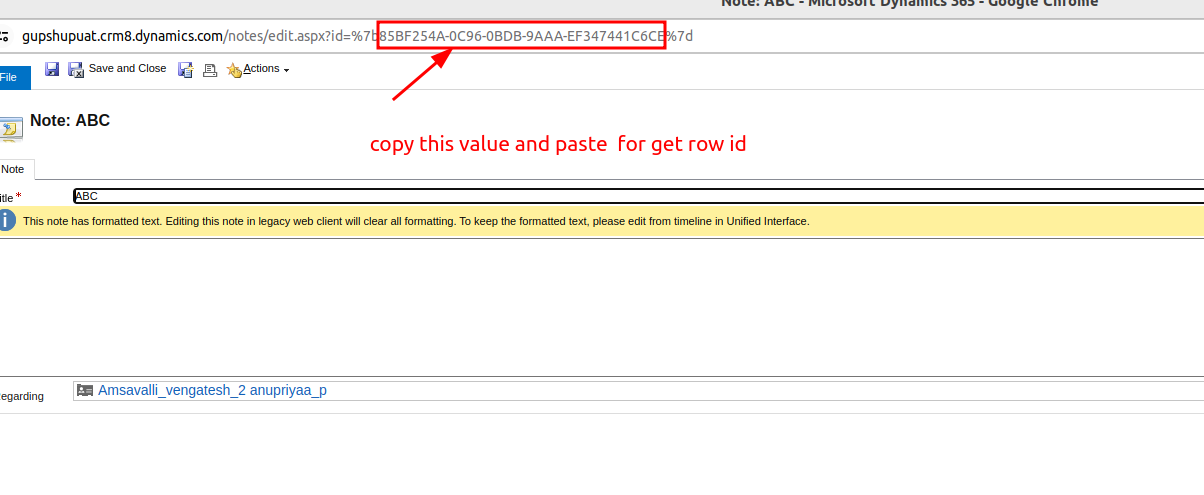
- copy and paste it value for notes
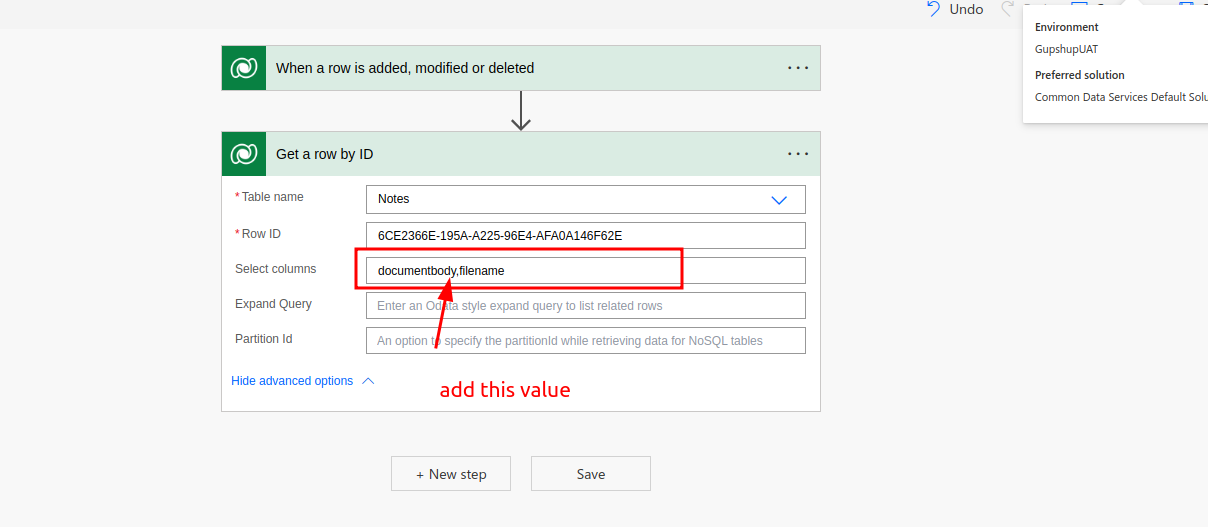
- copy and paste selct coloum below documentbody,filename
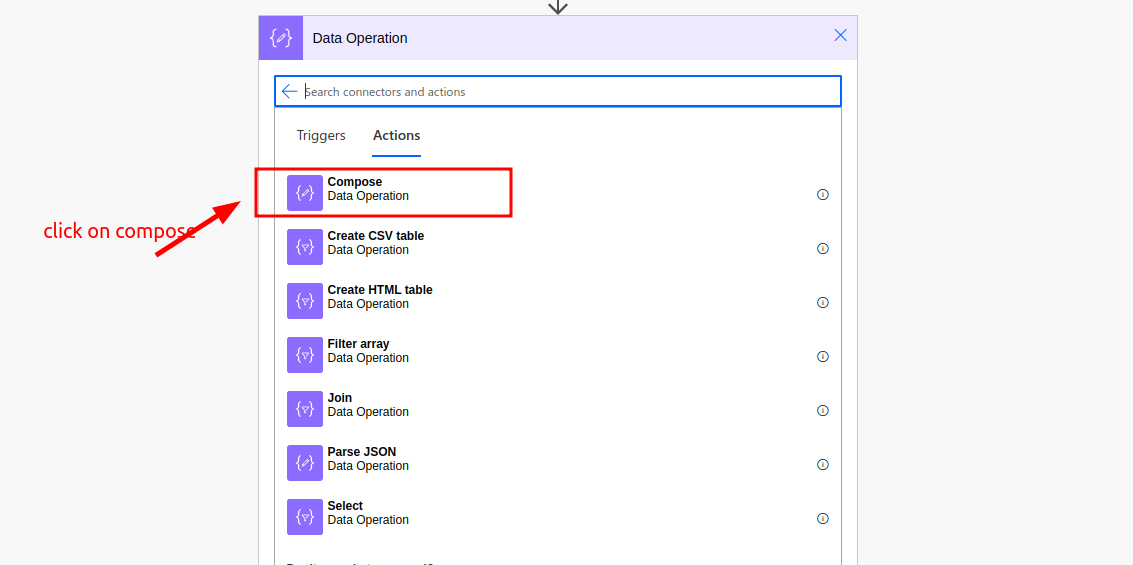
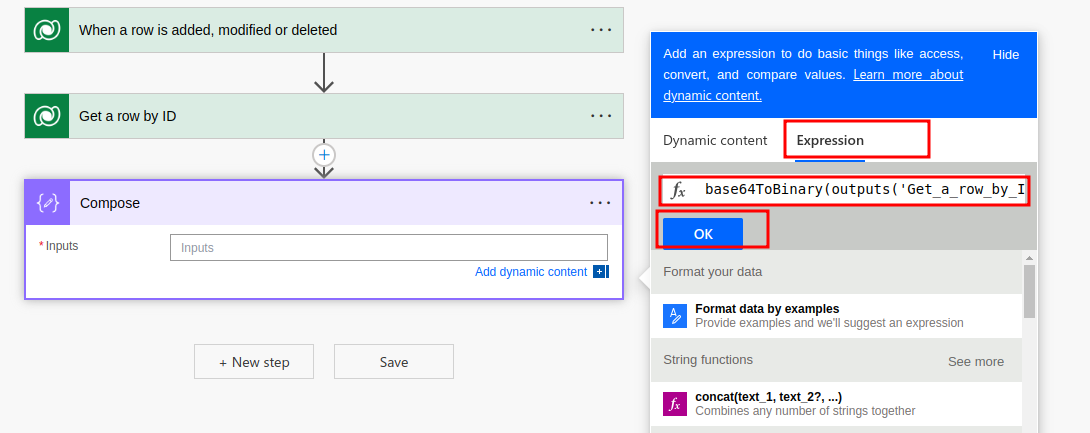
Compose Image
Need to compose the base64 image to the binary as expected by the WhatsApp image uploader request “base64toBinary” request can be used.
click on the compose text
Afterward, open the compose field, click on the input field marked "t," which will open a dynamic box on the left side. Then, click on "Expression," copy the value, and paste the following: base64ToBinary(outputs('Get_a_row_by_ID')?['body/documentbody']). Finally, click the "OK" button.
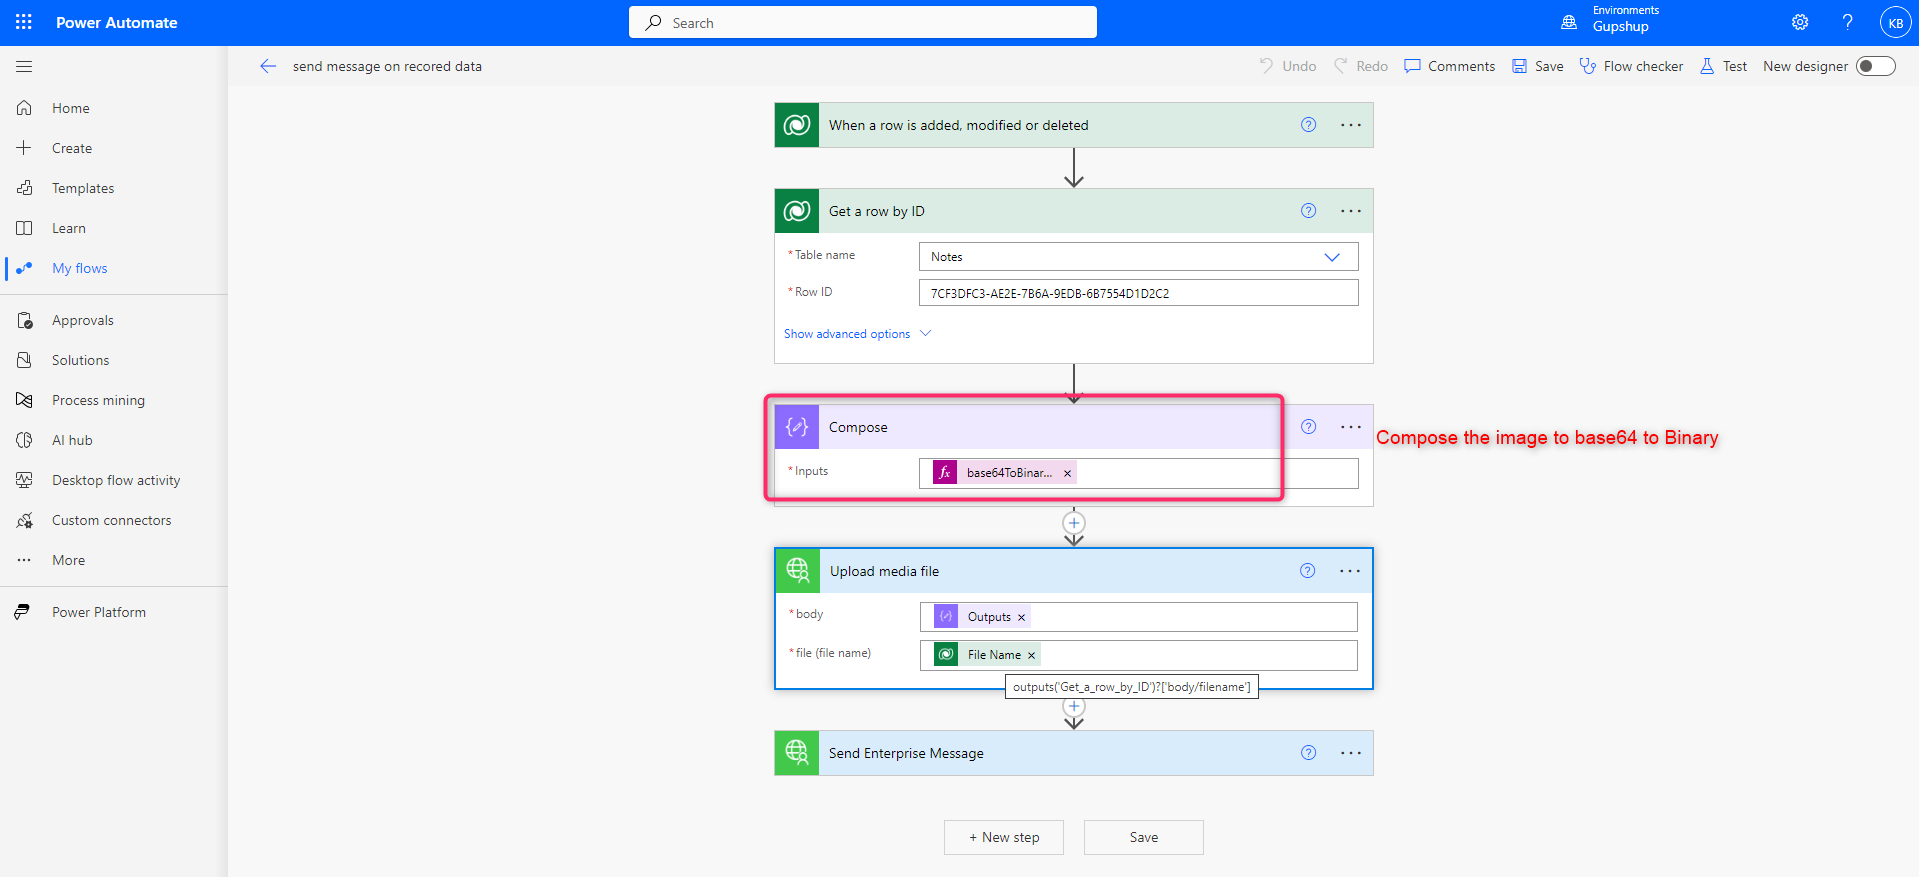
Next, click on the "Add" button, then select the Gupshp logo and click on it to upload the file.
Create an Image URL for WhatsApp
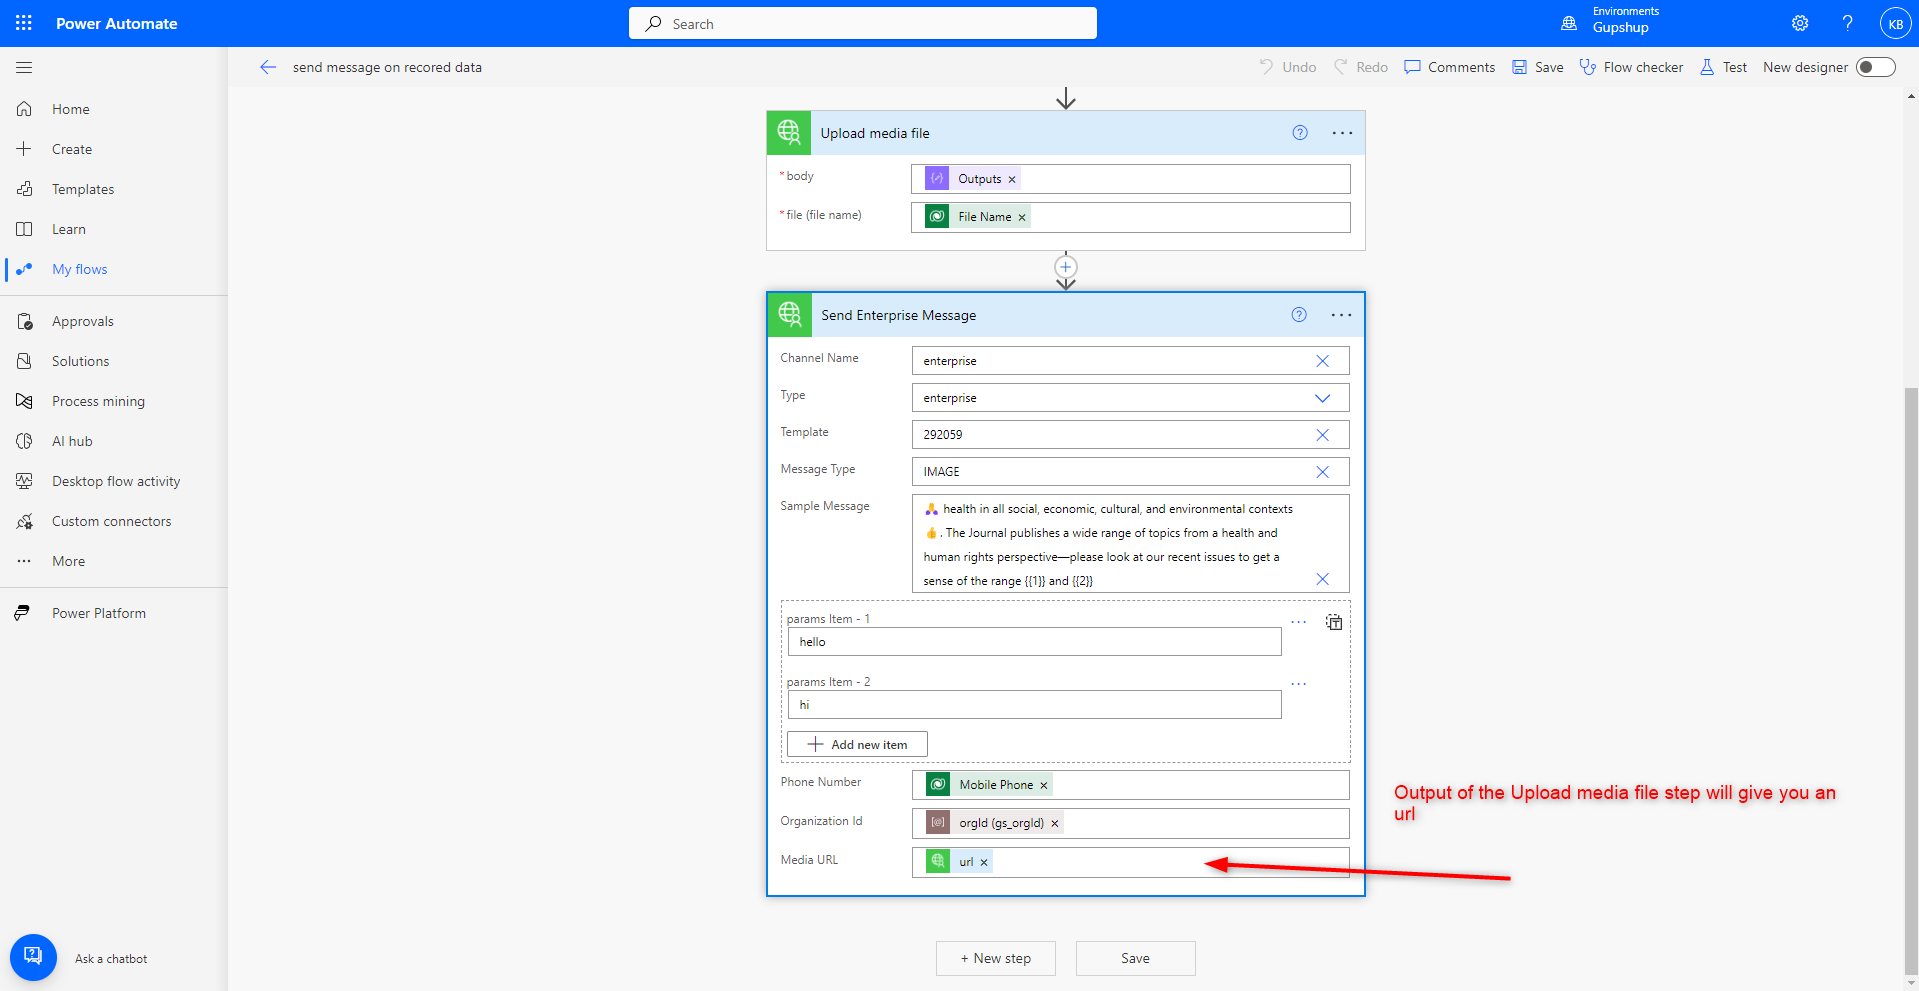
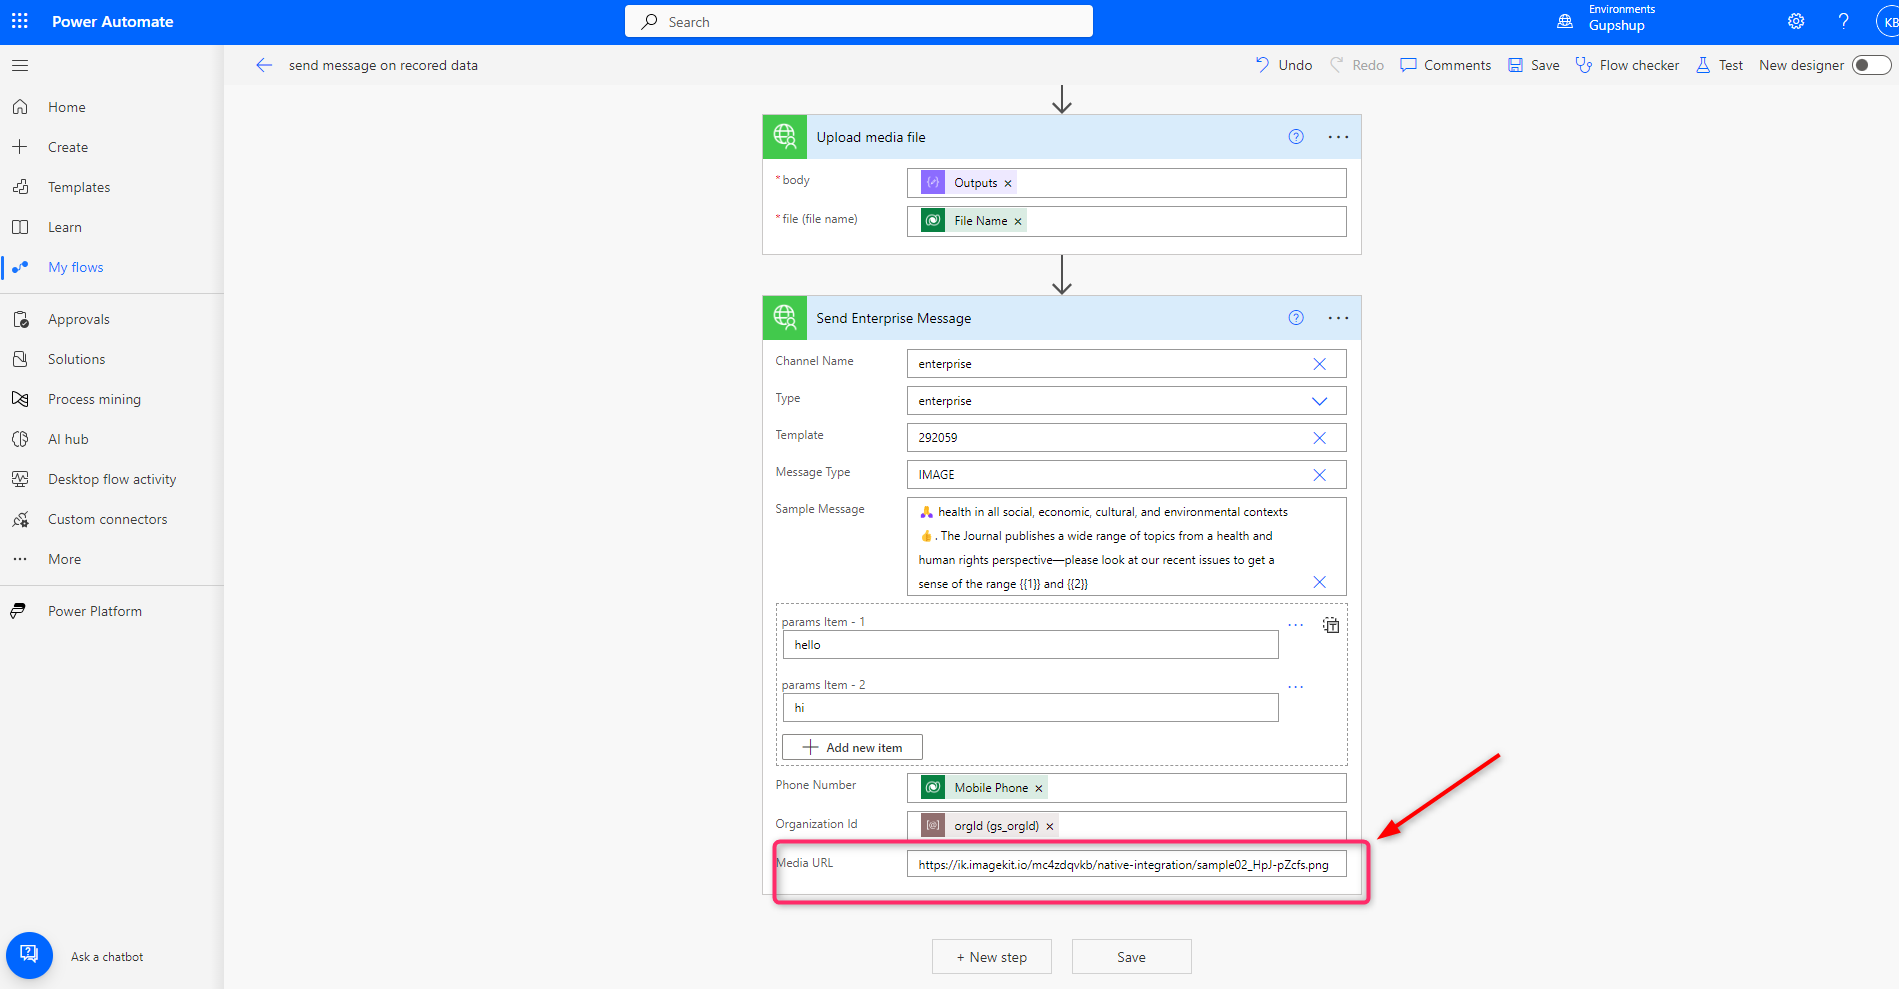
Upload the file to the WhatsApp server to generate the public url. You can use the below method “Upload Media File” method to generate the URL.
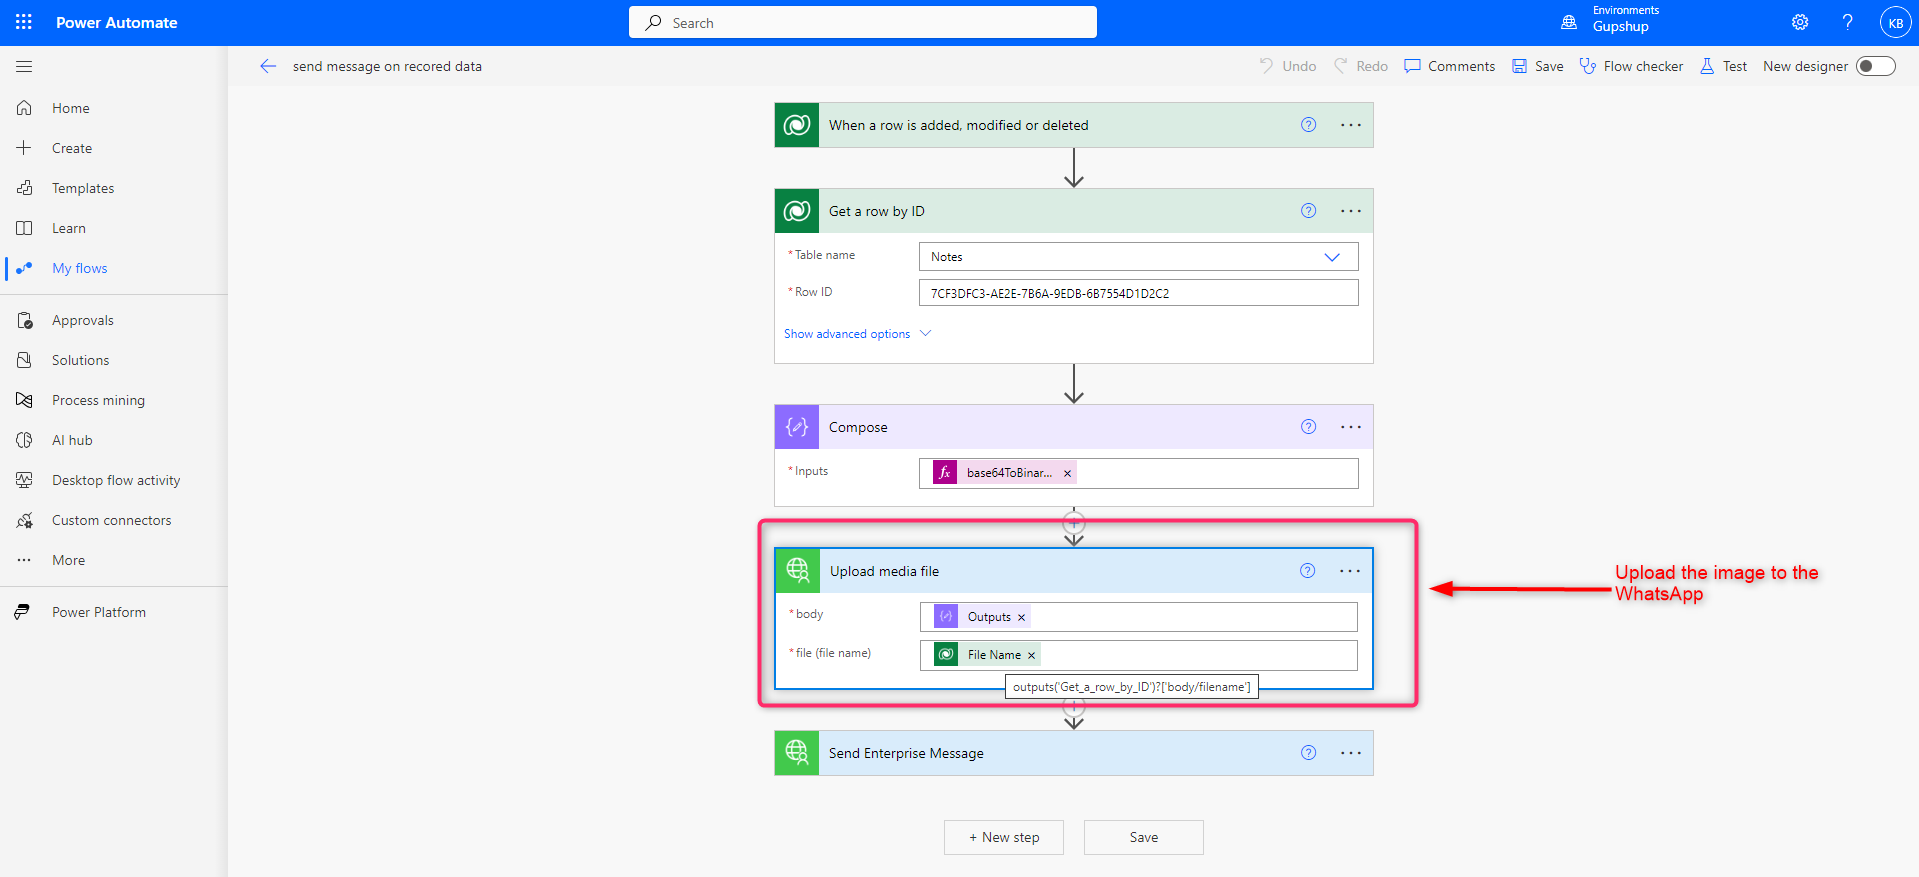
Pass the URL to the Media template
While sending the message make sure to set the url generated from the “upload media file” request.
Notes:while reading a document/video/image from the CRM, you need to make sure that the template that has been selected is of the same type. For example, if you have selected the template of type image make sure that you are reading the notes of image type only.
So message may be sent successfully from PowerAutomate but it is not received at the user end.
Direct link
You can also send the media message with a public link.
Image: https://i.natgeofe.com/n/726708f7-f79d-47a5-ba03-711449823607/01-balance-of-nature.jpg
Document: https://ik.imagekit.io/mc4zdqvkb/native-integration/sample02_HpJ-pZcfs.pdf
Video: https://ik.imagekit.io/mc4zdqvkb/native-integration/file_example_MP4_640_3MG_ygrU3Y81G.mp4
Send Automated message
You can send an automated message to client, for example, when a new lead/contact is created/updated.
You can create the Power Automate in a solution as shown below.
Follow the same steps to add the template message as explained in the common steps.

Schedule PowerAutomate
You can schedule the message to send the message at a given specific time,
You can create the Power Automate in a solution as shown below.
After that click on schedule and provide the necessary information, as shown below, and click Create

Provide the necessary information as shown below and done. You can refer to the common steps for the field information and link to the document
Limitations
1. If you are uninstalling the solution and encounter an error, make sure to delete all the connections/Power Automate created using this solutio
Updated 9 months ago