Onboarding Guide
Gupshup's WhatsApp Embedded Sign-up provides an easy way to register a WhatsApp Access API App for your business/brand. This process is self-service and can be started from Gupshup's Dashboard.
Registering a WhatsApp Business account will allow you to send and receive messages from your company's brand using Gupshup's APIs. Meta enforces certain restrictions and you will likely need to complete Meta Business Verification before making your App live.
Prerequisites
Before you get started with this guide, you'll need:
- A Gupshup account.
- A valid email address.
- A new phone number. Alternatively, you can migrate a live phone number.
The number must be able to receive an SMS or phone call. If the number can only receive phone calls, it cannot be using an IVR.
If migrating from the current BSP to Gupshup using the Embedded Signup Flow, disable 2FA for the phone number at the source BSP.
During this process, you can either create a new Meta(Facebook) Business Account or select an existing one. We recommend using an existing Meta(Facebook) Business Account if someone within your company has already created and verified it. If this is the case, they will either need to invite you as an administrator with full access or you can share the Direct Facebook Registrationlink with the Meta(Facebook) business account owner. They can log in and complete the WhatsApp Business Account process.
Let's Get Started
-
Start by logging into your Gupshup Dashboard. Then, select WhatsApp
Login > Dashboard > WhatsApp
-
You can either create your first app or select an existing app from the dashboard.
-
Select Go Live. You may seeComplete FB Registration instead of Go Live if you have started the registration process in the past.
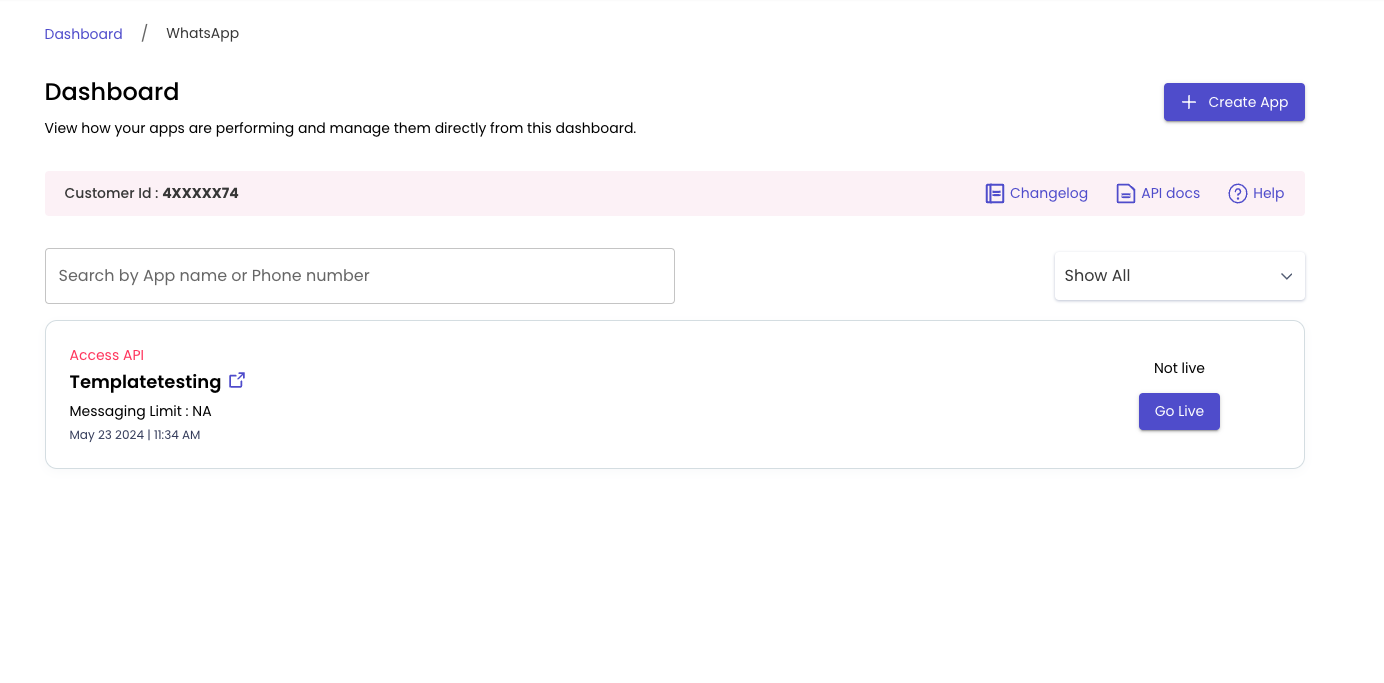
Go Live
-
Select the type of phone number you wish to configure for your WhatsApp Business Account.
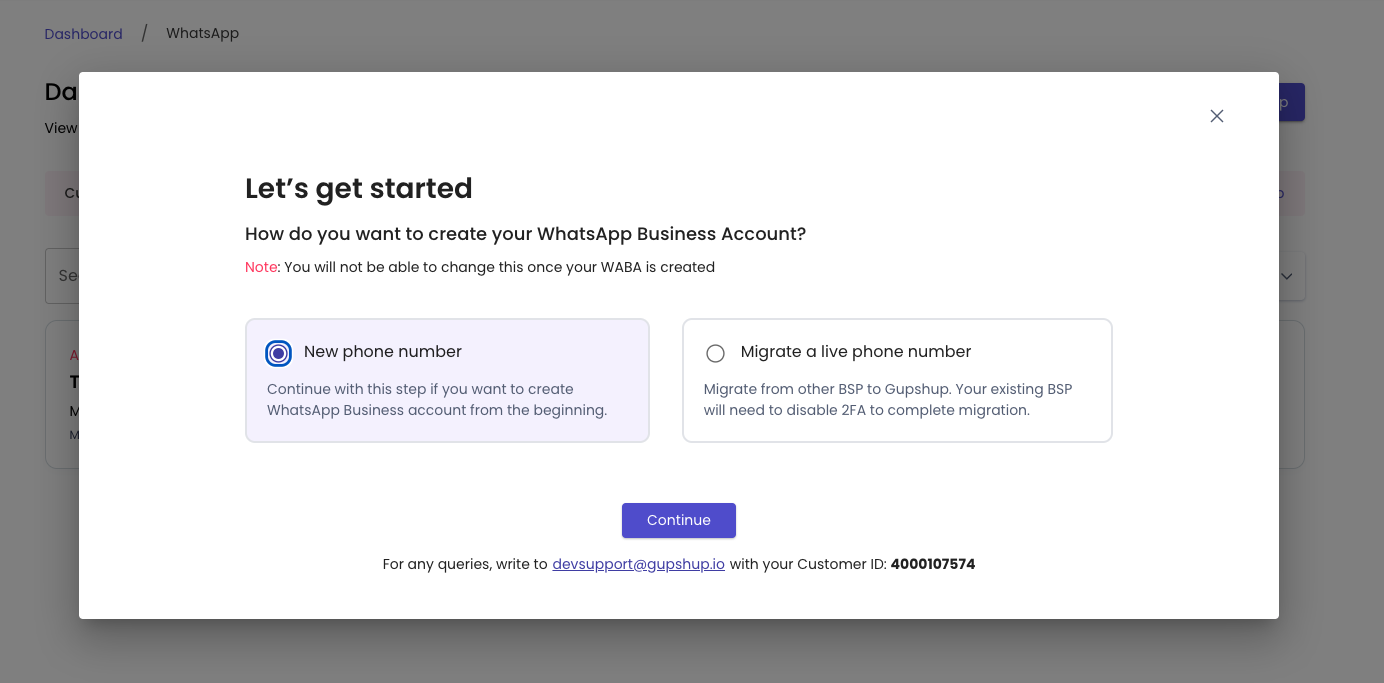
Select Phone No. Type
-
Review the data storage region, the respective country's WhatsApp free, and select Proceed.
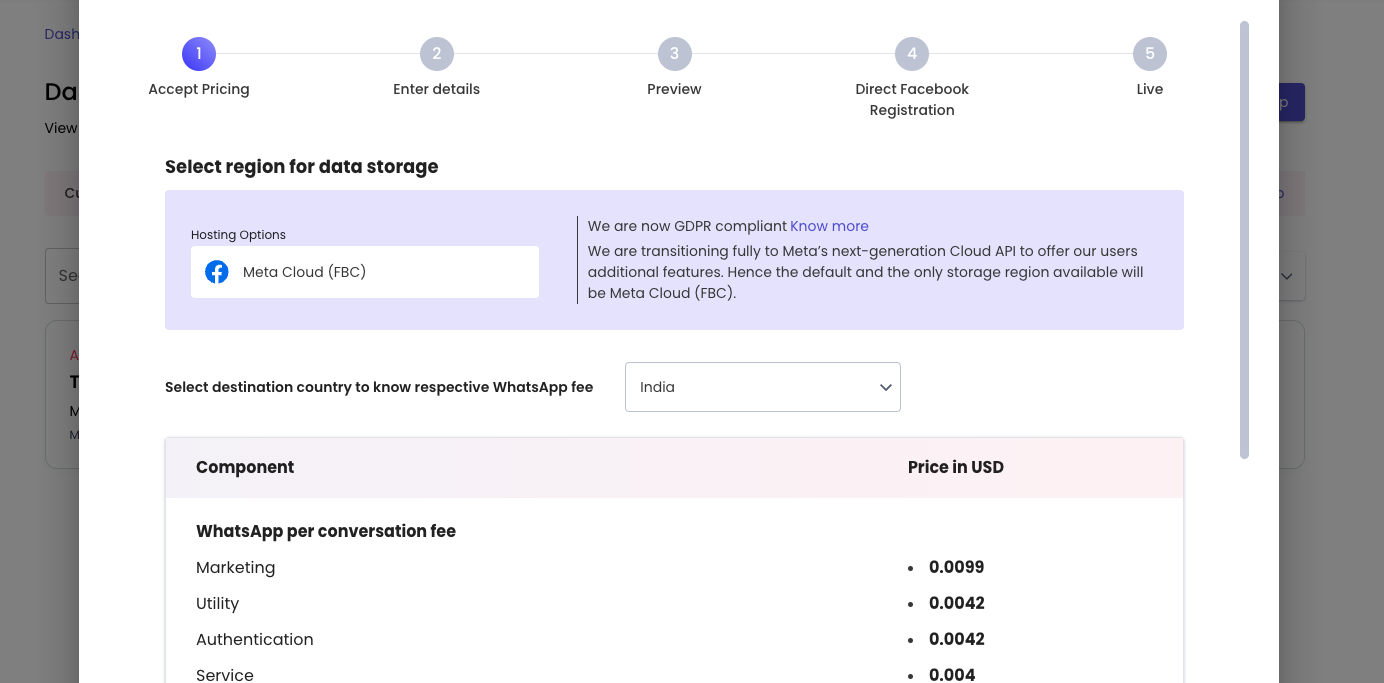
Accept Pricing
-
Enter the required details and mark the checkboxes to agree with T&C, Privacy Policy, Business Policy, and Commerce Policy. You will receive an OTP on the provided email address to proceed further. Enter the OTP and follow the prompts.
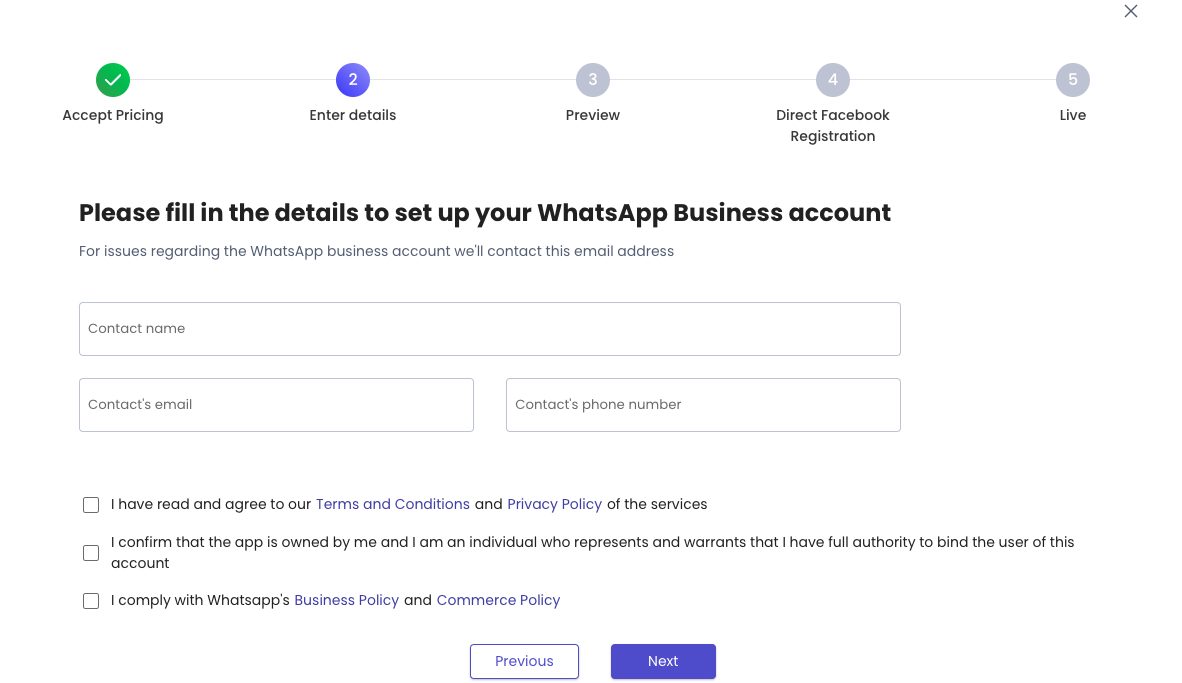
Enter Details
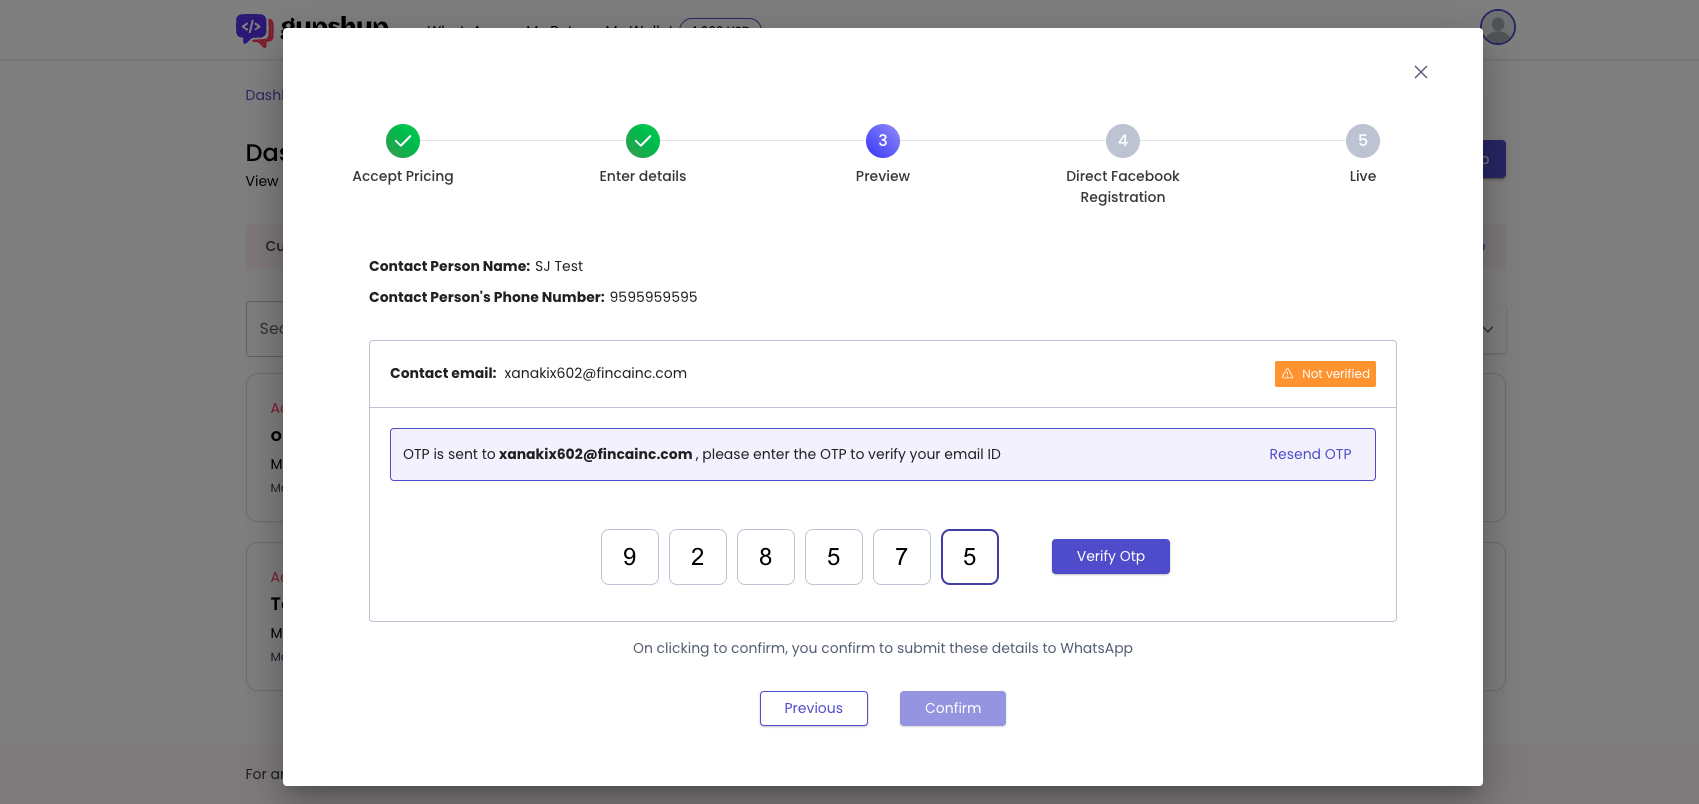
Verify OTP
-
Once your email address is verified, review your details and select Confirm.
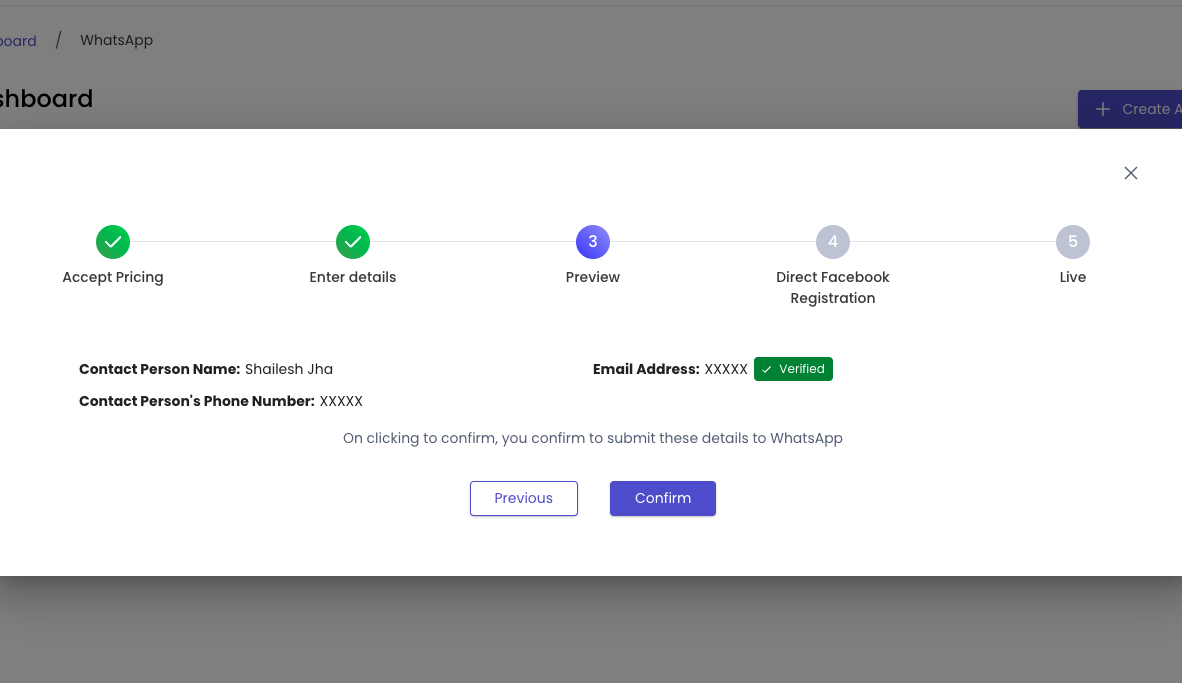
Preview
-
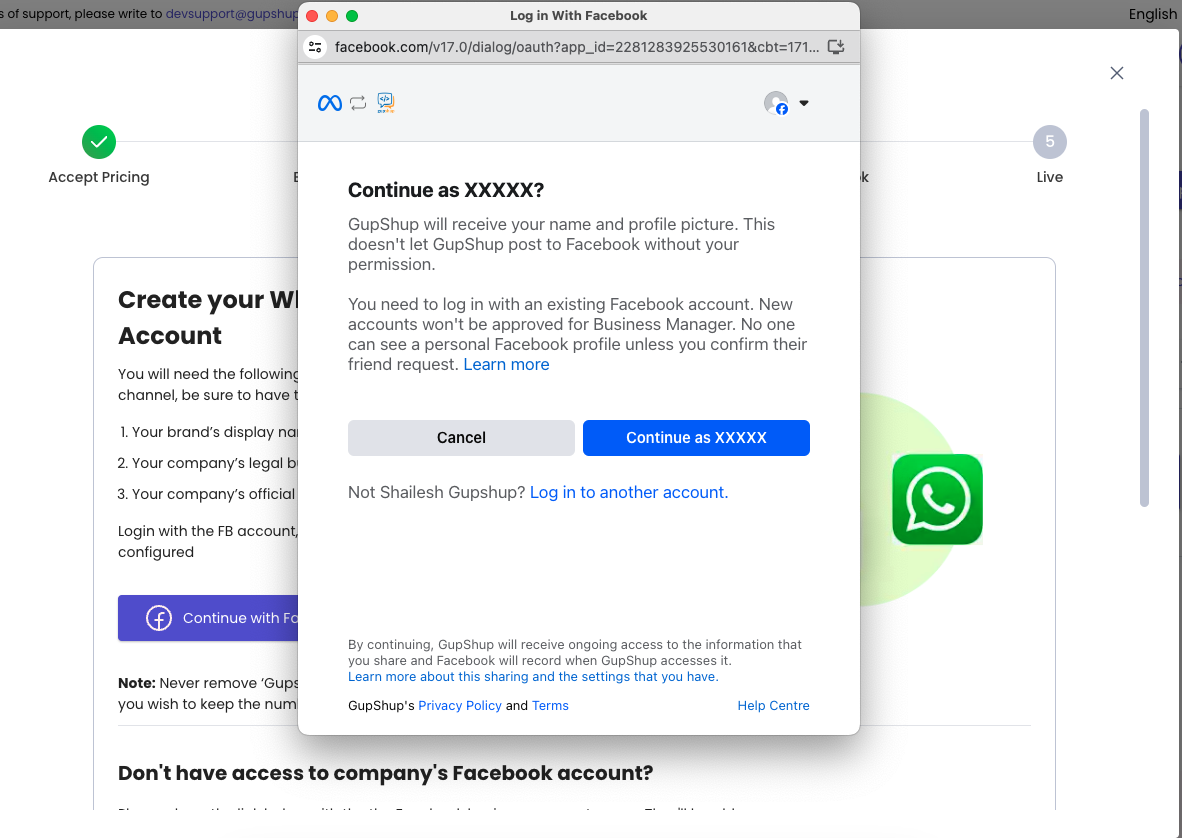
Select Continue with Facebook to proceed further. If you do not have the access to company's Facebook account, you can copy the URL and share it with your administrator.
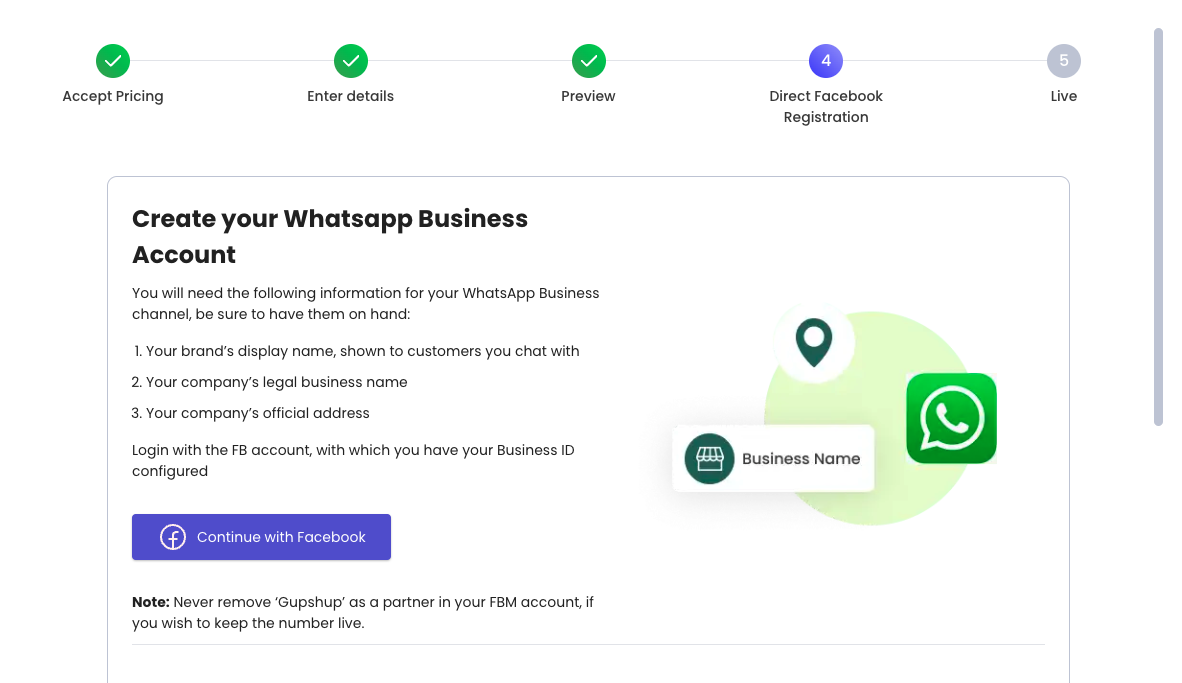
Direct Facebook Registration
This step will open a pop-up window leading to Facebook.com. Do not close the pop-up window or navigate to a different page.
Please ensure that your browser is configured to allow pop-ups to load.
-
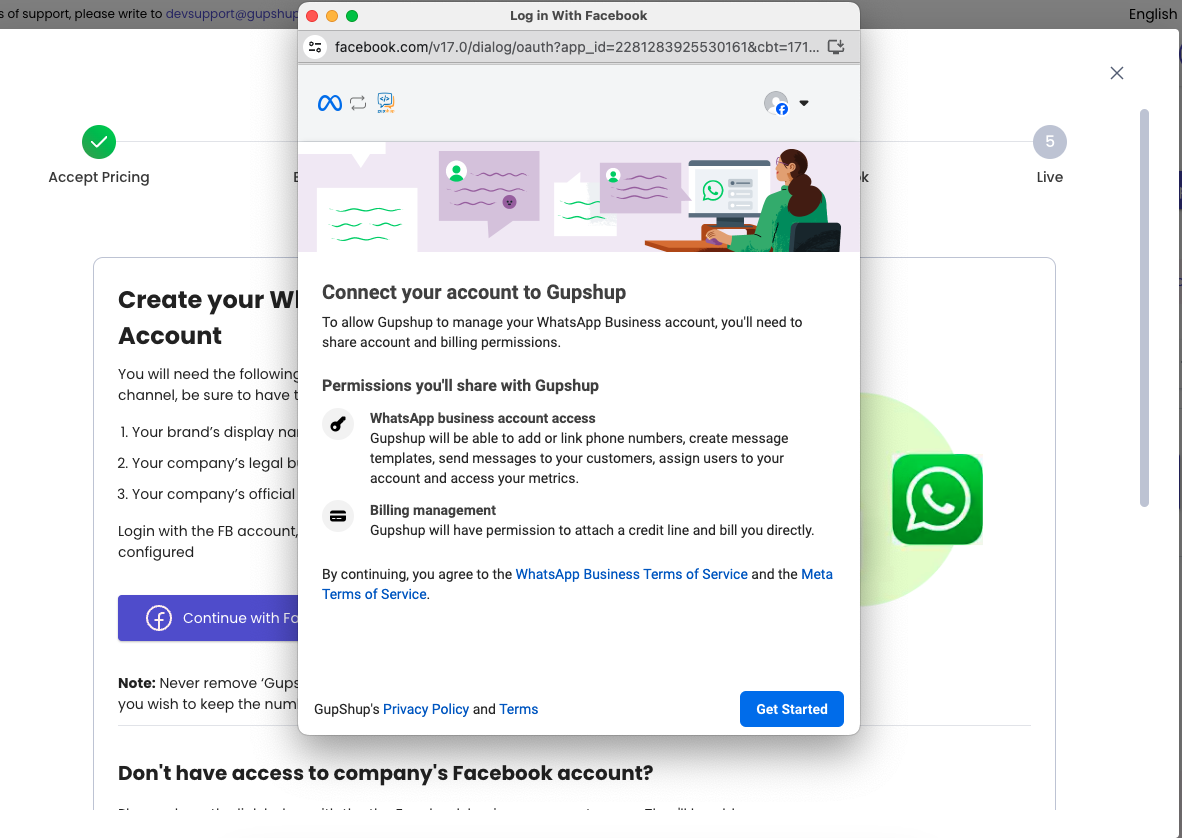
Log into Facebook if you haven't already or click Continue as[your name] if you're already signed in. After logging in, you will be shown an overview of the process of connecting your number to WhatsApp.
Continue with Facebook
-
Select Get Started.
Get Started
-
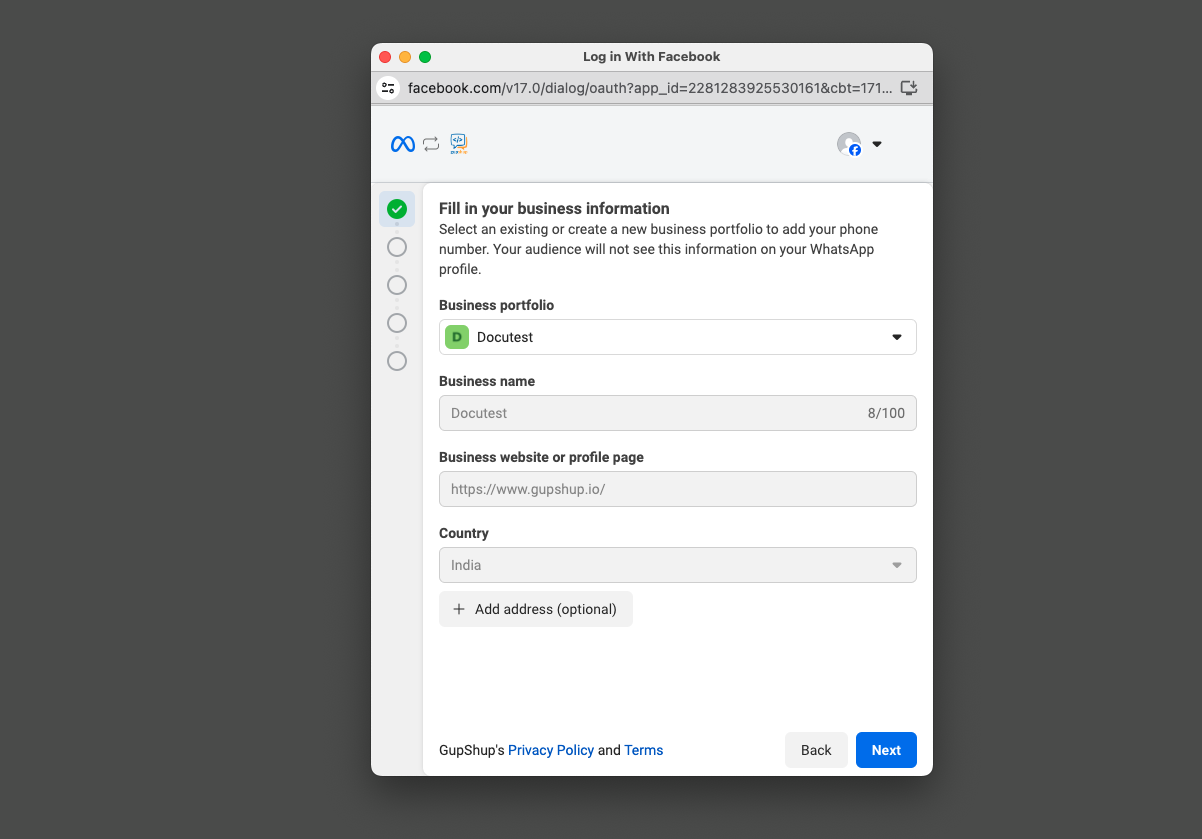
Fill in your business information and select Next.
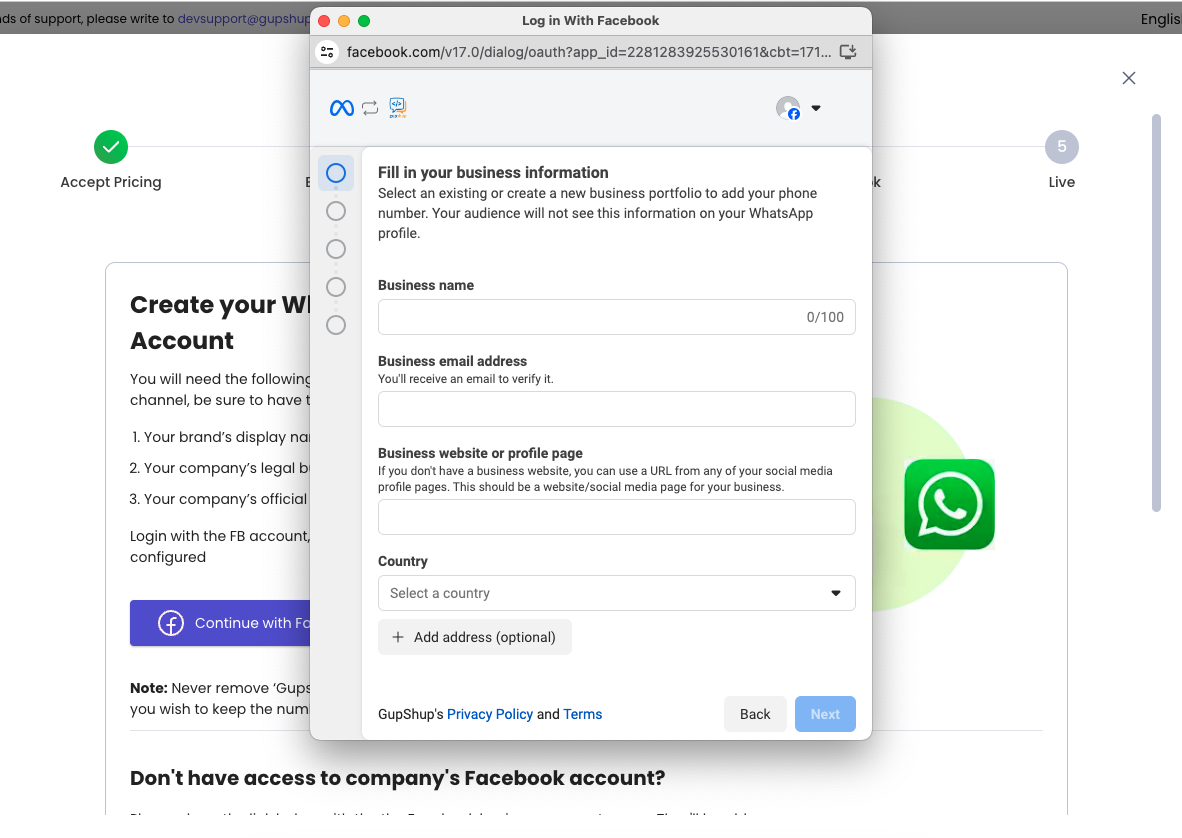
Provide Business Information
-
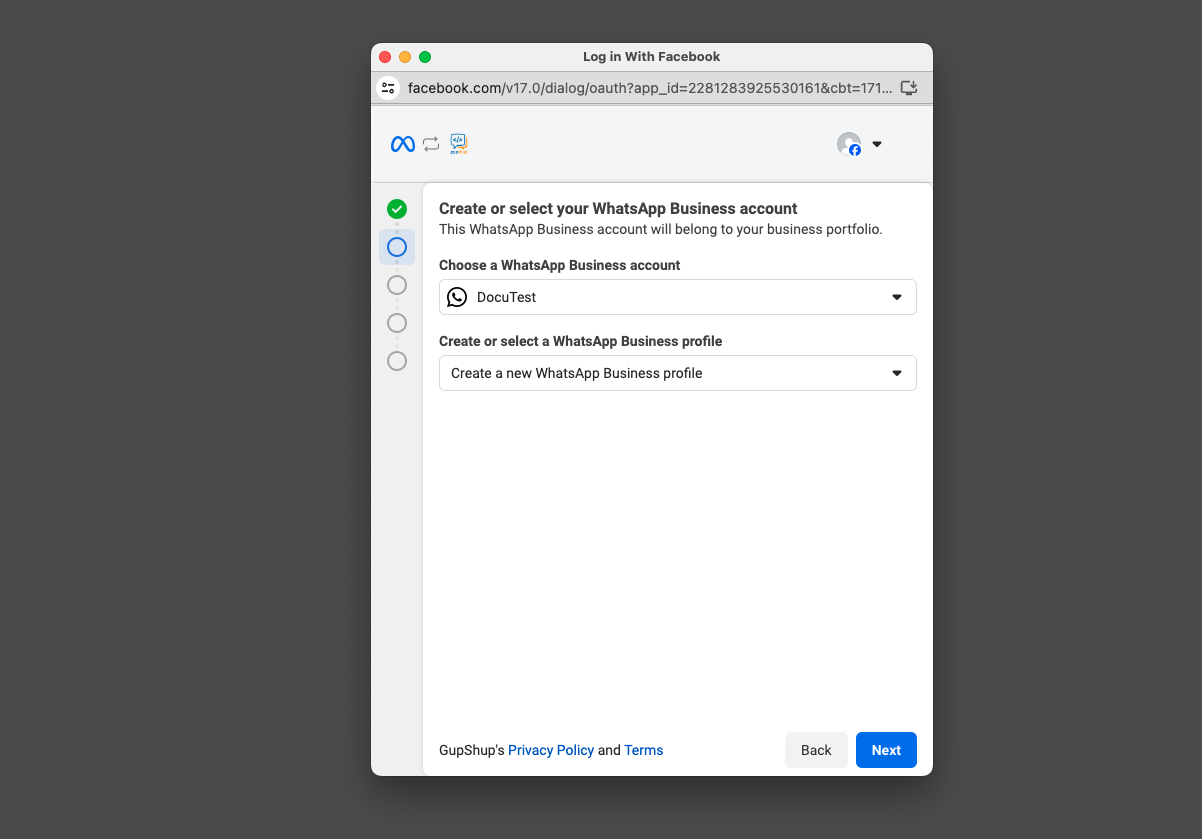
Next, you will be able to select a WhatsApp Business Account (WABA) and WhatsApp Business Profile or create a new one.
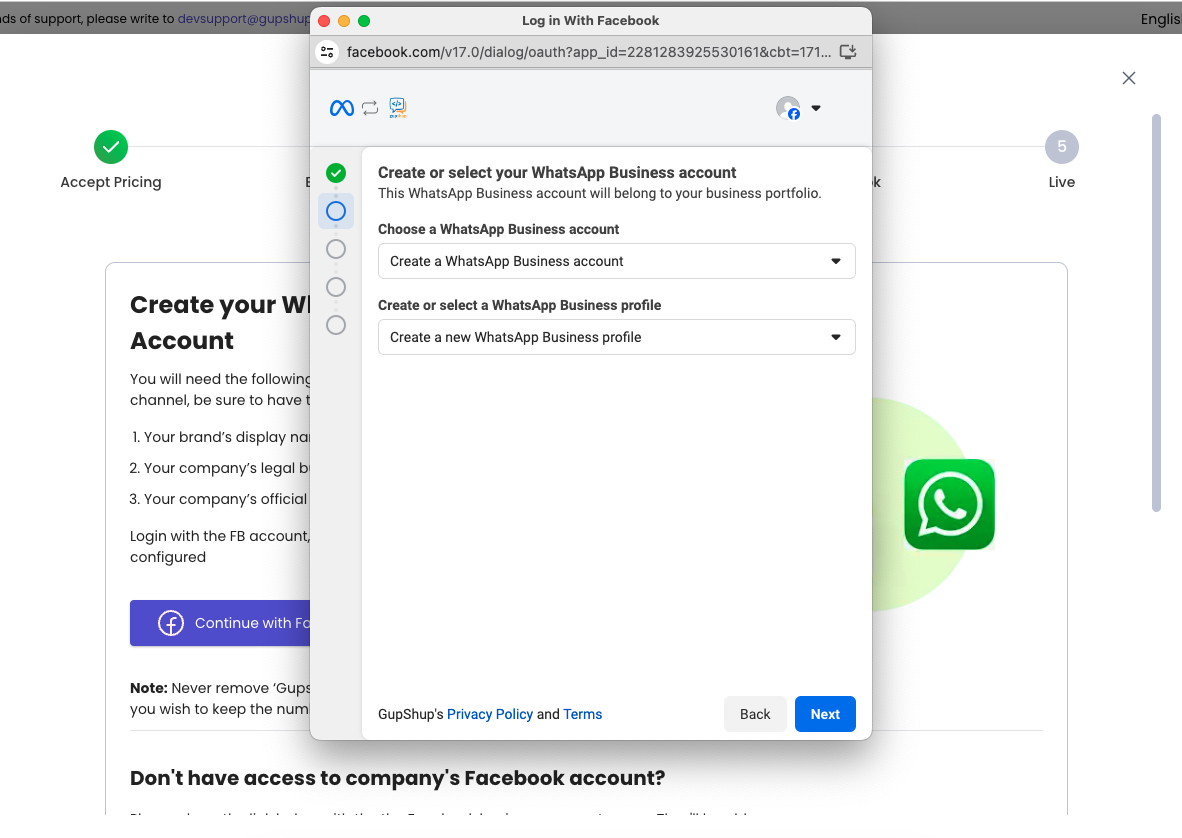
Create or Select WABA
-
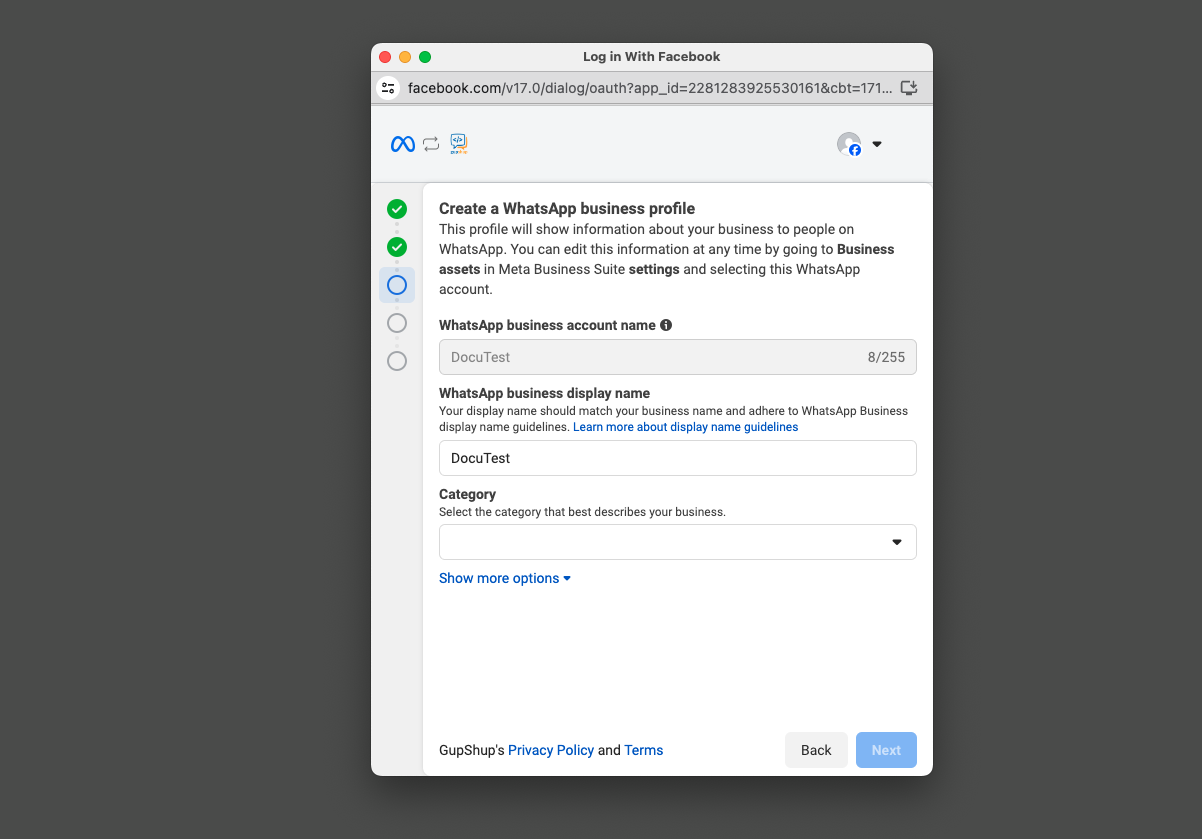
Now, provide details for your business information.
Business Information Details
-
Create or select your WhatsApp Business account. Then, select Next.
-
Provide a WhatsApp Business display name and select the category. Then, select Next.
-
Next, you will receive a verification code on your registered phone number. Enter the verification code and select Next.
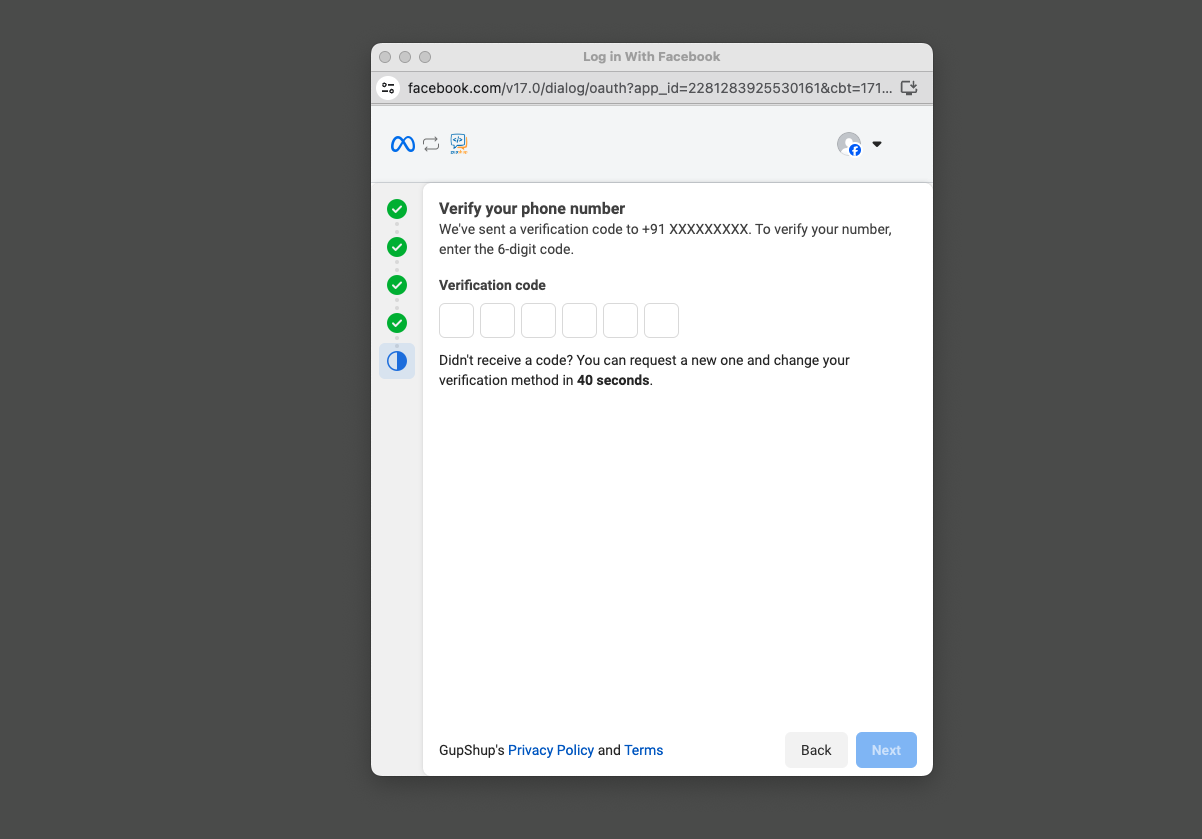
Enter Verification Number
-
Review the permissions requested and select Continue.
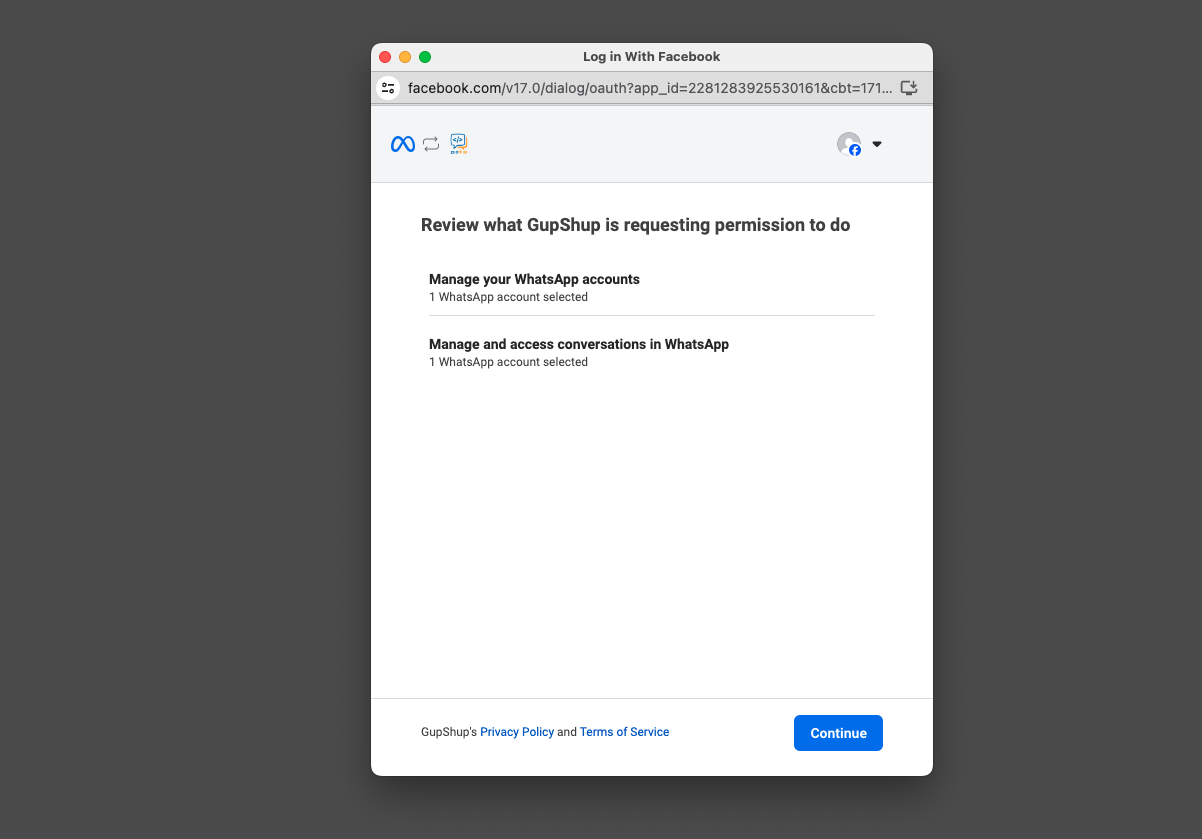
Review Permissions
-
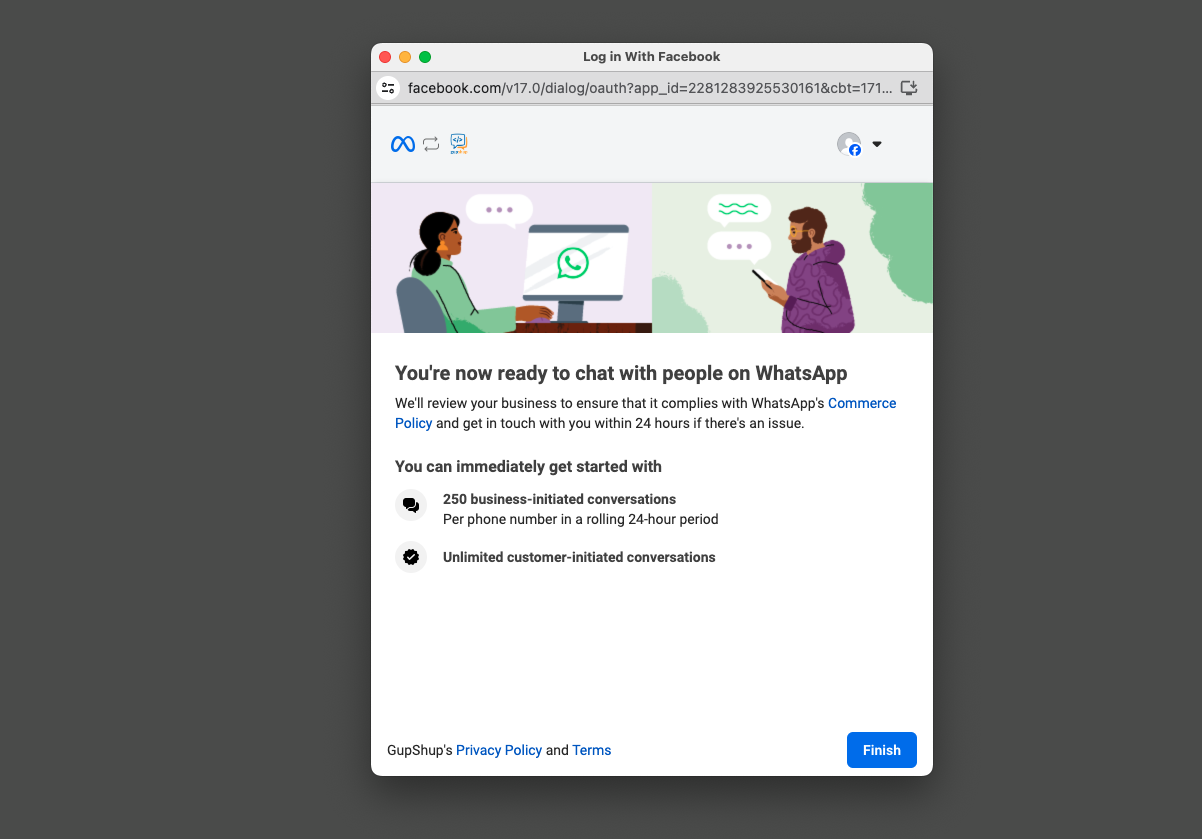
You're all set to go. Select Finish.
-
Confirm the WABA ID and phone number.
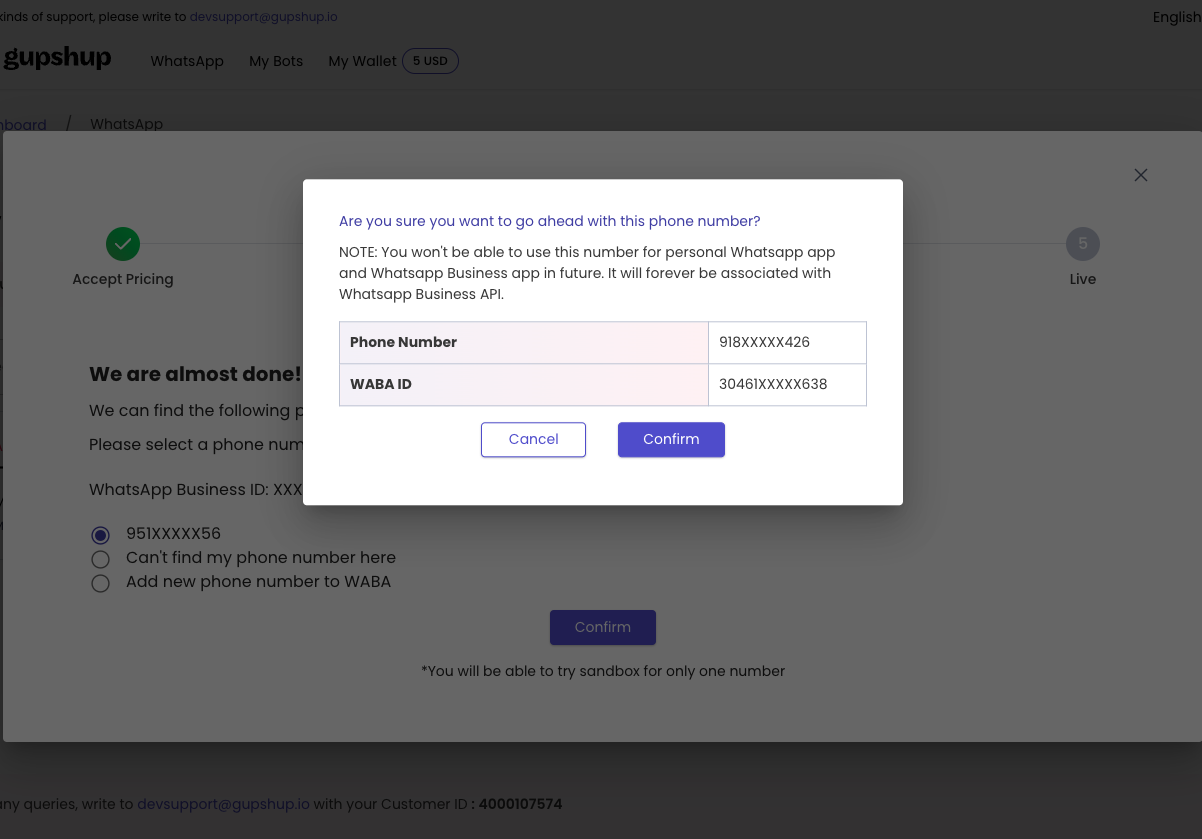
Confirm WABA ID and Phone Number
-
Congratulation! You are now ready to send messages. Select Go to dashboard.
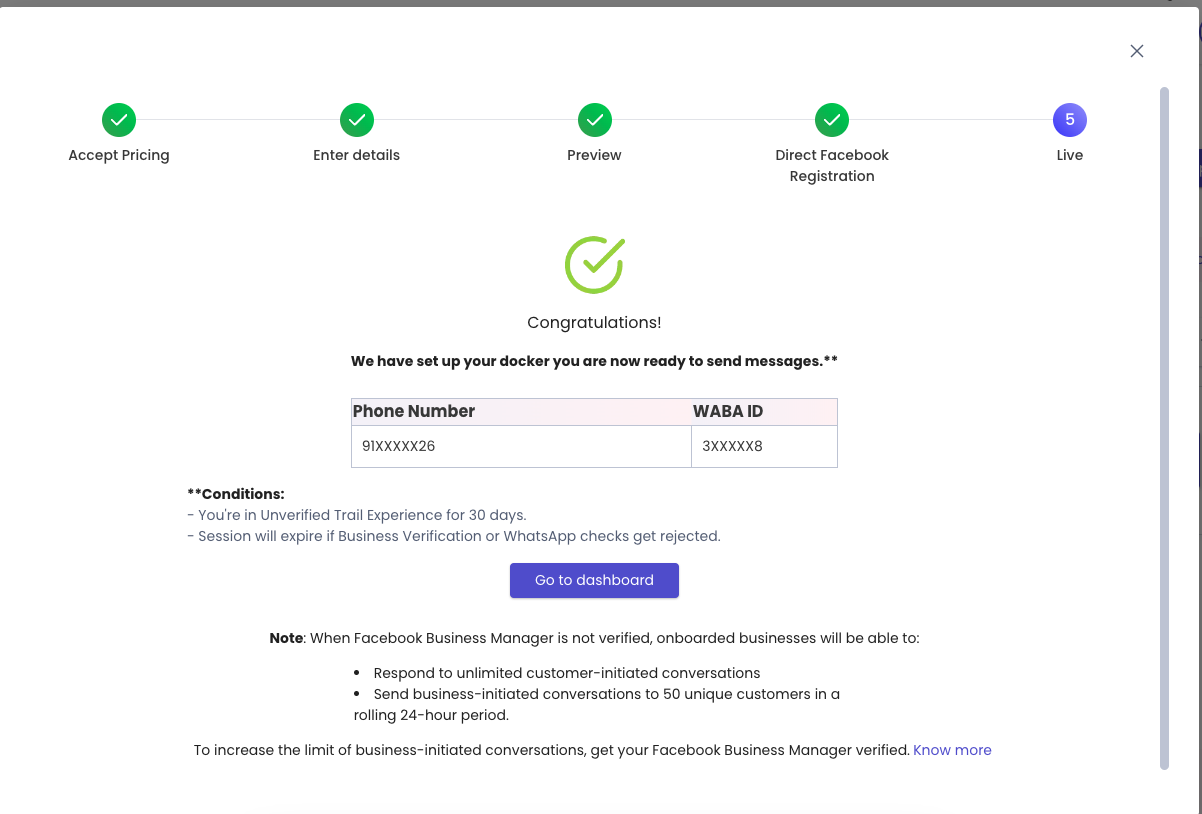
App is Live
Updated 9 months ago