Send WhatsApp Message Using Gupshup App Inside Responsys Program Designer
Follow the steps below to send a WhatsApp message using the Gupshup Oracle App in the Oracle Responsys Program Designer.
Step 1: Add the Gupshup App Block
- Open Program Designer:
- In Oracle Responsys, navigate to the Program Designer screen.
- Add the Gupshup App Block:
- Drag the App block onto the canvas.
- Double-click on the app block to see all available apps for your account.
- Select the Gupshup App:
- Choose the Gupshup app from the available apps list.
- Select Send WhatsApp Message service (Gupshup-Oracle).
- Confirm the Selection:
- After selecting the service, click Done to create an instance of the service.
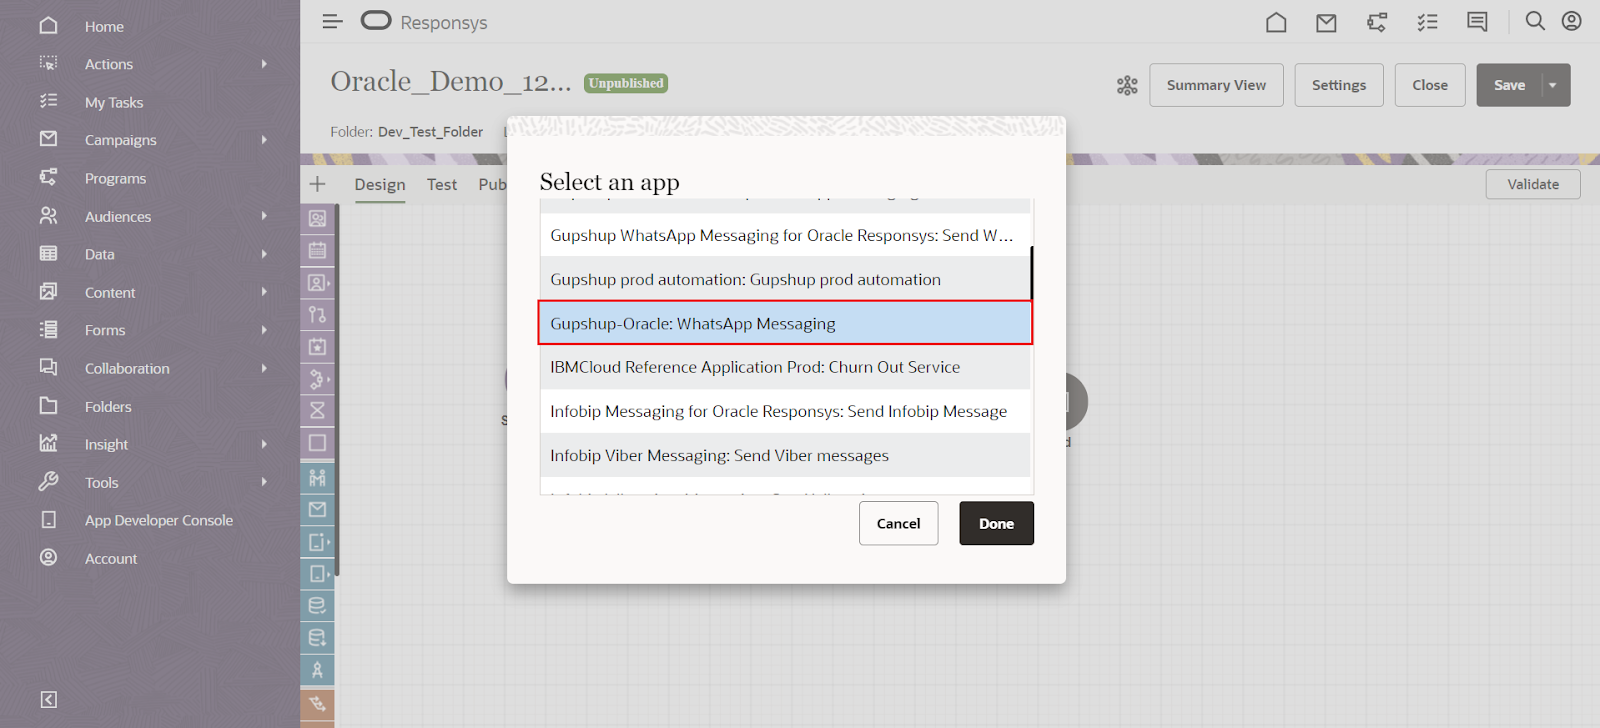
Select Gupshup app
Step 2: Configure the Service Instance and Choose Gupshup account
-
Configure the Gupshup App:
-
Click on Configure App to open the service configuration screen
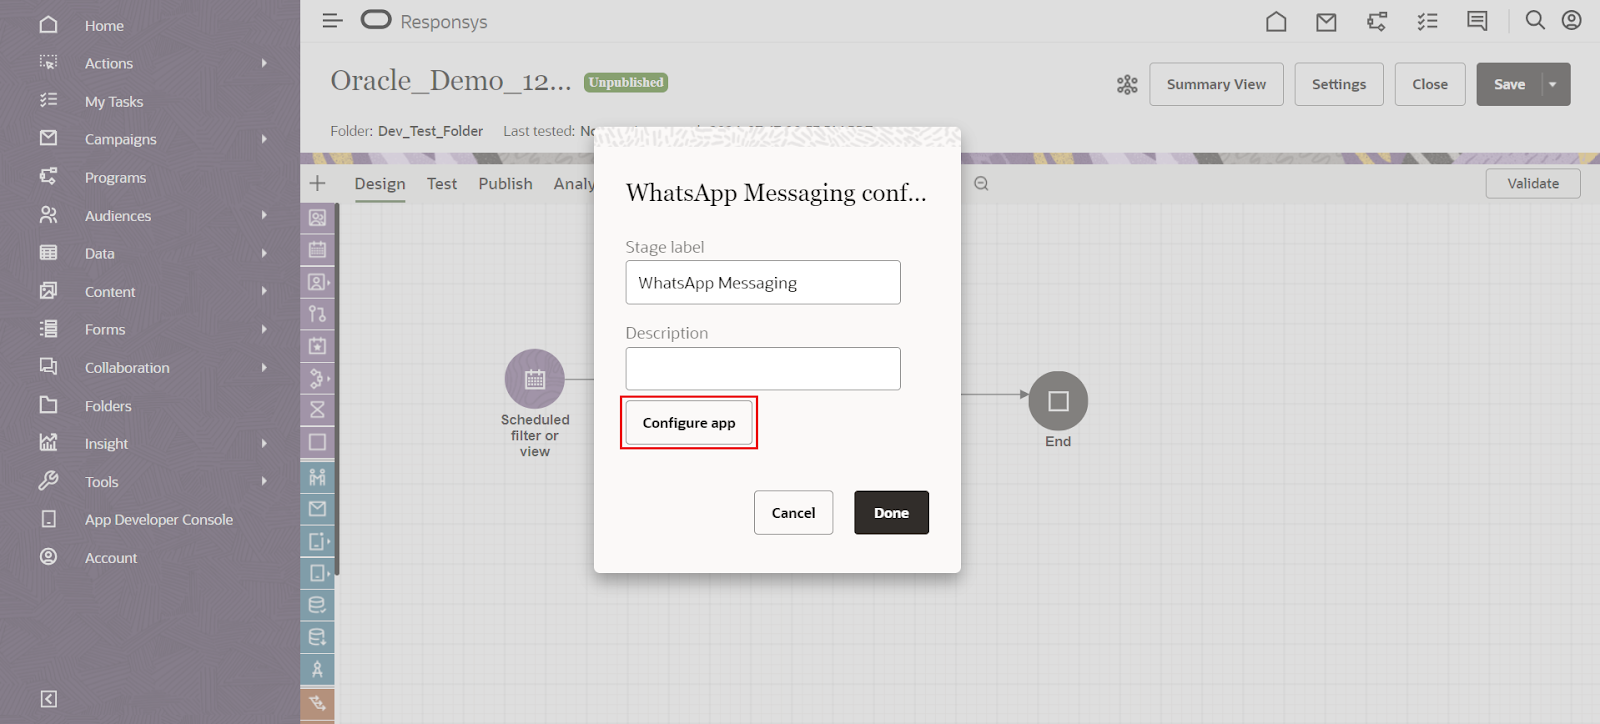
Service Configuration
-
-
Select Gupshup Account:
- From the drop-down list, choose the Gupshup Account that you configured earlier (these are the accounts you saved in the configuration step).
-
Set "Send To" Field:
- Map the Send To field to the phone number field, which should contain the recipient’s phone number. This ensures that the message is sent to the correct contact.
-
Click on Next:
-
After configuring the account and the recipient phone number, click Next to continue.
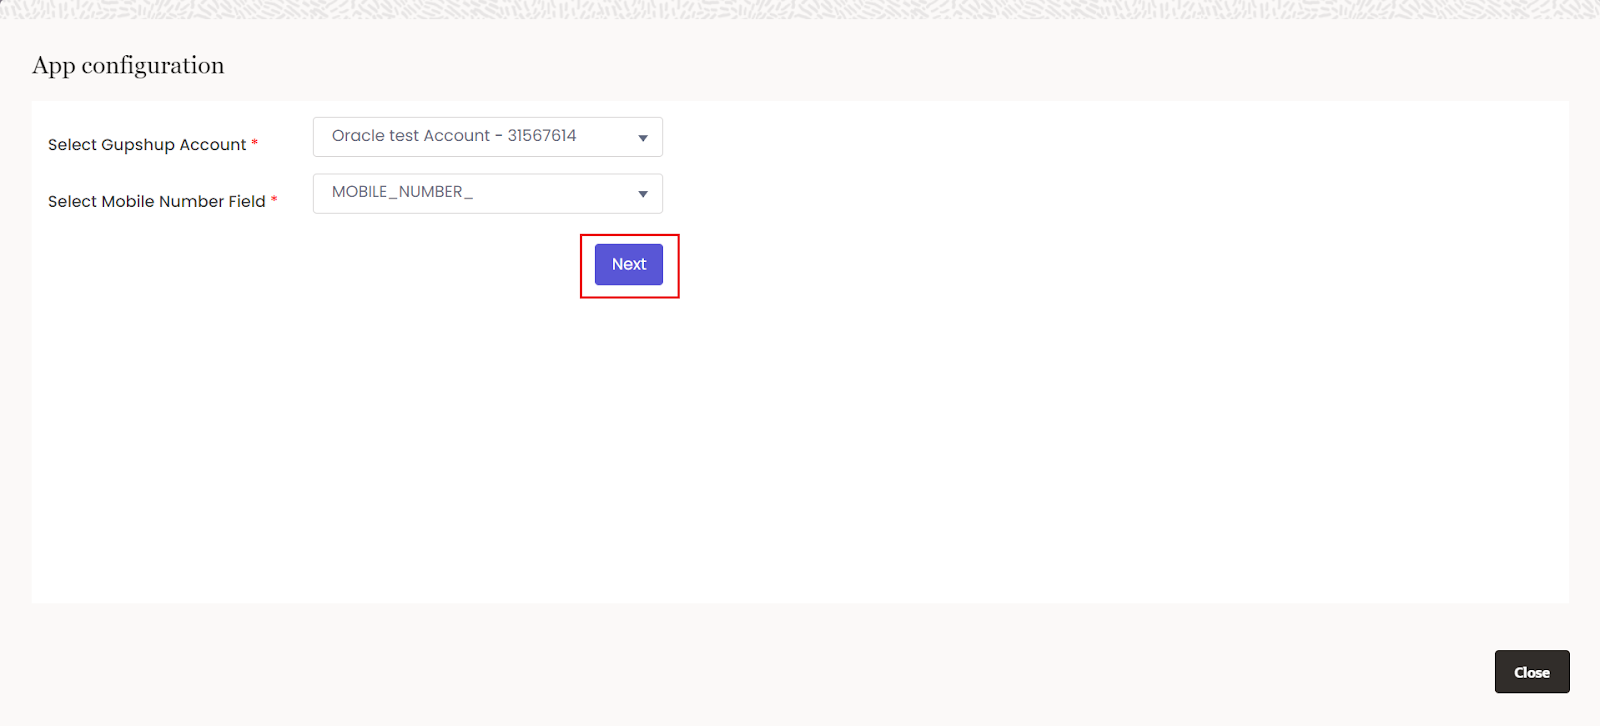
Gupshup app service configuration
-
Step 3: Convert the Campaign to an Interactive Journey
-
Convert the Campaign:
-
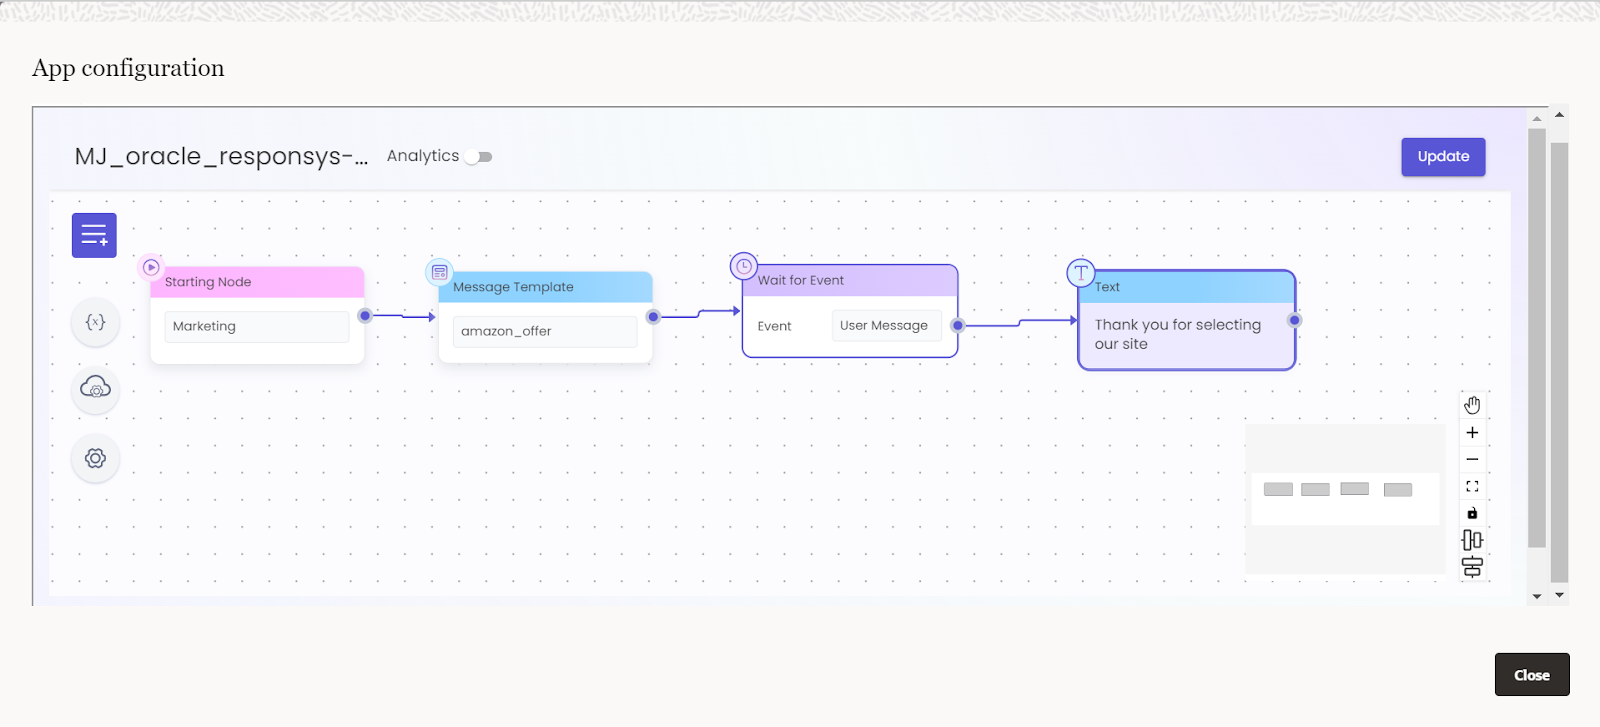
Click the Convert button. This will convert your 1-way campaign journey into an interactive journey.
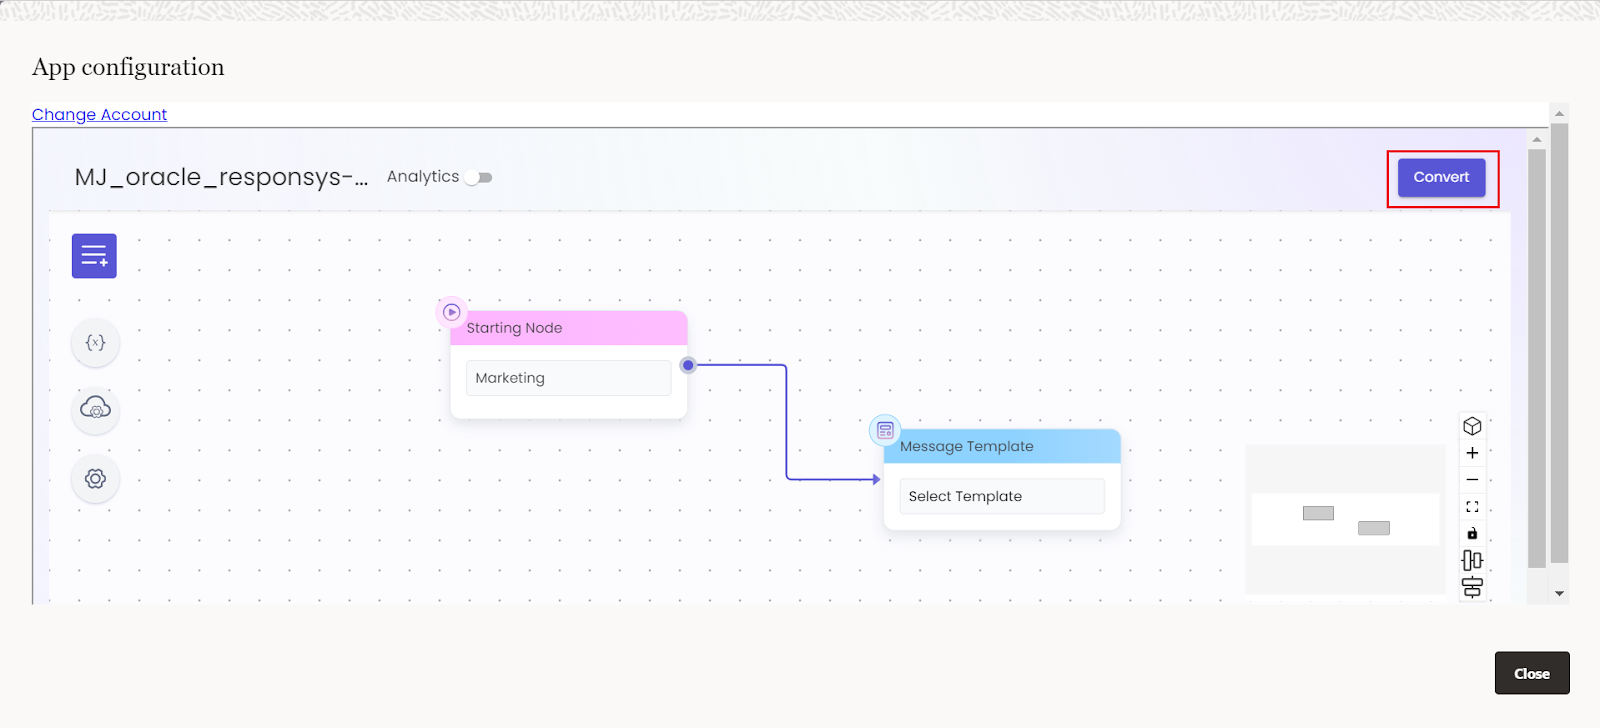
-
-
Default Journey Setup:
- After conversion, the default journey will include the Start Node and the Template Node.
- Do not modify the default nodes as they are necessary for the journey to function correctly.Build the
-
Interactive Journey:
- Now you can edit your interactive campaign journey as needed. When the marketing campaign is triggered (based on the scheduled time), the bot will trigger the interactive journey when customers respond to the campaign.
-
Save the Journey:
-
Once your interactive journey is set up, click on Update to save the changes.
-
For more on creating and managing interactive journeys, visit the Gupshup Bot Studio for detailed instructions.
Step 4: Program Invocation to Send WhatsApp Message
Now, let's configure the program to send the WhatsApp message at the scheduled time.
- Drag the Scheduled Filter or View Block:
- From the Program Designer, drag the Scheduled Filter or View block onto the canvas.
- Connect Blocks:
- Link the Scheduled Filter/View block to the Gupshup service instance.
- Link the service instance to the End block.
- Configure Scheduled Filter:
- Double-click the Scheduled Filter or View block to open its properties.
- Scroll to the Scheduled Filter section and select the filter you created previously (under the Run Filter field).
- Set Frequency:
- Scroll down to the Frequency section and configure the schedule to trigger the program when the specified condition is met.
- For this demo, select 2 minutes in advance from the time specified in the Program Designer. Click Save to update the time.
- Validate the Program:
- Click on Validate to check for any configuration errors.
Step 5: Publish the Program
- Publish the Program:
- After validation, click the Publish tab.
Click on the Publish button.
- After validation, click the Publish tab.
- Confirm Publishing:
- A pop-up will appear asking for confirmation. Click Yes to confirm and publish the program.
- Program Invocation:
- At the scheduled time, the program will invoke the Gupshup app’s service and send the WhatsApp message as configured.
Updated 3 months ago
