Workflows
To understand the functionality of Workflow, it is crucial to know the terminologies. These terminologies are very easy to deal with. It's just a nomenclature through which the components of the tool are being addressed. So, let's dig deeper into this document and know what the plugin has.
Workflow
A workflow is a set of steps that are connected logically to meet an objective. it is configured to automate your task.
Each workflow has to have at least two elements, Trigger and Action.
You can create more simple or complex workflows as per your use case by using Gupshup Workflow Automation plugin. For example, when an order is placed on WooCommerce store, Send WhatsApp message to customer on his phone number .
Trigger
A trigger is an event or an occurrence that kick-starts step(s) configured in a workflow. It is a mechanism that initiates the execution of a workflow. It is basically a trigger or starting point of workflow automation which tells, “If this (event of your choice) happens, trigger automation”.
Some of the most popular triggers are New Order, Order Status and Order Cancel and so on.
Action
An action is a user-defined step that performs a task whenever a trigger event occurs.
Referring to the workflow use case discussed above Workflow section, the first part i.e. " when an order is placed on WooCommerce store" is your trigger and the second part "... Send WhatsApp message to customer on his phone number " is an action.
Create Workflow
To create a workflow with a WhatsApp message template action in our plugin, follow these steps:
- First go to Gupshup plugin, and click on Workflow menu item
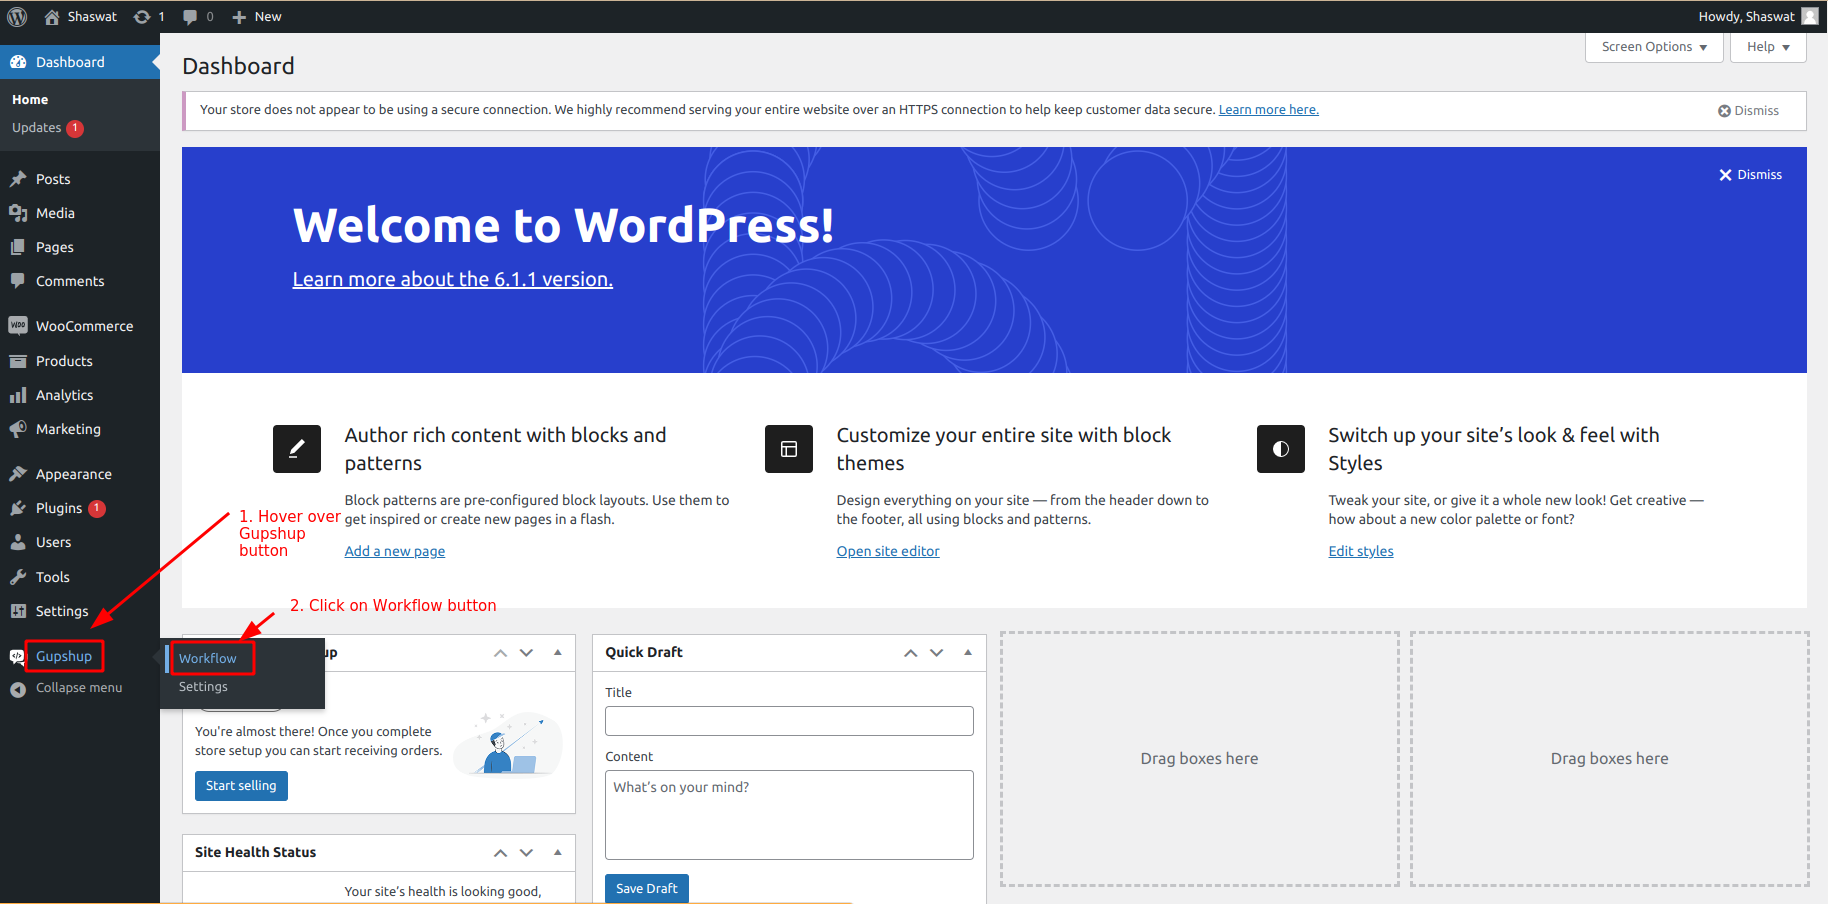
Workflow Menu item
- Clicking on the Workflow Menu item, you will be redirected to the Workflow’s Landing Page.
- On the Workflow landing screen, Create a new workflow by clicking on Create New Workflow button
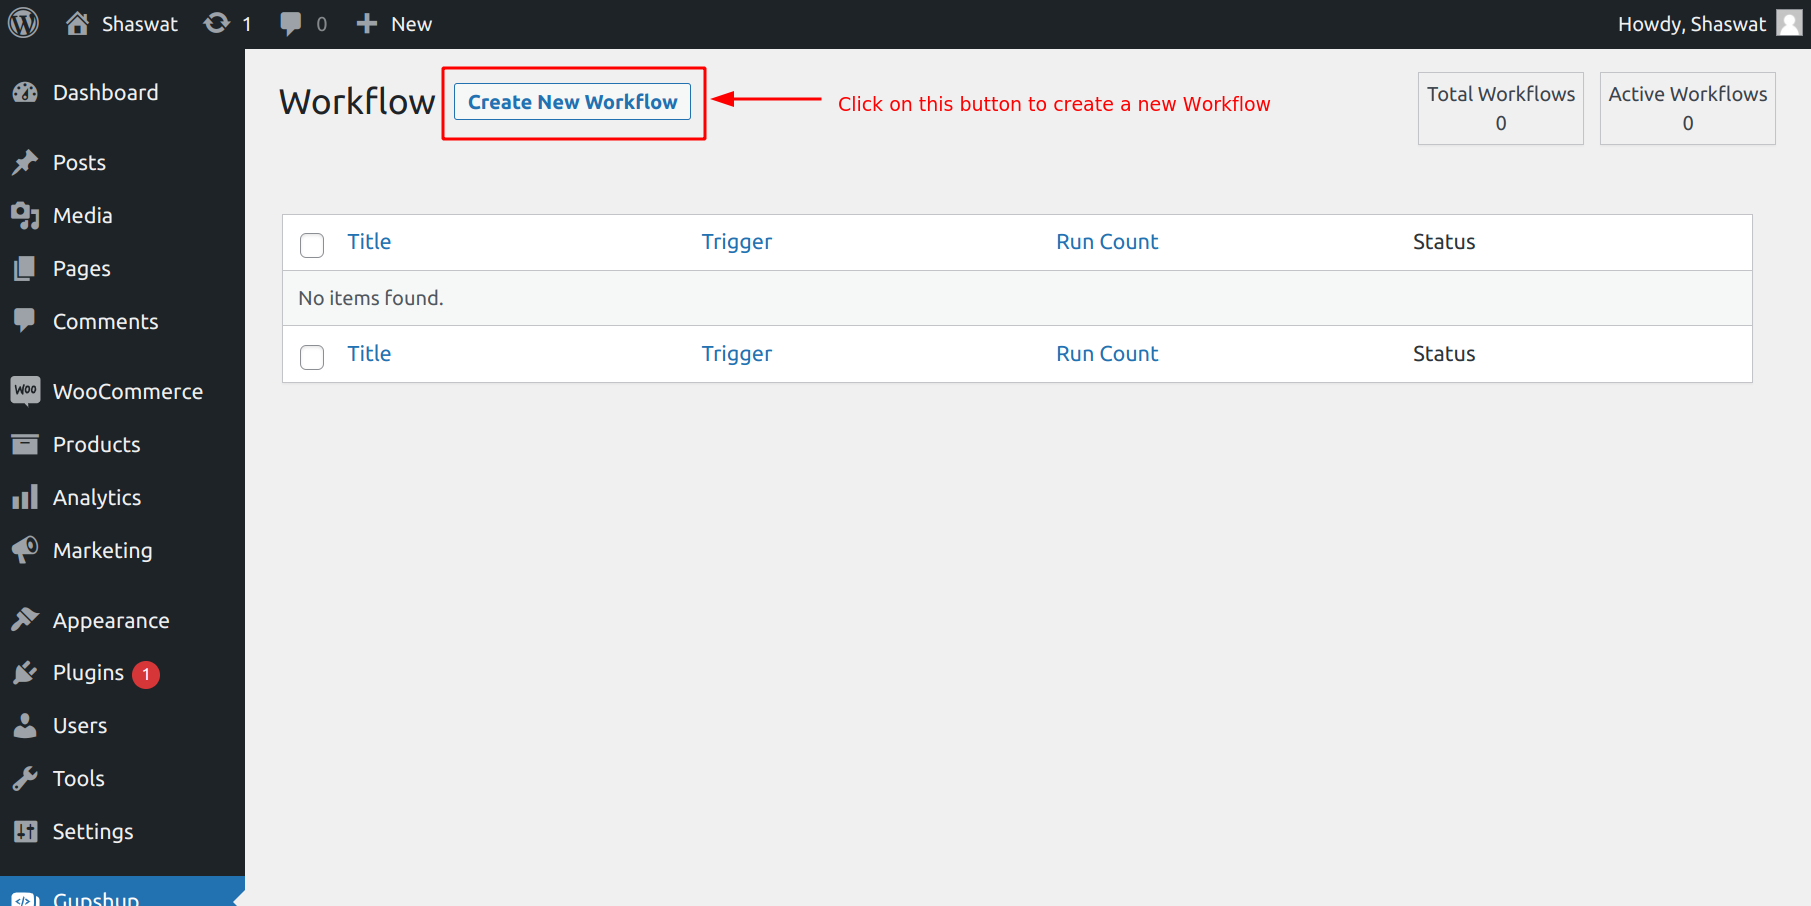
Create New Workflow
- Next, give your workflow a title by filling out Title field. This should be a descriptive name that will help you and other users identify the workflow later on.
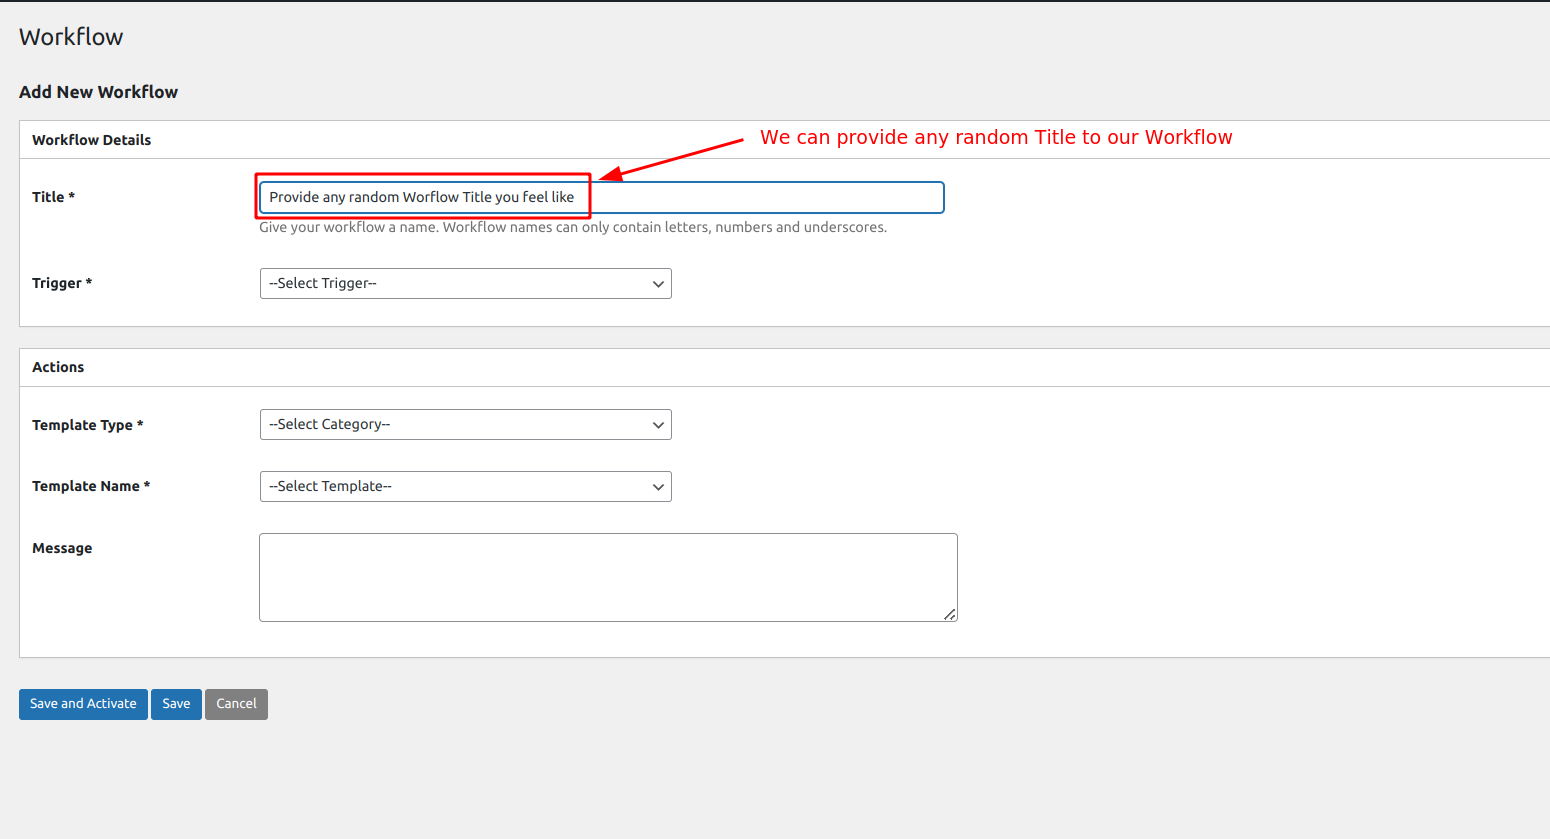
Title of the workflow
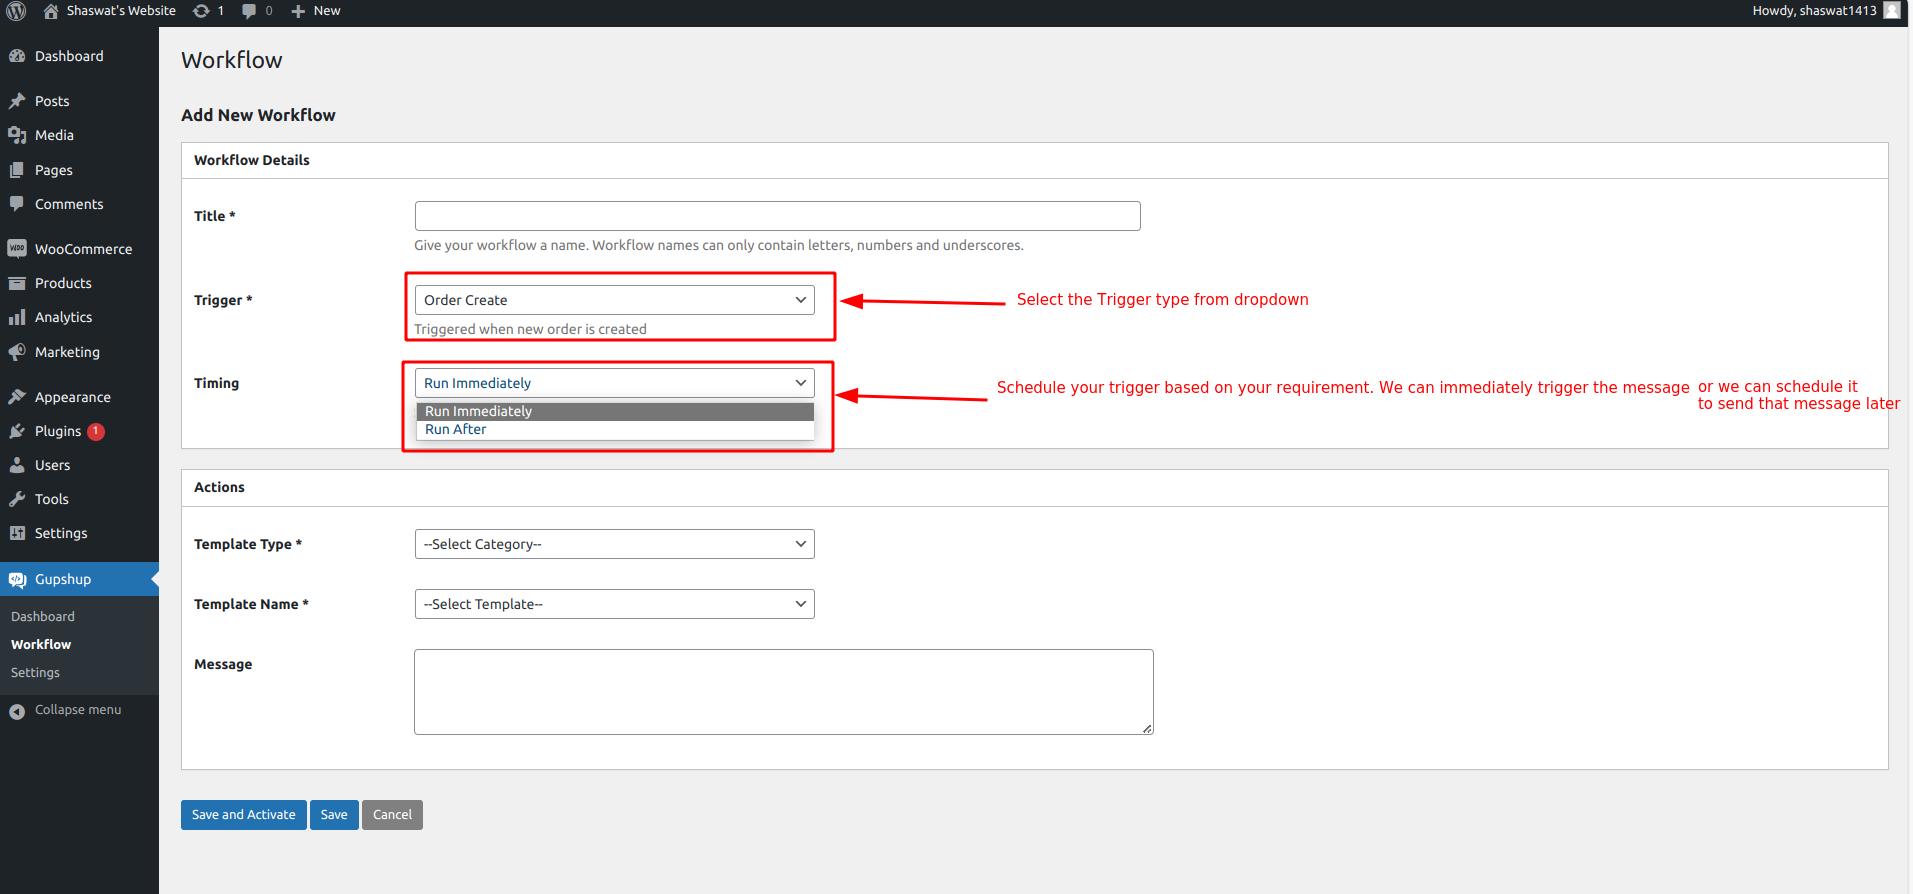
- After you've named your workflow, select a trigger that will start the workflow. In this case, you want the trigger to be something that will cause the WhatsApp message to be sent. Here you have the following triggers available in gupshup plugin.
- Order Create : On enabling this, a message is sent to the user once he/she creates an order
- Order Status Updated : On enabling this, a message is sent to the user once the shop owner updates the status of the order. For example : If in case, the shop owner updates the status from Processing to On Hold, a message is sent to its user based on the workflow defined
- Order Processing : On enabling this, a message is sent to the user once the shop owner updates the status of the order placed to Processing.
- Order On-Hold : On enabling this, a message is sent to the user once the shop owner updates the status of the order placed to On hold.
- Order Completed : On enabling this, a message is sent to the user once the shop owner updates the status of the order placed to Completed.
- Order Cancelled : On enabling this, a message is sent to the user once the shop owner updates the status of the order placed to Cancelled.
- Order Refunded : On enabling this, a message is sent to the user once the shop owner updates the status of the order placed to Refunded.
- Order Delete : On enabling this, a message is sent to the client once the order is deleted by his/her shop owner.
- Abandoned Cart : On enabling this, a message is sent to the user if in case he/she has not placed the order but has filled in all the details including his/her Whatsapp number. This message will be sent to the user after the time which was defined while creating the workflow of this particular trigger type. Let's say, a Workflow was created of this trigger type and set the timing as 5 minutes, then in case their customer is left with placing the order after providing all the details, a message will be sent to their Whatsapp number as a reminder any time within 20 mins and will ask the customer to continue with placing the order.
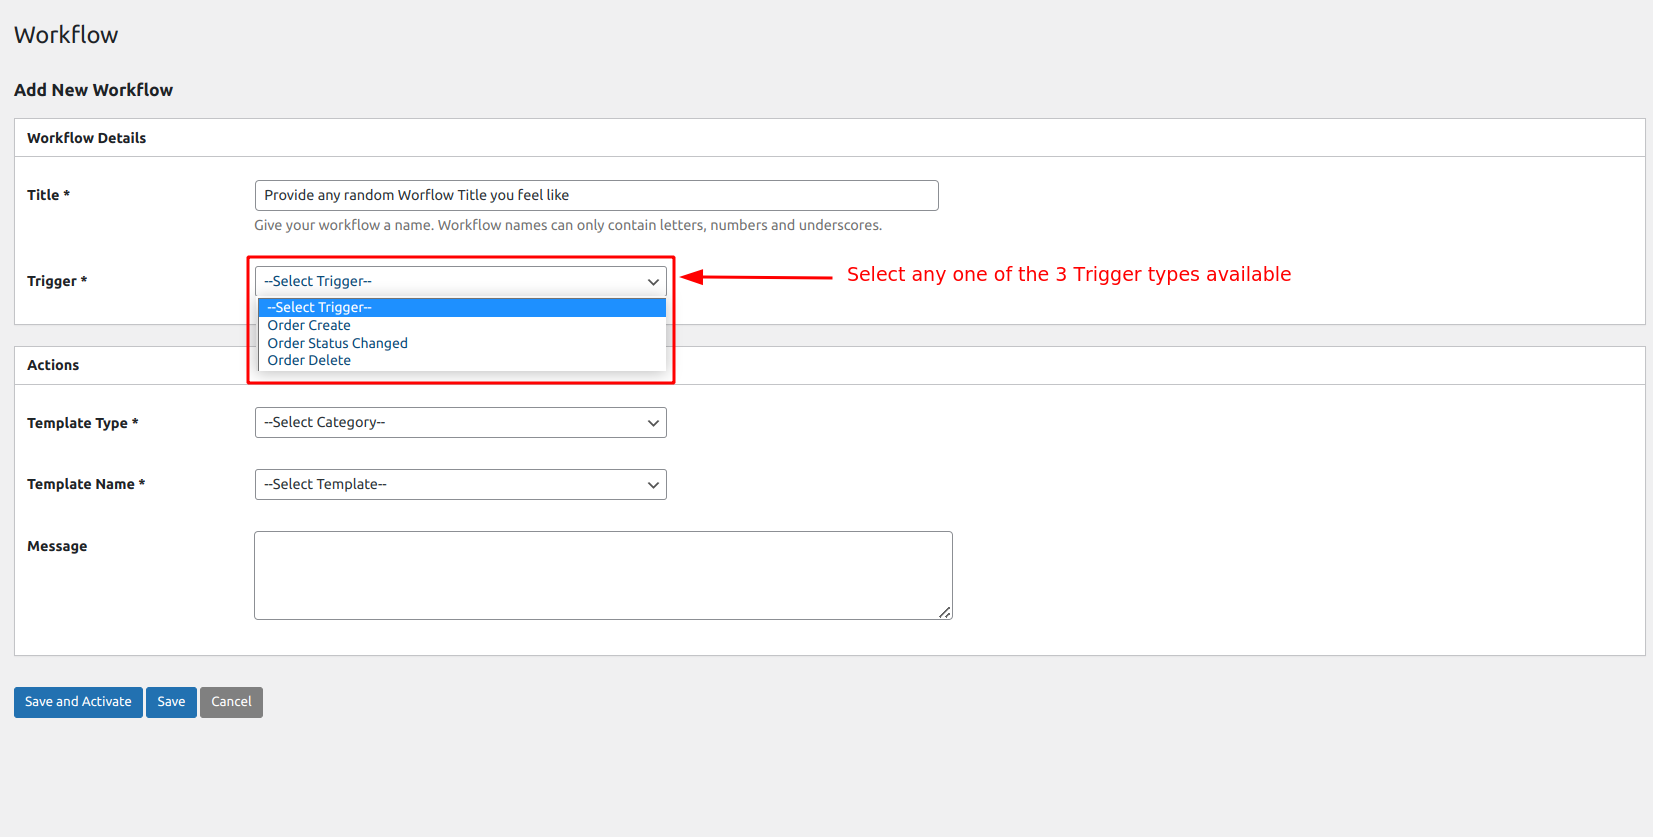
Select Trigger
- After we select the Trigger type, you will see a timing field where you can make the workflow to trigger as soon as the action is performed i.e continue with Run Immediately which is selected by default for this field / can opt to trigger it after some time. In order to do so, you need to click on the drop down button against Timing field and select Run After.
- Specify the Age as per your requirement. Value on this field will decide after what time the shop owner want the workflow to trigger whenever the action is performed.
Add age
- Once you have selected your trigger, it's time to add the action to send WhatsApp message template.
- Template Type: Choose template type Text/Image/Video or Document.
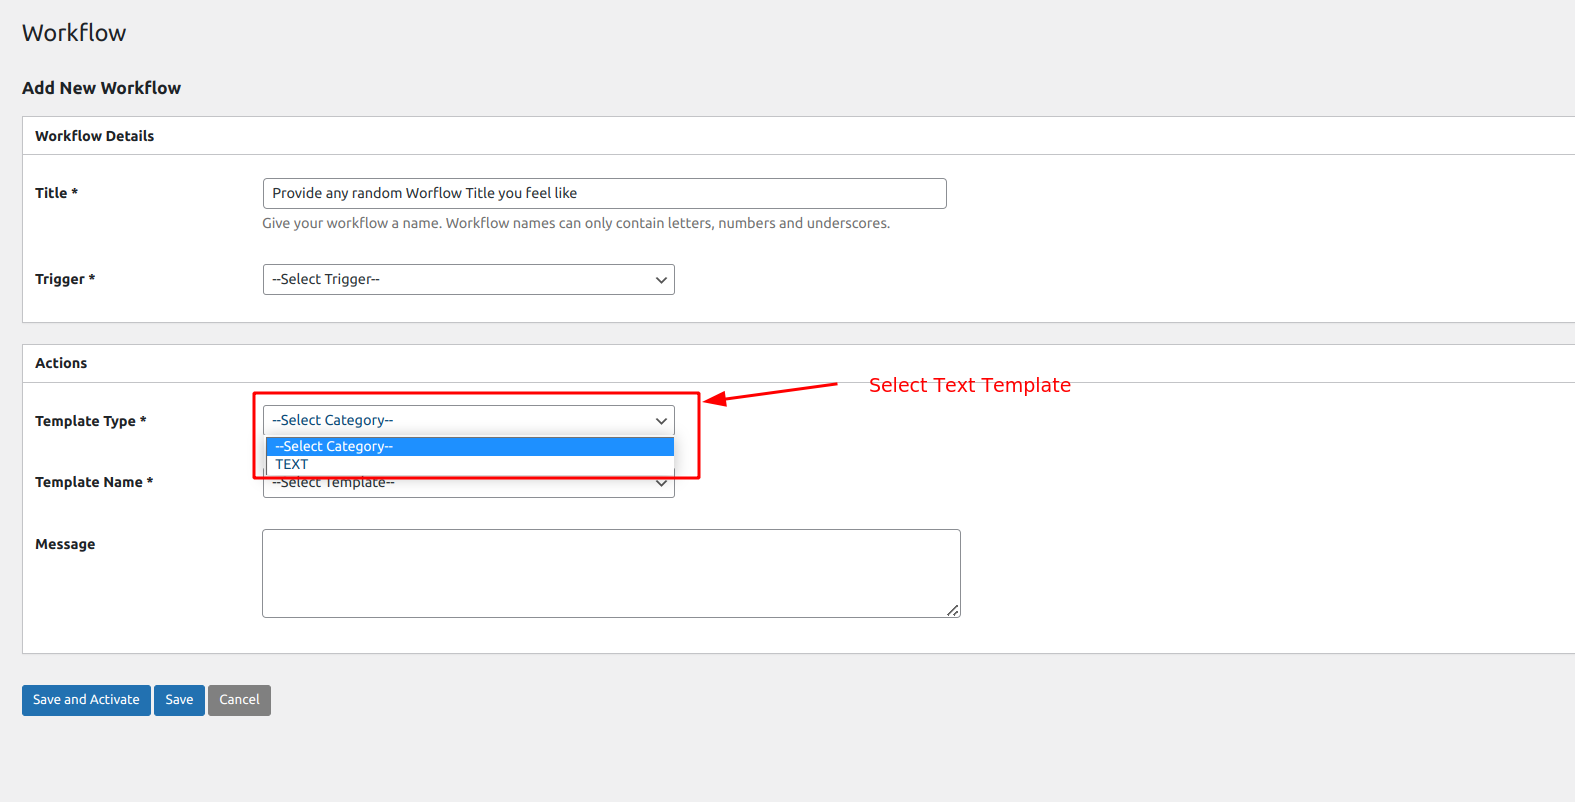
Template Type
| Type | Supported Content-types |
|---|---|
| Text | English and Unicode characters (max. 1024 characters) |
| Image | image/jpeg, image/png |
| Video | video/mp4 Note: Only H.264 video codec and AAC audio codec is supported. |
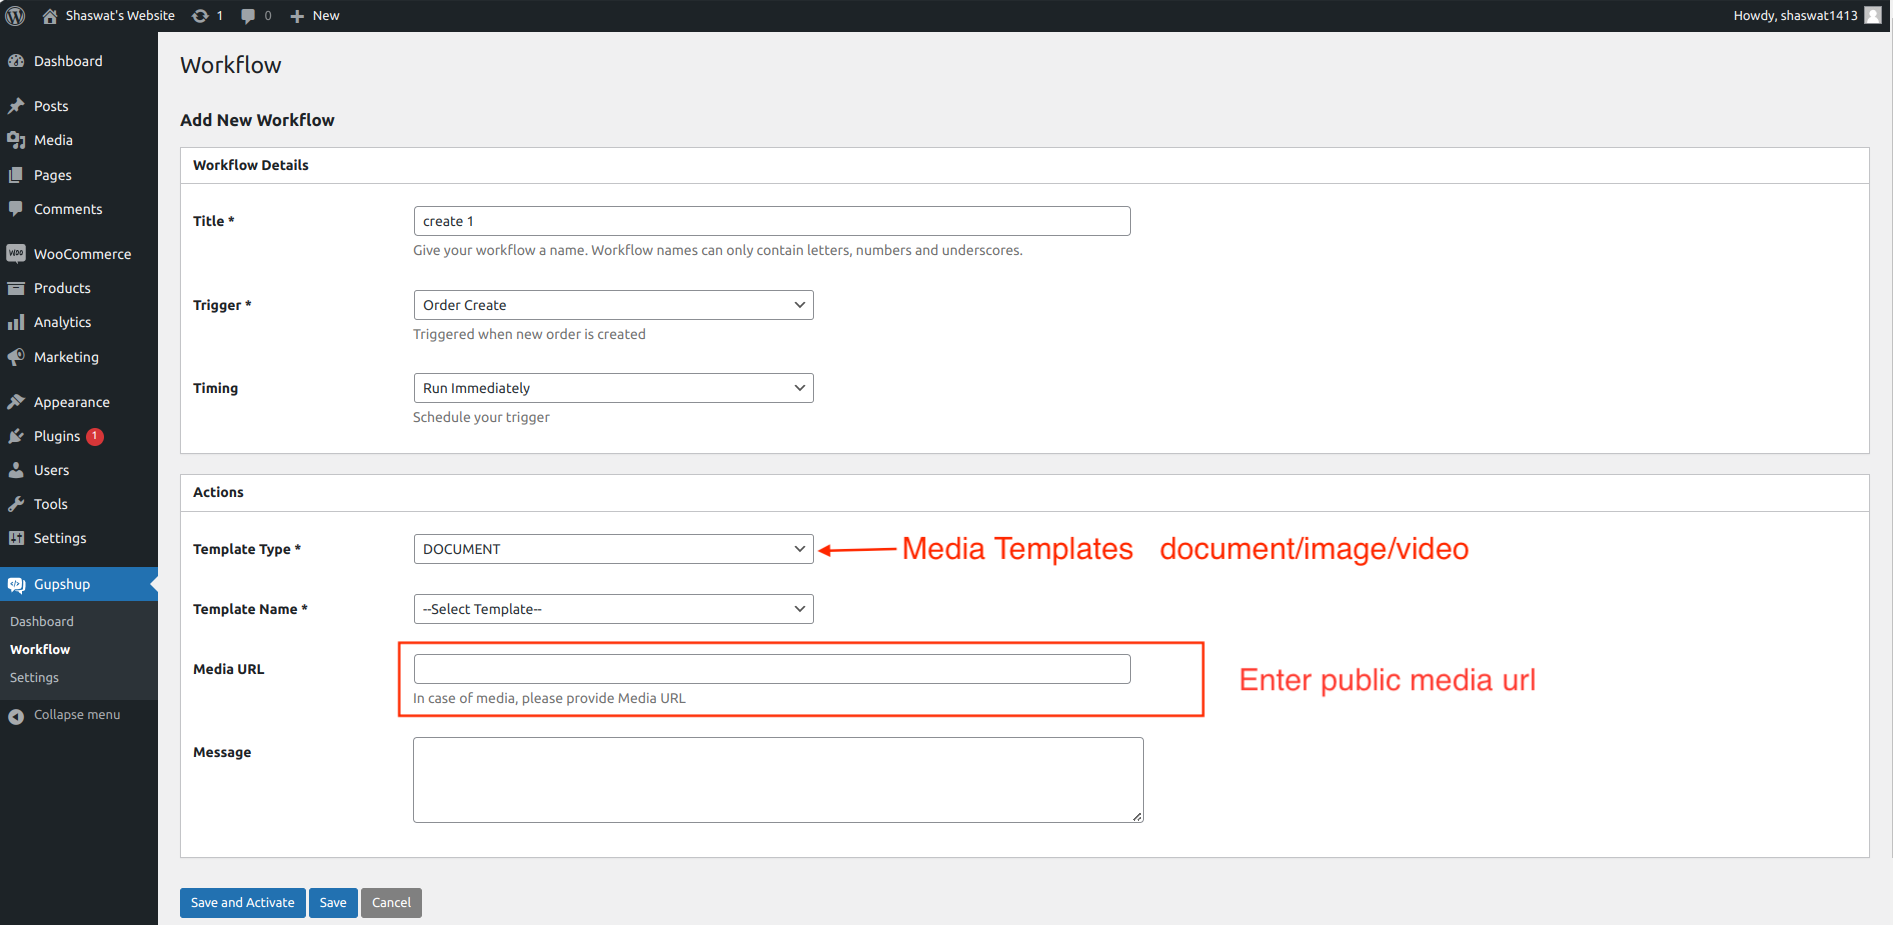
Media messages
- Note: Currently we support media messages only public url
- Template Name: Select the Template Name. Based on the Template type selected, a list of all approved templates in your Business Whatsapp No will be populated in dropdown.
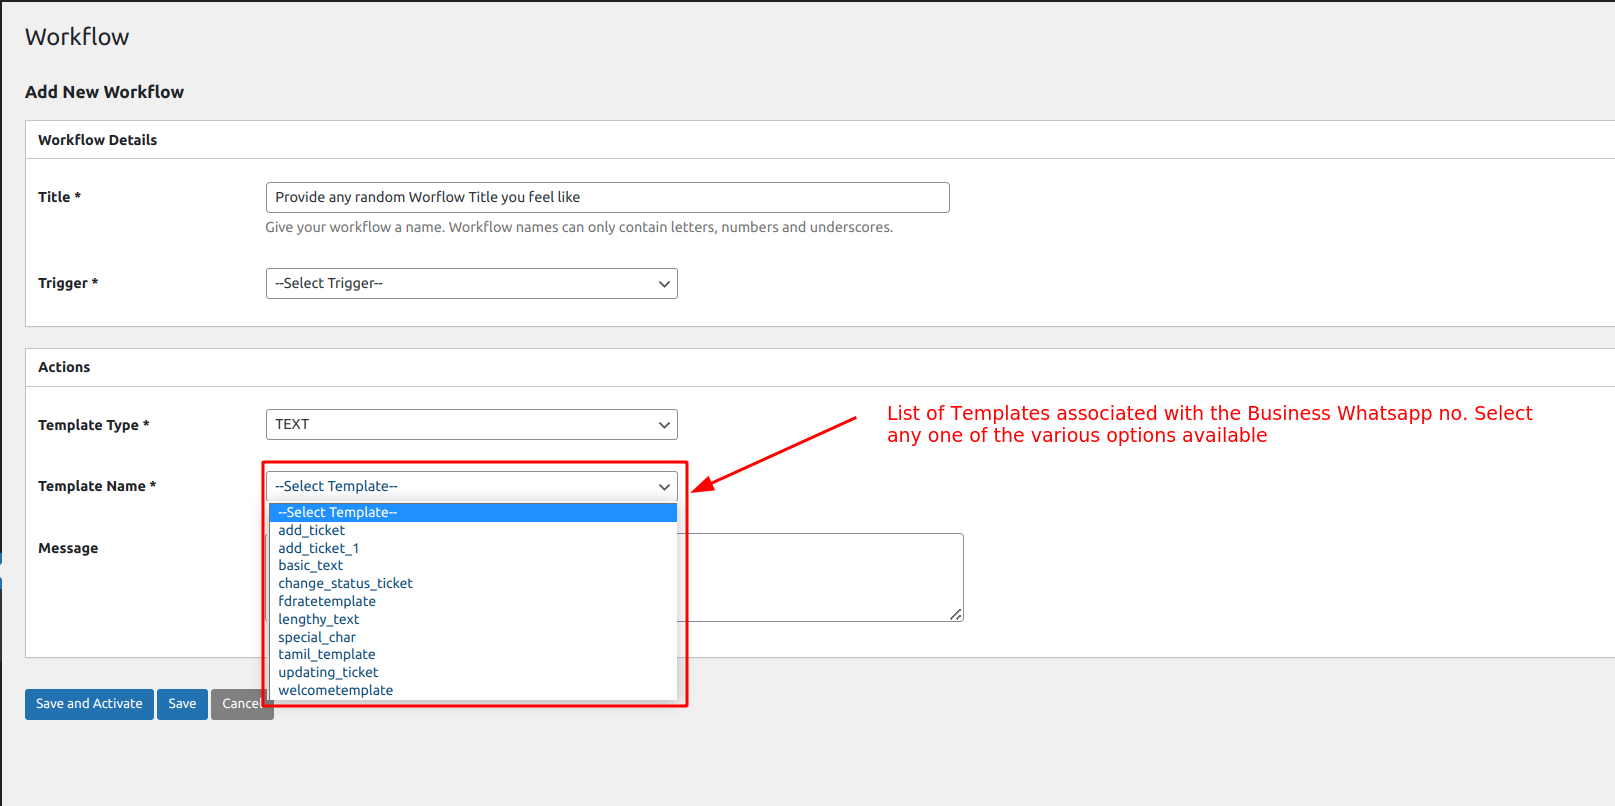
Select Template Name
- Based on the template selected, you will be able to see the preview of the message in the Message Section.
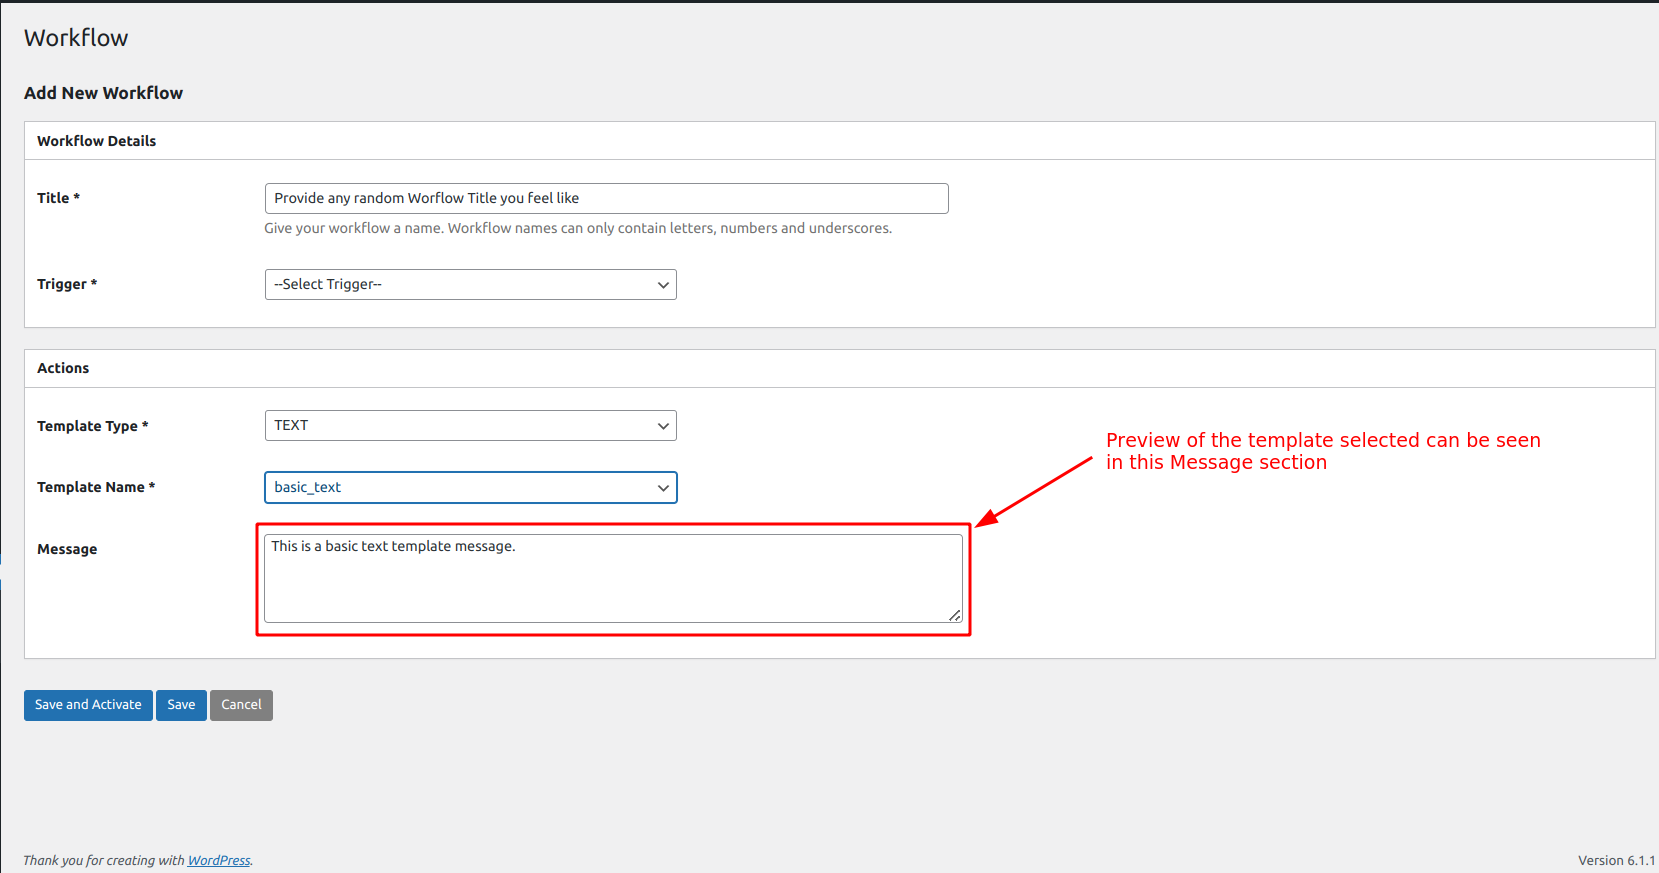
Message Preview
- Body: If the template has got some attributes associated to it, you will be able to see the Body section.
- Static Inputs in the Body section: If in case, we manually input values, then all the users will get the same message with the same attributes we input manually. For example, I have selected change_status_ticket template and in the body section, if I want I can add static inputs in the section as shown in image below.
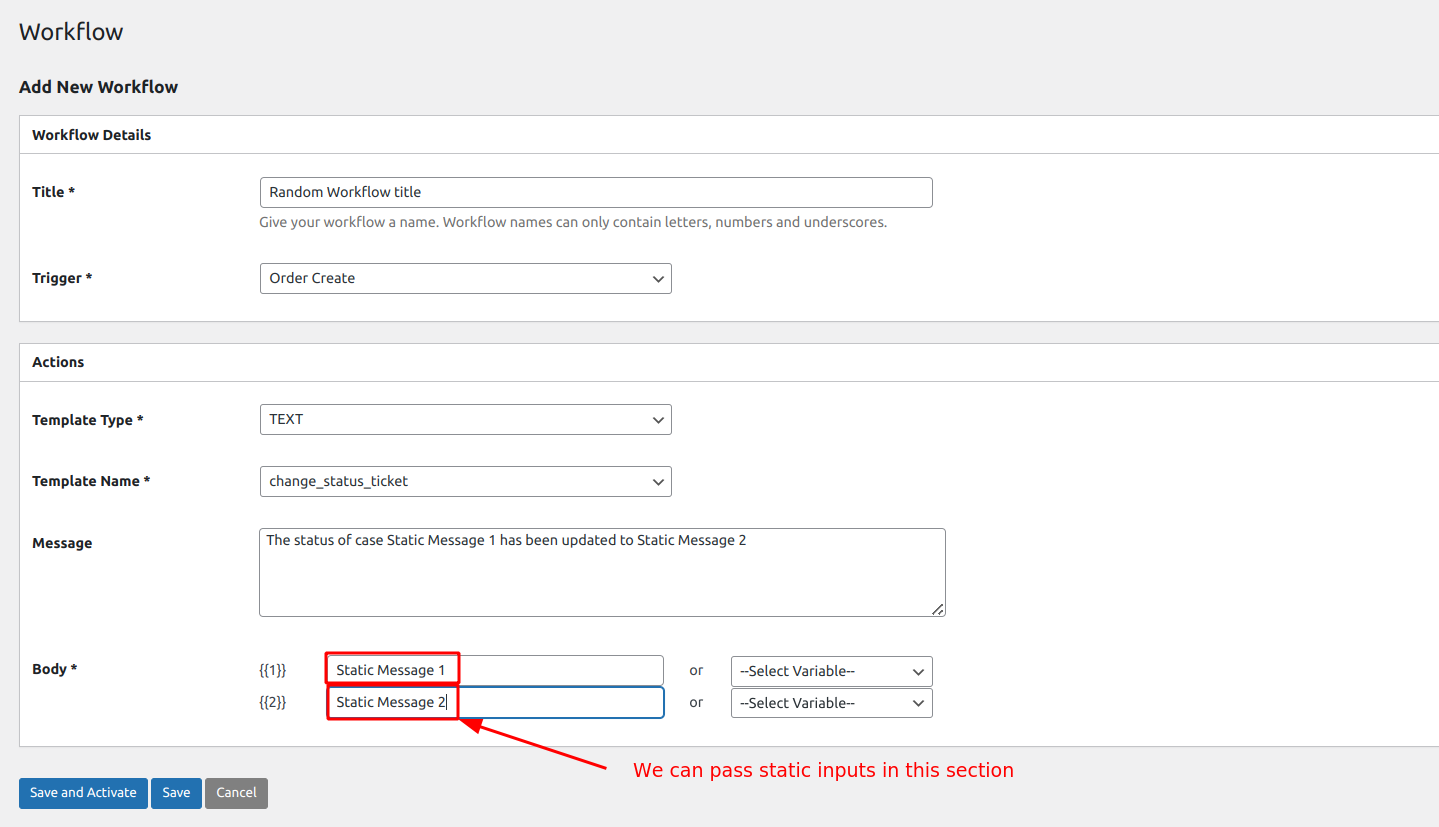
Static text variables
. Dynamic Inputs in the Body section: If in case, we dynamically input values, then the users will get the message based on the attribute selected. The values will keep changing based on the attribute selected. For example : I have selected Order ID as the first variable / attribute and Order Status as Second Variable.
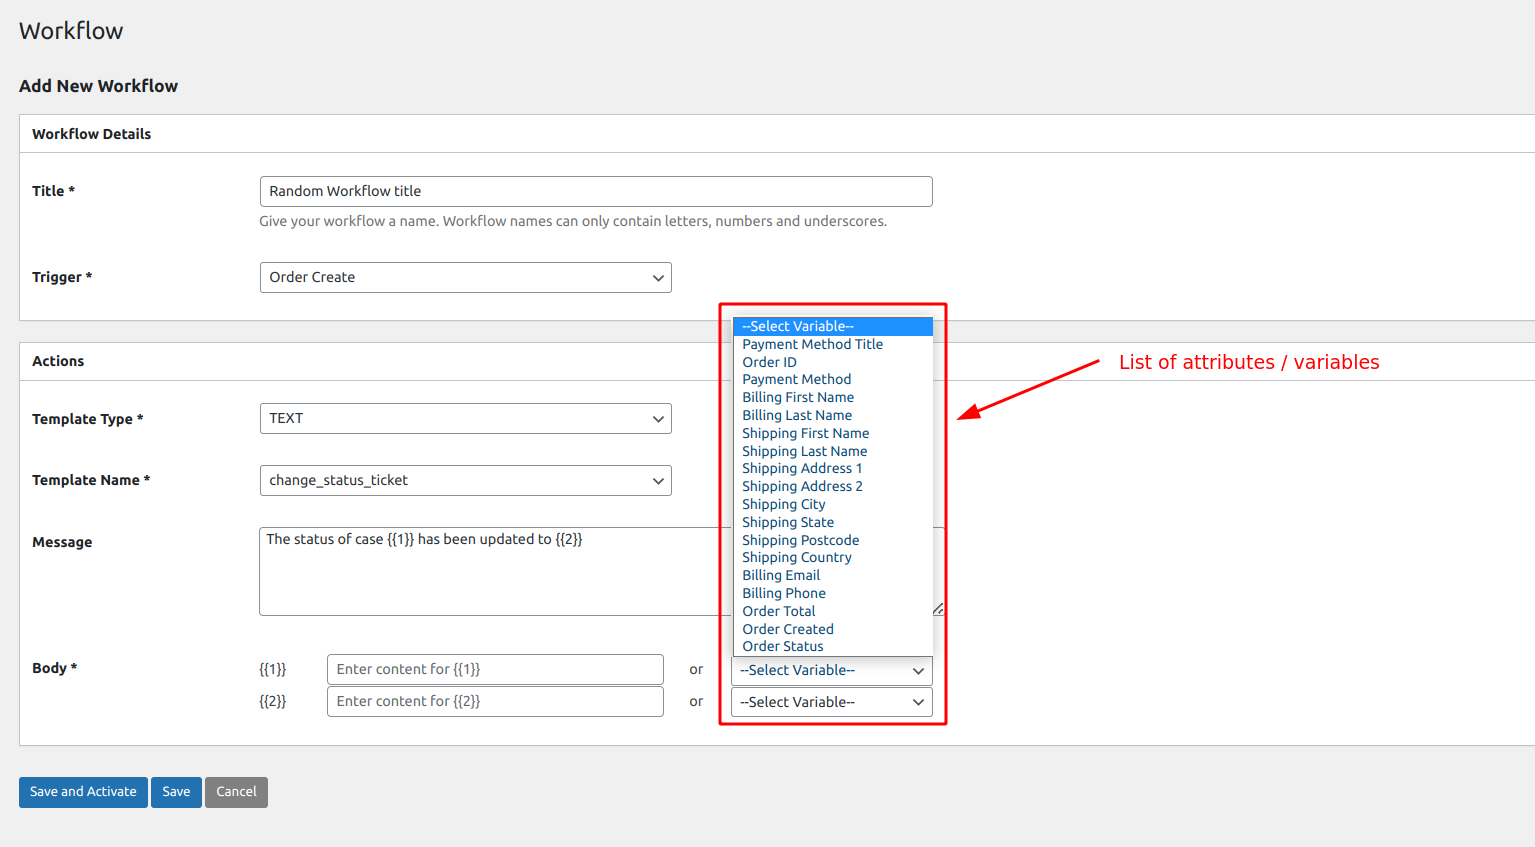
Dynamic input fields
- After filling out all the mandatory fields, we can Save or Save and Activate the workflow.
- Save : If we click on Save button, then the Workflow won’t activate
- Save and Activate : If we click on Save and Activate button, then the Workflow is Activated as well.
The difference can be seen in the image below
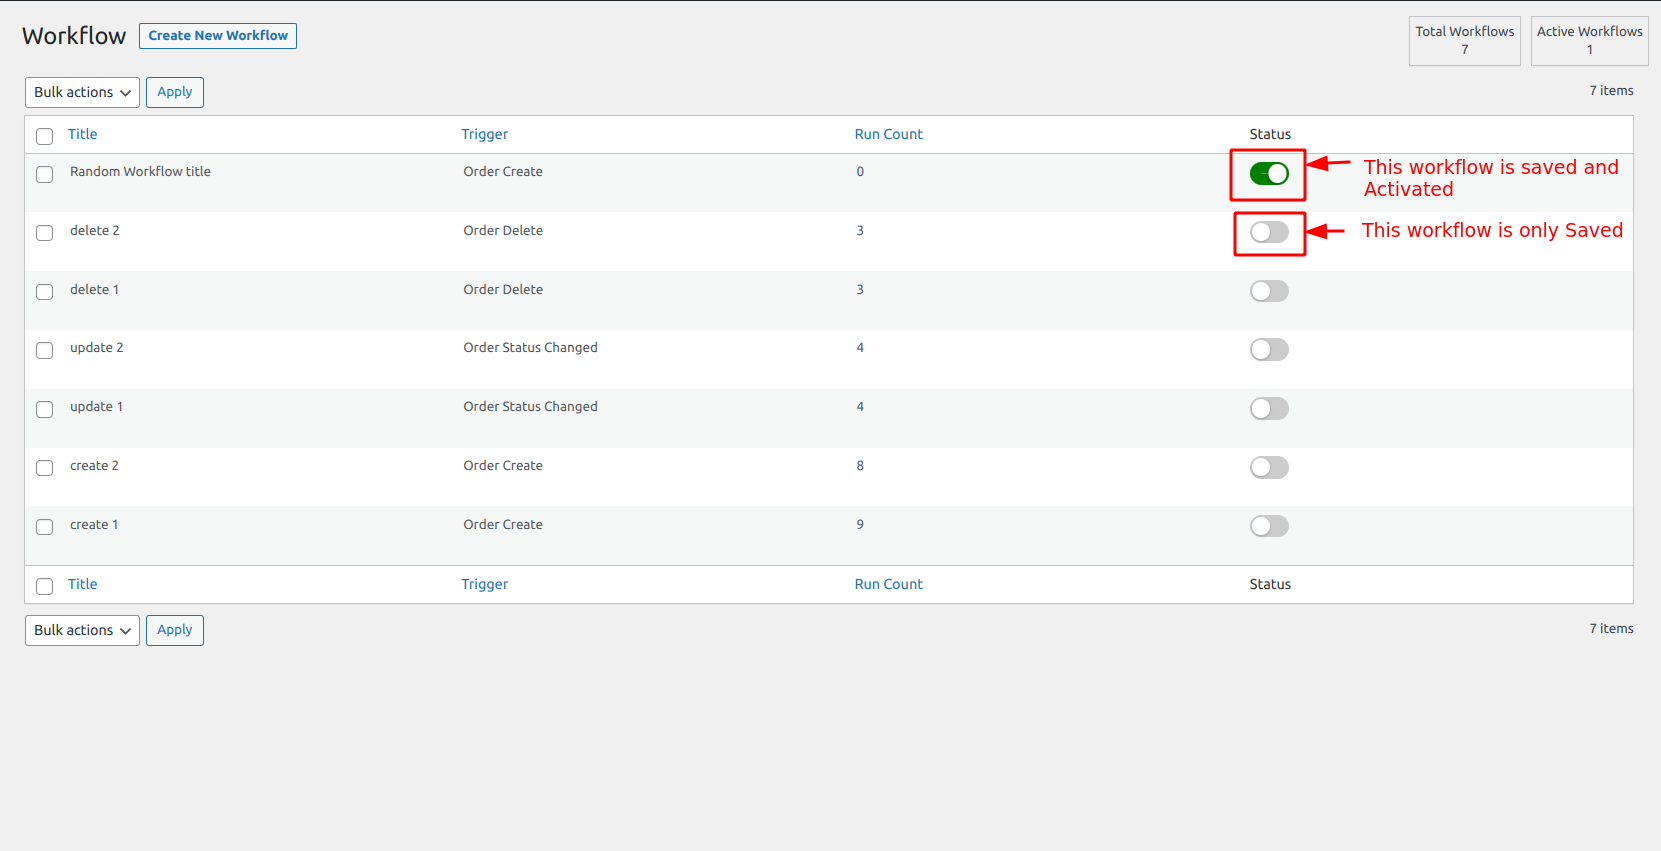
Active/Deactivate workflow