Gupshup Partner Onboarding via Meta's Tech Provider Program
AttentionThis guide is no longer maintained from 31st Jan 2025. Please refer the updated one here.
Target Audience
The target audience for this document is Tech Providers (i.e., ISVs who want to Sign-up/operate as Tech Providers)
Objective
This document will help you understand
- Steps to sign up as Tech Provider on Meta
- How to create a Meta App
- How can you create a joint solution ID
- Steps to sign up as an ISV (Tech Provider) on Gupshup’s Partner Portal
- How to register with the previously created Solution ID and Solution Name
NoteTo know more about the benefits of becoming a Tech Provider while working with Gupshup (Meta’s Solution Partner), reach out to your regional CSM or write to us at [email protected].
Steps to Sign Up as a Tech Provider
Understand how you can sign up as a Meta Tech Provider as well as the impact of the Tech Provider Program on the Gupshup partner portal.
Tech Provider Onboarding Steps
Step 1: Create a Meta Business Account
Create or use an existing Meta Business Account to ensure all the necessary business details (address, website, email, etc.) are provided during the verification process.
Note
- Your business is limited to a maximum of two Meta Business Accounts.
- Make sure all information is accurate to avoid rejection during business verification. Onboarding WhatsApp services may fail if your business account is not in good standing with Meta.
- For updated article refer here.
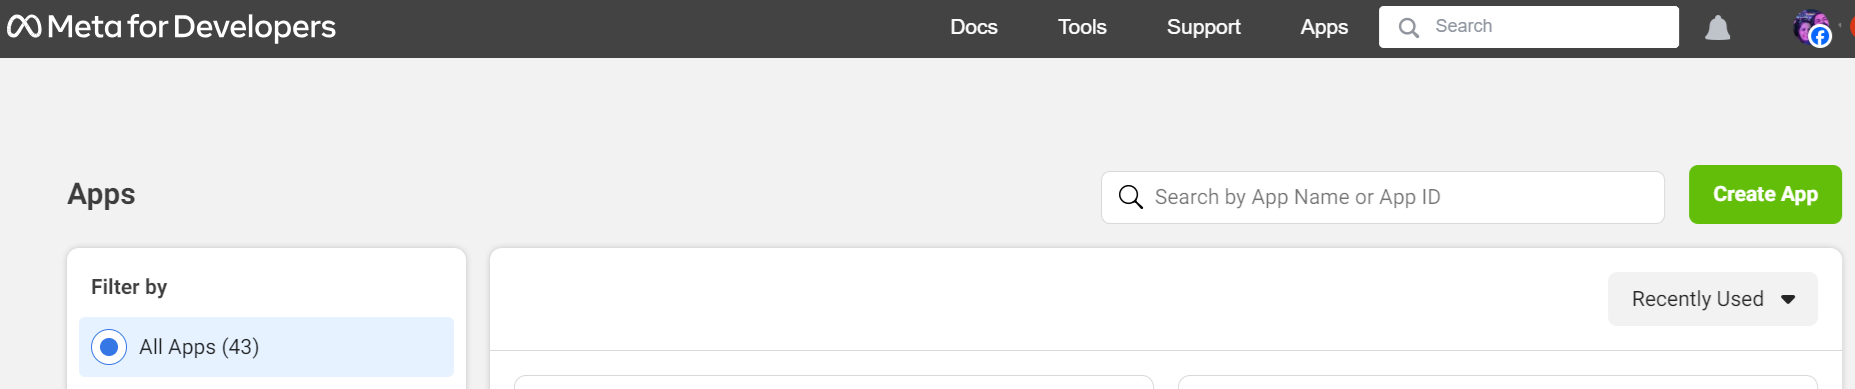
Step 2: Create a Meta App
Navigate to My Apps panel, create a new business app, and connect it to your Meta Business Account. Alternatively, if you have an existing app, you can directly link it to your Meta Business Account by loading it in the App Dashboard and skipping to step 3.
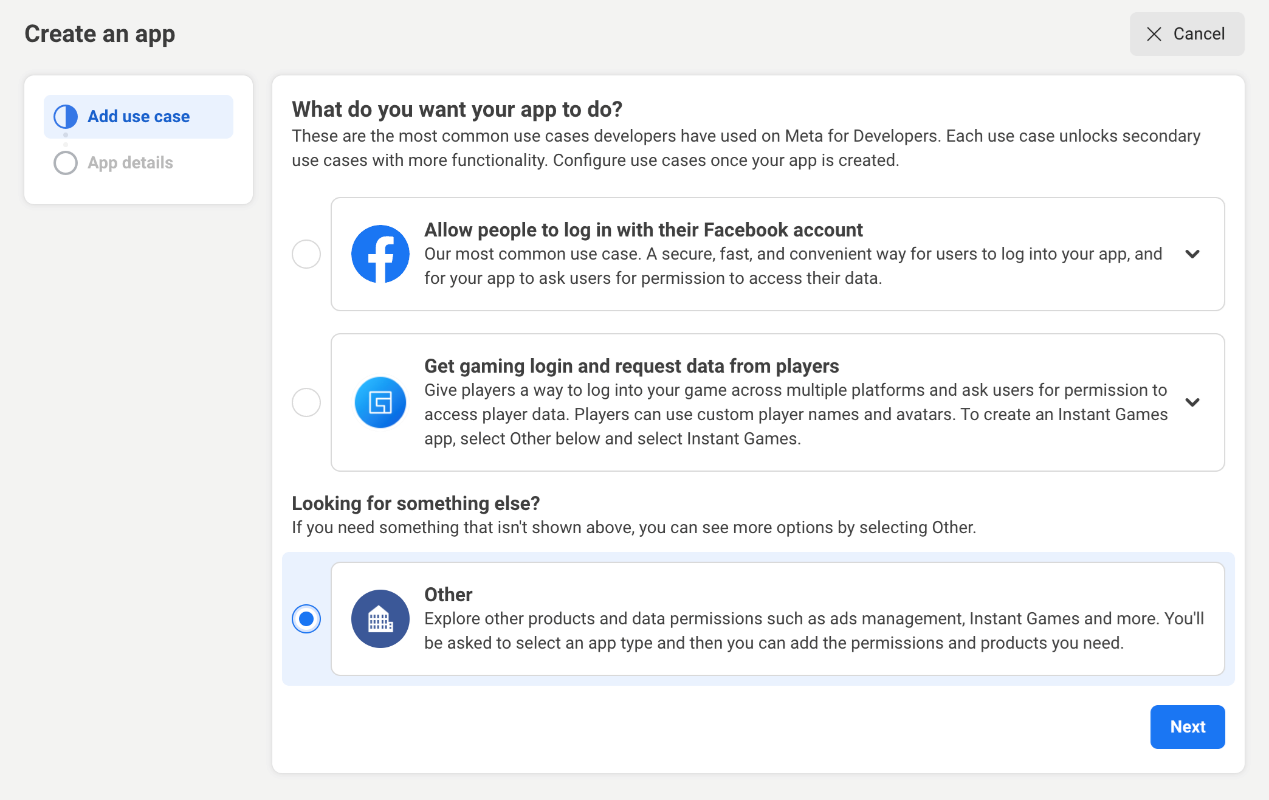
Upon app creation, if you can't develop a business app, select Other > Next.
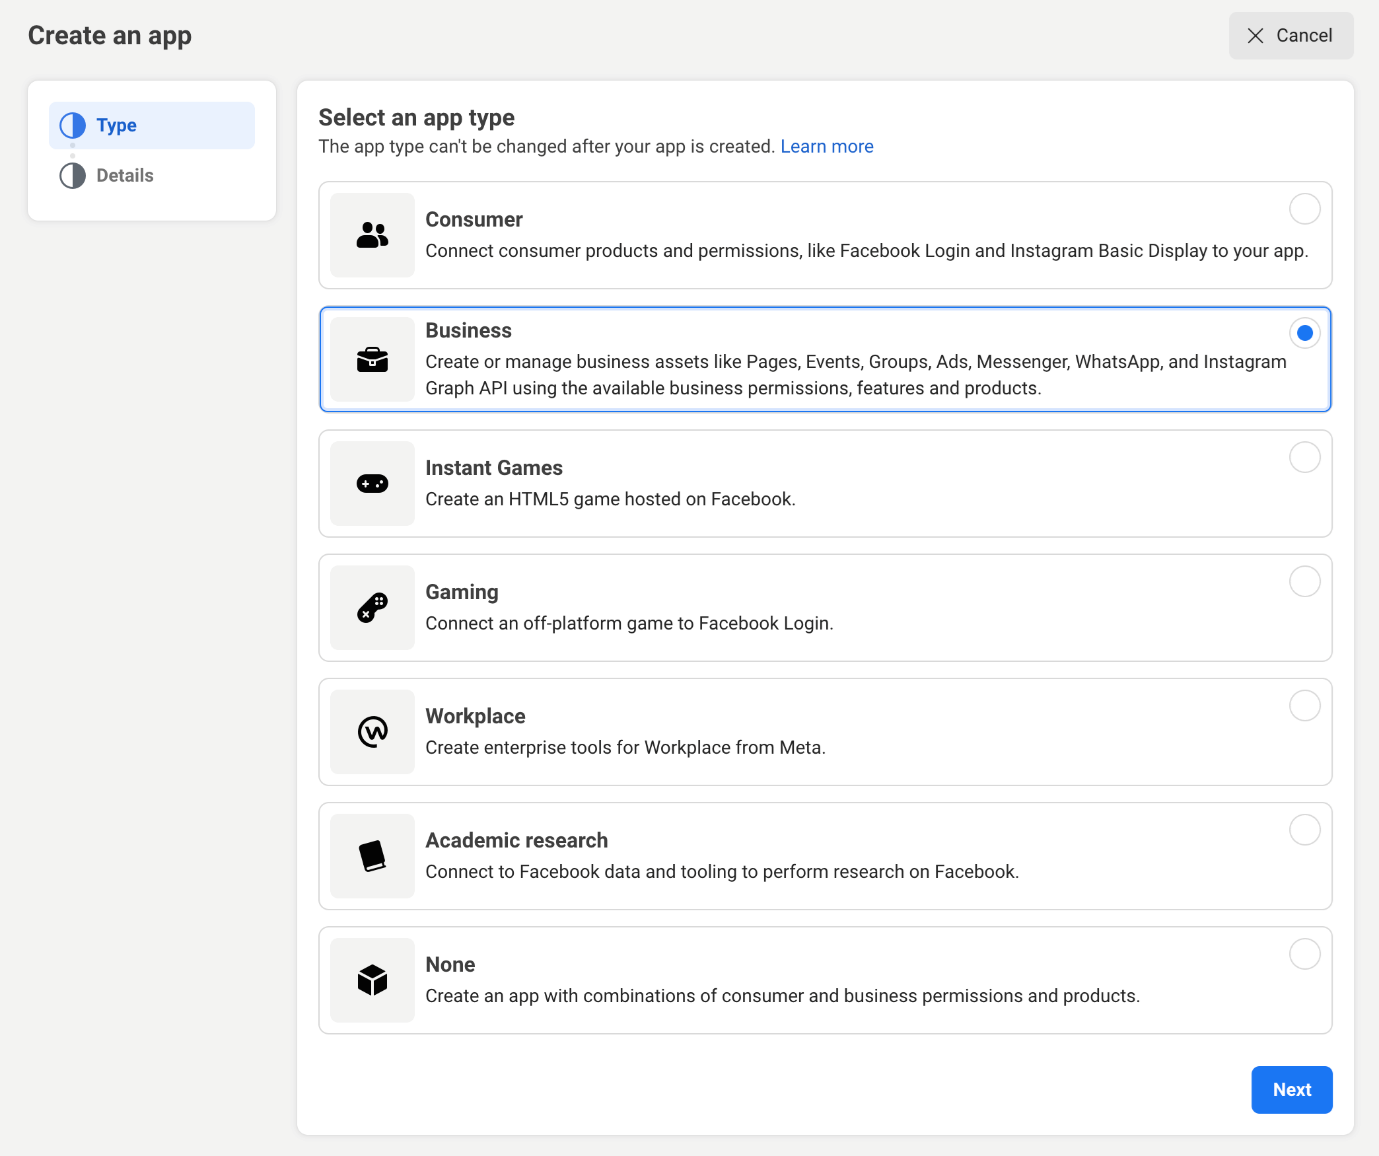
Select Business.
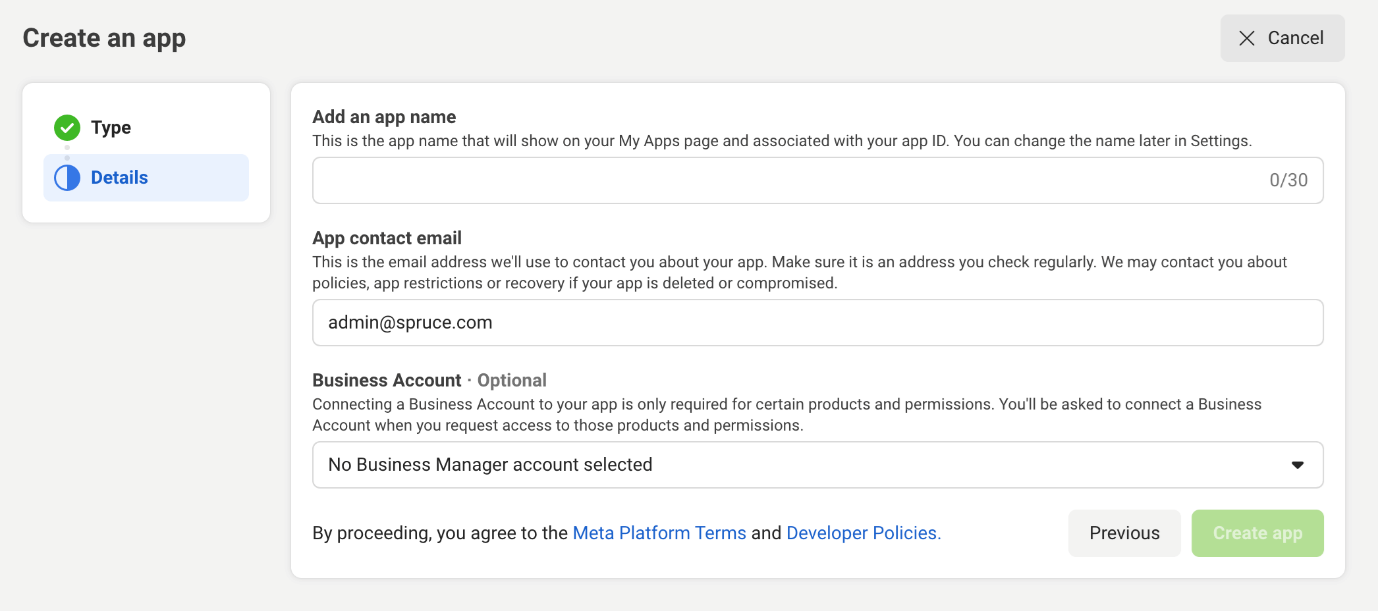
Fill in the necessary information and select the Business Account from the dropdown. If you are unable to move past this step, try setting the Business Account dropdown menu to No Business Manager account selected and proceed. You can set it up later.
After creating the app, go to App Settings > Basic and update your app's domains and icons under the basic settings tab.
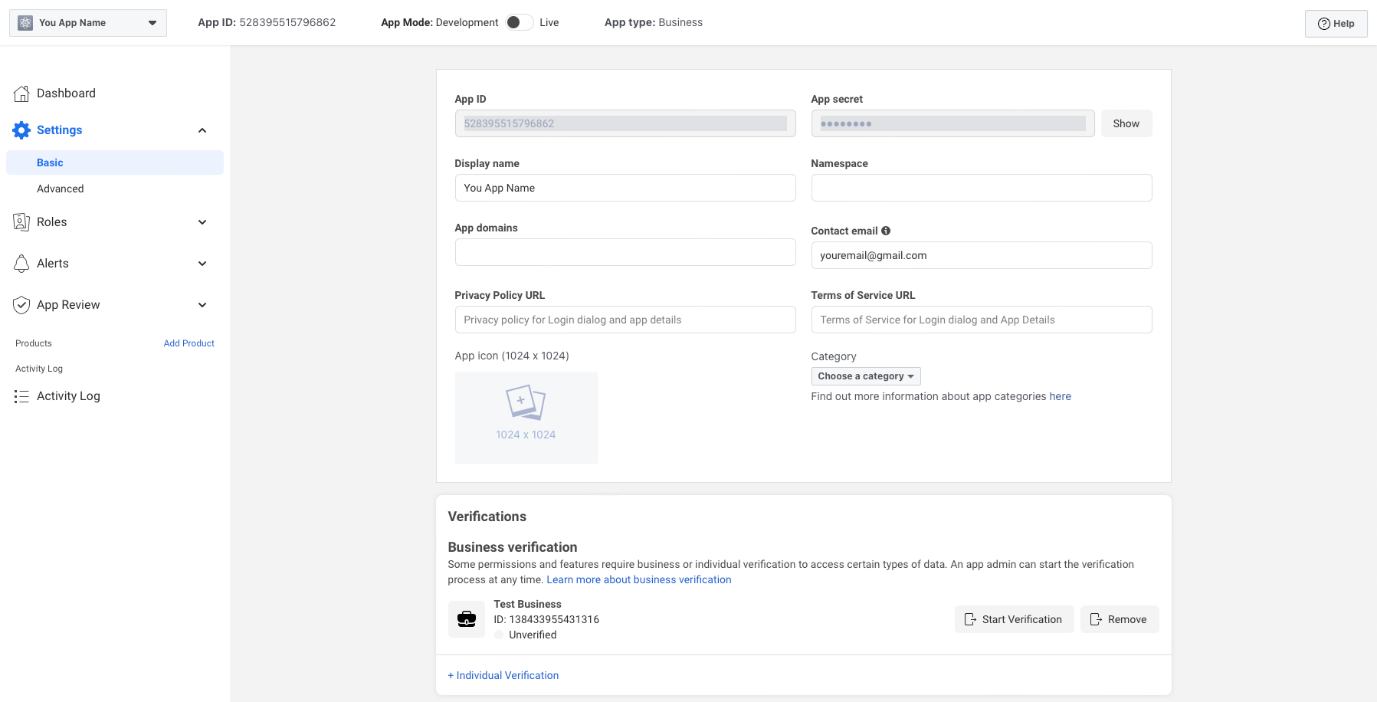
Add your privacy policy and terms of service URLs, which will be visible to users onboarding through Embedded Signup once we do Joint Solutions. Select Messaging
Also, initiate the business verification process as mentioned in the screenshot and save changes.
Read how to verify my Meta Business Account
Step 3: Add the WhatsApp Product
From your App Dashboard, add the WhatsApp product.
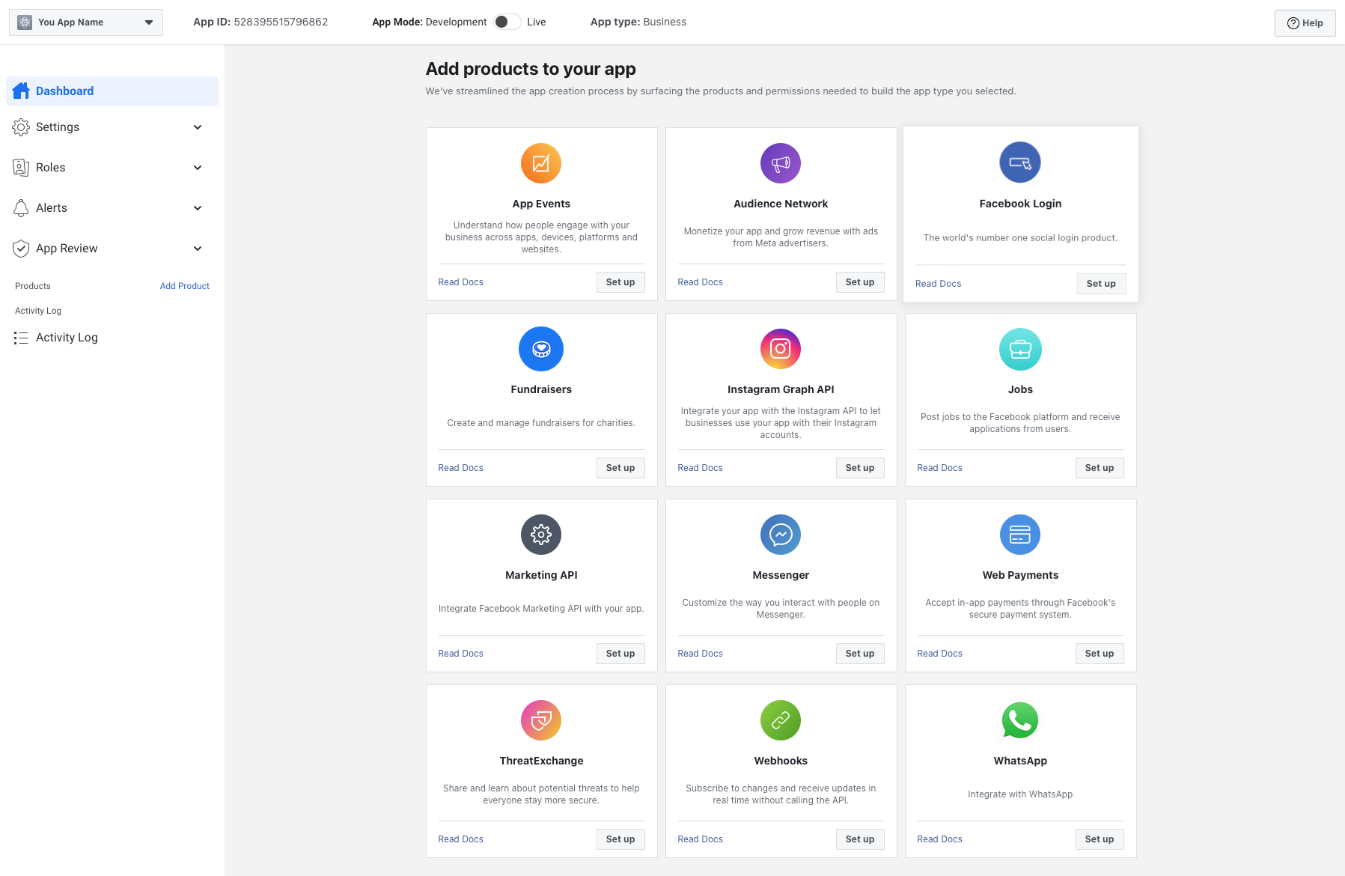
You will get redirected to choose your business account (if not selected previously) and agree to the Facebook and Meta Hosting Terms to continue.
Ensure you agree to Meta’s Tech Provider Terms of Service by clicking the Start Onboarding button in the App Dashboard > WhatsApp > Quickstart product panel when you add the WhatsApp product to your app.

Link to Meta’s Business Messaging Tech Provider Terms
In case you have added the product to your app and didn't accept the terms, you must return to Quickstart to accept the terms.
Step 4: Initiating Solution Request
Contact your Gupshup CSM and work together to determine:
- A solution name. The solution name should be agreed upon by both you and Gupshup to ensure it is distinguishable from other solutions.
- Details needed for Initiating Solution Request Gupshup recommends that Tech Providers initiate the solution request with Gupshup app ID i.e. 2281283925530161
- Partner Portal Setup for Tech Provider Once you have an approved Solution ID, sign up as a partner on the Gupshup partner portal, providing your Solution ID
- Anything else, such as contracts, service level agreements, services provided, billing processes, etc. This decision will be made jointly by you and Gupshup based on your agreements with Meta.
- Navigate to the App Dashboard > WhatsApp > Partner Solutions panel and click Create a partner solution button.
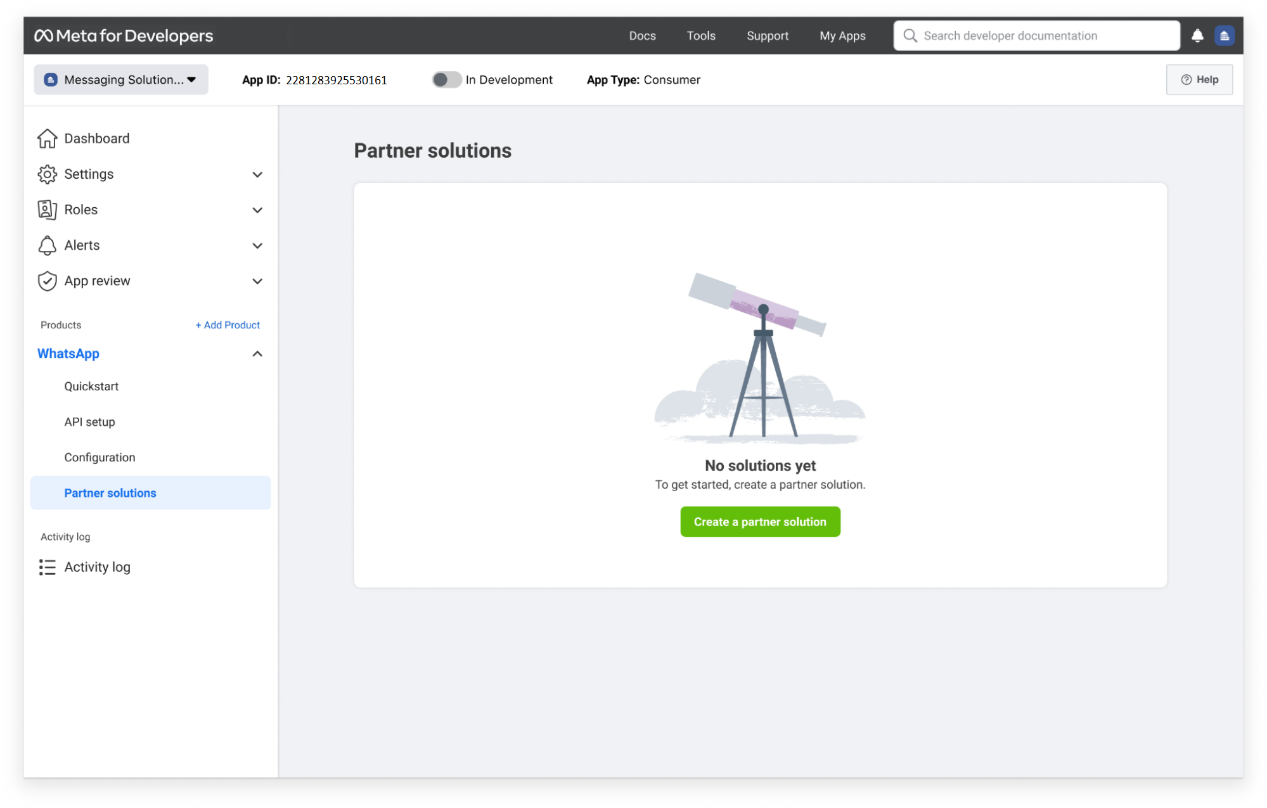
- Fill in the Solution name and Gupshup’s app ID(2281283925530161)in the partner app ID in the screen below.
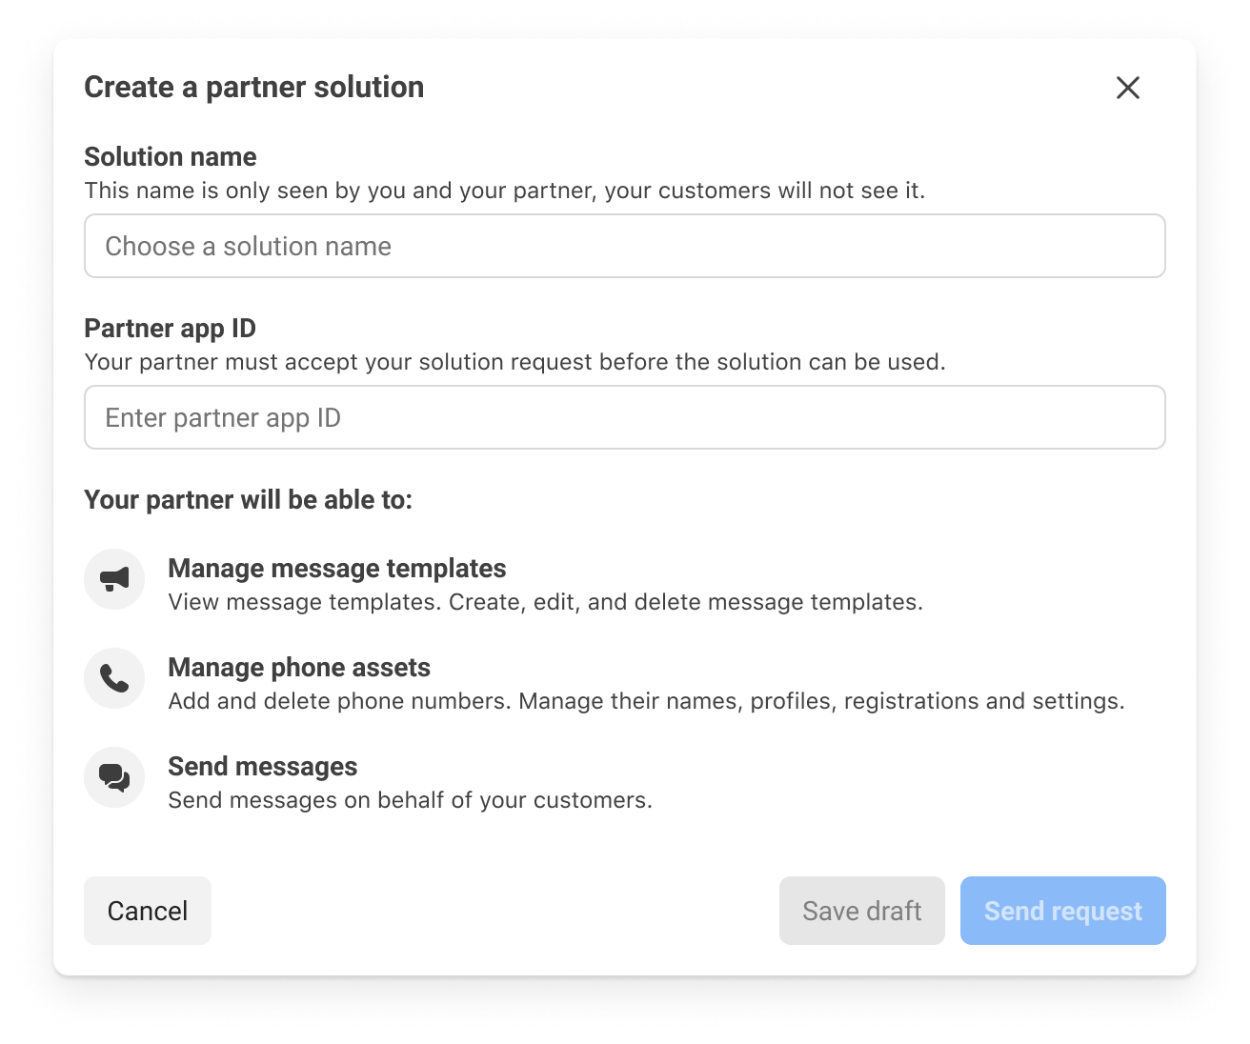
- The solution will be displayed in the solutions panel as Pending until Gupshup accepts it.
- Upon approval, the request will be designated as Active. Confirm with your CSM that Gupshup has accepted the solution request (solution status must be Active in the Meta App Dashboard).
- In the event of rejection, the request will be marked as Inactive. In case Gupshup rejects your solution request, please reach out to your CSM, understand the rejection reasons, and resubmit a fresh solution request, post addressing your rejection reasons.
- Both you and Gupshup's Meta business account name (Business Settings > Business Info) will appear in the Embedded Signup flow.

Once you have completed these steps on Meta’s App Manager, you can sign up for Gupshup partner on the Gupshup partner portal. Have your Solution ID, Solution Name, and other business details handy.
Gupshup Partner Portal for Tech Providers
- Gupshup Partner Portal is offered to Tech providers(TPs), who want to use WhatsApp for business communication and serve business customers.
- TPs onboard their customers on the Gupshup Partner Portal. Upon onboarding a new customer through the Gupshup partner portal using the embedded signup flow, the Guphsup credit line will be automatically assigned to your customers.
- Partner Portal allows the TPs to view all the customers.
- Tech Providers have access to analytics for their customer's WhatsApp usage
NoteCurrently, the Partner Portal supports the Admin and the User role. The Admin role has the advantage of adding more users.
Partner Setup Process
Understand step by step, how you can get onboarded as a Tech provider on the Gupshup partner portal.
Steps for Partner Onboarding
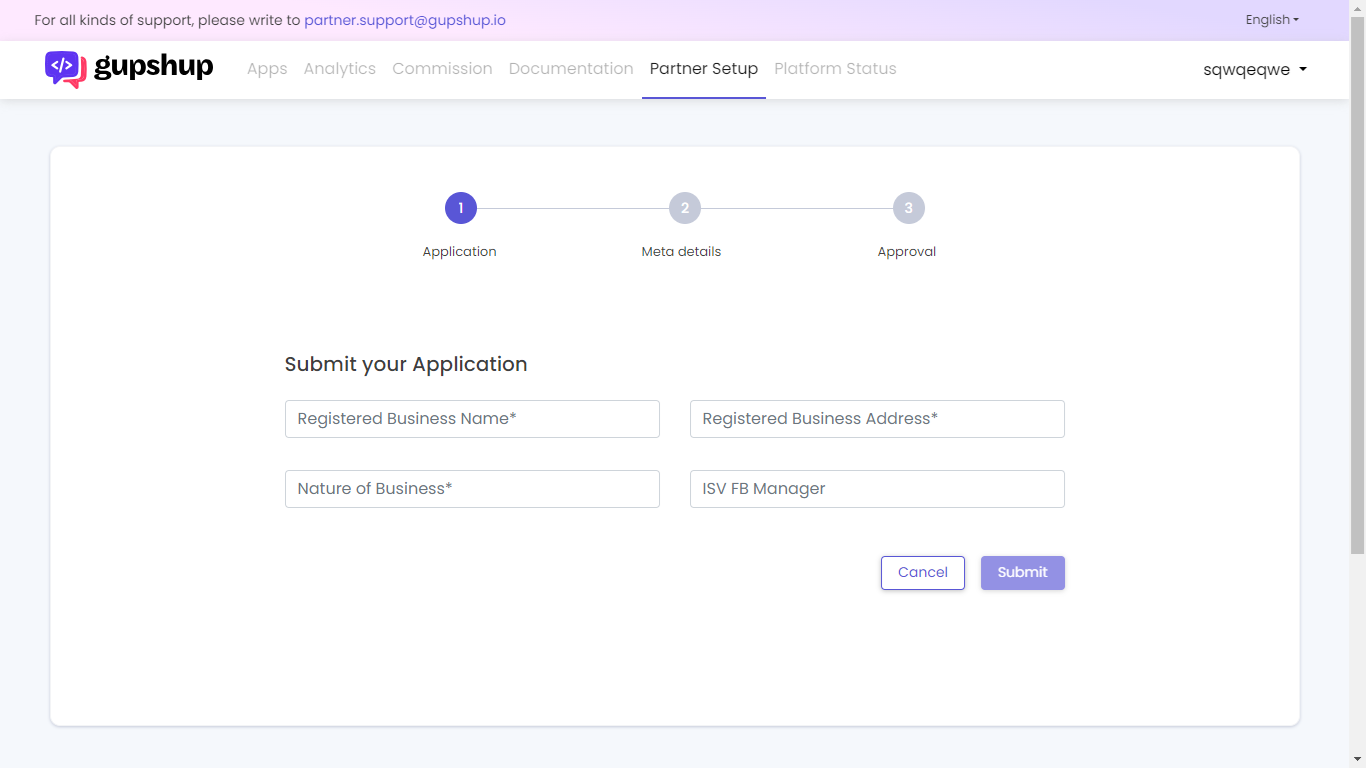
Step 1: Partner Sign up
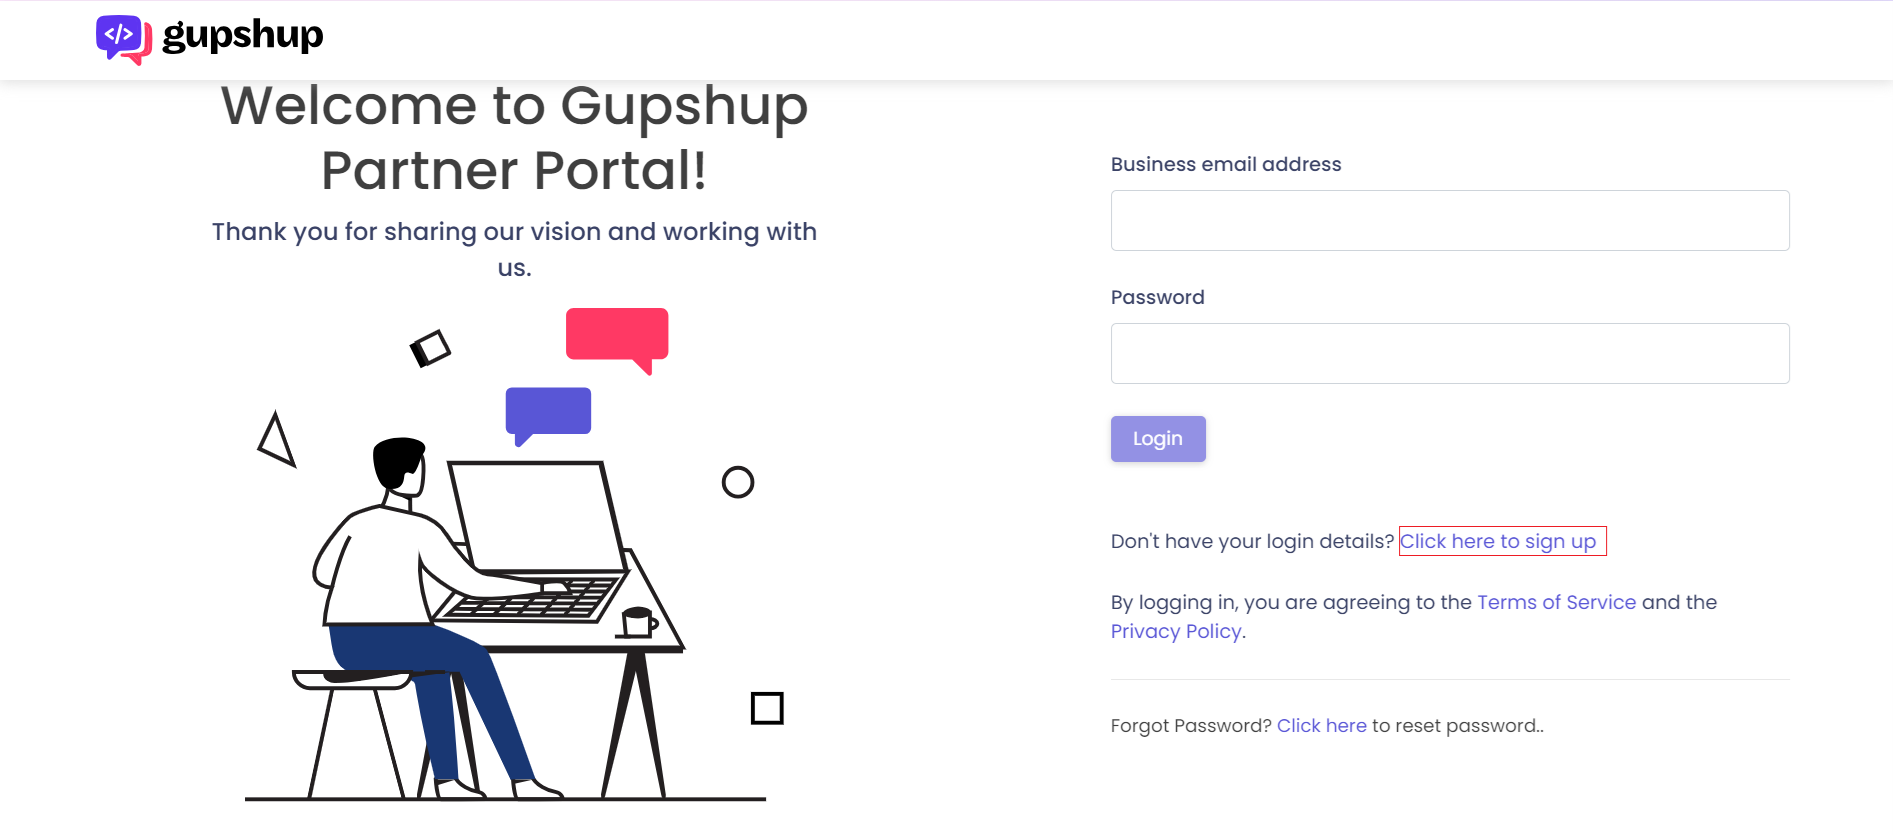
- Navigate to the https://gupshup.io/partner/login . The login page displays, select Click here to sign up.
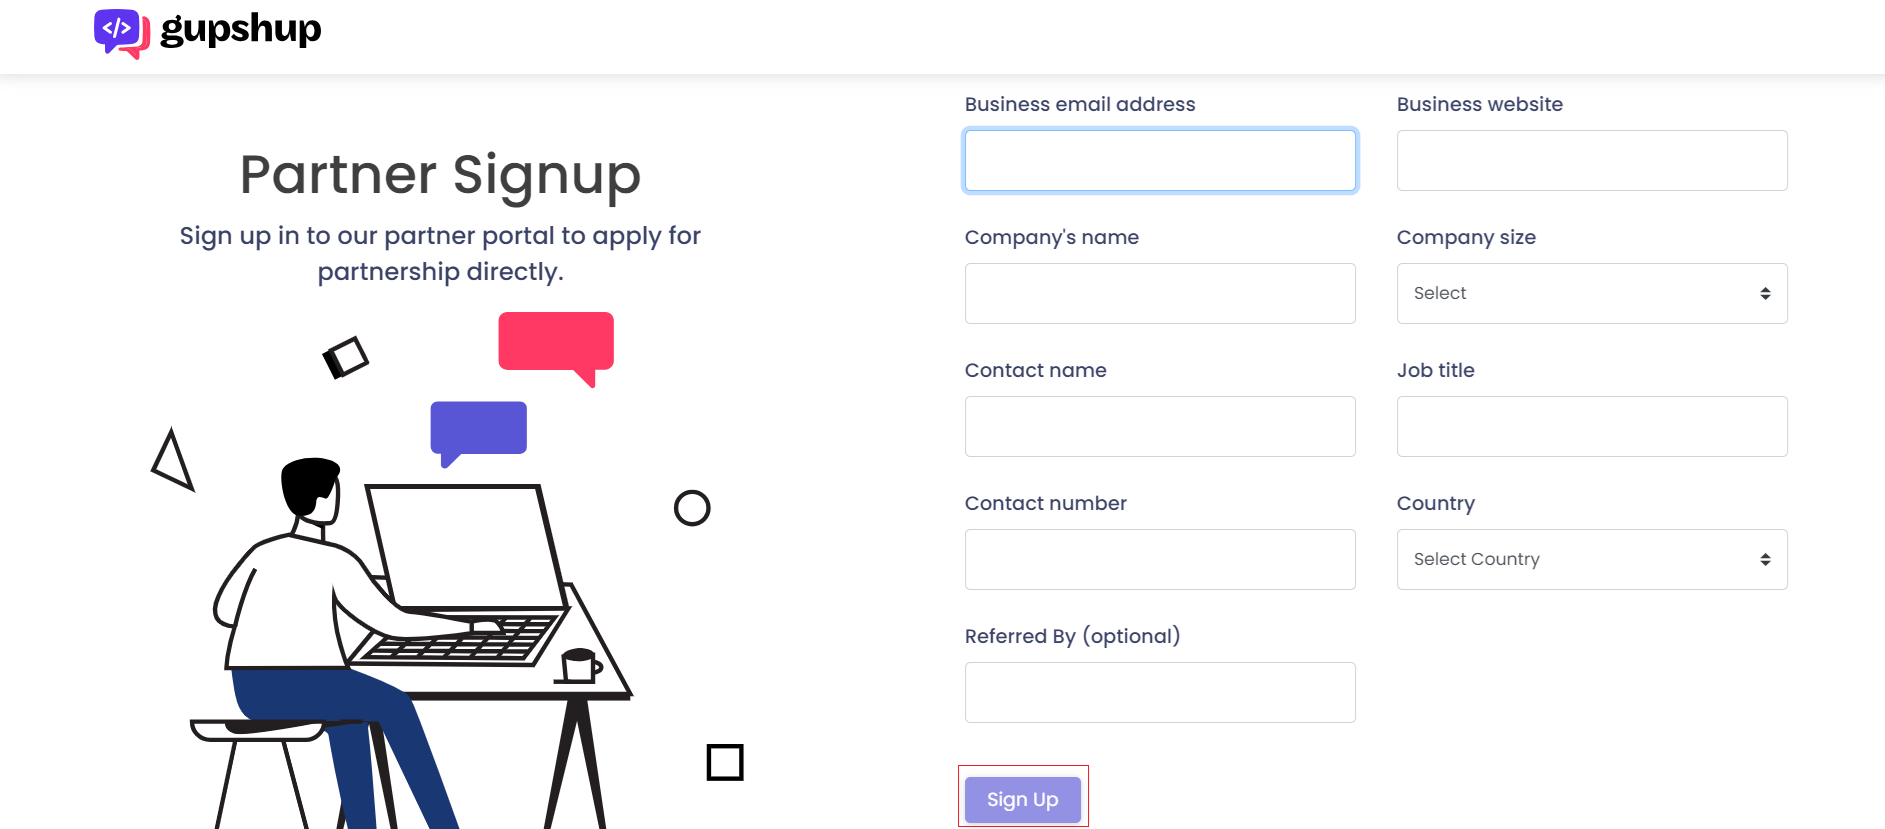
- Fill in all the necessary fields provided on the Signup page, and click the Sign Up button to proceed ahead.
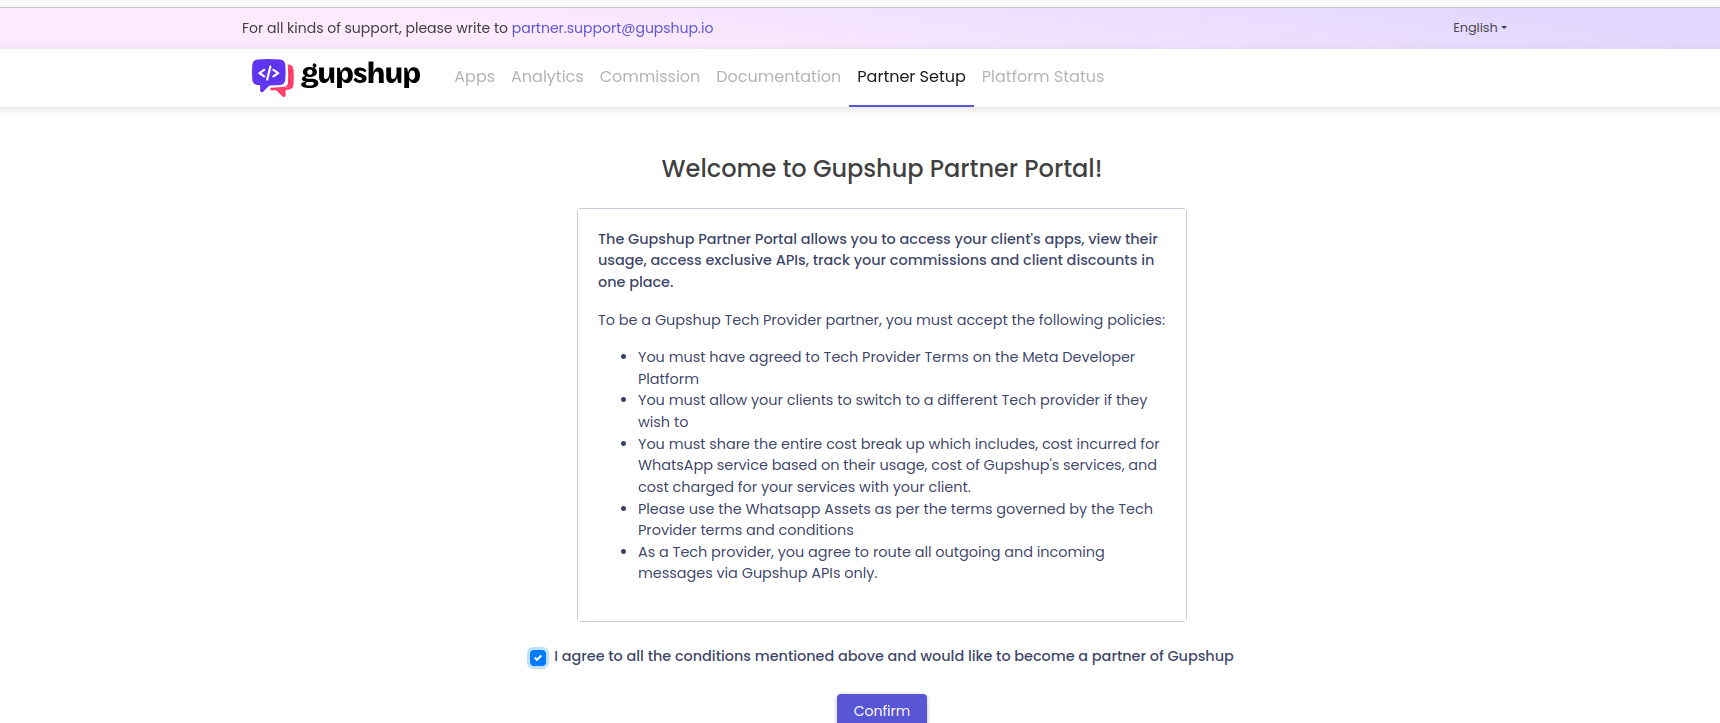
- Read all the Gupshup tech provider terms and conditions and agree to them.
- Next, you will be redirected to the Application Page, fill in all the necessary fields, and click Submit.
Step 2: Map Solution ID
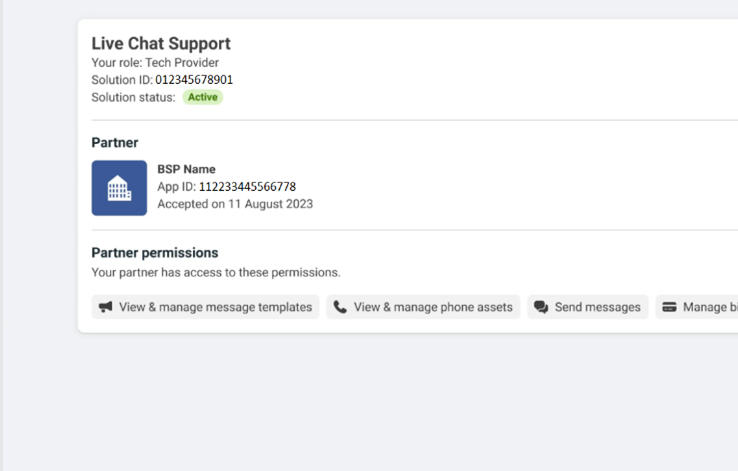
- On the Meta App Details Page, enter Solution Name & Solution ID (joint solution created with Gupshup as Solution Provider), and click Submit.
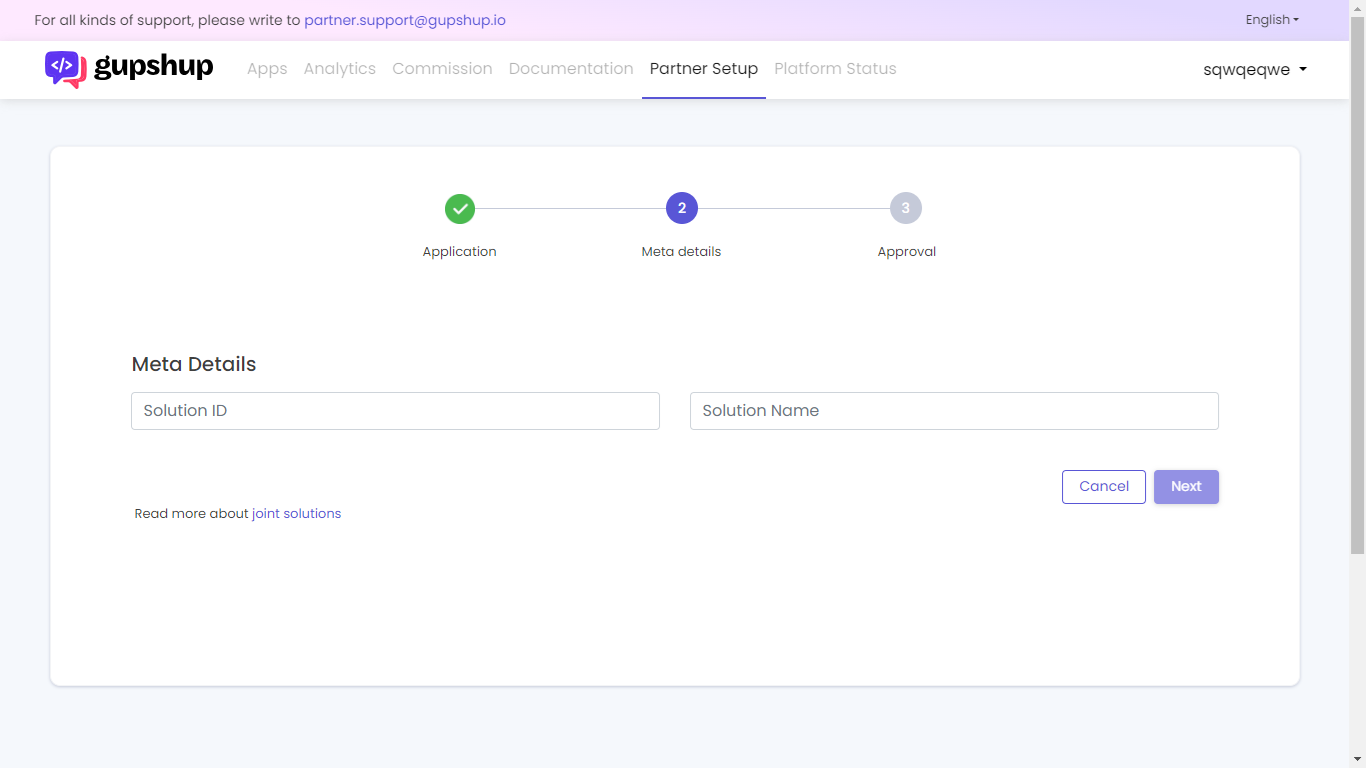
NotePartners need to submit their joint Solution ID, numeric identifier generated for joint solutions between tech provider and solution provider, and the Solution Name
Step 3: Partner Approval
- Partner creation requests will be sent to the support team for approval. The support team will evaluate each request and approve or reject the partner creation request
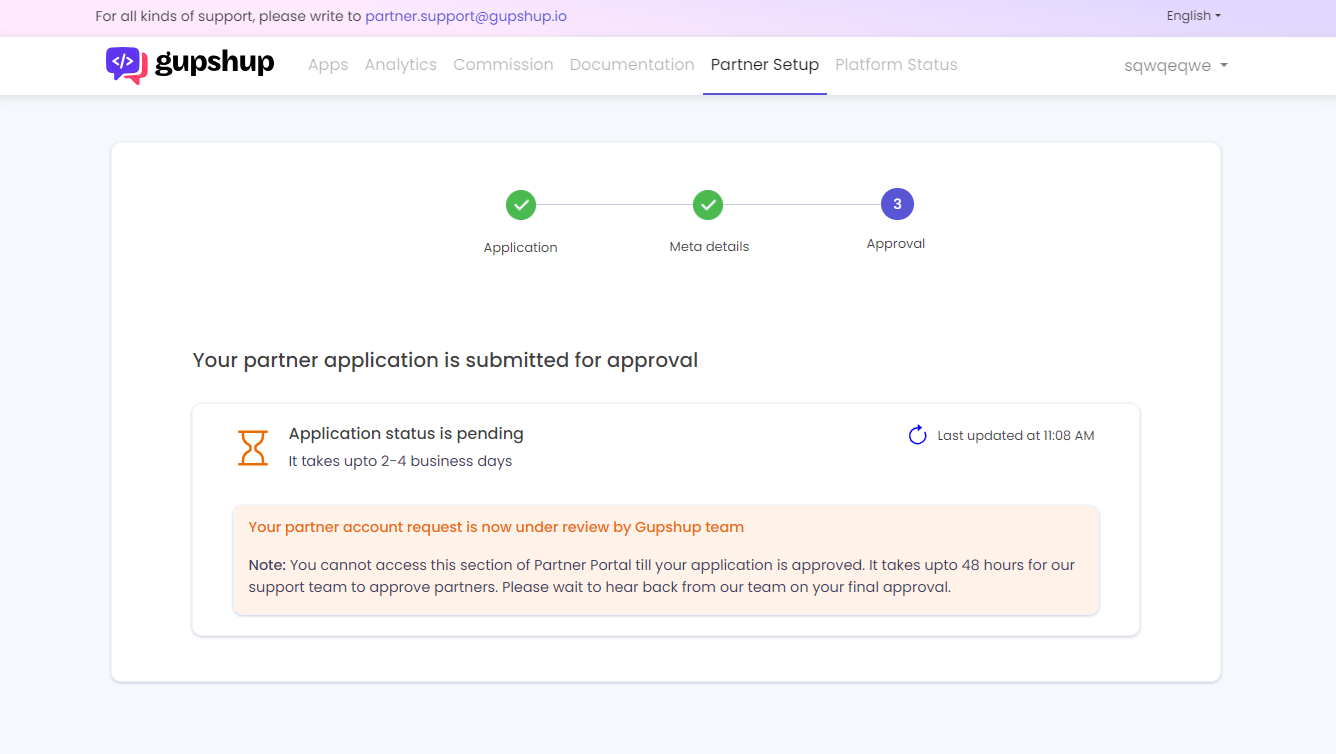
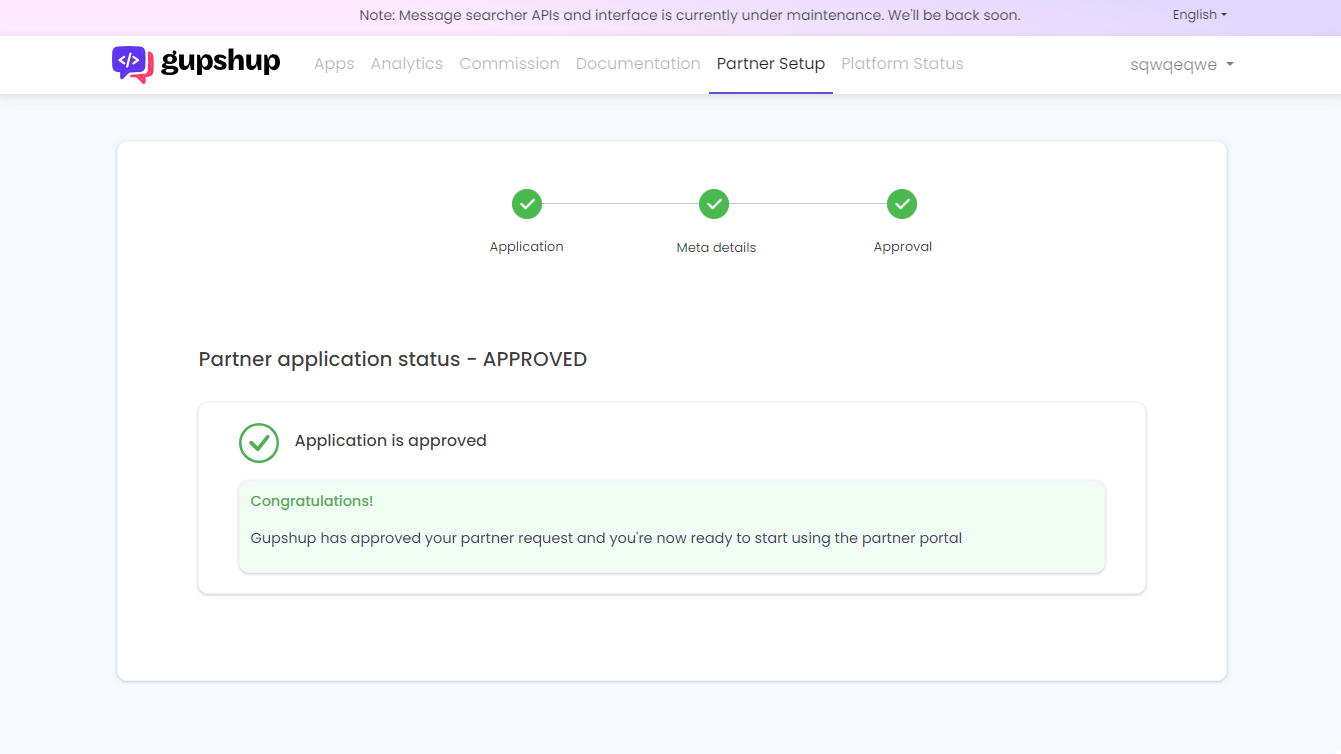
- Upon partner creation request approval, the remaining tabs will be enabled for the partner. The partner will be able to see their partner application status as Approved. Once your application is approved, please log in to the portal once again to view and use all the other features of the portal.
- In case the partner application is rejected, partners can submit their application again with a modified Solution ID and solution Name.

Updated 8 months ago