Zapier - Gupshup for Business
Introduction
Zapier is a third-party service that connects Gupshup for Business to many other apps and services, including Shopify, Google Sheets, Calendly, Hubspot, and more. This article is specifically designed to teach you how to design Zaps where Gupshup for Business is the trigger (i.e. receiving a new WhatsApp message creates a new support ticket in Freshdesk), and where Gupshup for Business is the action (i.e. doing something in another app/service will automatically trigger the Sending a new message on Whatsapp).
Gupshup’s new Integrations platform feature is an alternative to using Zapier, allowing you to configure custom trigger-action workflows directly without ever having to leave your Gupshup base platform.
Prerequisites
Here's what you'll need to get started if you choose zapier to integrate Gupshup WhatsApp Business.
- a Gupshup enterprise account: You'll need to input Gupshup WhatsApp Business account.
If you don’t have an gupshup enterprise account, please contact your account manager. For any queries, our support is available for you at 022 42006799 or email us at enterprise-[email protected] or visit here - a Zapier account
Zapier basics
The basic structure of a Zap is that there is a trigger app and an action app. Whenever a specified event happens in the trigger app (e.g., for Shopify this might be "A new order placed on a store," or for Hubspot, this might be "New lead created") it automatically triggers an action in the action app.
Some examples of Zaps might include:
- Whenever a incoming message received on WhatsApp using Gupshup for Business (the trigger app), create a corresponding lead in Salesforce CRM (the action app).
- Whenever a new contact is added in Hubspot (the trigger app), send a welcome message for that contact on WhatsApp using Gupshup for Business (the action app).
- Whenever you get a new order is created on Shopify store (the trigger app), send a order notification message for that user on WhatsApp using Gupshup for Business (the action app).
To make a Zap with Gupshup for Business, you'll need to log in to Zapier (or create an account). From the home page, click the "Make a Zap!" button.
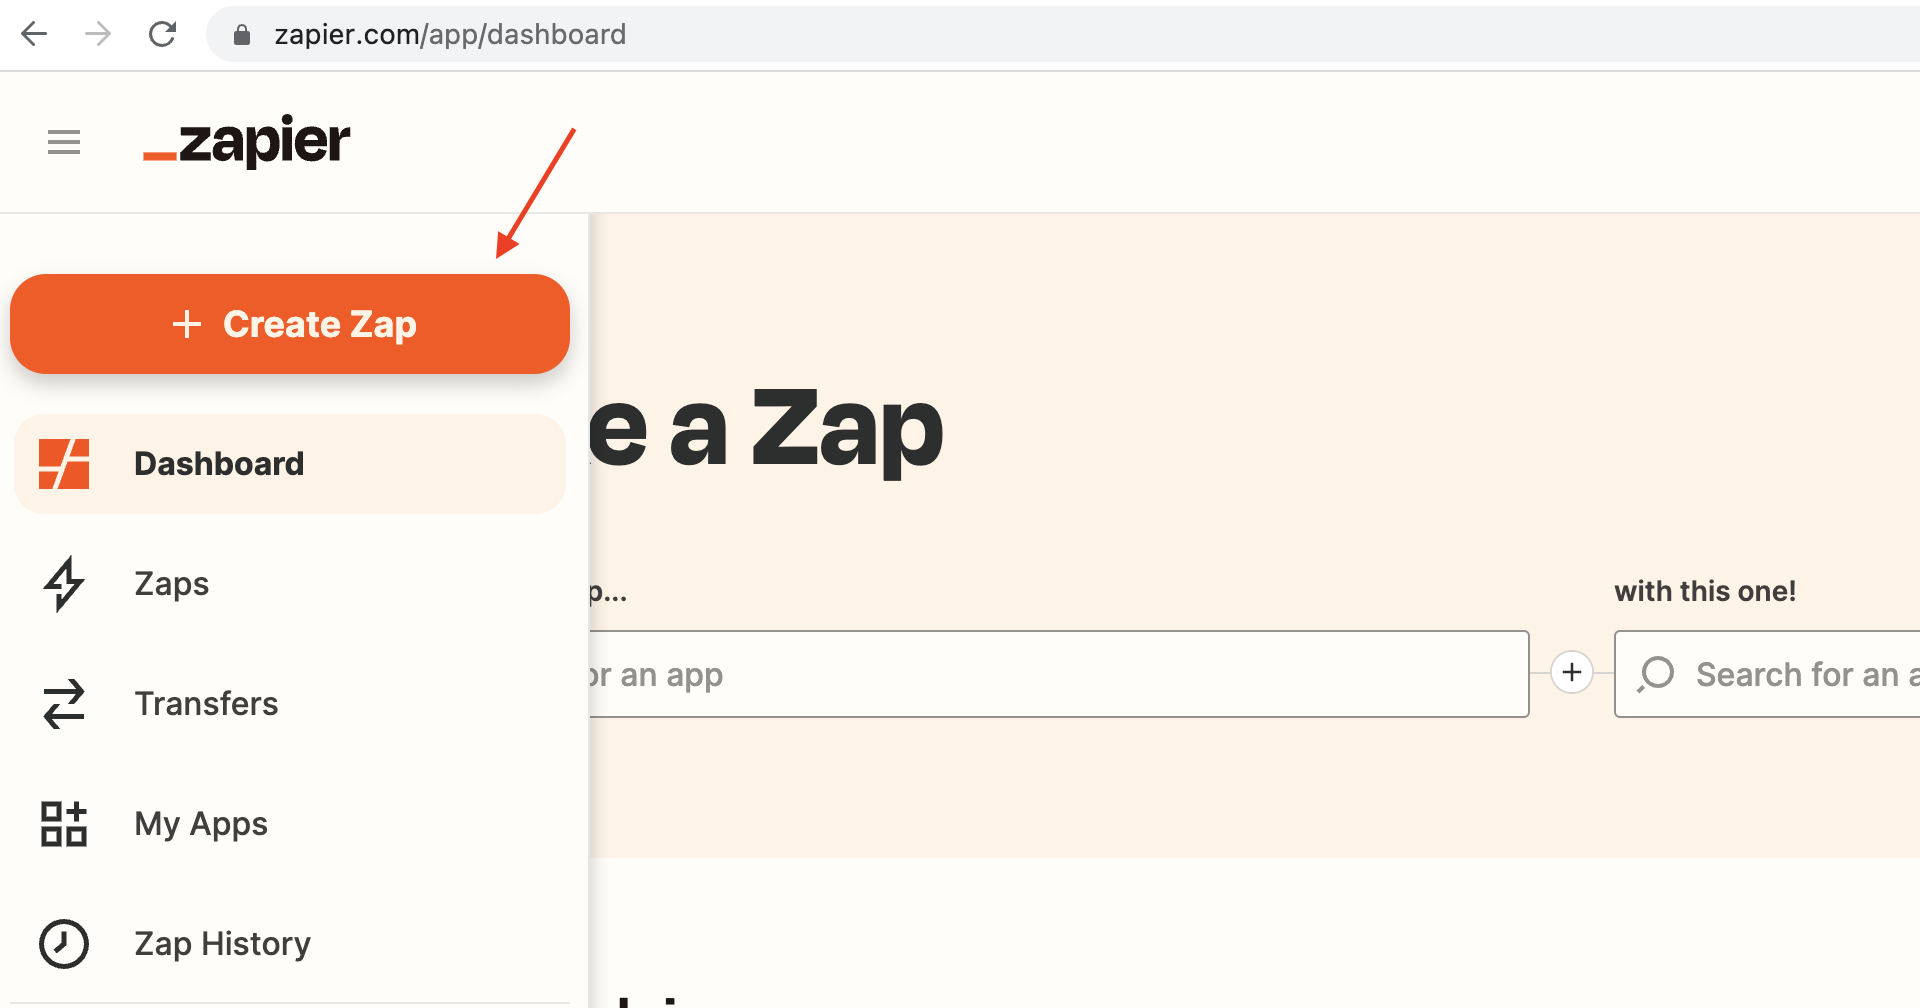
Create Zap
If you have any additional questions, you can open a ticket with Zapier Support from https://zapier.com/app/get-help
Popular use cases
Example 1: Creating a Zap with Gupshup for Business as the trigger ( Create a contact on Hubspot whenever a incoming message is received on WhatsApp)
Use case: I ran a WhatsApp message campaign this summer offering deals to my leads, and for those who replied to the campaign, I would like to convert them as a contact on HubSpot.
For this example, involves two different platforms: WhatsApp and Hubspot. The integration can be achieved using third-party tool such as Zapier.
To make a Zap with Gupshup for Business, you'll need to log in to Zapier (or create an account). From the home page, click the "Create Zap" button.
You'll then be brought to the Zap configuration page. Here is the page where we will set up the trigger and action for our Zap. We recommend taking a moment to name your Zap to keep track of it.
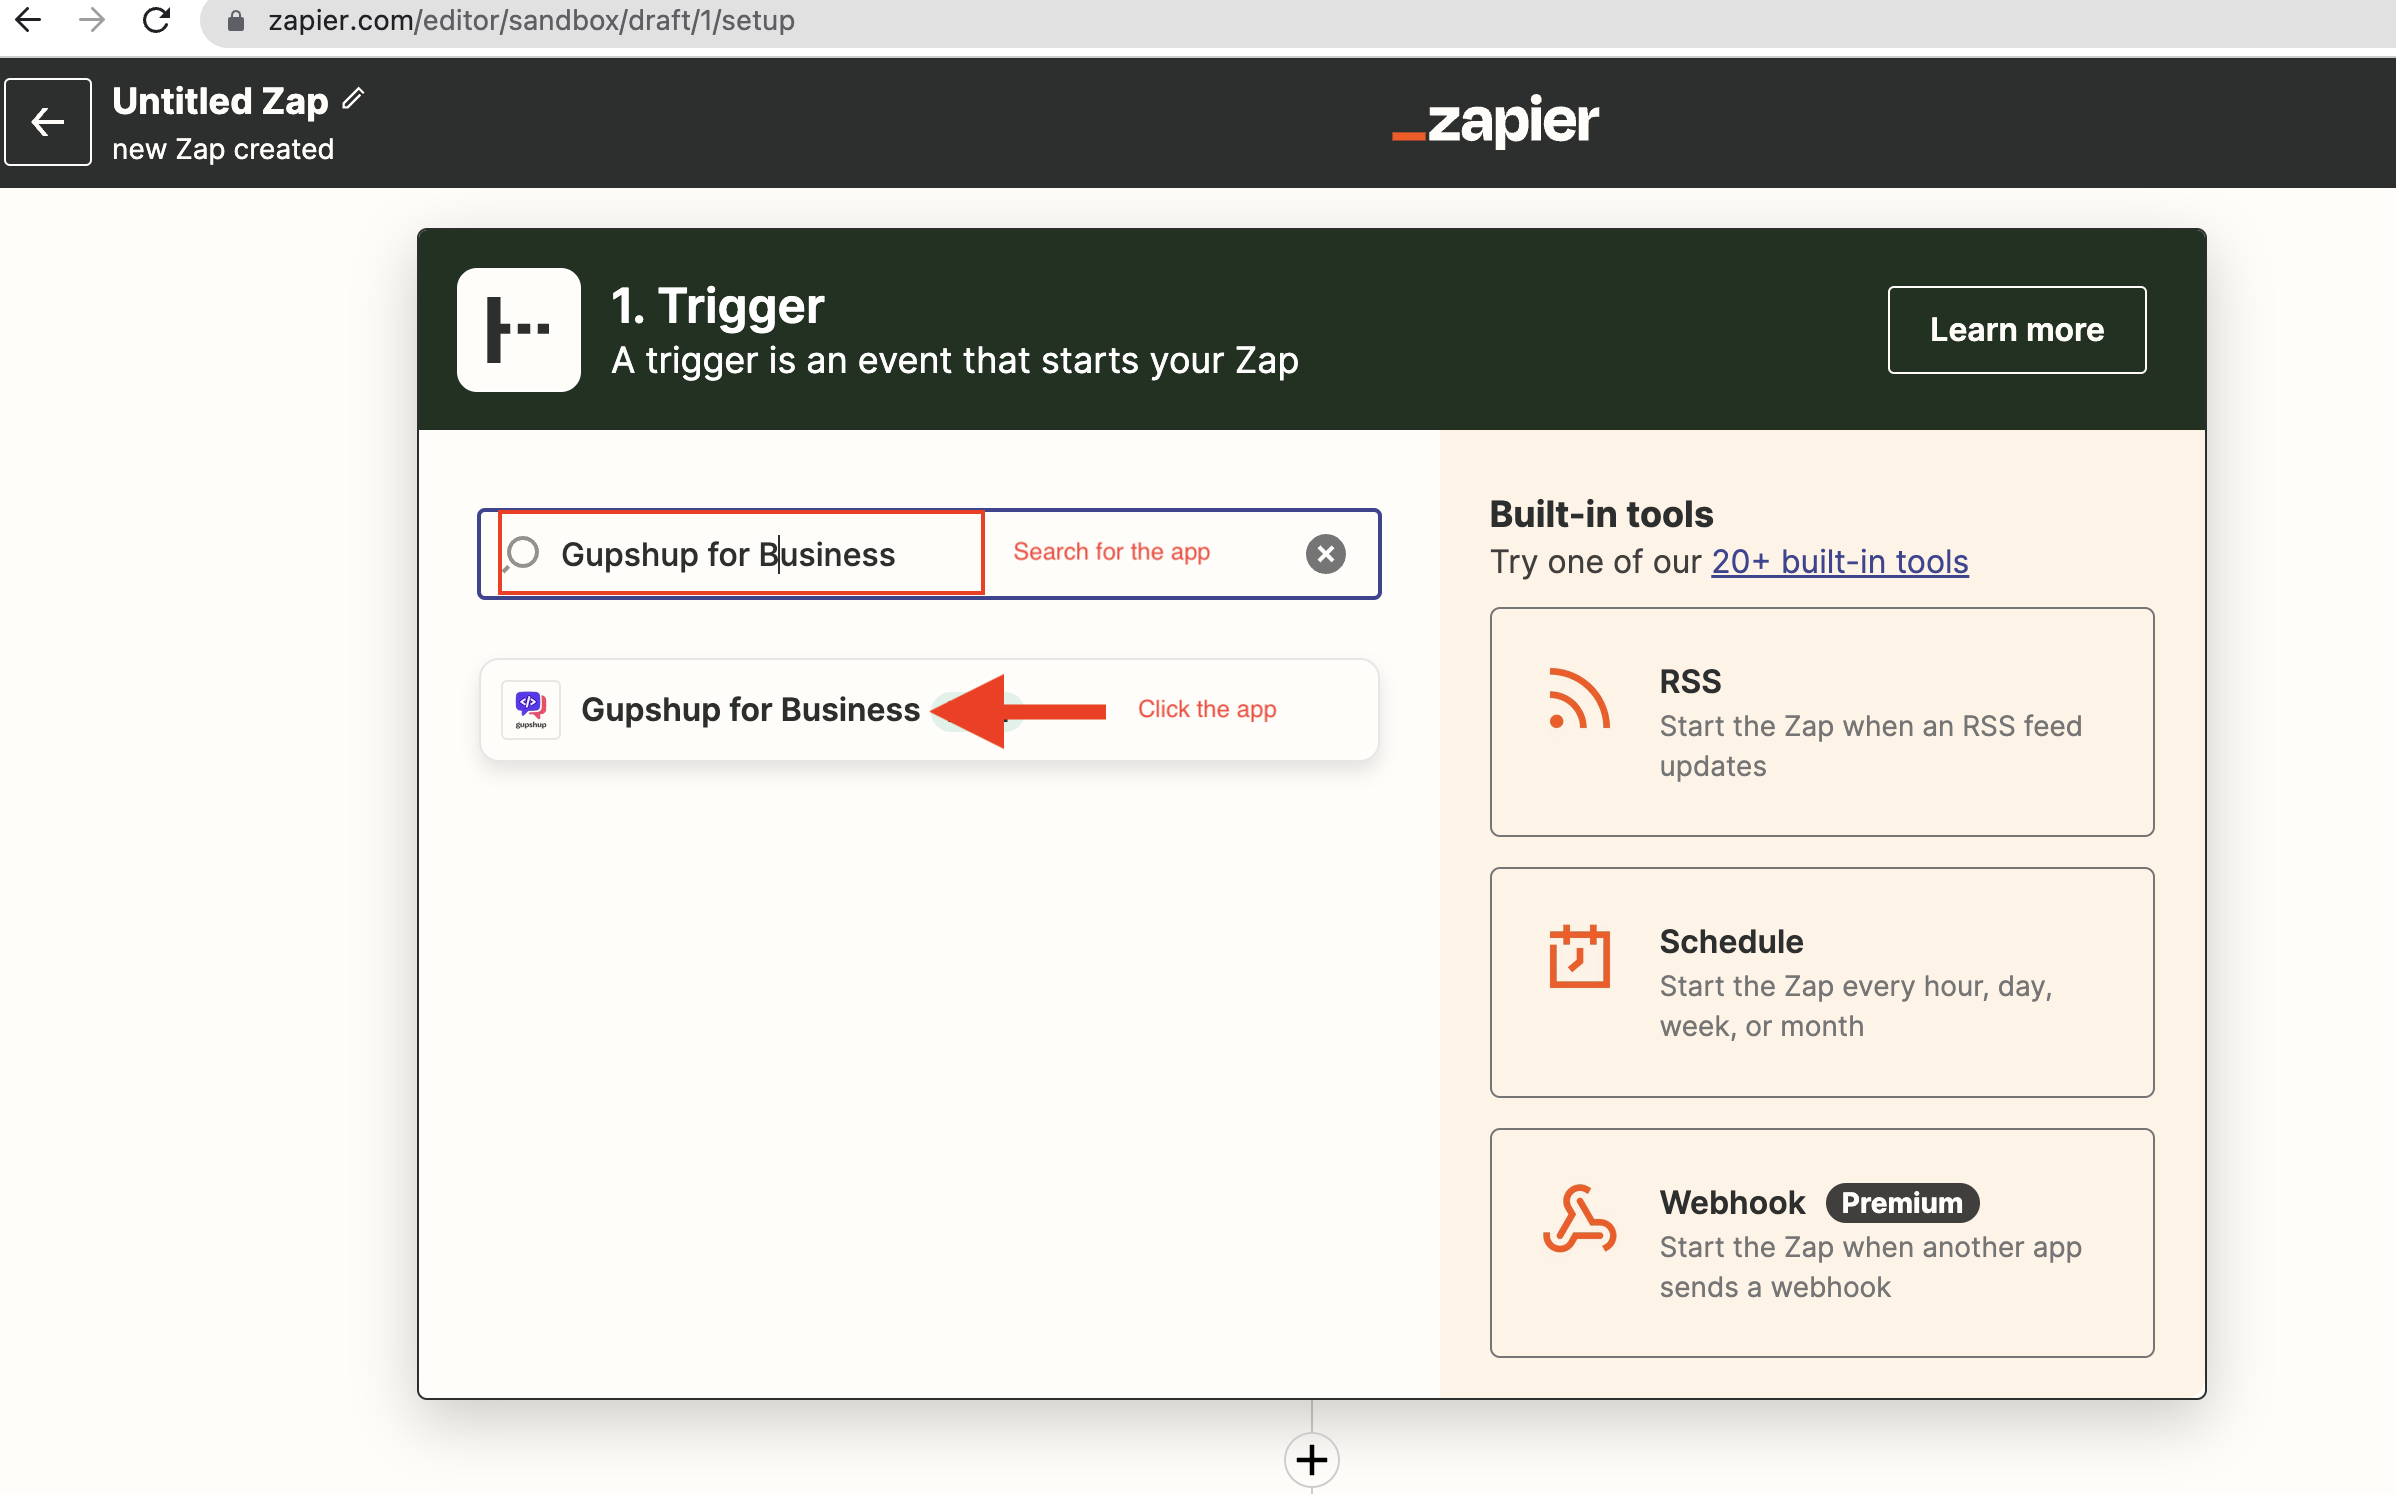
Step 1: Set up the trigger (Gupshup for Business)
The first step of any Zap is to set up a trigger. In this case, we would like Gupshup for Business app to trigger an action (create lead)—so Gupshup for Business would be considered the trigger app.
Search for the Gupshup for Business app : In the Apps list, search for the Gupshup for Business app and click on the app to proceed.
After selecting Gupshup for Business as the trigger app, you will be prompted to choose the specific conditions for activating the trigger. In this case, we want the Zap to run whenever a new message is received. so, select the event Receive Incoming Message
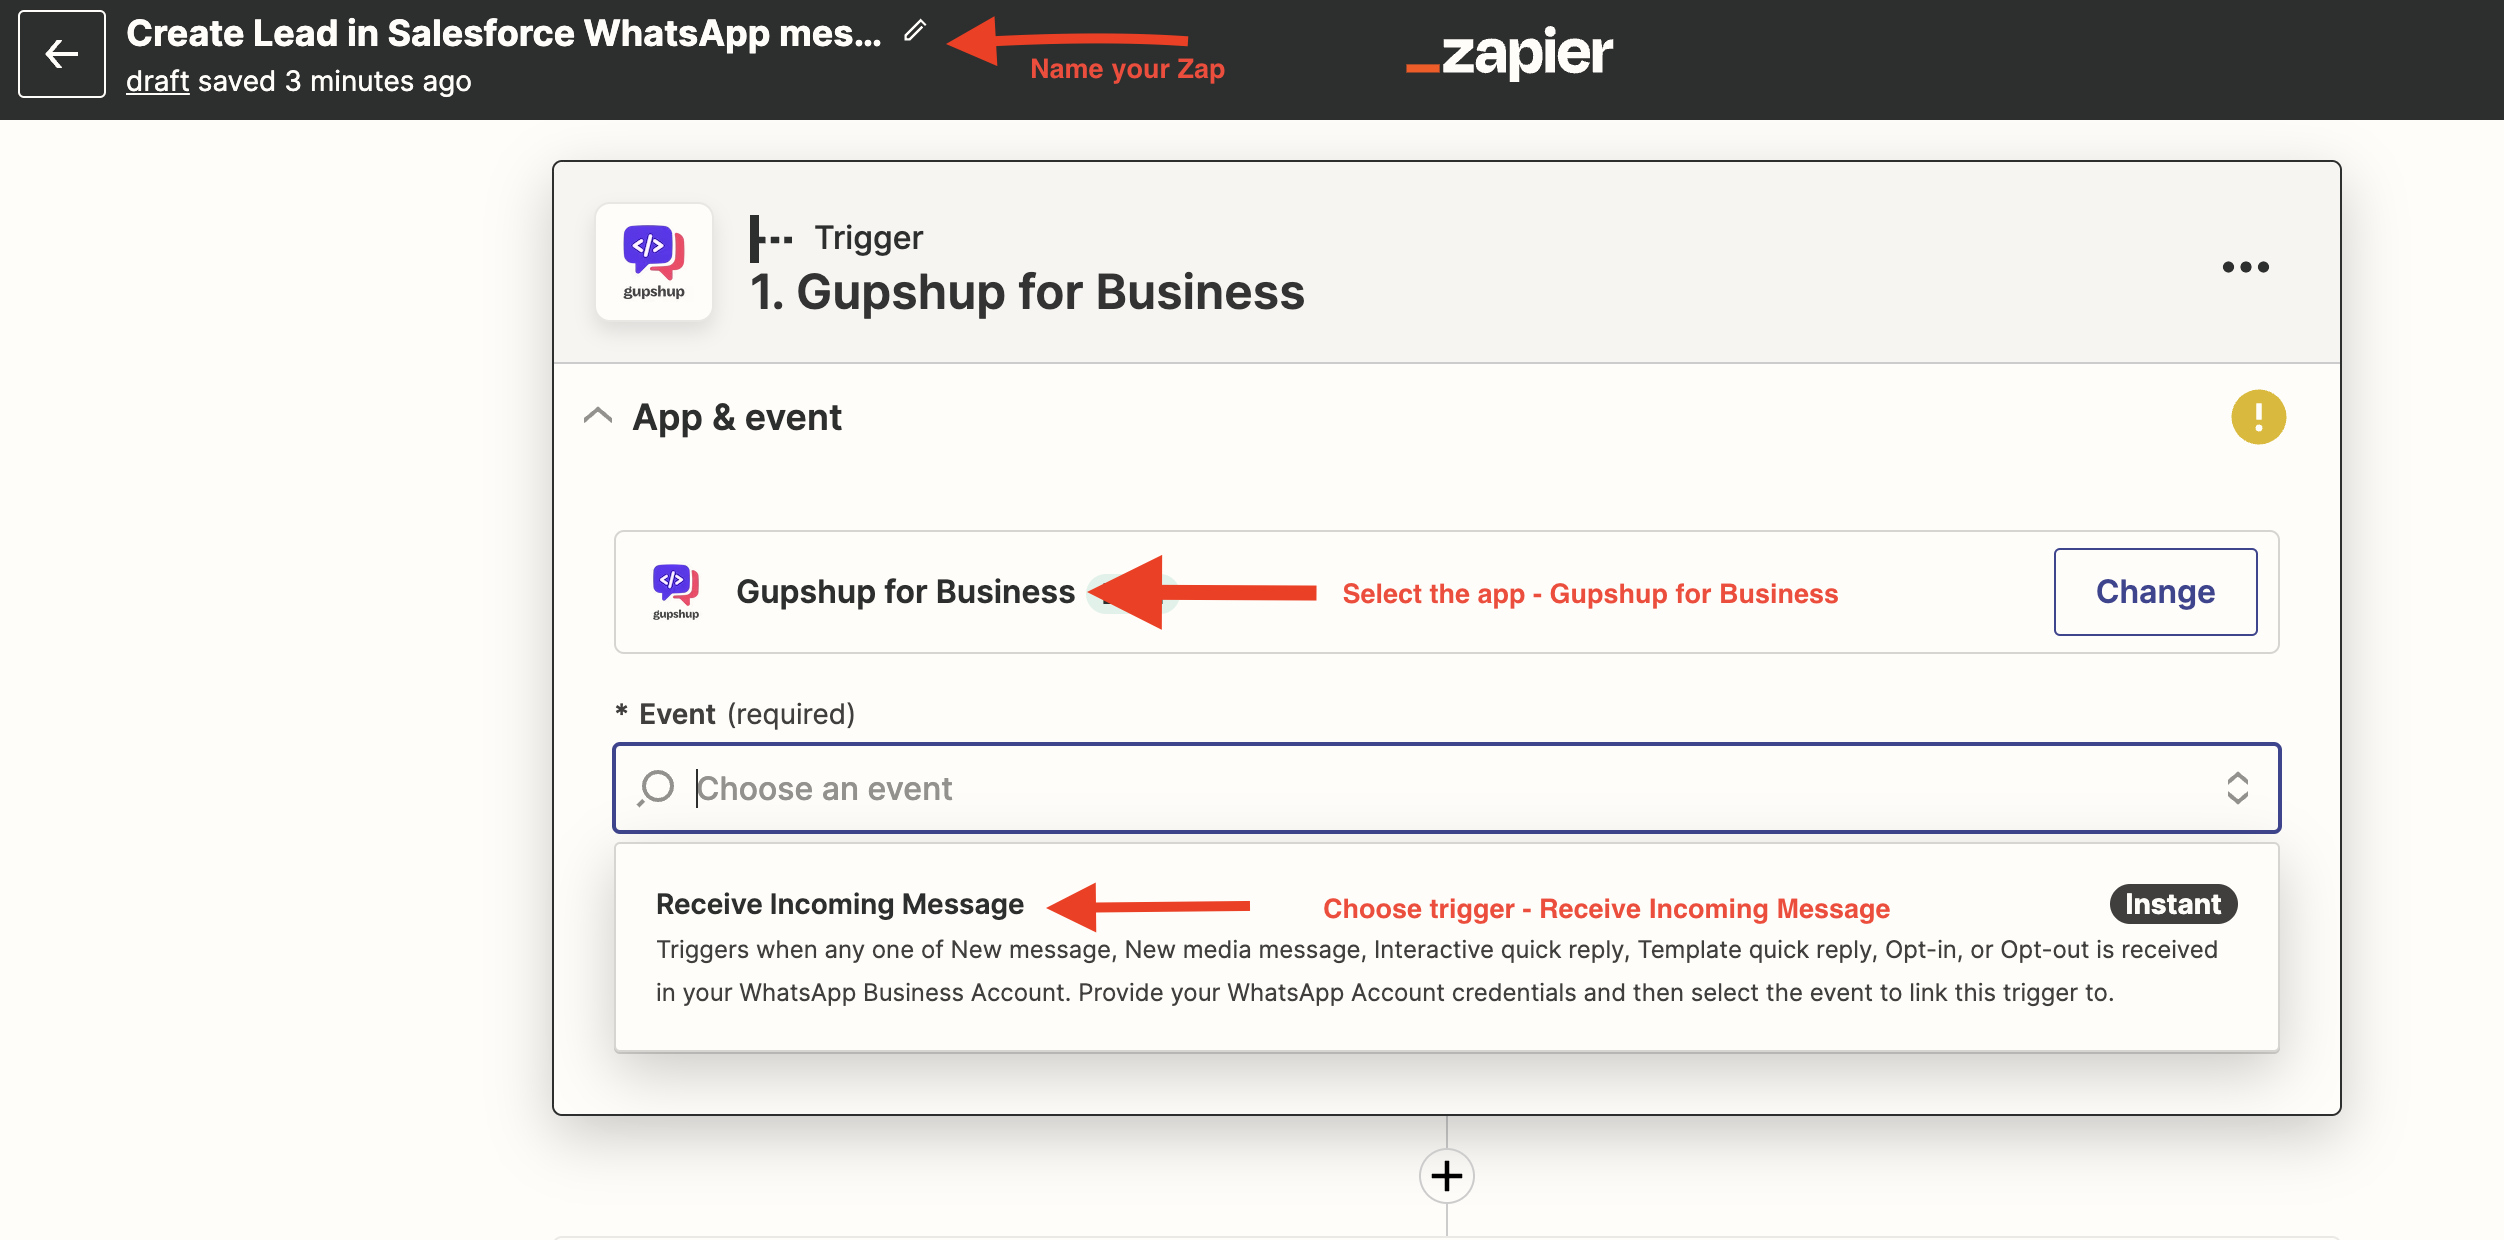
Create trigger
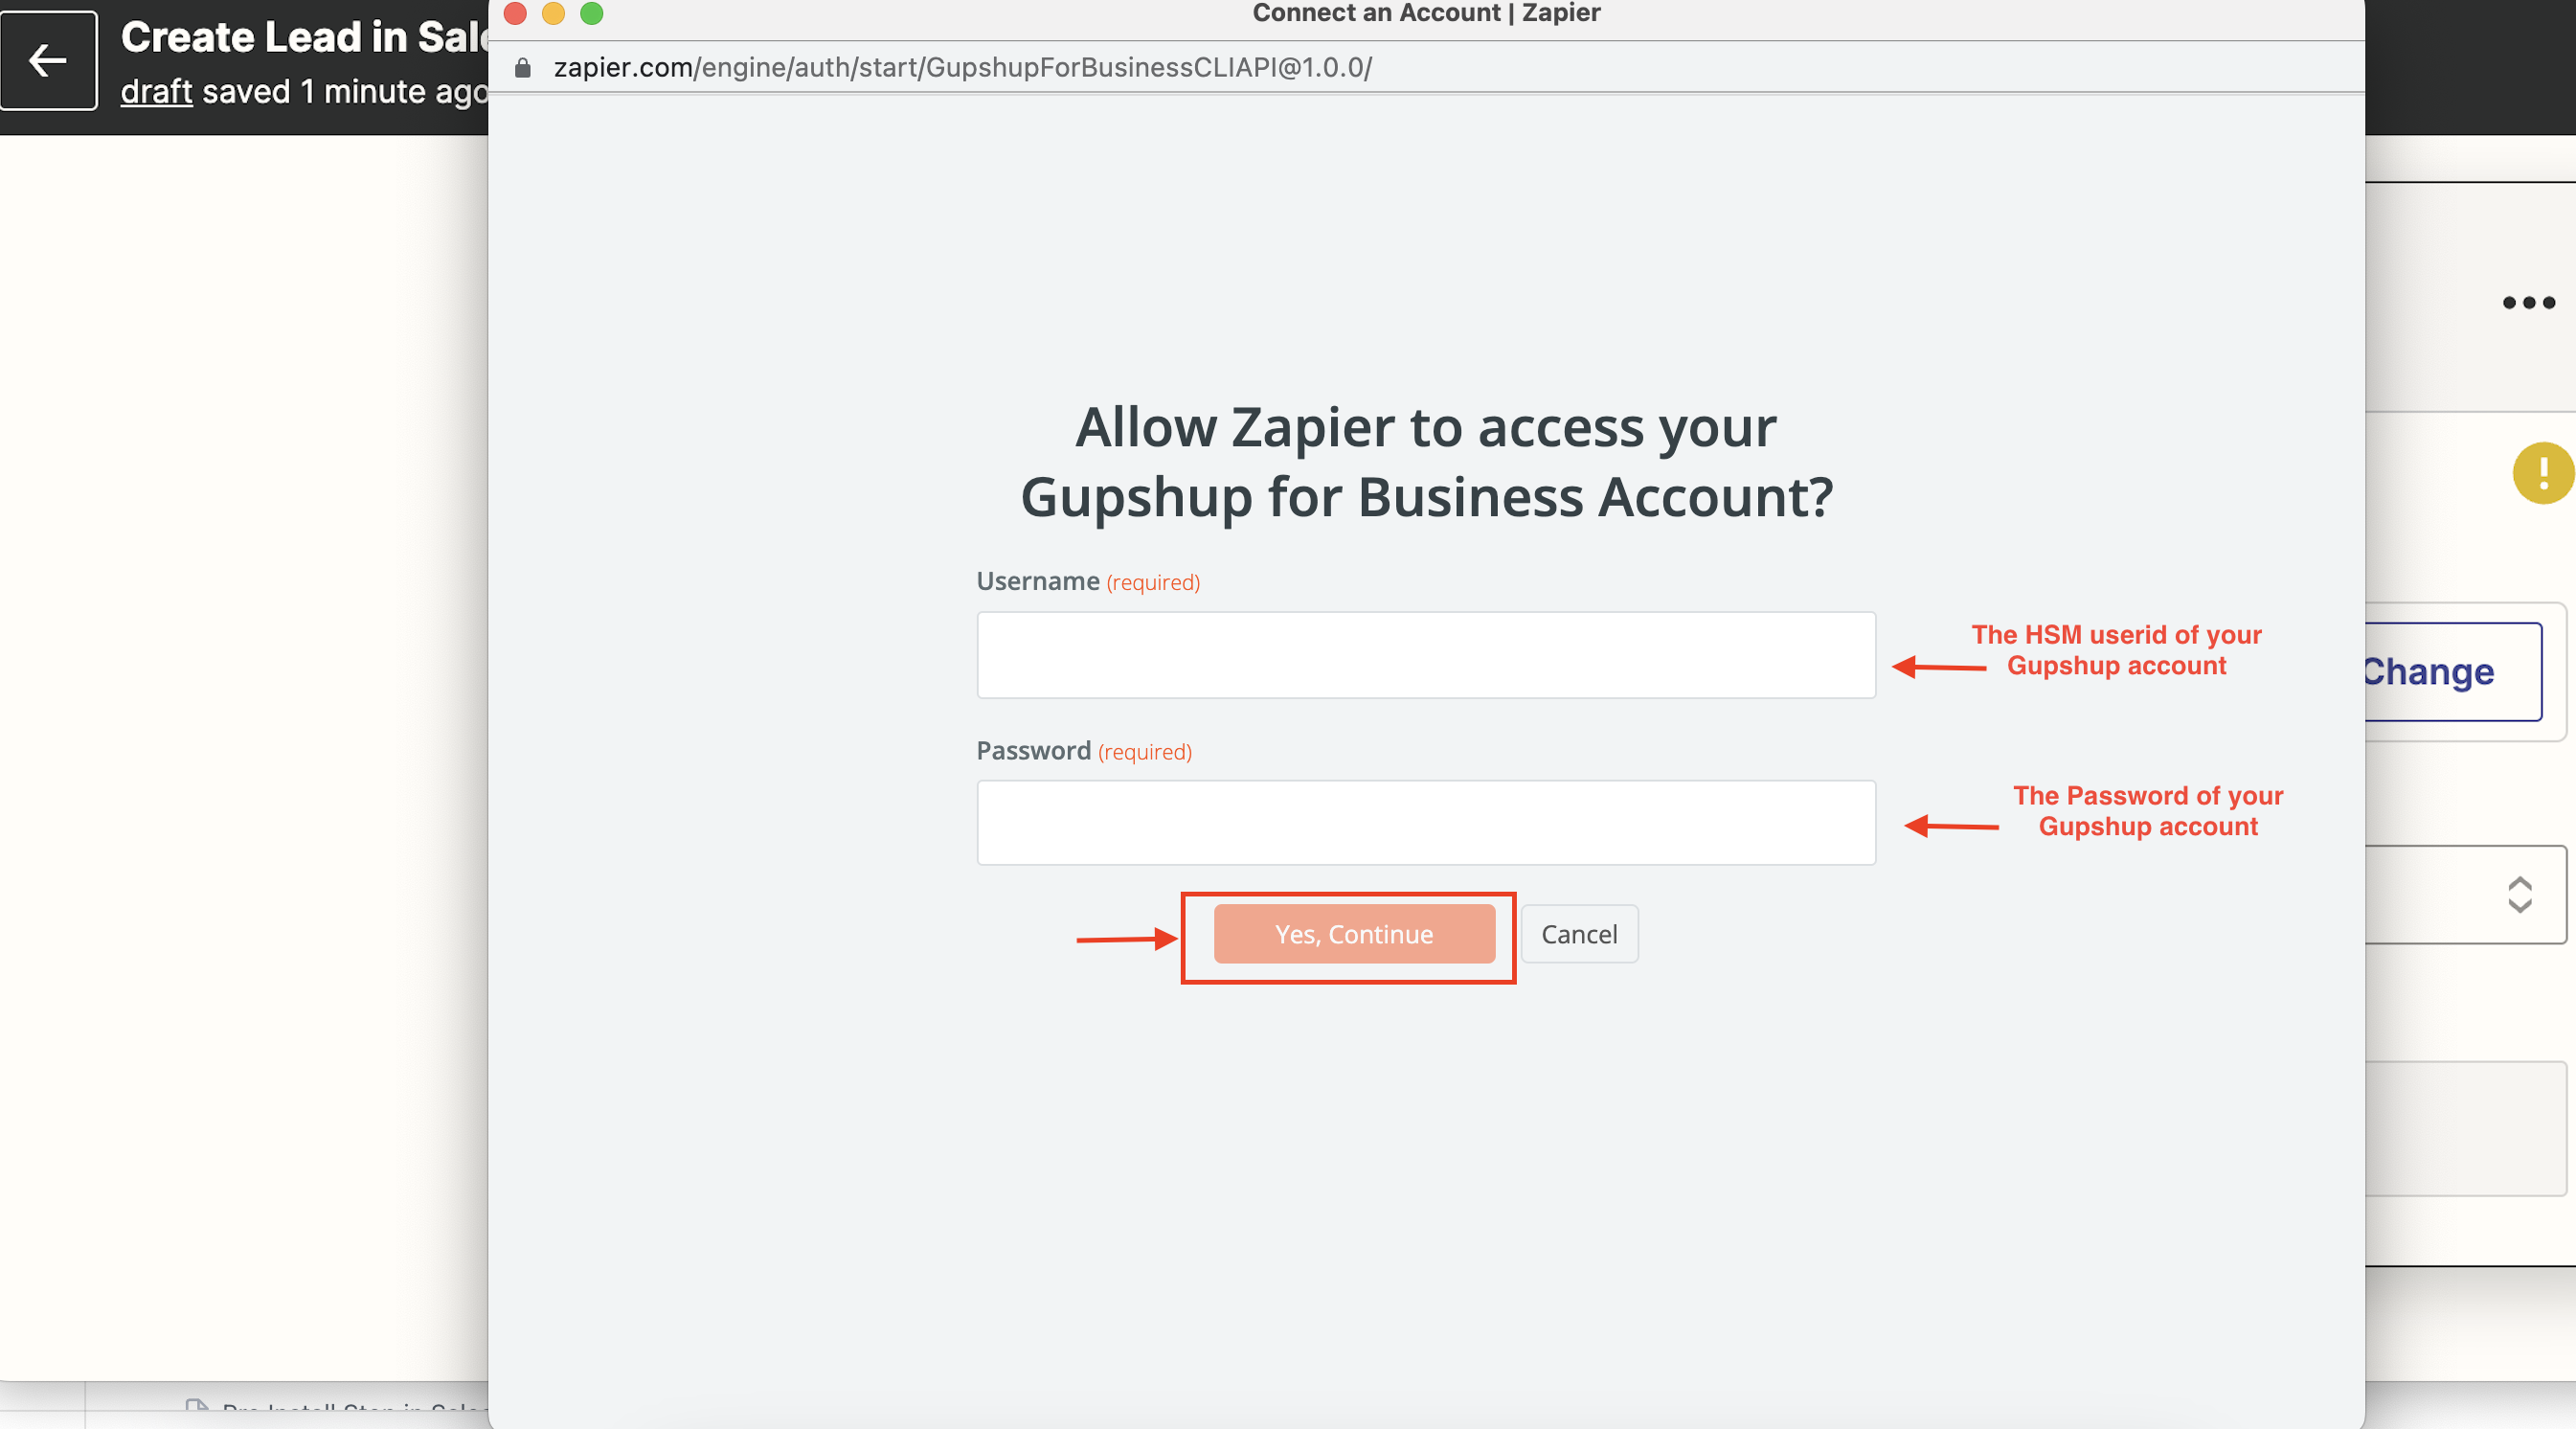
The next step is to connect your Gupshup's WhatsApp Business account to Zapier (or to select an already connected Gupshup's WhatsApp Business account). If you do not already have an Gupshup WhatsApp Business account, Talk to an expert.
The Gupshup for Business app authenticates using your Gupshup account userId and password. Enter your username (HSM userid) and password, after successfully authenticating click on Yes, continue button to proceed further.
- To configure your Gupshup's WhatsApp Business account
Create a new connection to your Gupshup WhatsApp Business account
- To select an already connected Gupshup's WhatsApp Business account
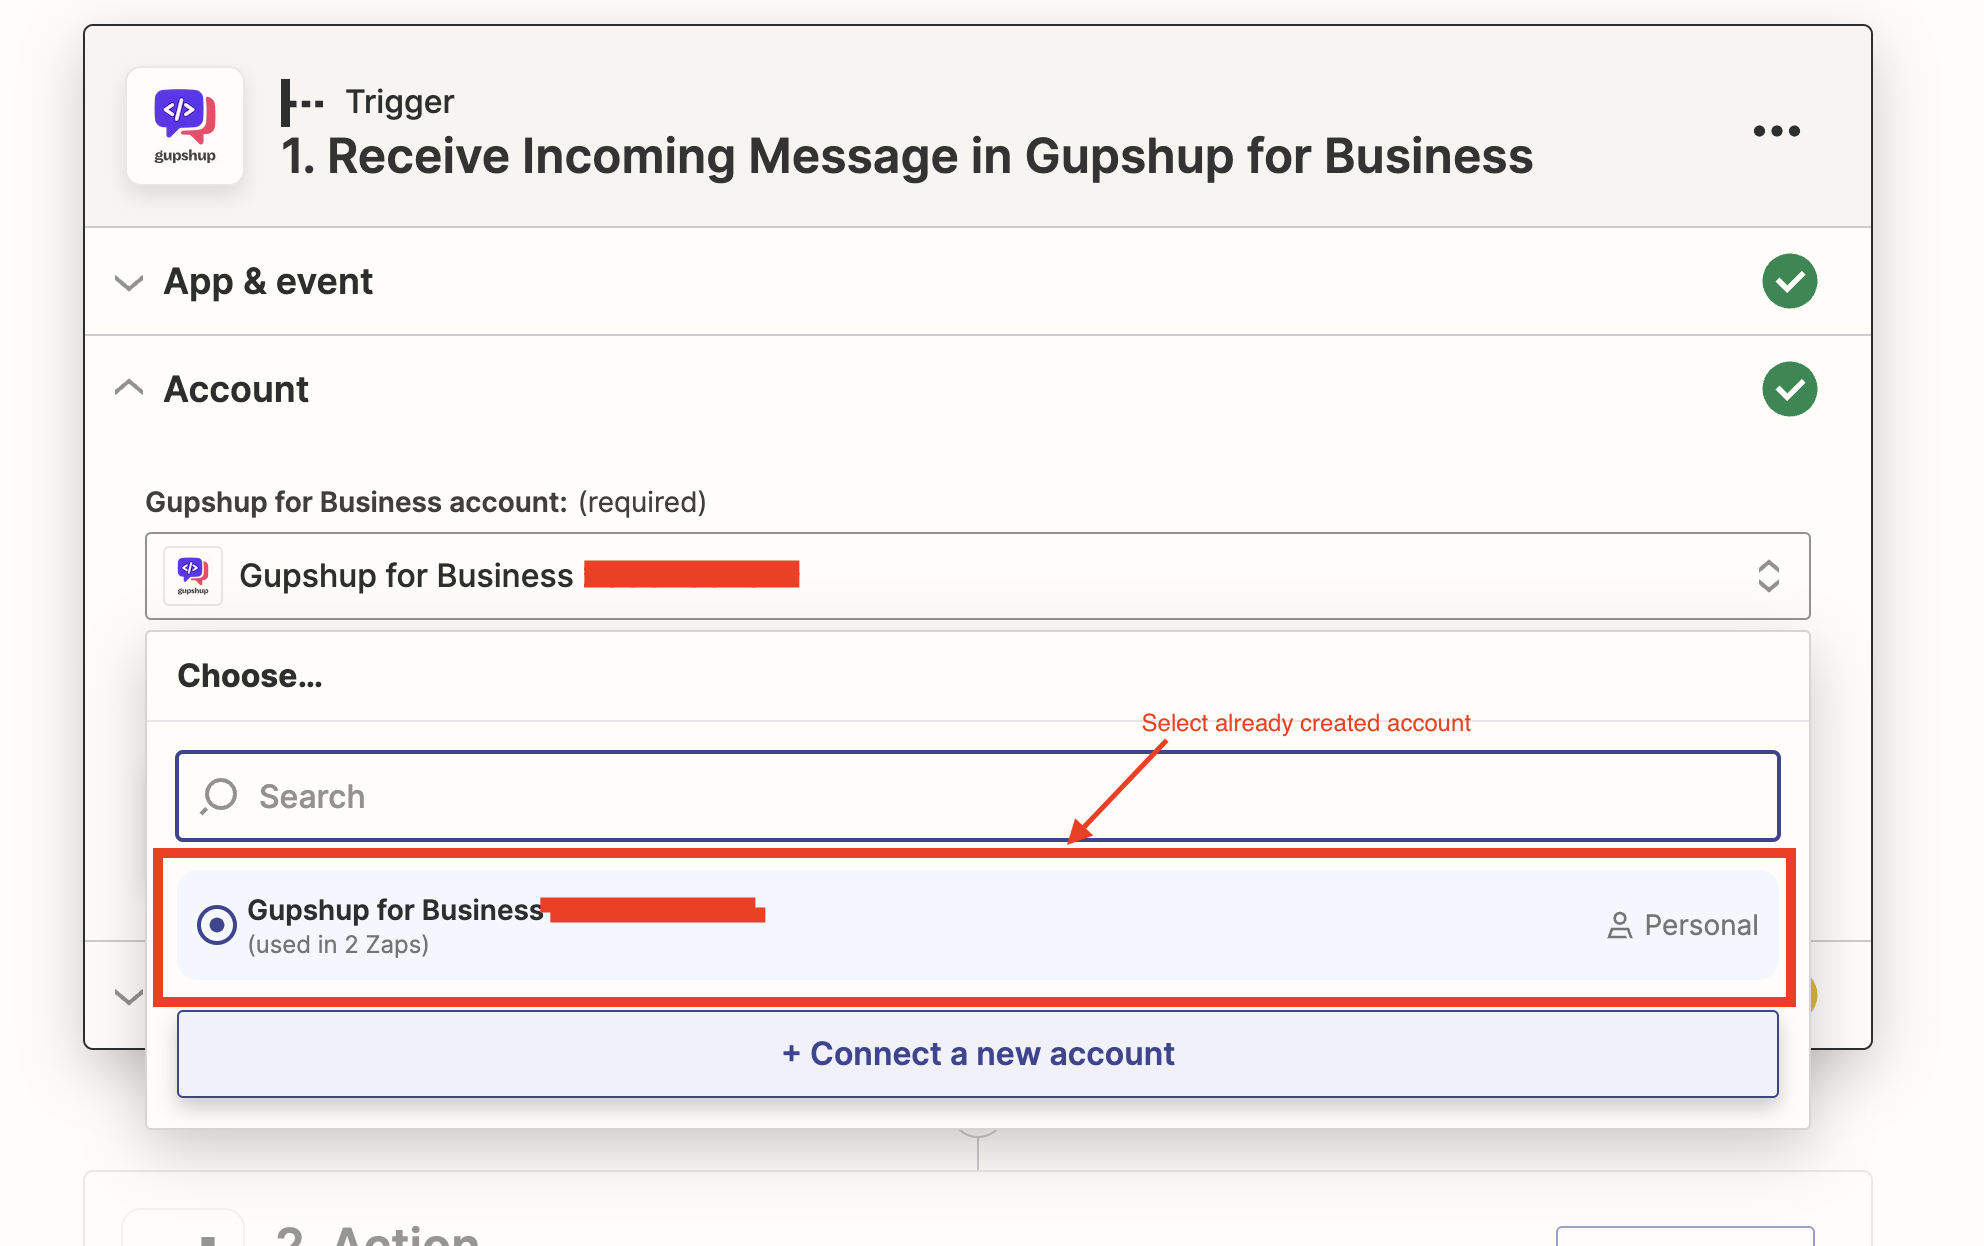
Select an already created account
In the Trigger step, you will be asked to enter your email ID to which we will be sending webhook URL. this webhook URL needs to be set up as a callback URL in your Gupshup WhatsApp business webhook settings. Please reach out to your account manager at ([email protected]) to set the Callback URL for your account in order to receive inbound message webhook events.
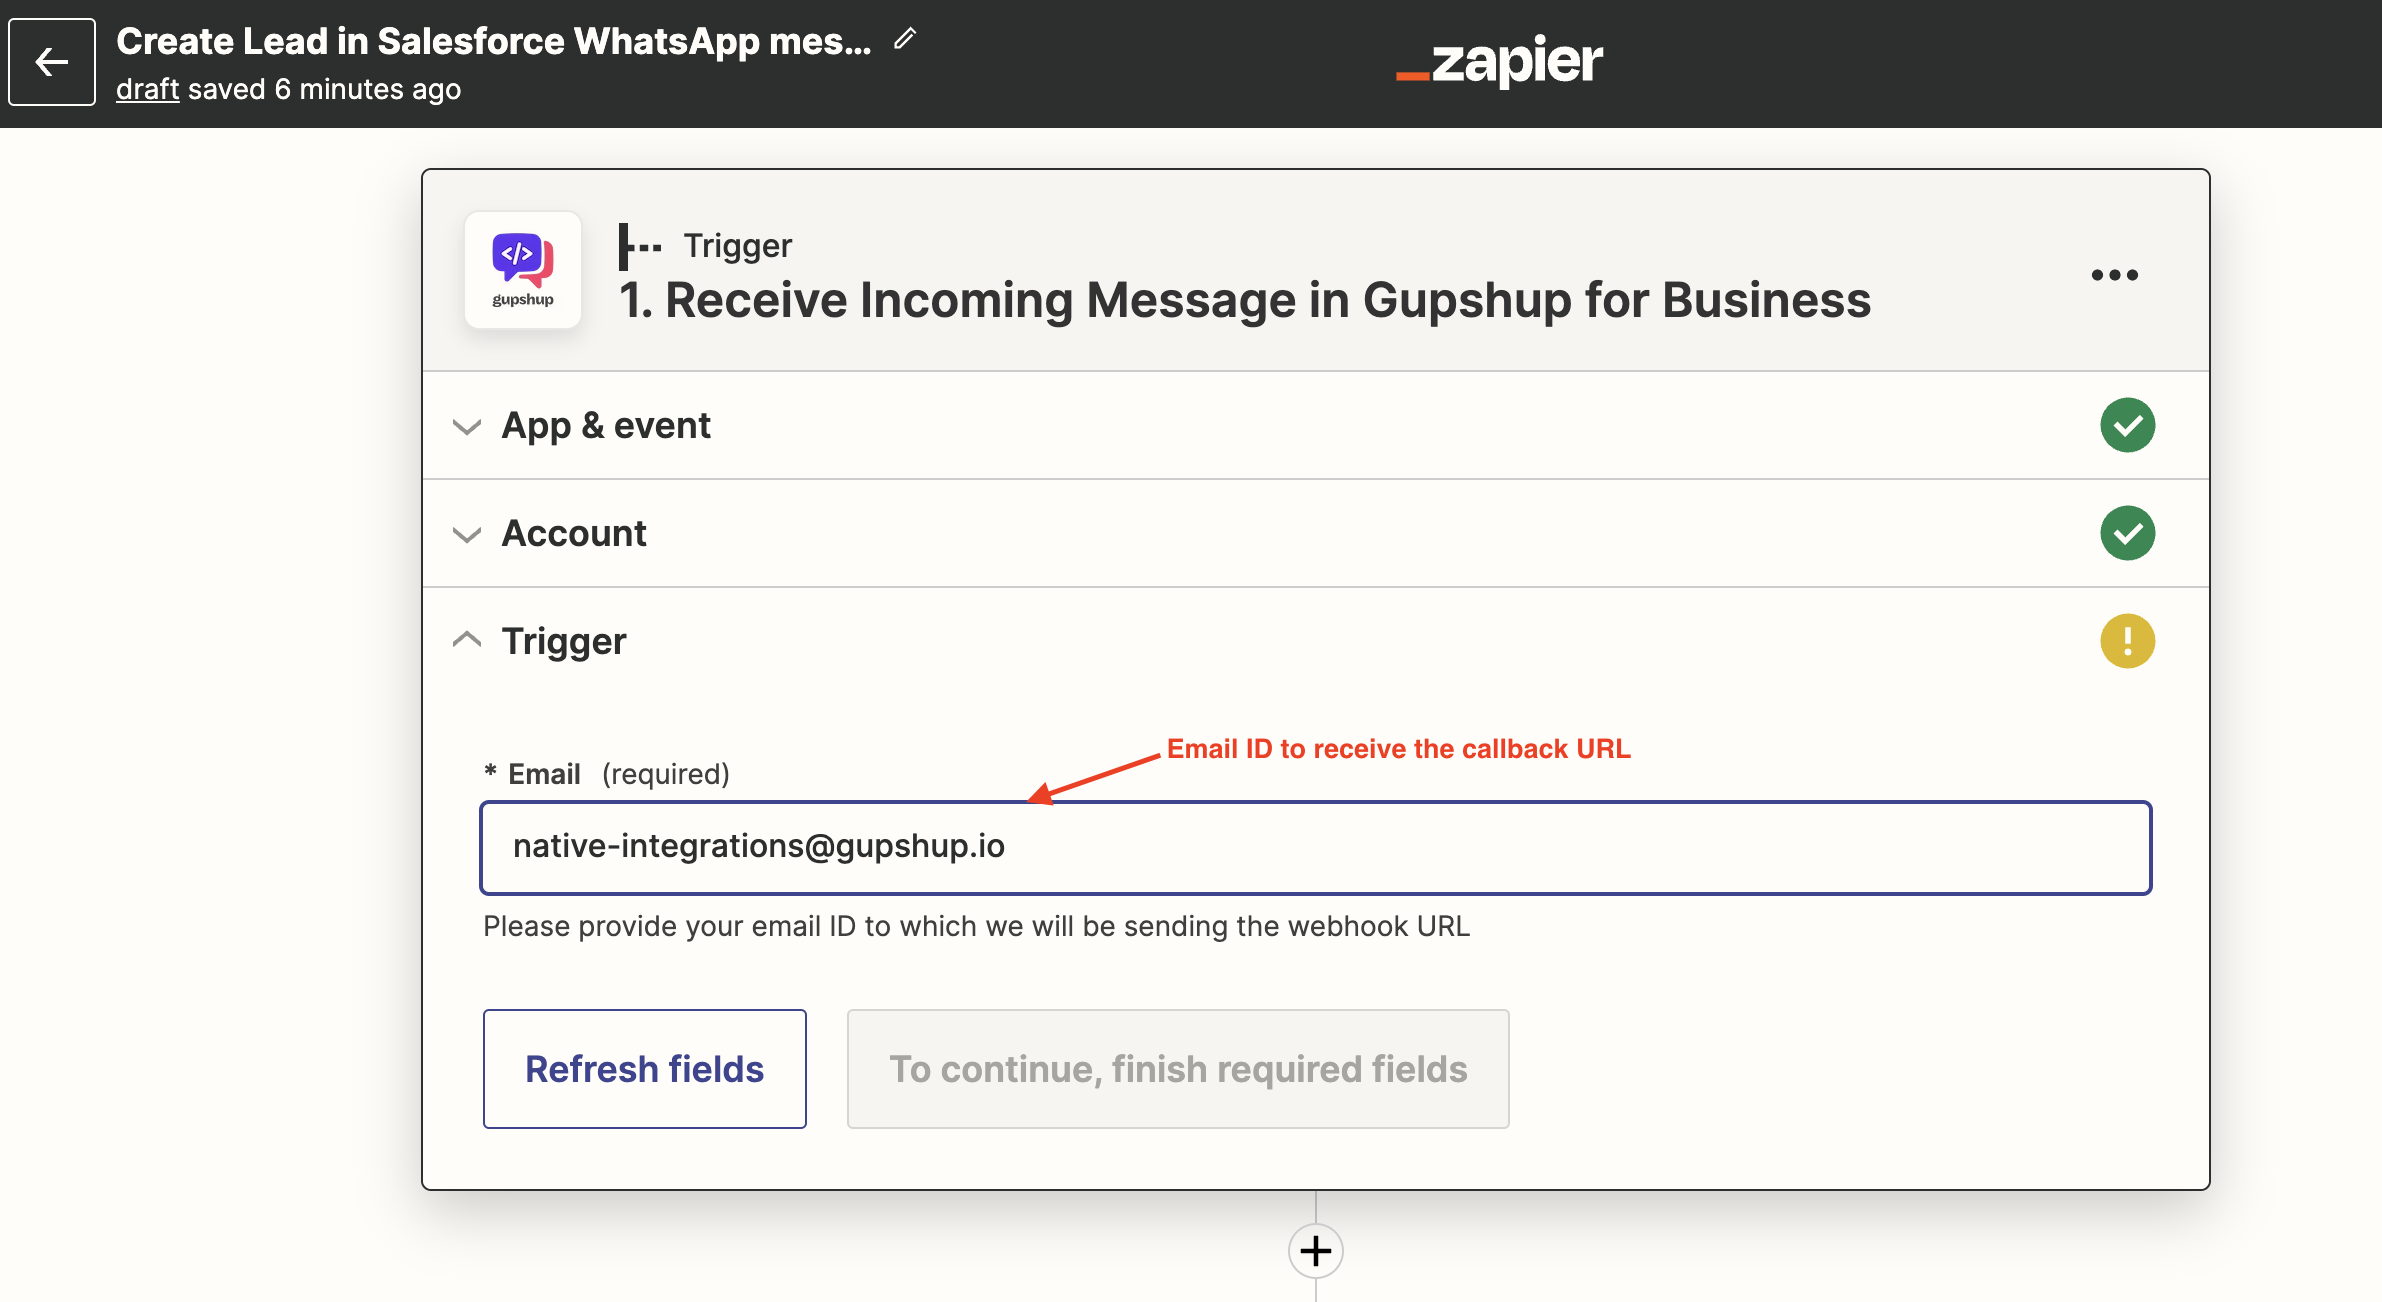
Email to receive callback URL
For the last part of the first step, Zapier will ask you to test your trigger. If everything works, then you'll be prompted to move onto the next step of your Zap.
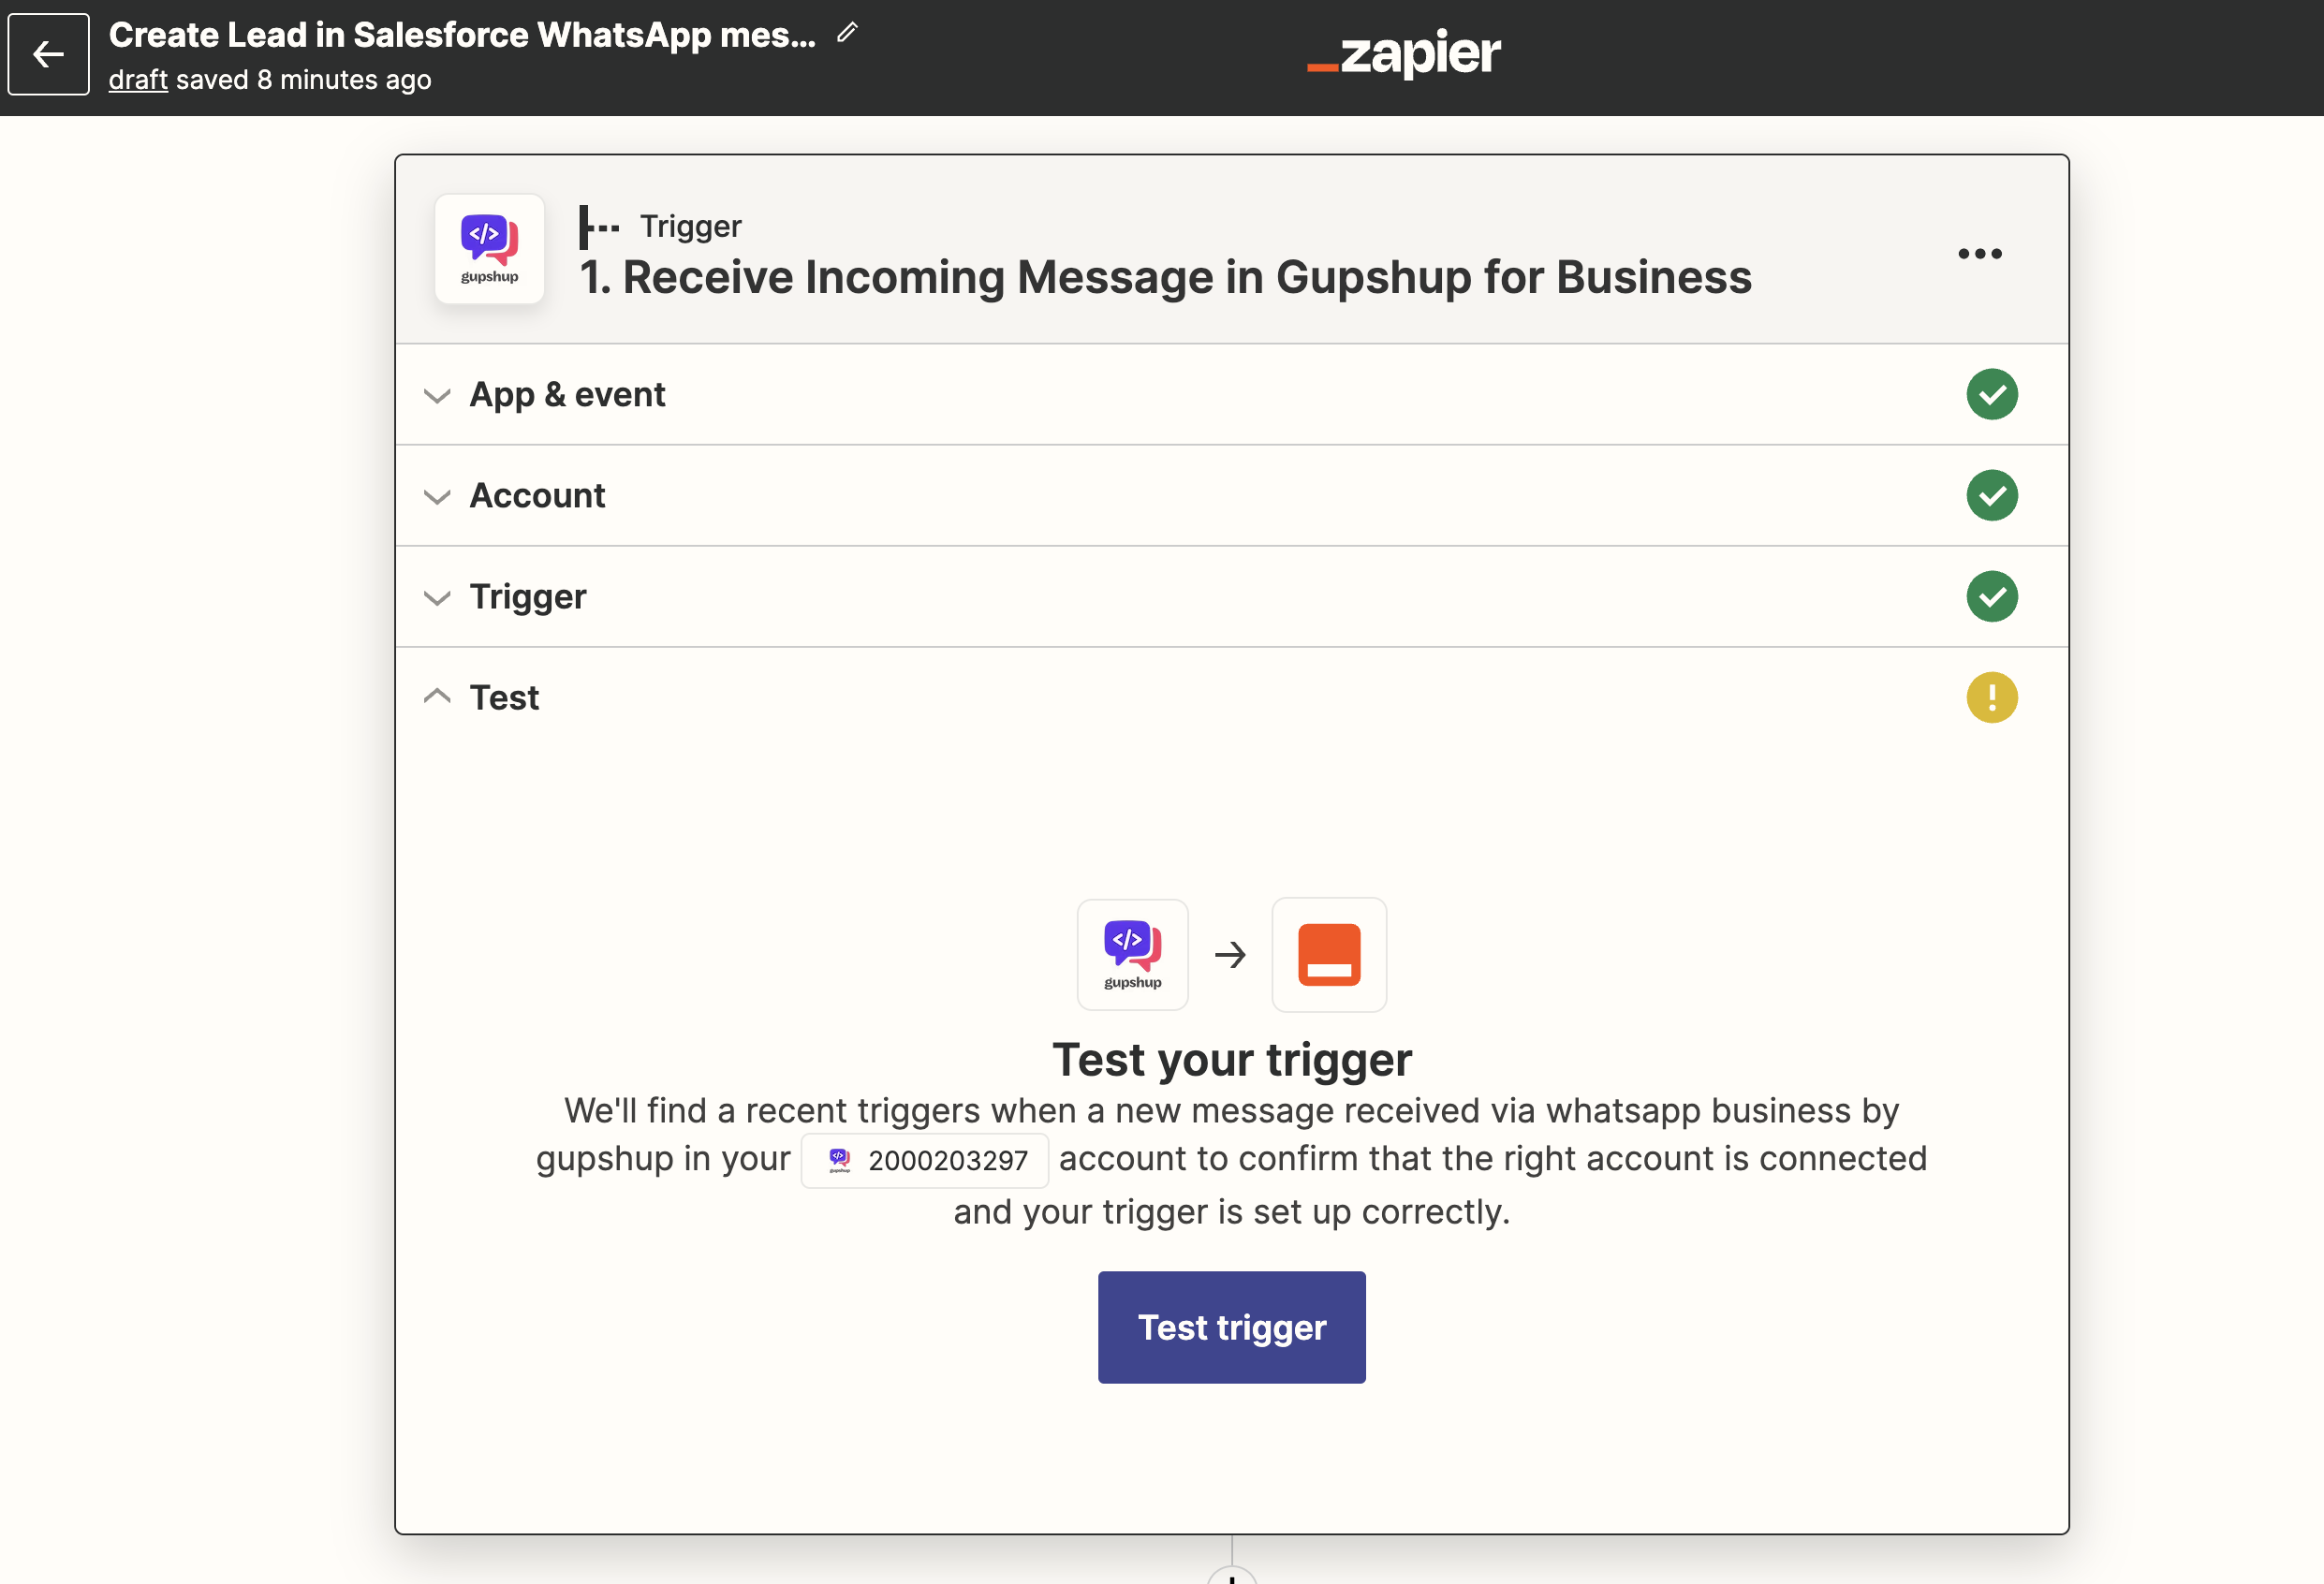
Test trigger
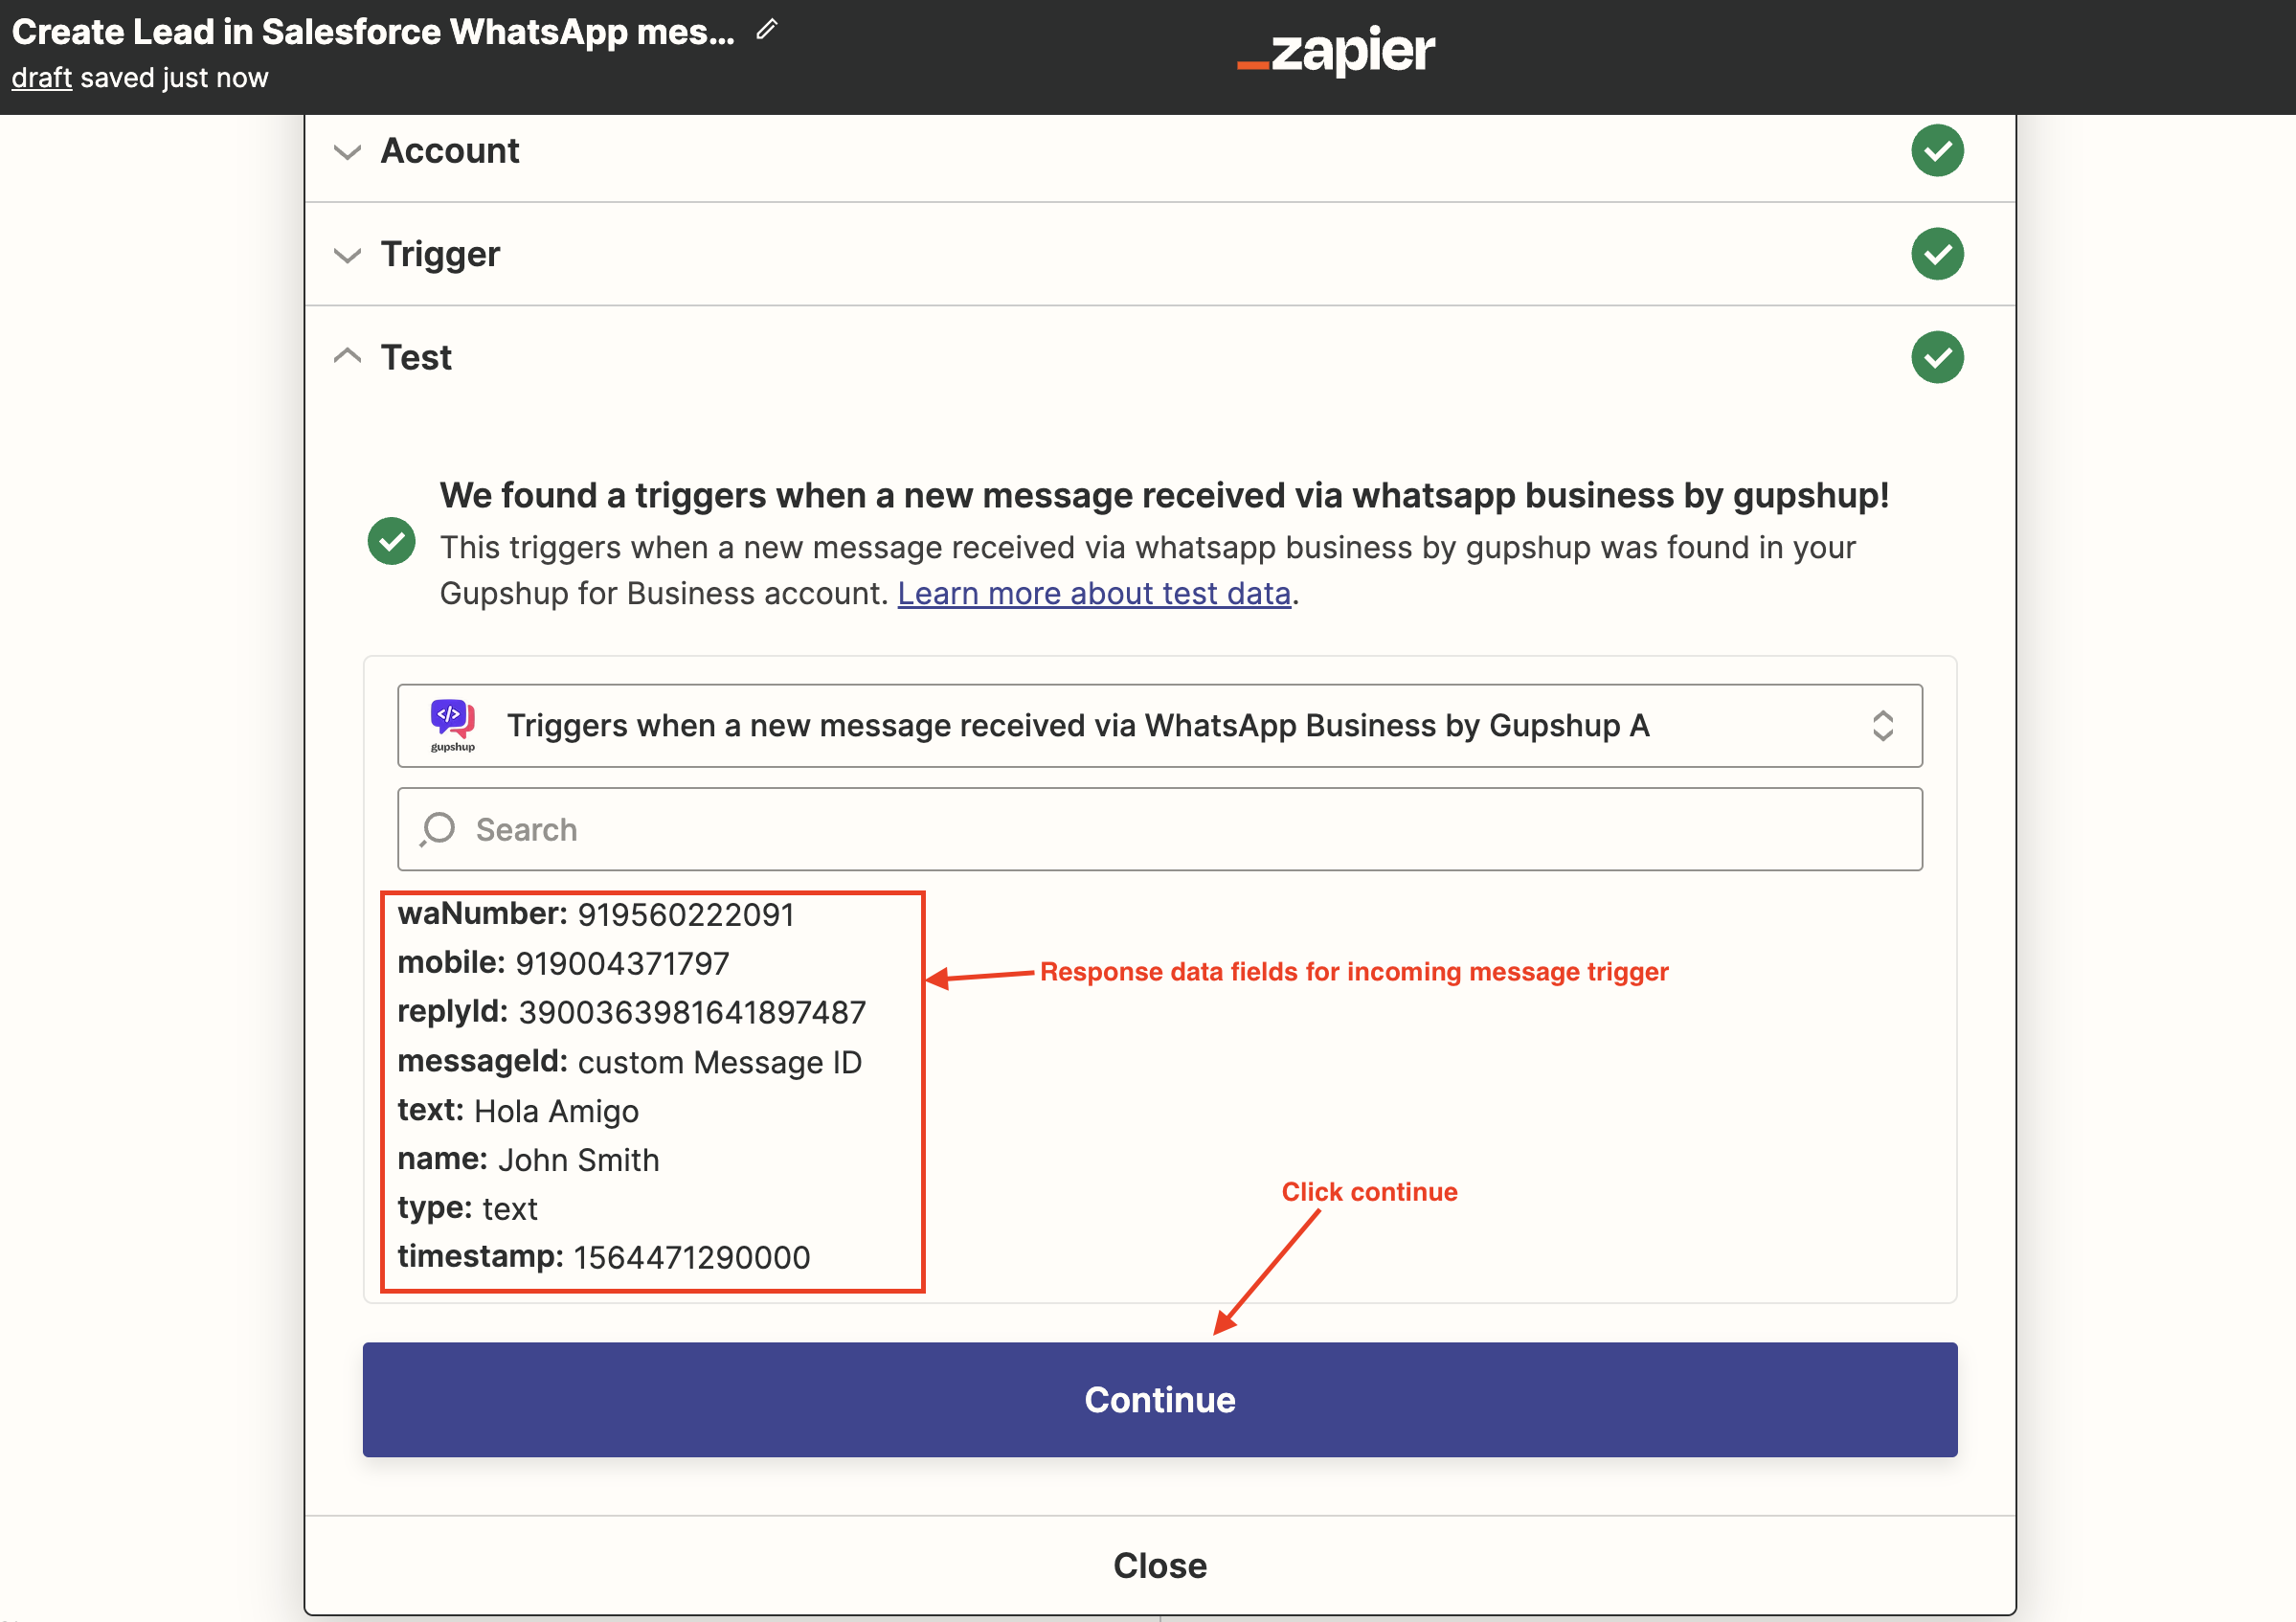
final step
Step 2: Set up the action
For the second step, you'll be asked to pick an action app. You can pick any action CRM app such as HubSpot, Salesforce, Zoho CRM etc. For this example, let's pick HubSpot as the action app.
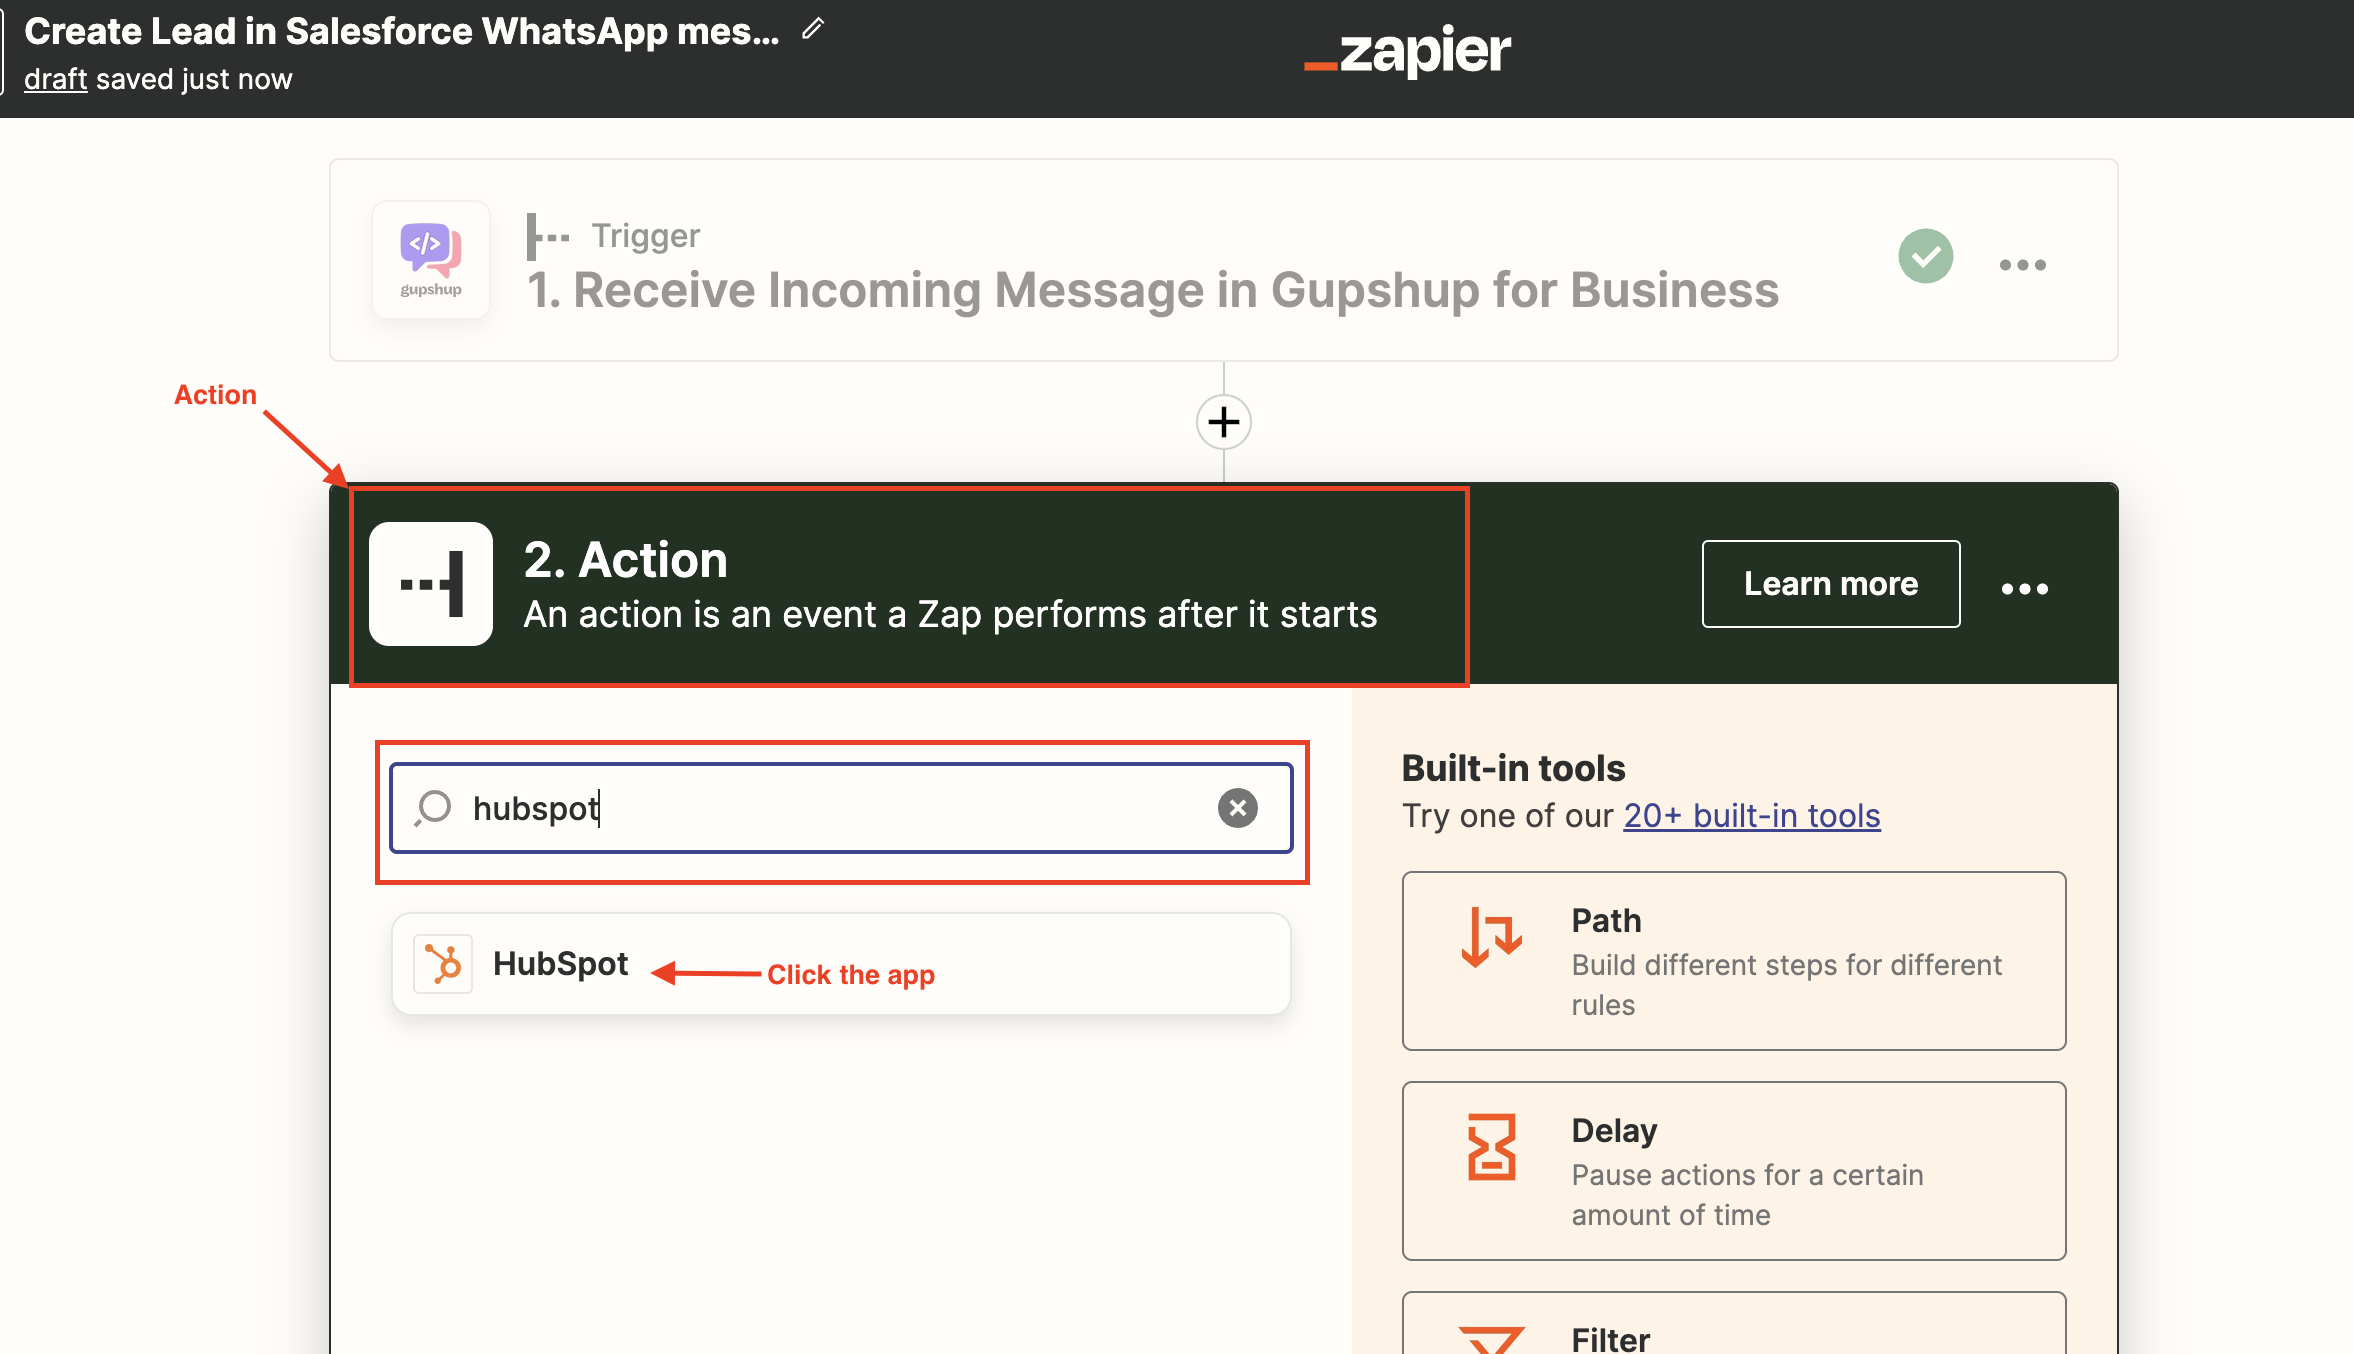
Action
You'll then be asked to select an action for HubSpot to take. There are a variety of potential options, but for our purposes, we want to pick Create Contact. this action will create a contact in HubSpot.
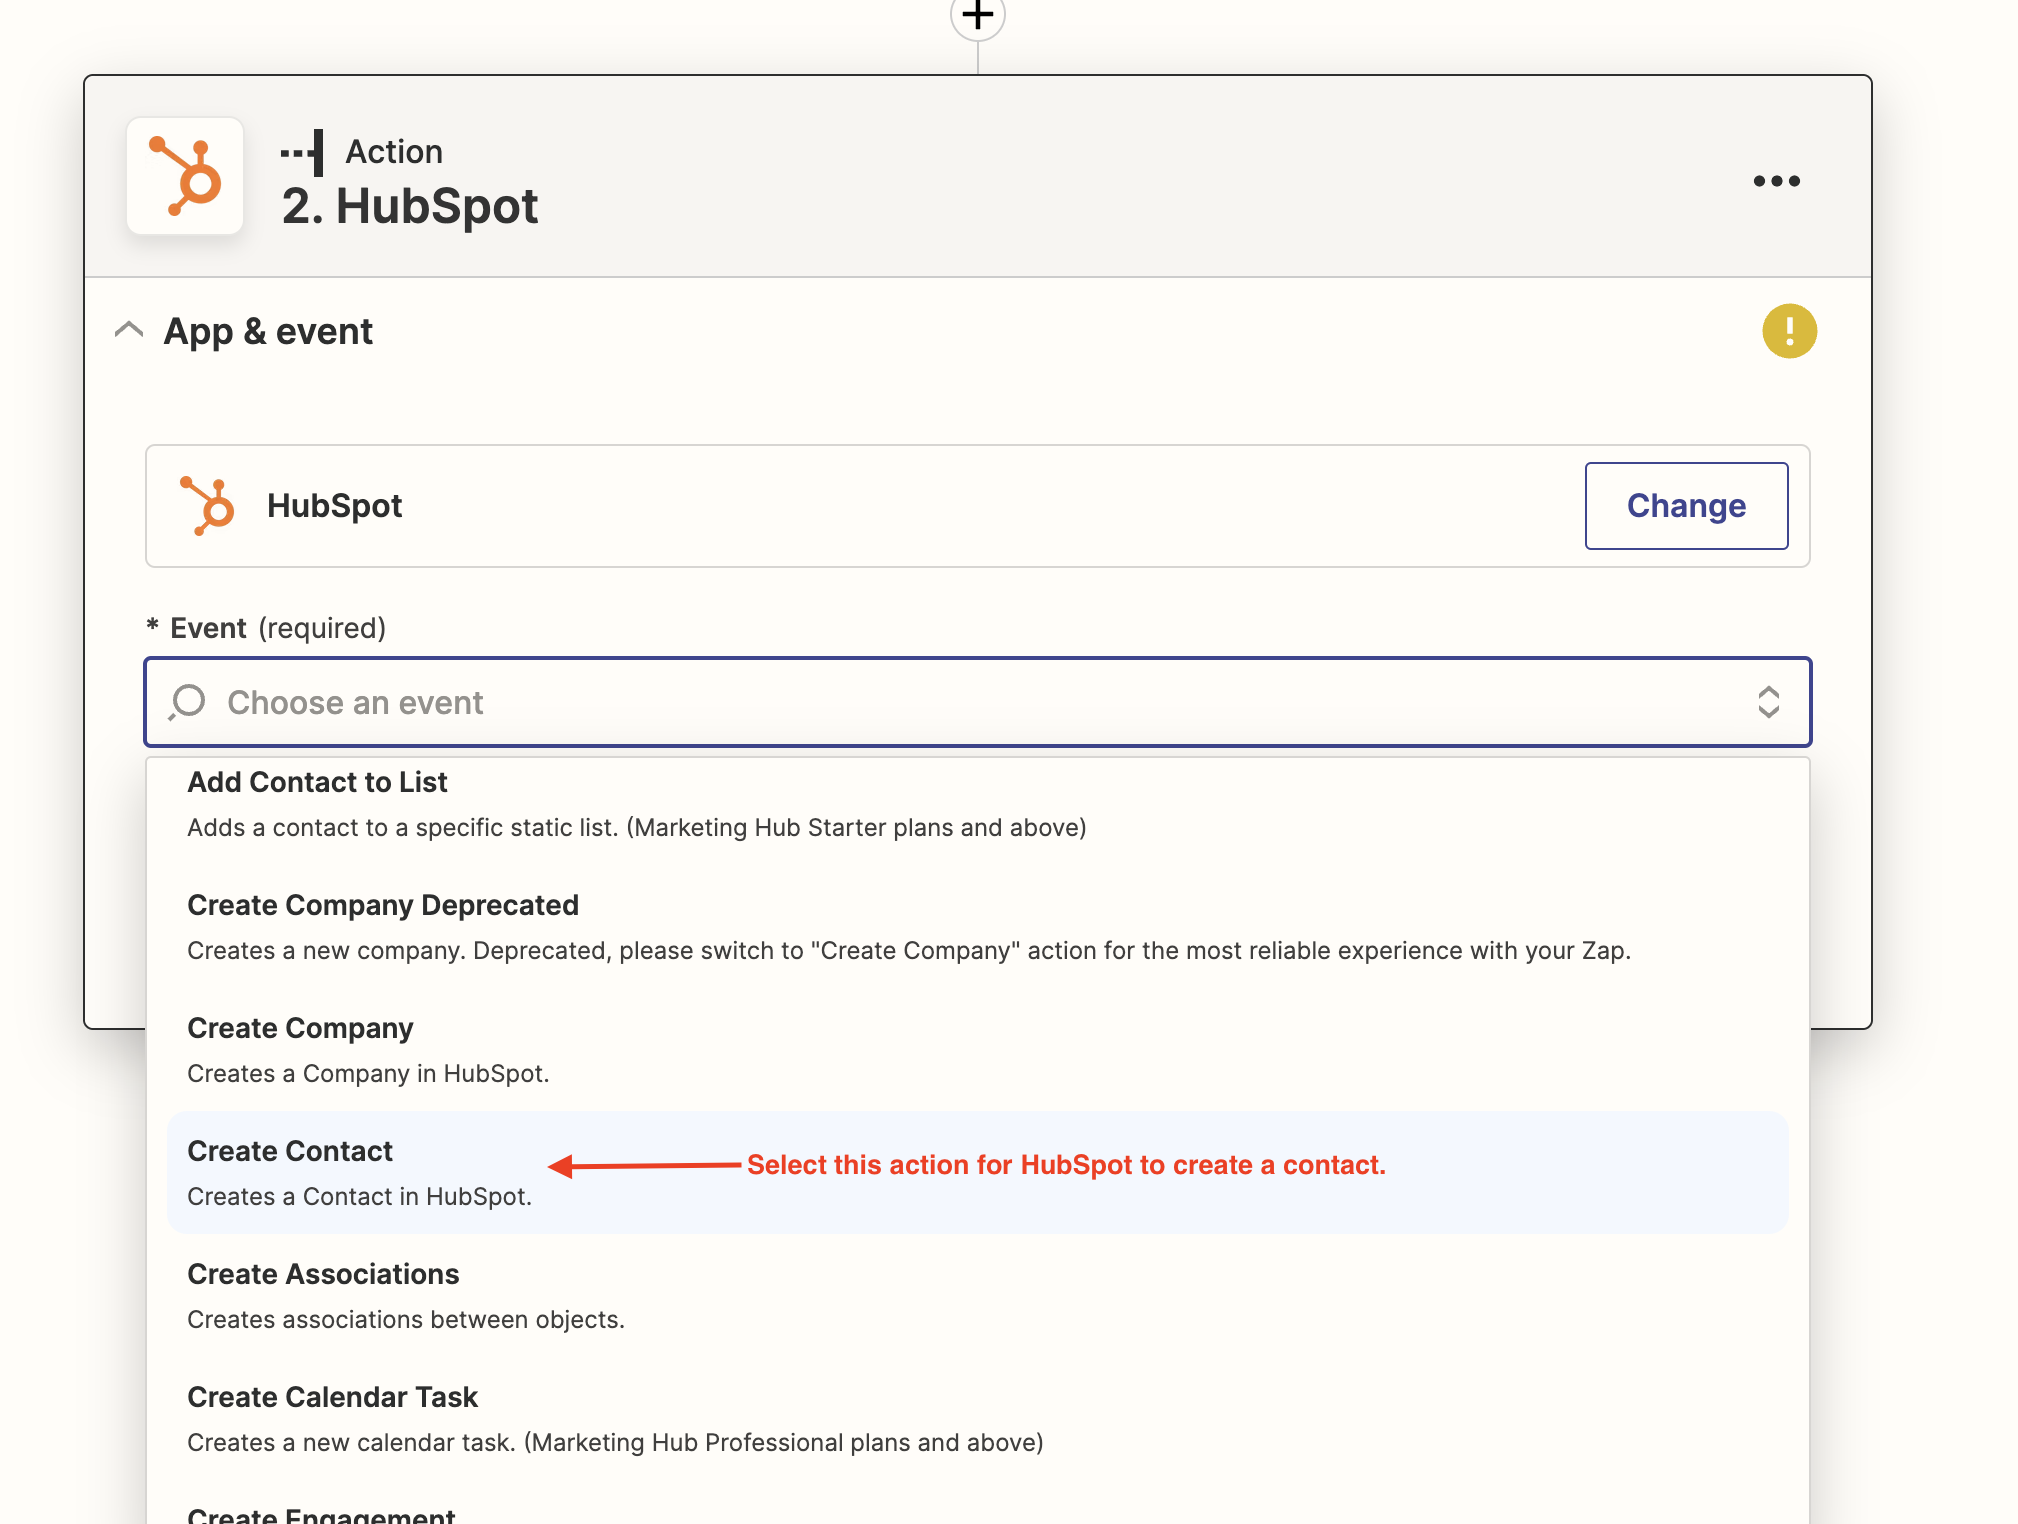
Choose action - Create Contact
The next step is to connect your HubSpot account to Zapier (or to select an already connected HubSpot account). Click Sign in.

Connect HubSpot
HubSpot Authorization: HubSpot uses OAuth_2 based authorization. This means authorizing the supported services of the HubSpot with a set of permissions through HubSpot oAuth Sign In. Once signed in successfully, the user needs to allow the set of scopes intended to perform the activity in the zap on your behalf.
After clicking on SignIn,A window will pop up containing the list of HubSpot accounts you hold. Refer to the following image:
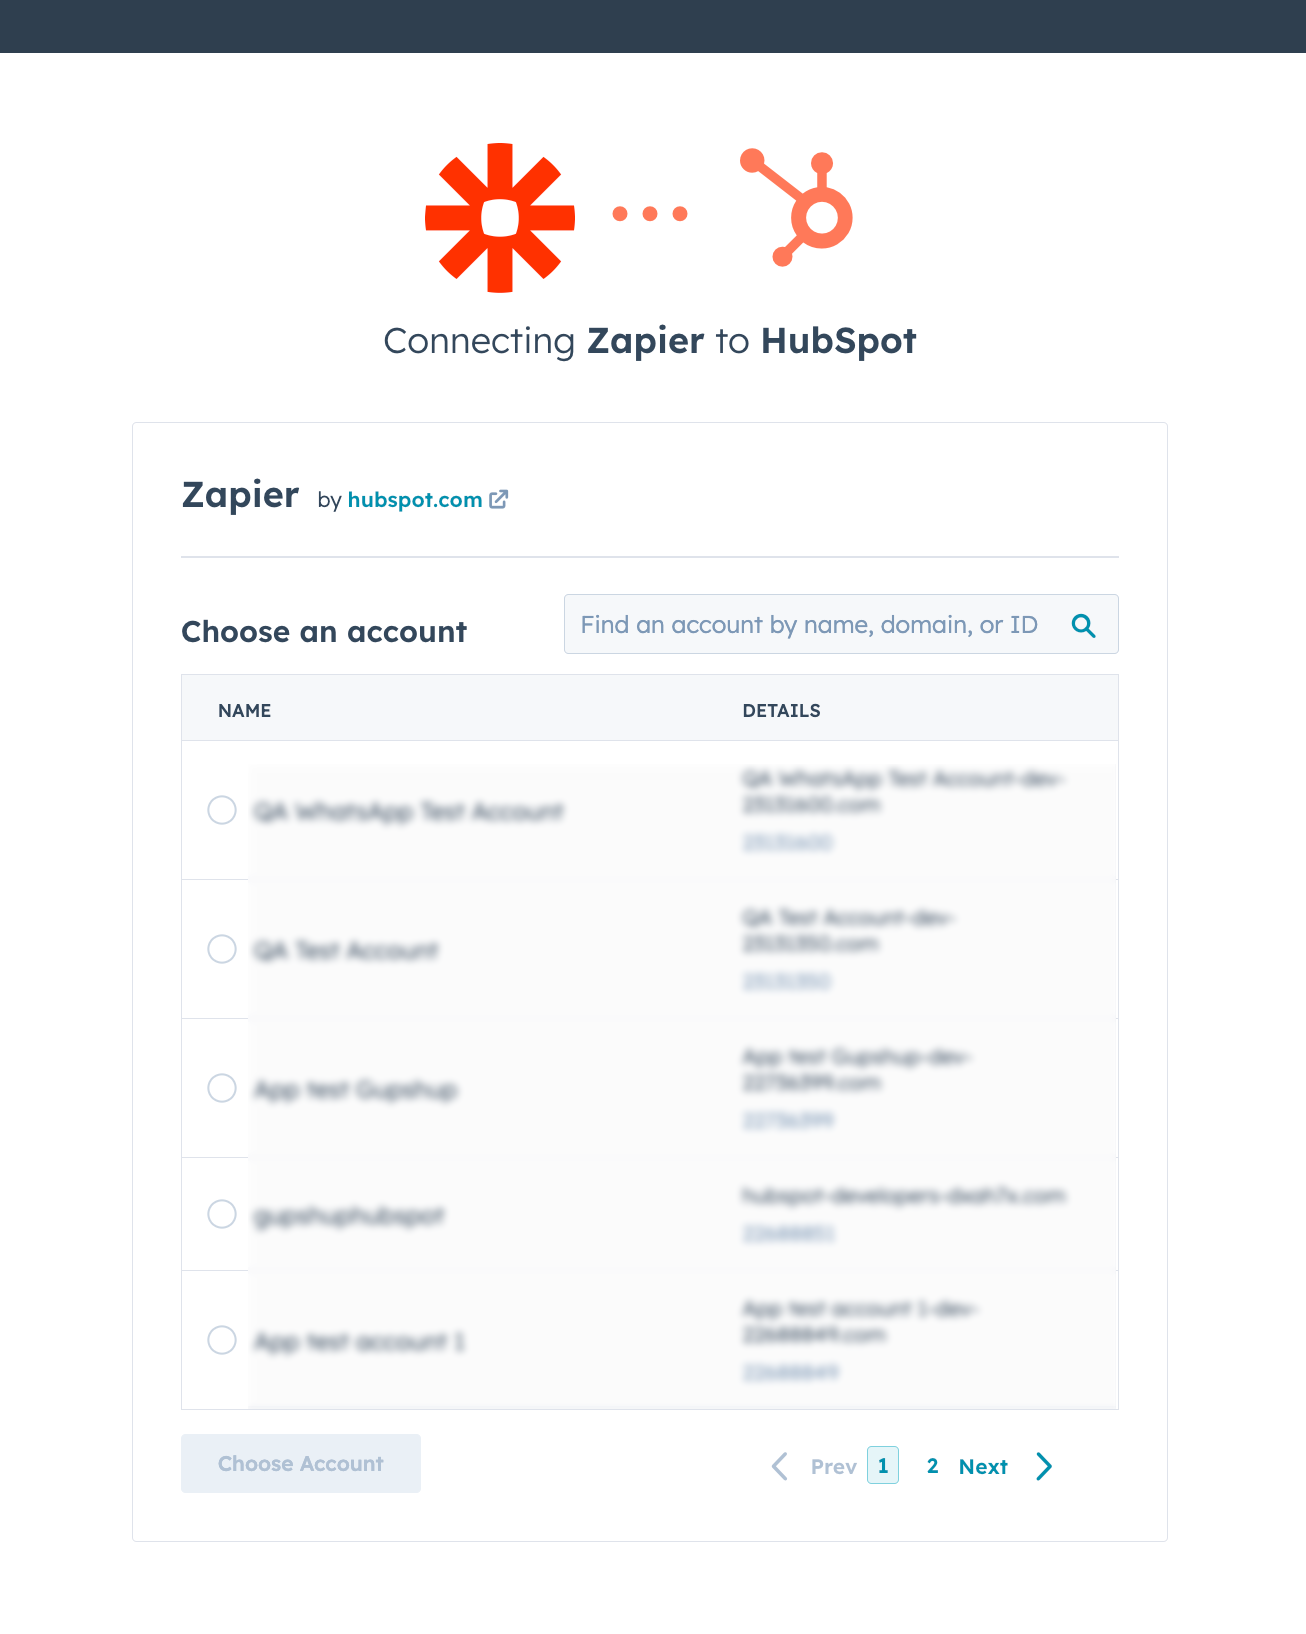
A list of HubSpot accounts
Choose a HubSpot account with which you want to continue creating a connection. You'll be taken to the next connection window where Zapier Automation requires permission to access your HubSpot account's information:
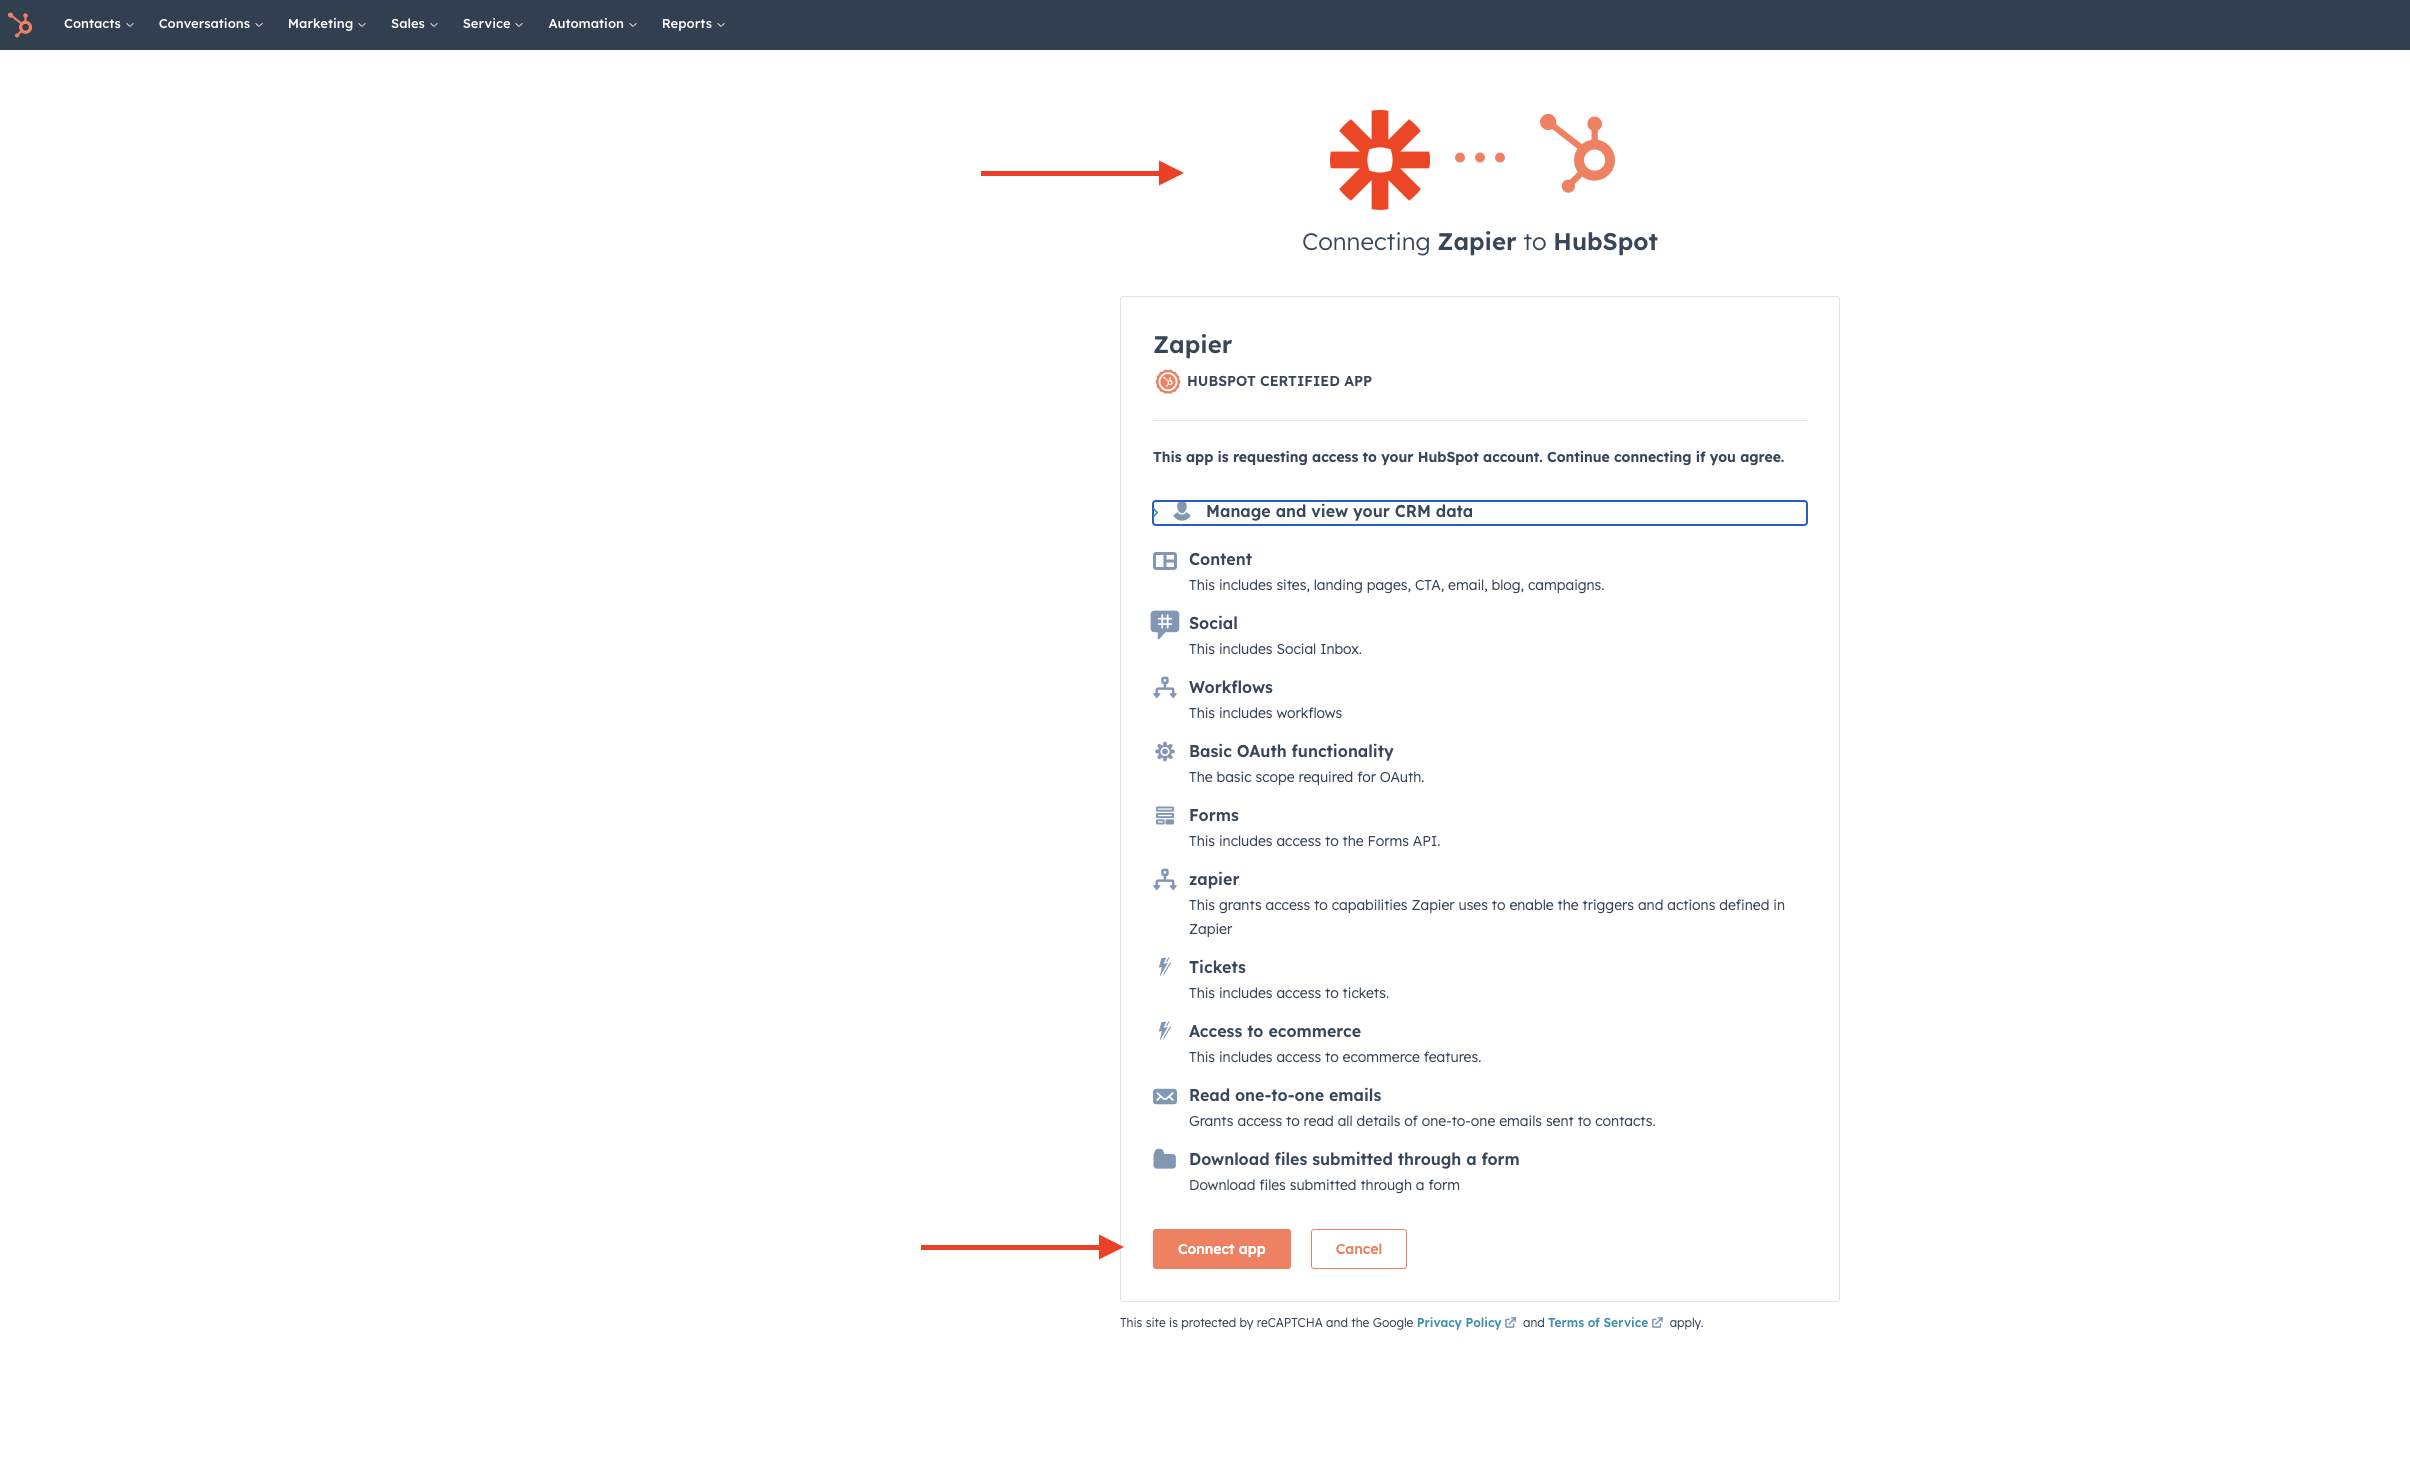
The permissions window
Once your HubSpot connection is successfully established, you’ll see the further action fields of HubSpot as shown here:
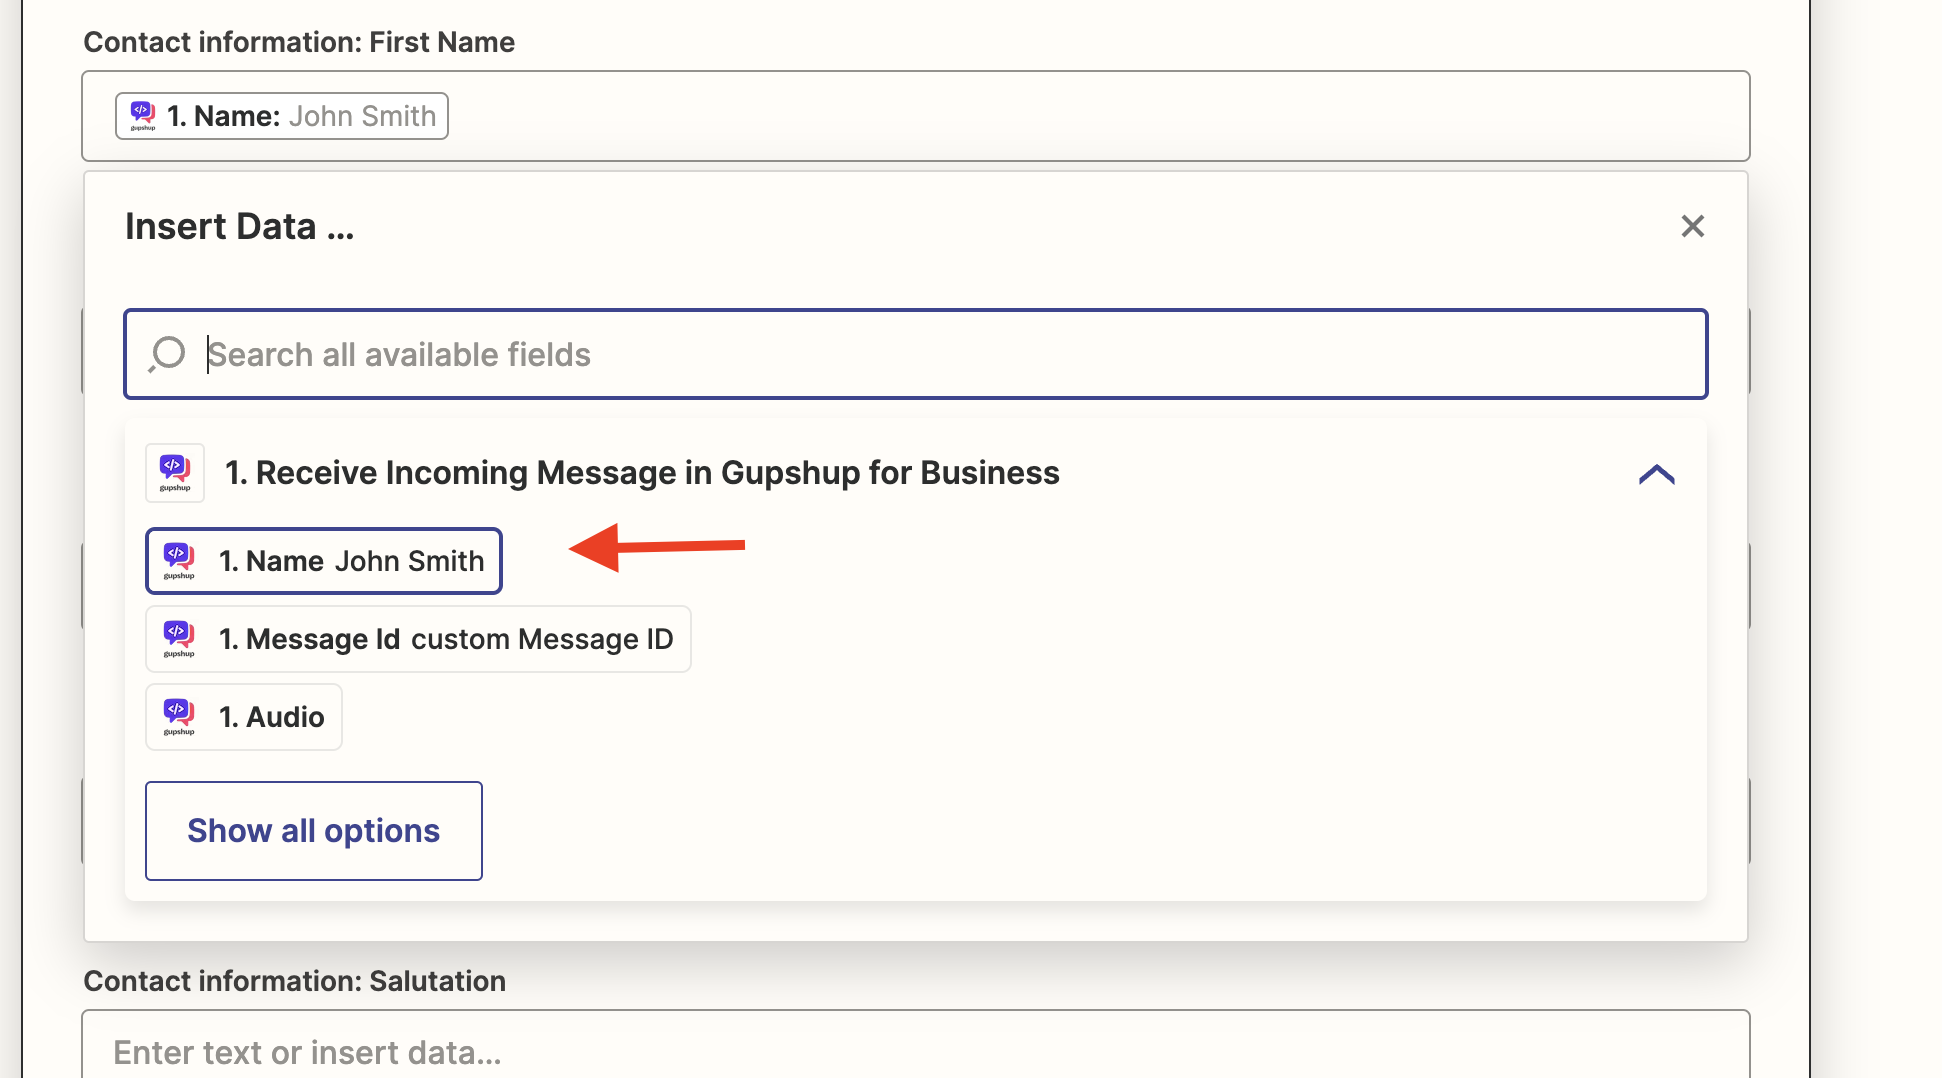
After that, you'll need to set up the contact details for the HubSpot. There are several customization options here, but at a minimum, you'll need to specify an Name, Phone Number.
When creating the contact in Hubspot for your action step, you can incorporate both plain text and dynamic data from the incoming message from Gupshup WhatsApp. So say you have received an incoming in our "Gupshup account". Since that record triggered this Zap, we would have access to that record's data in the Zap itself, so we could include that data in our contact record in HubSpot. When inserting data on any of the contact inputs, you can access the available record data from the dropdown menu as shown in previous image.
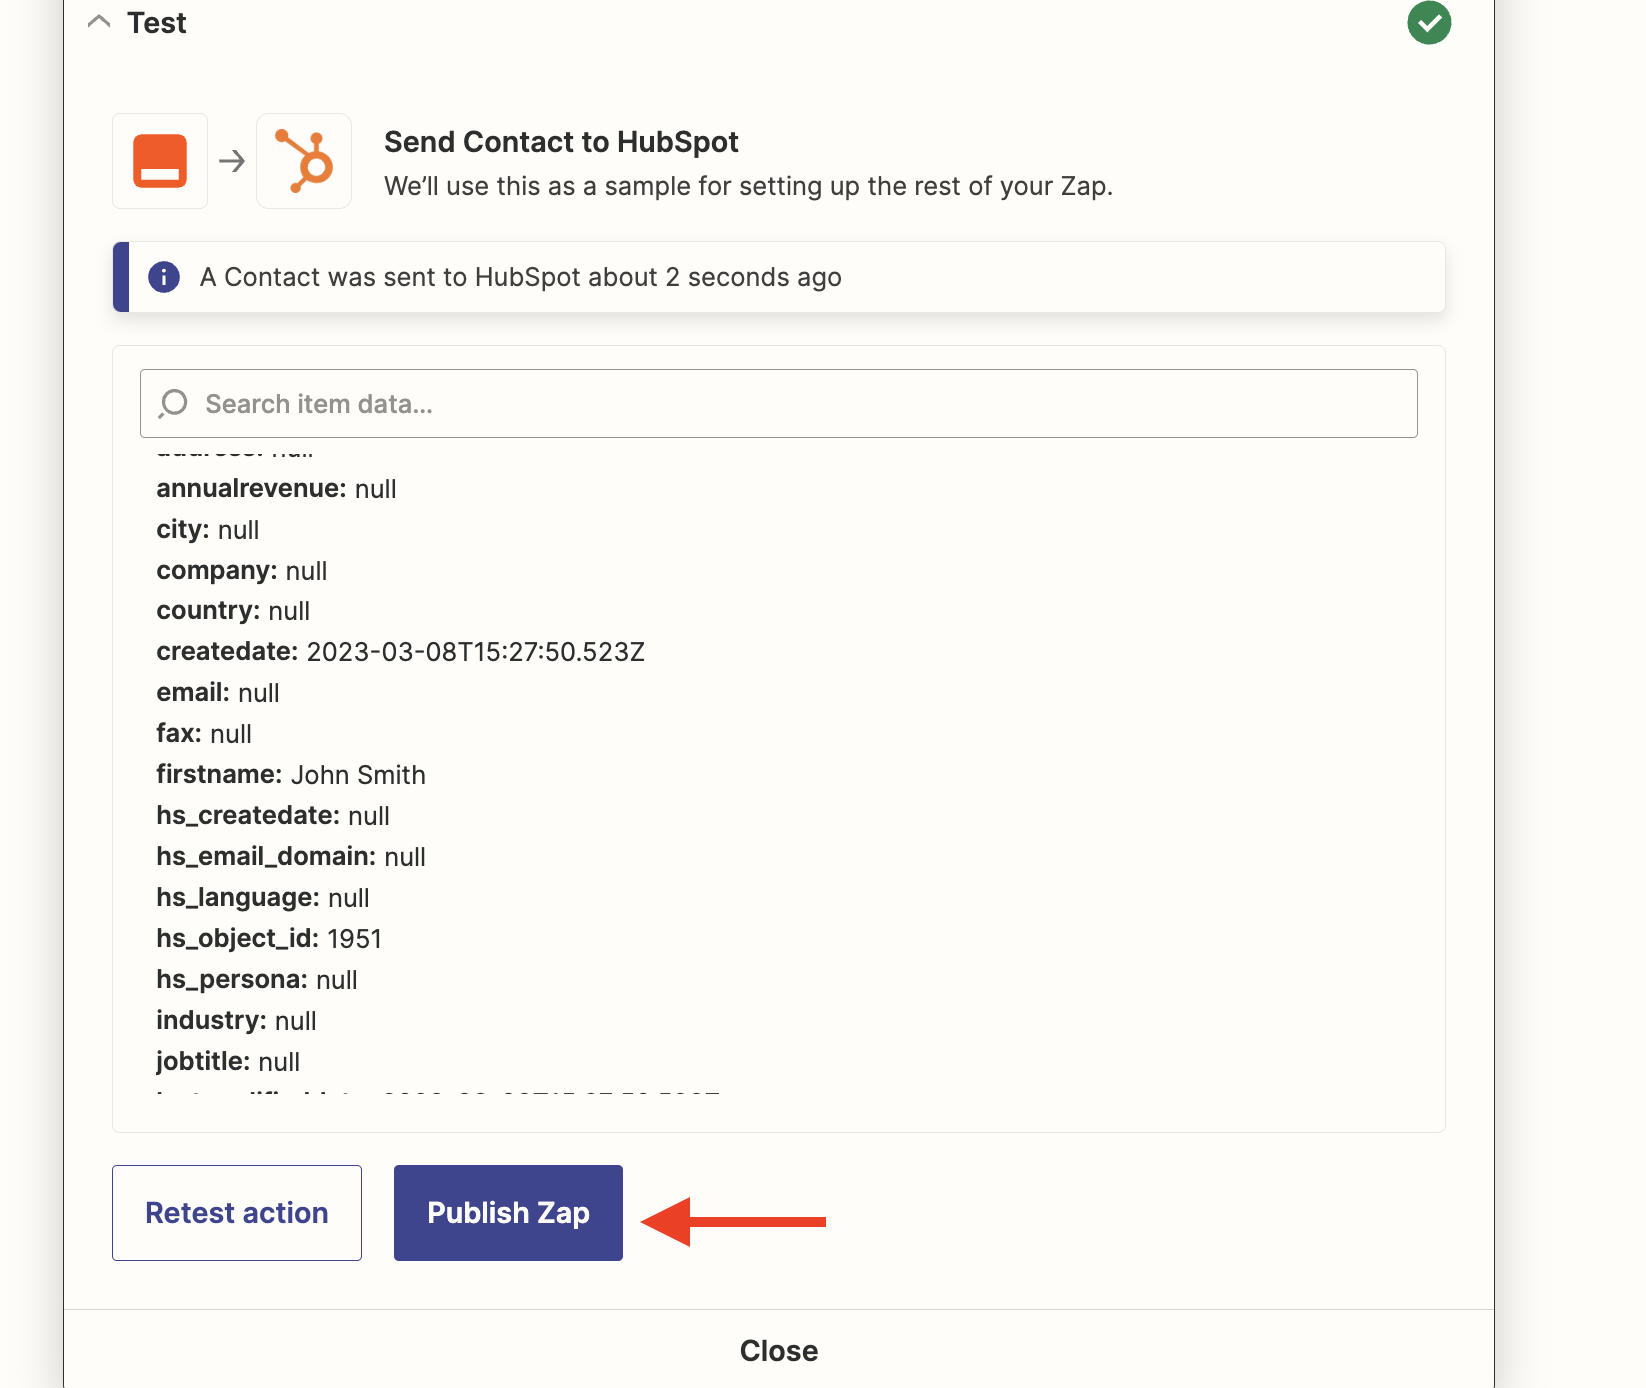
Once you're done creating the contact data, click the blue Continue button. Zapier will create a contact for you before you're done completing the step so you can check to see if everything looks good. Make sure you test the action before moving on:
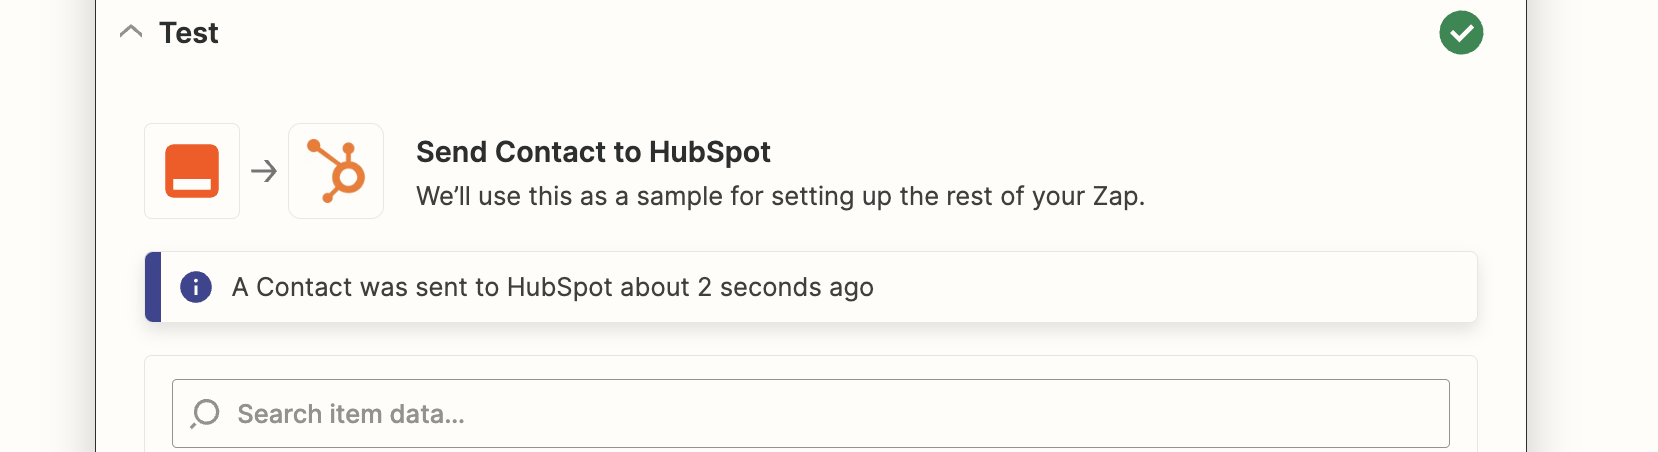
Test action
After testing, all that's left to do is to turn on the Zap! Congrats! You've set up create contact workflow!
Updated 9 months ago