Step 2: Configure Self-Client
Once the app is successfully installed, we need to set up authentication configuration in extension.
Setup OAuth with Zoho
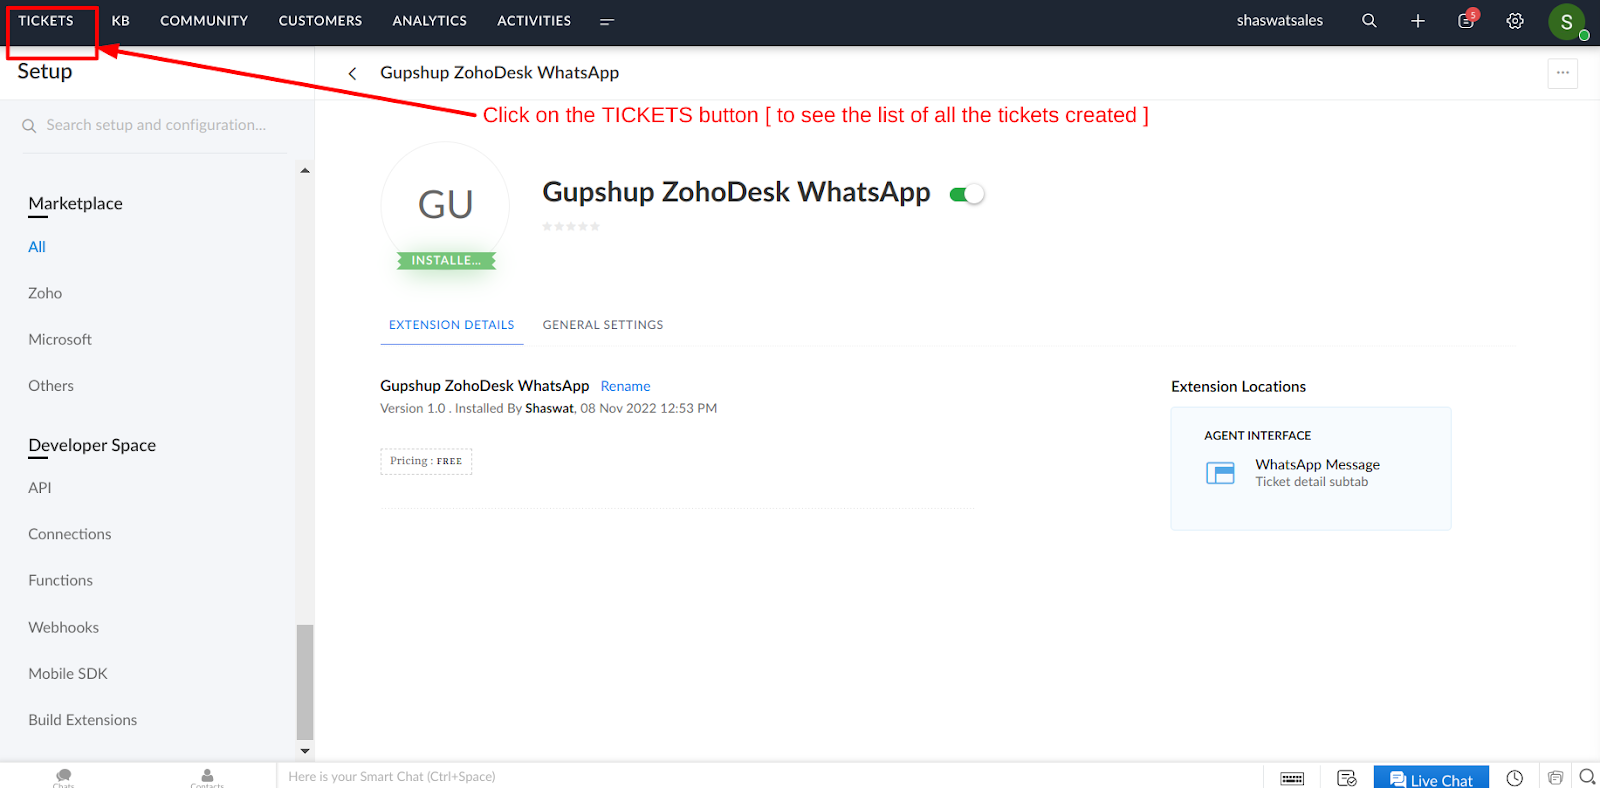
- Click on the Tickets button on the top left corner of the page to see the list of all the tickets
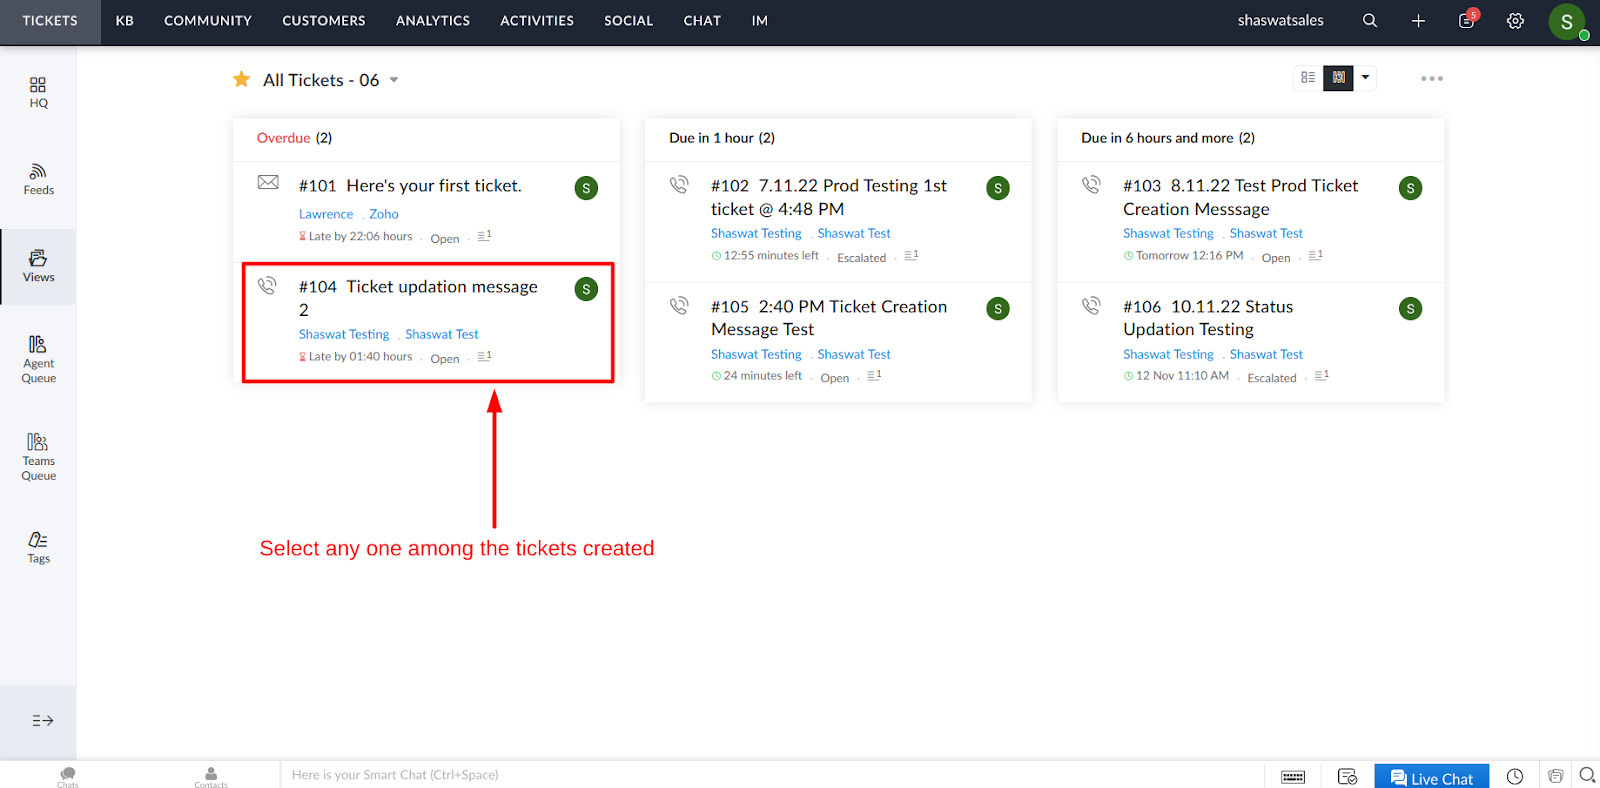
- Open any ticket / We can try by creating one
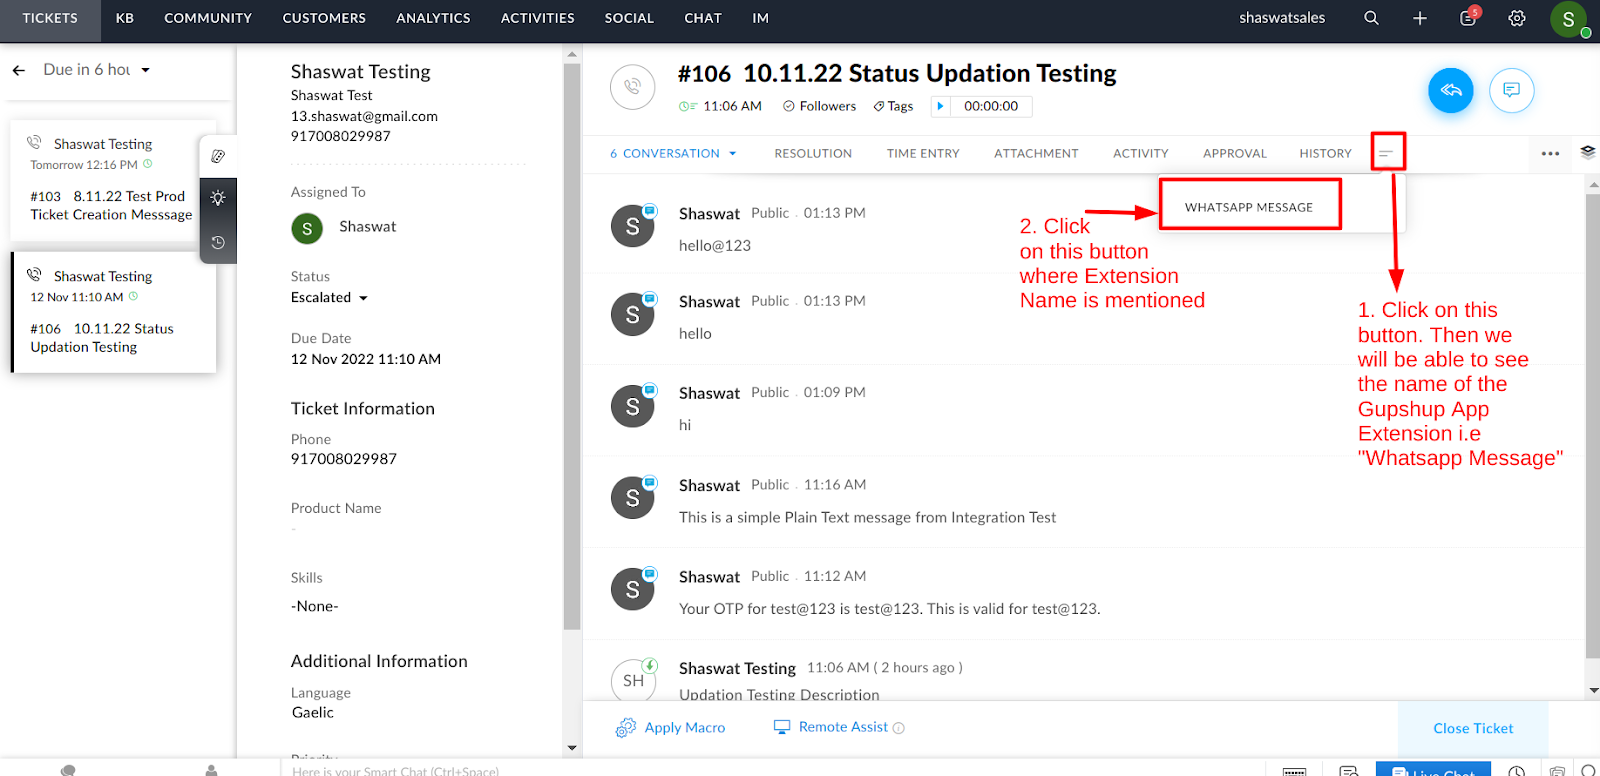
- After opening the ticket, click on the Name of the Gupshup App Extension. In this case, it’s QA WHATSAPP MESSAGE
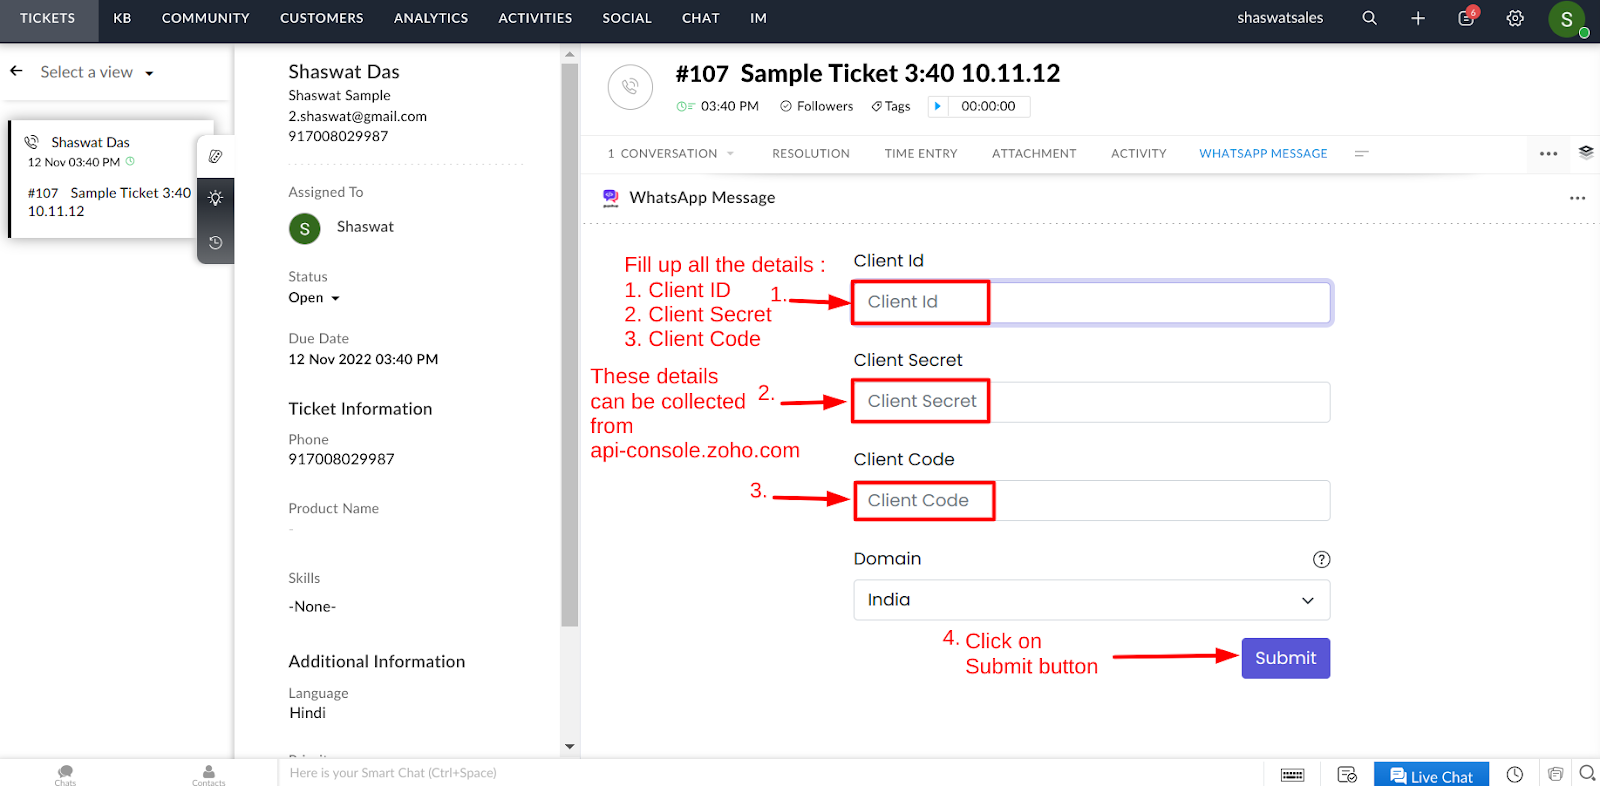
- This action will end up opening the Landing Page of Gupshup App Extension of ZohoDesk. It will ask for Client ID, Client Secret and Client Code. Fill up and then click on Submit button.
- Client ID is a unique identifier you receive when you register your application with Zoho.
- Client Secret is a unique key generated when you register your application with Zoho. This must be kept confidential.
- Client code The client code is used to create an access token and a refresh token.
- Domain Domain name of the API. You must use your domain-specific Zoho Accounts URL to generate access and refresh tokens. Supported domains US, AU, EU, IN, CN, JP
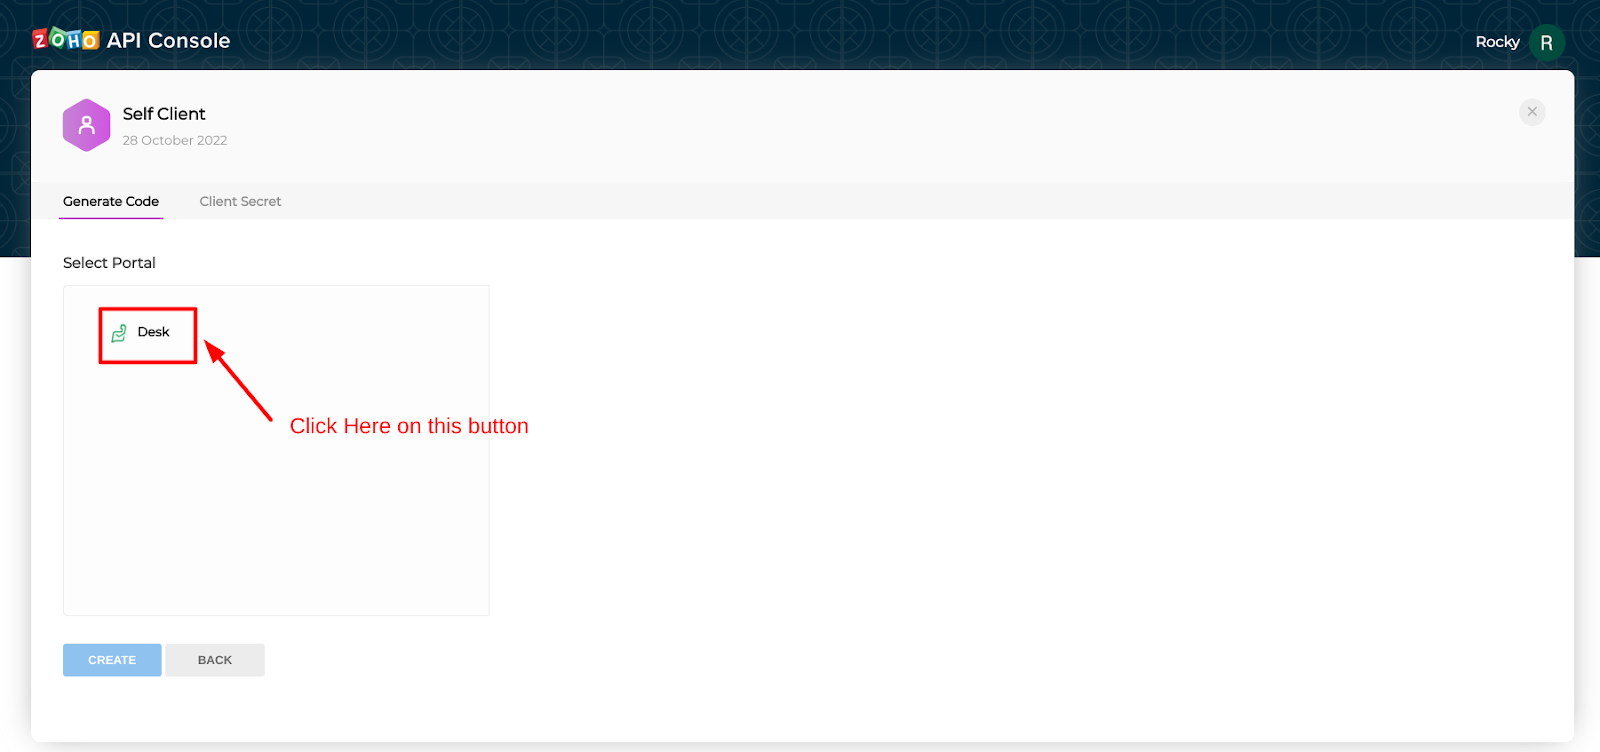
Create Self Client
To create a self client,
- Go to Zoho API Console and click GET STARTED.
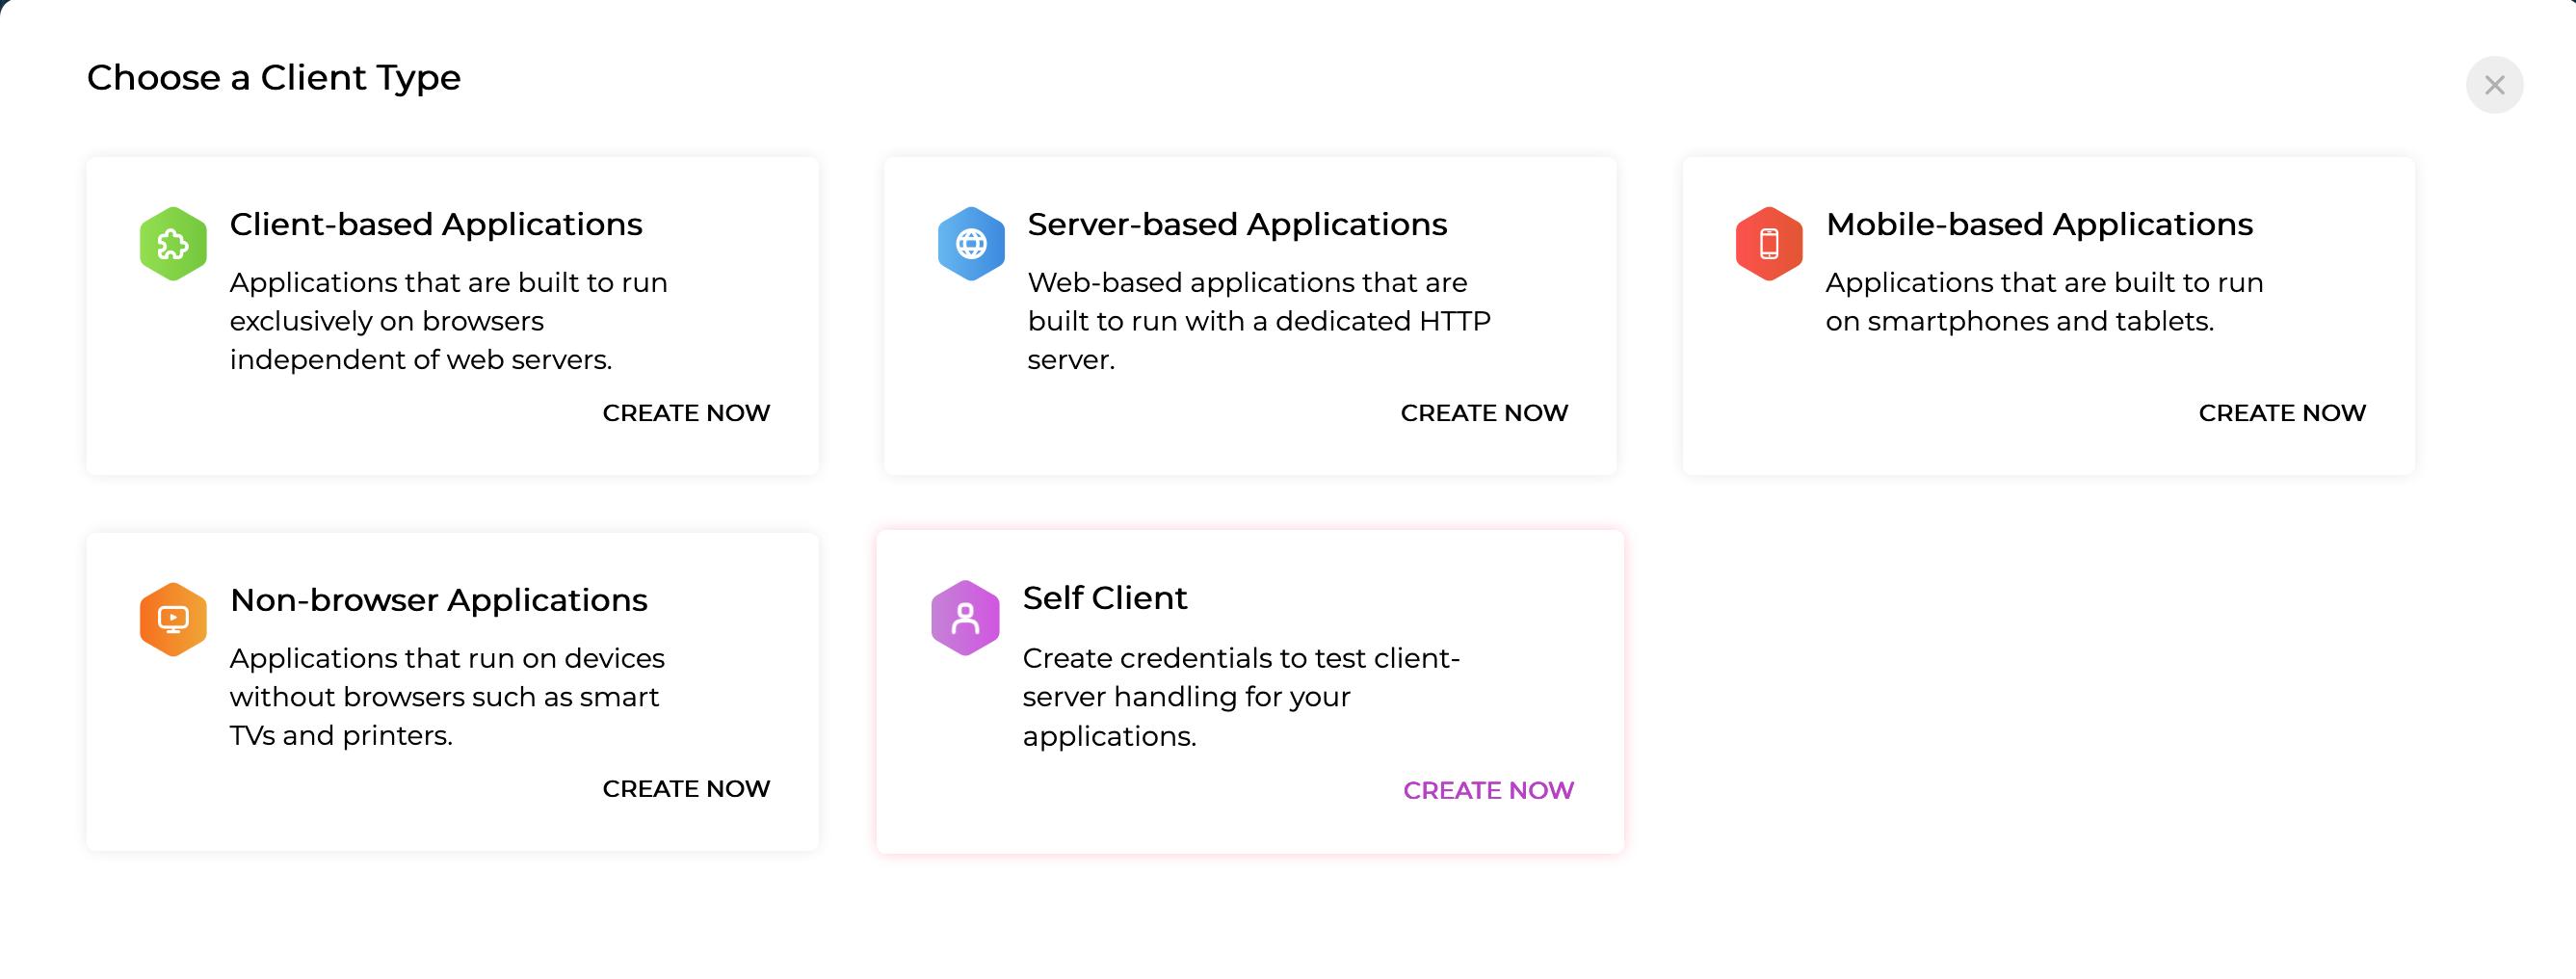
- Hover over the Self Client click CREATE NOW and then click OK.
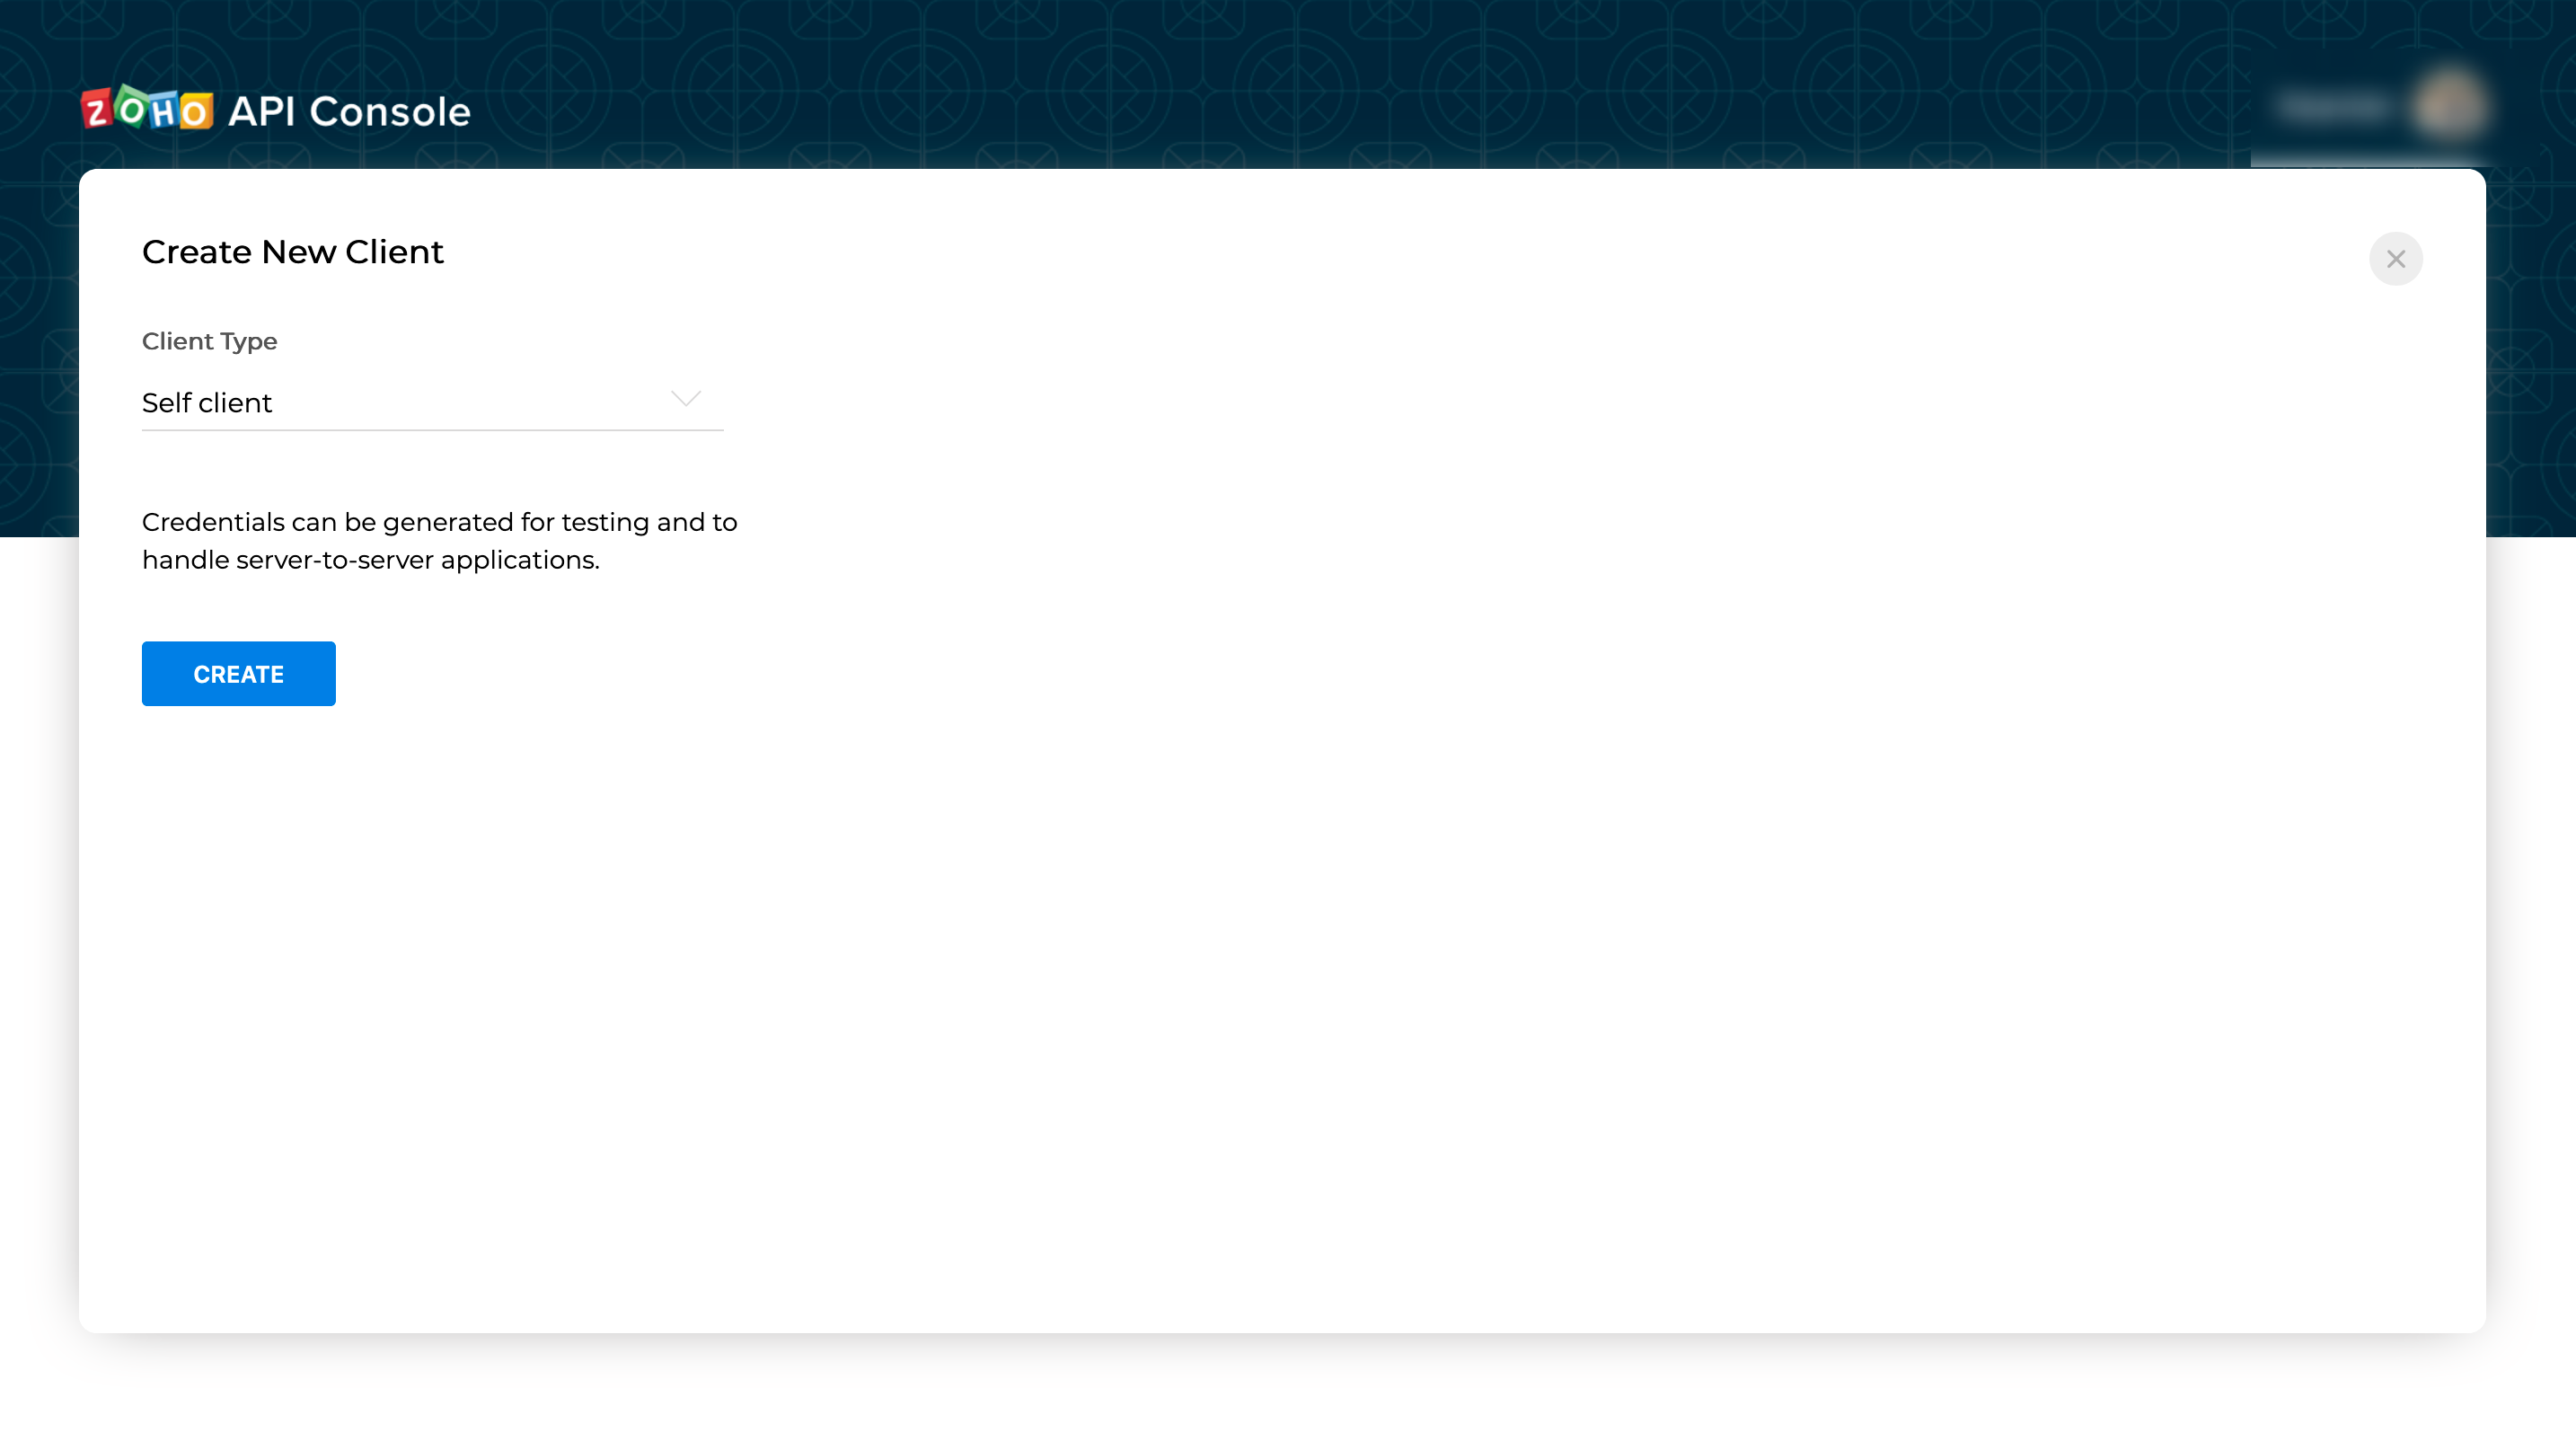
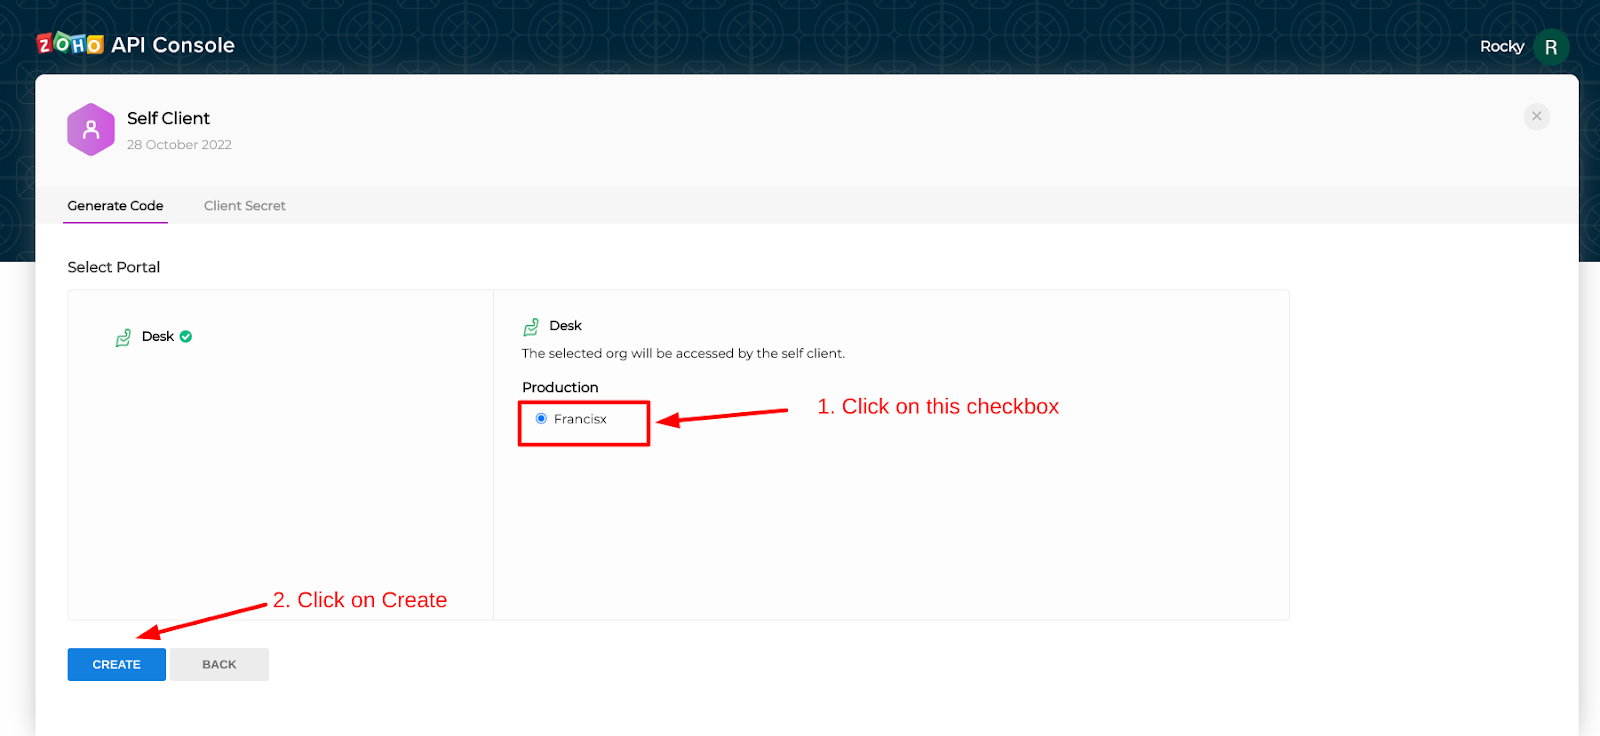
- Enter client type Self client and click CREATE
- Now you can find client credentials such as Client Id & Client Secret from Client Secret Tab.

application
- You can generate Client code by filling valid scope details and setting the time duration under Generate Code tab. Scope value must be :-
Desk.tickets.ALL,Desk.settings.ALL,Desk.basic.READ,Desk.basic.CREATE,Desk.events.ALL,Desk.contacts.ALL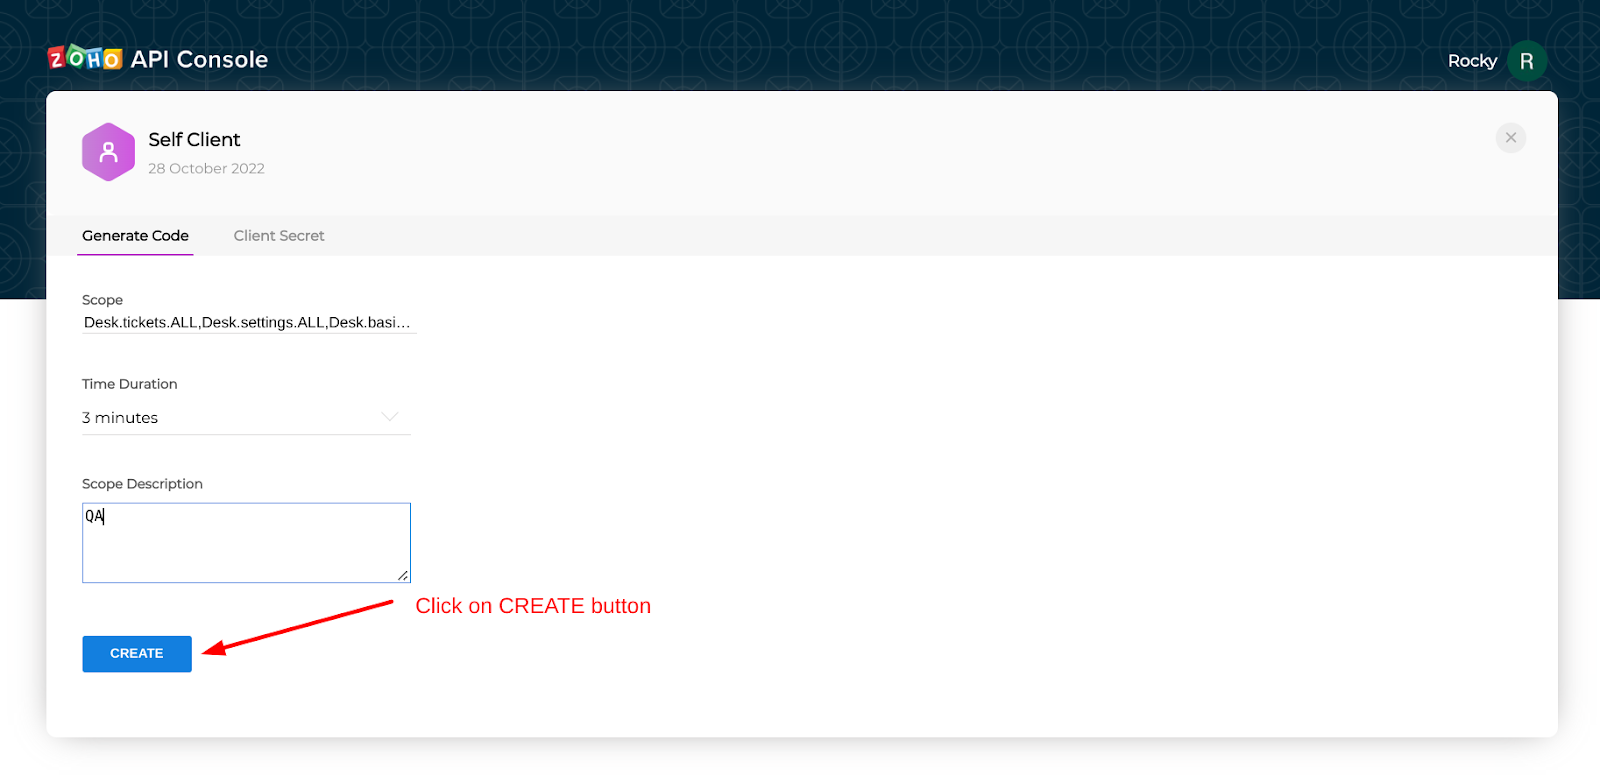
- Copy the code generated for some time and paste it in the Gusphup App Extension where it asked for Client Code too. Once, we enter Client ID, Client Secret and Client Code, we need to click on SUBMIT button
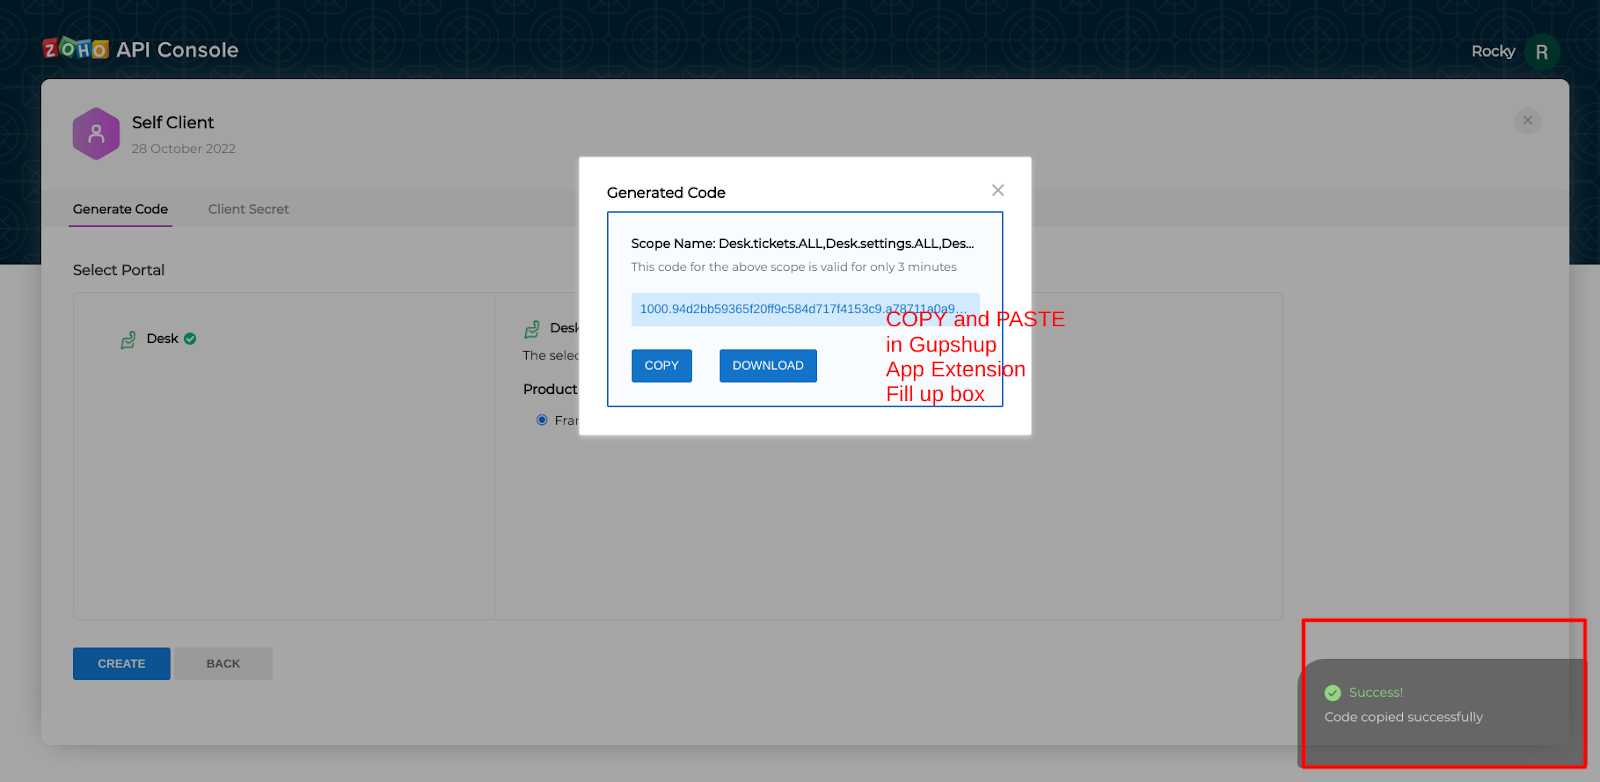
Note : This client Code can be used one time only in the selected time duration.
- Now, Go back to WhatsApp message popup in Ticket module and enter Client ID, Client Secret, Client Code and Domain
- Click Submit button
Updated 8 months ago
What’s Next
Did this page help you?