Cisco Webex Teams
How to publish a bot on Cisco Webex Teams
Log in or sign up to Webex for Developers
- Go to Webex for Developers.
- Log in or sign up into a Webex account.

Create a Webex App
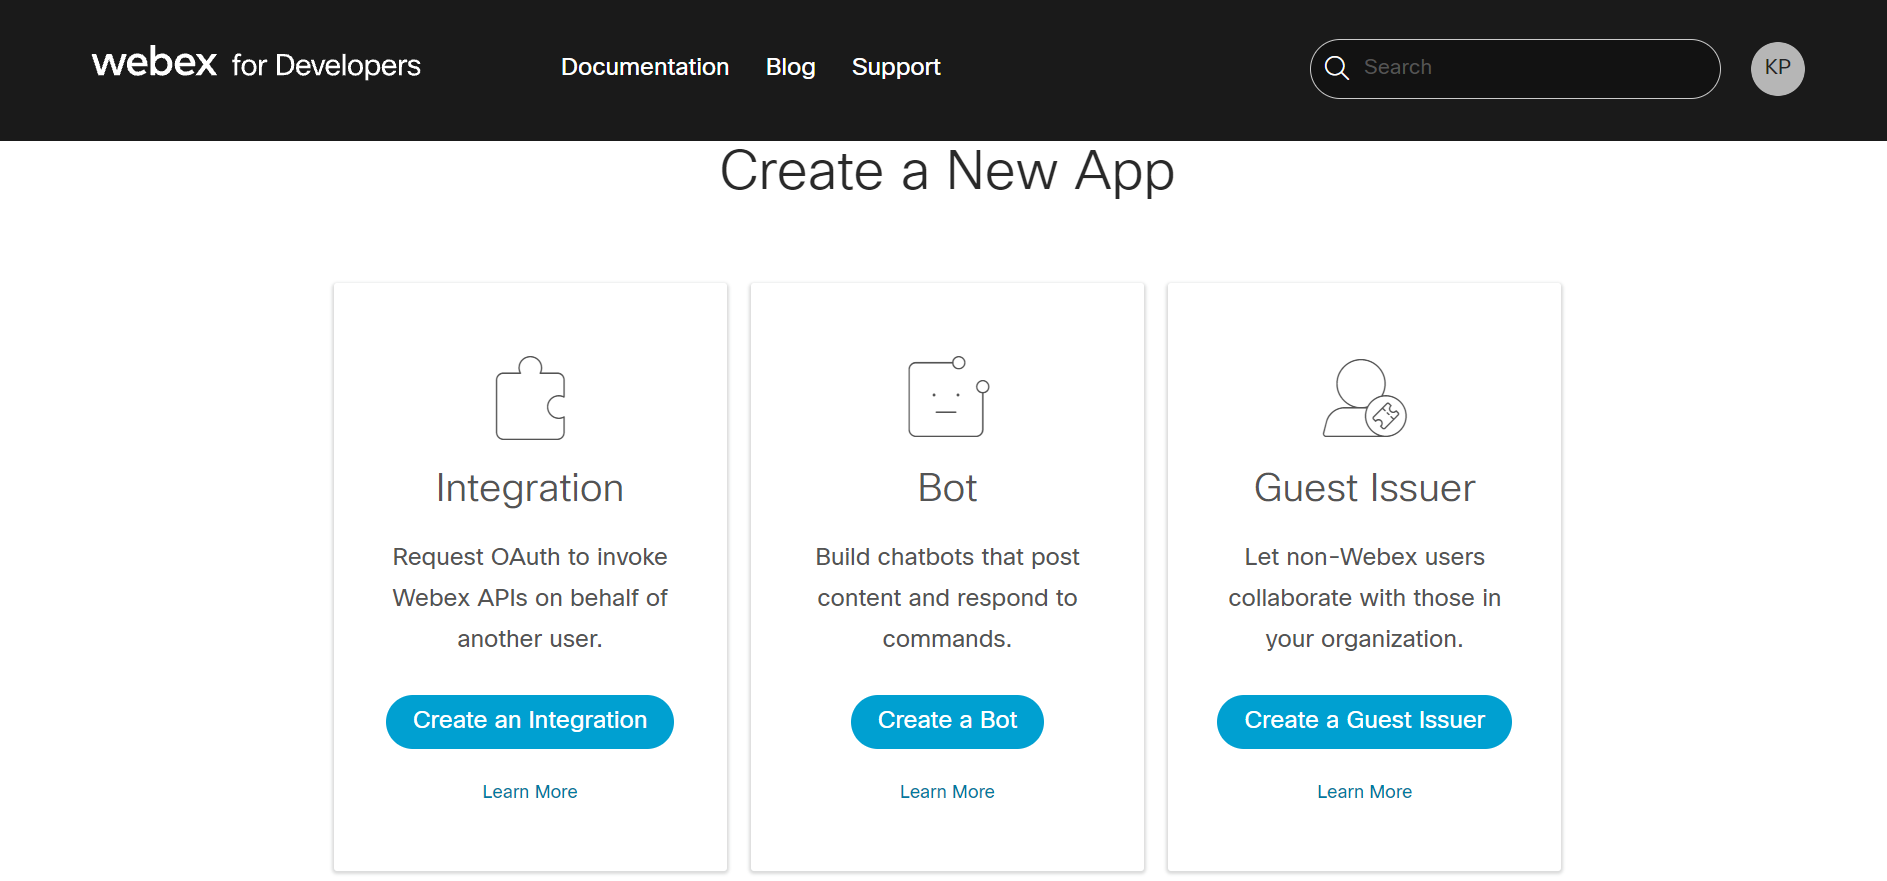
- After logging into your account, click the Start Building Apps button.
- Click the Create a Bot button.

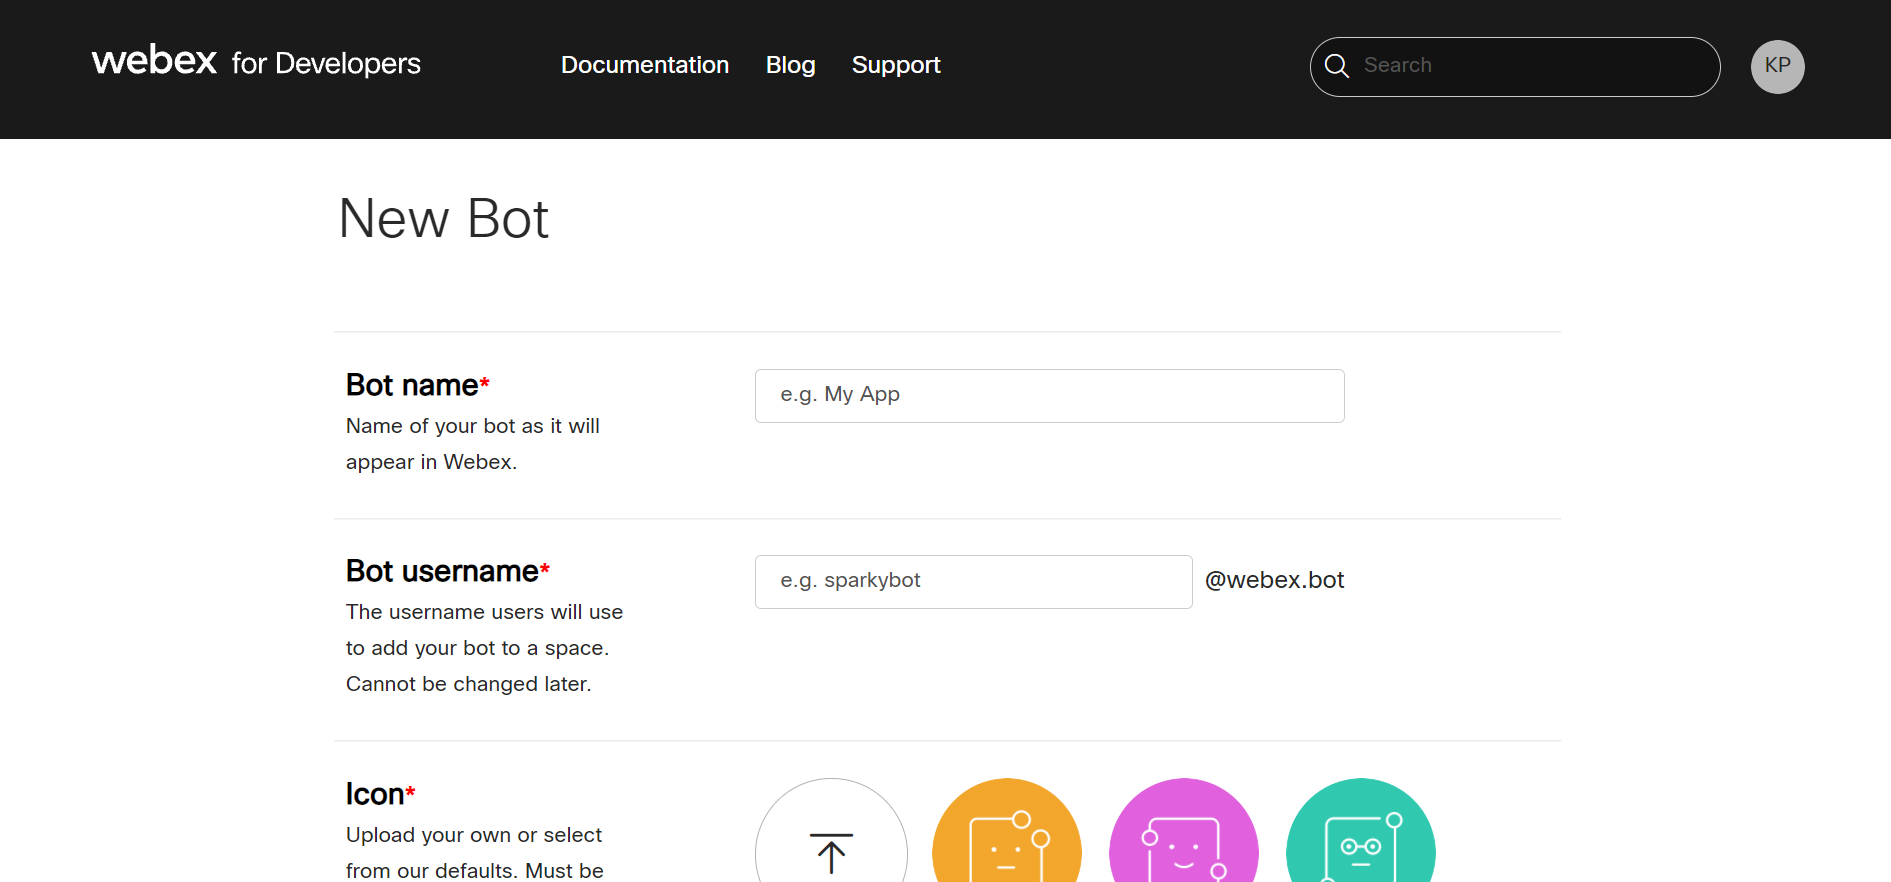
- Enter the bot name and bot username.
- Select an icon for your bot and enter the bot description.
- Click the Add Bot button.

Get Access Token
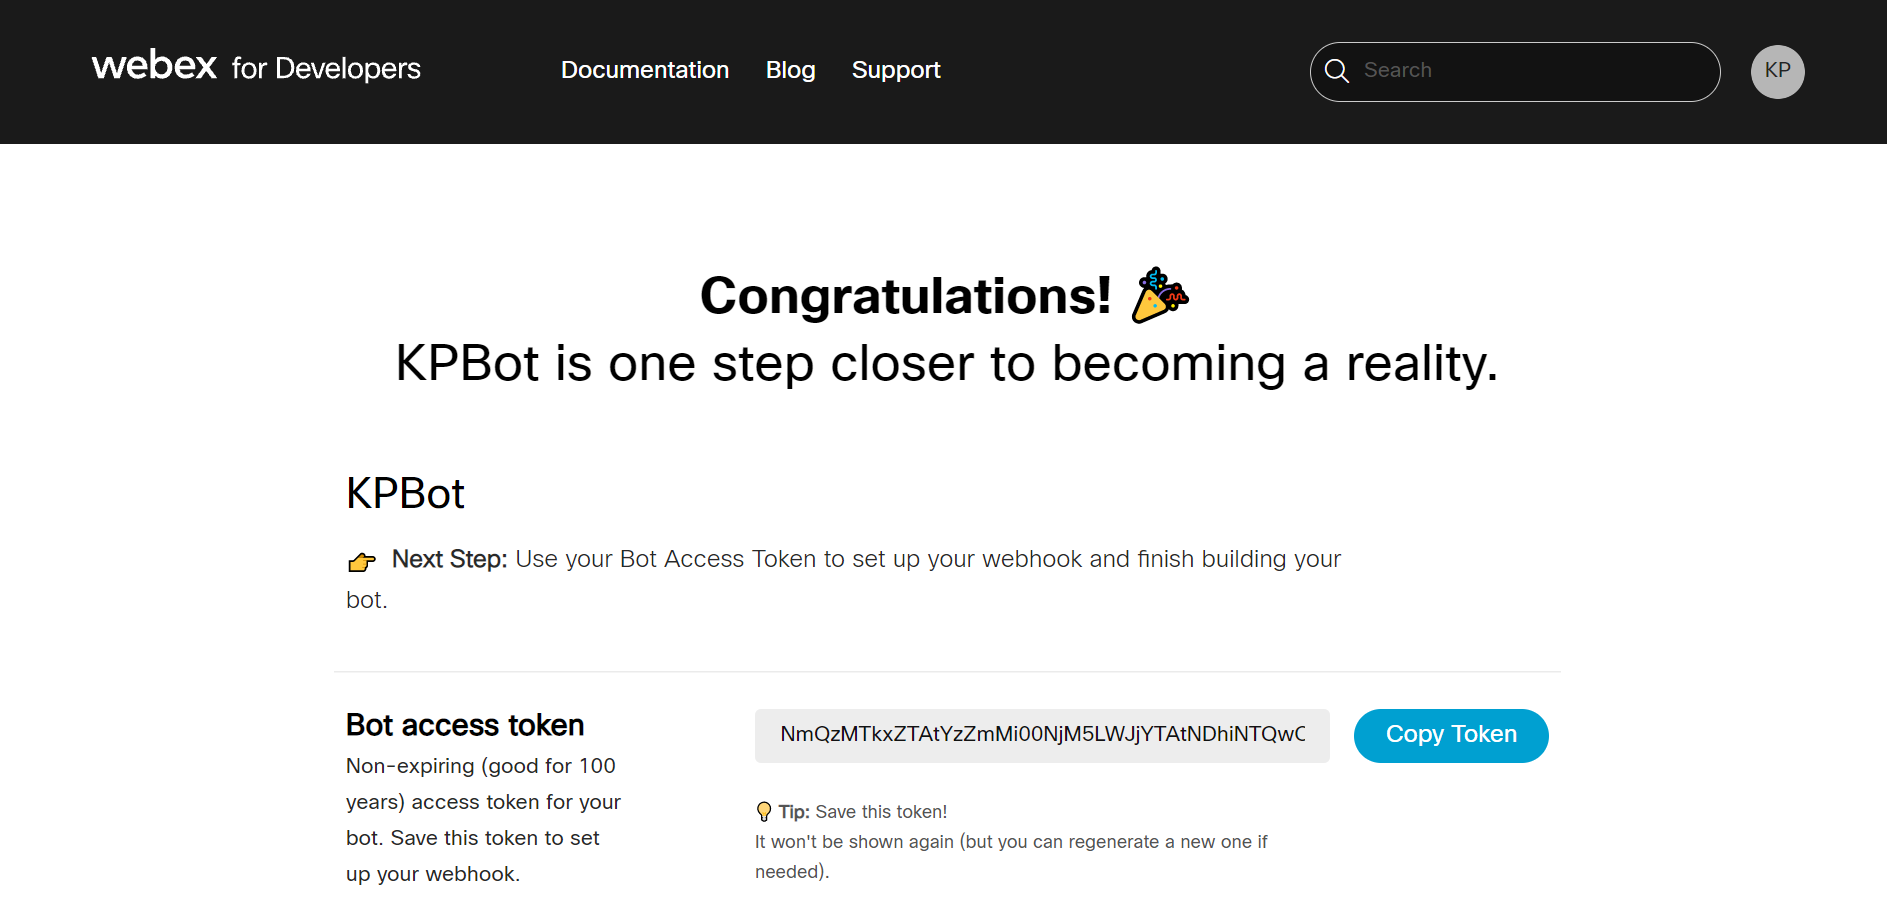
- After clicking the Add Bot button, a congratulations message is displayed along with the bot's access token.
- Copy the access token for later use.

Submit credentials
- Log in to the Gupshup website.
- Go to Dashboard tab > My Bots section.
- Select the button under the Publish column against the bot you wish to publish.
- A list of channels will appear. Click on the Publish button against Cisco Webex Teams.
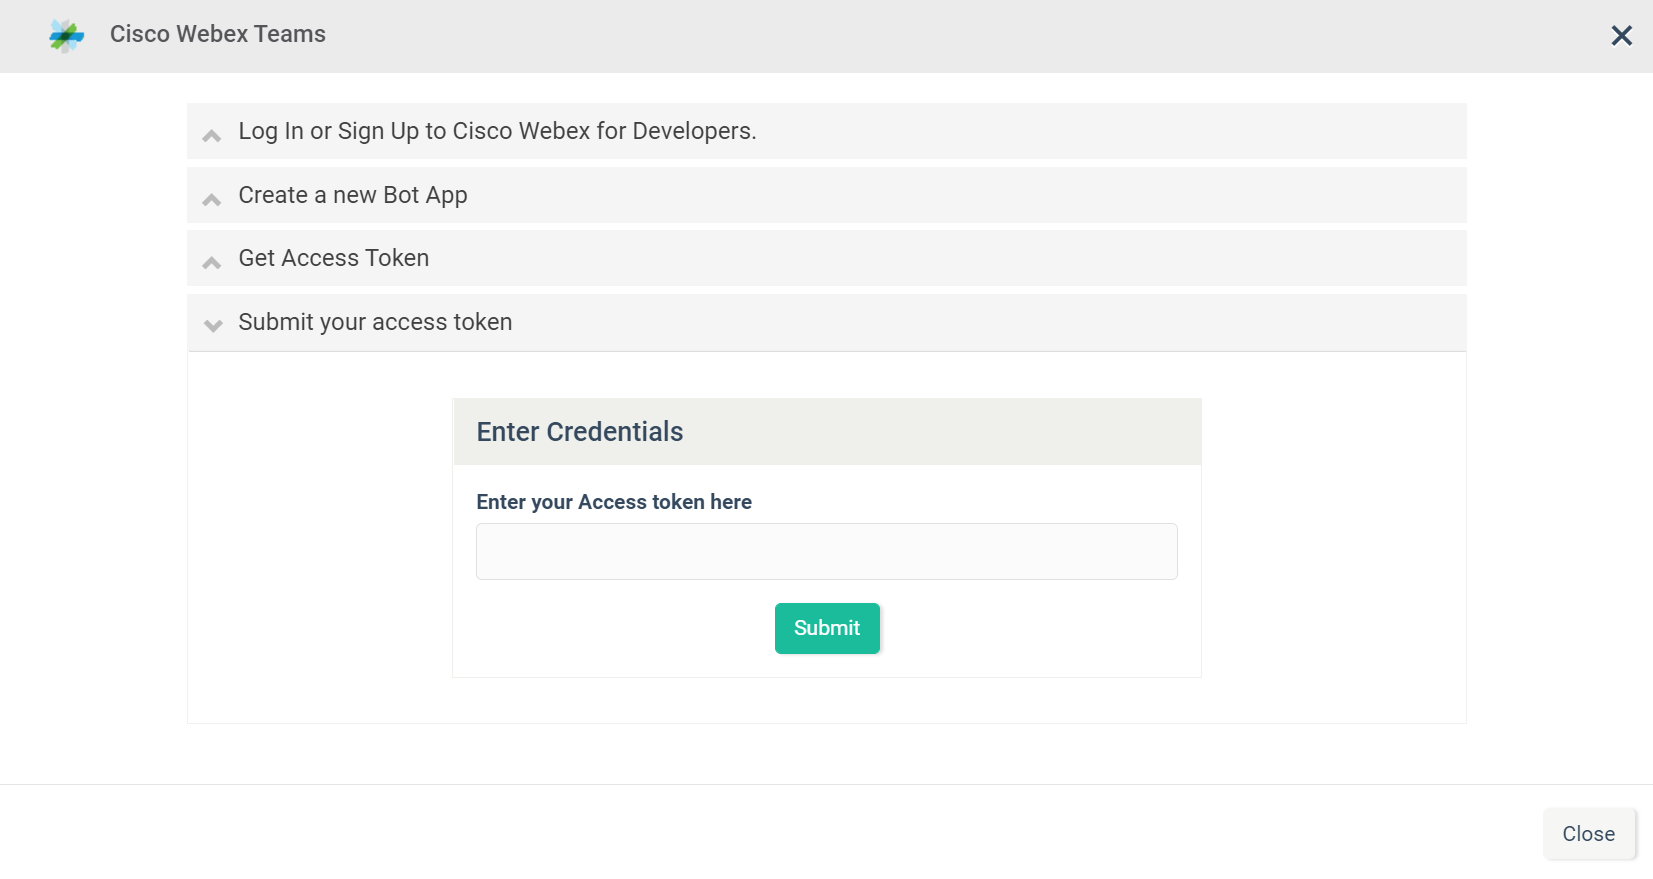
- Scroll down and click Submit your access token.
- Enter the access token copied earlier and click Submit.

Updated 4 months ago
