Feature #5: Service Cloud
This is used for sending messages to records in Case Object.
Case Object
- If you don’t have any existing Case Page Layout in Case Object, then you can follow the steps given in point 2 of “Step 2: Setup Configuration” and implement the page assignment for Case.
- If you already have an existing Case Page Layout, then follow below steps:-
Setting up the Gupshup Components to the existing page layout : -
- Go to setup and open Object Manager Tab.
- Open the Case Object setup.
- Go to “Case Page Layouts” and edit you existing Page Layout.
- Drag “Gupshup Global Opt In” from “Fields” section to “Case Information” section in page layout.
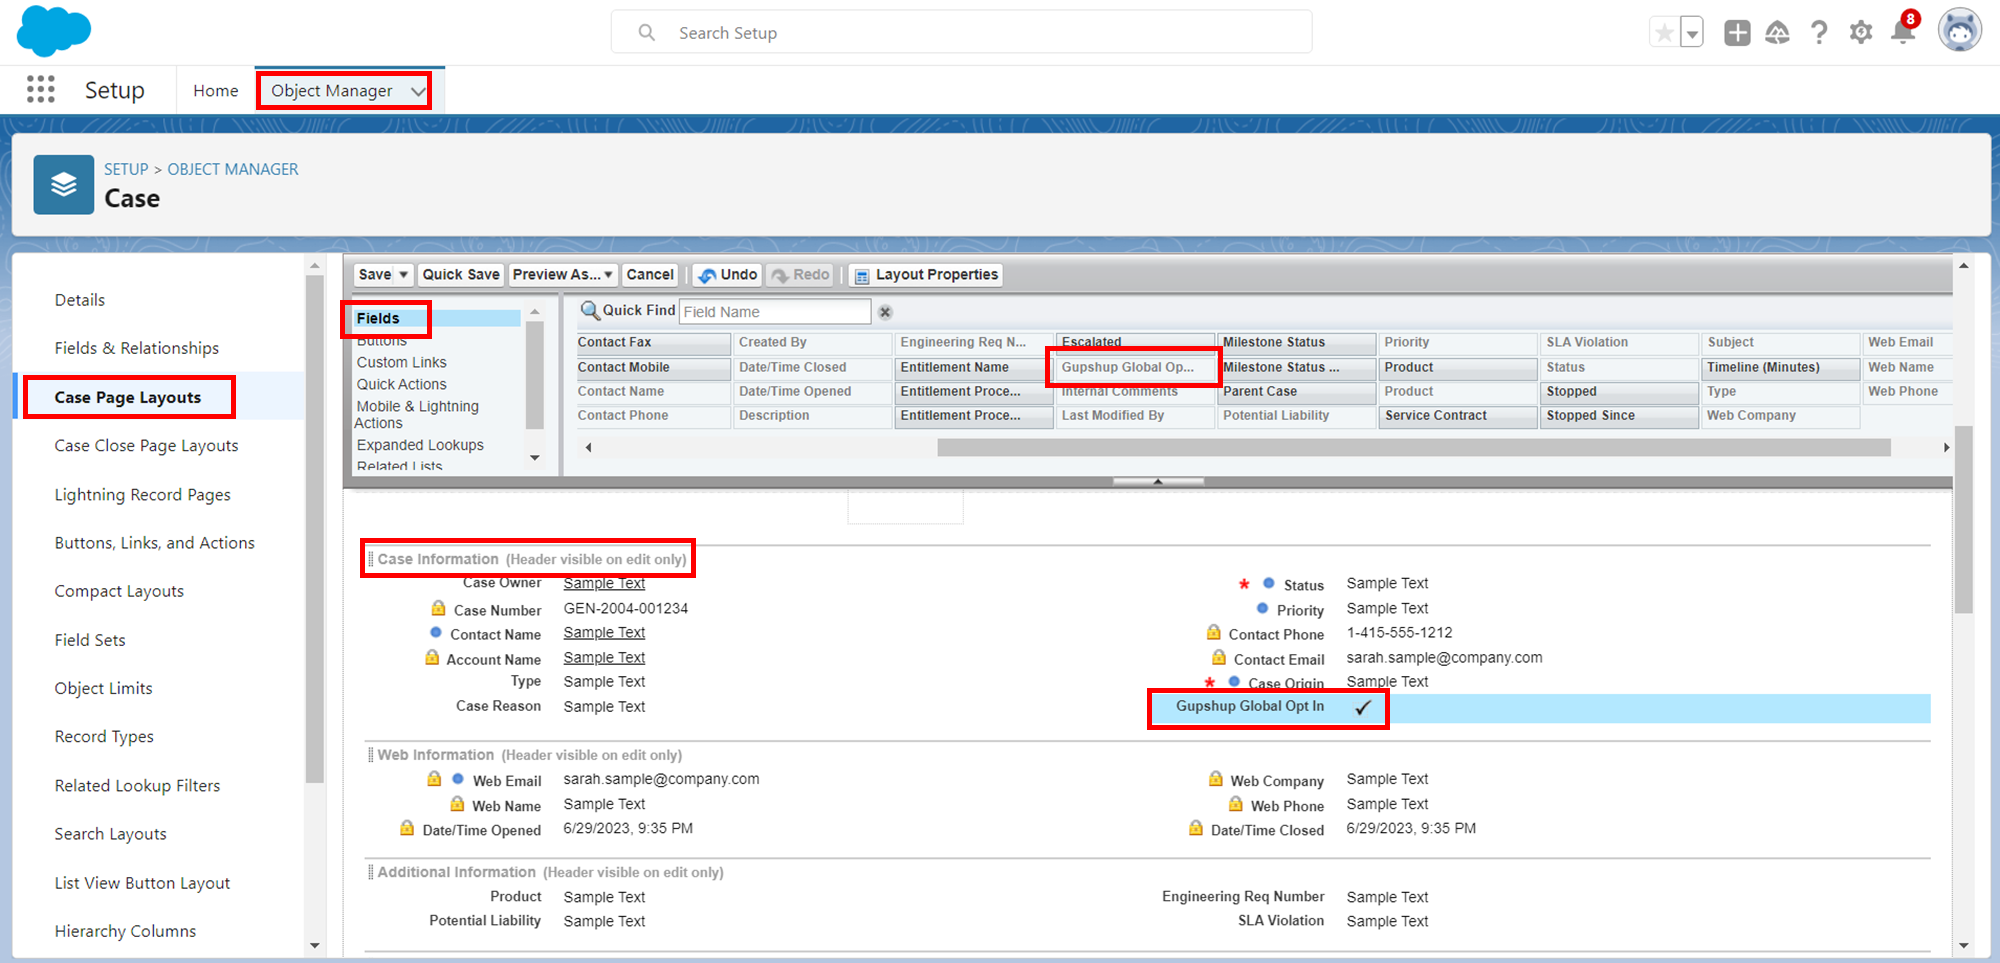
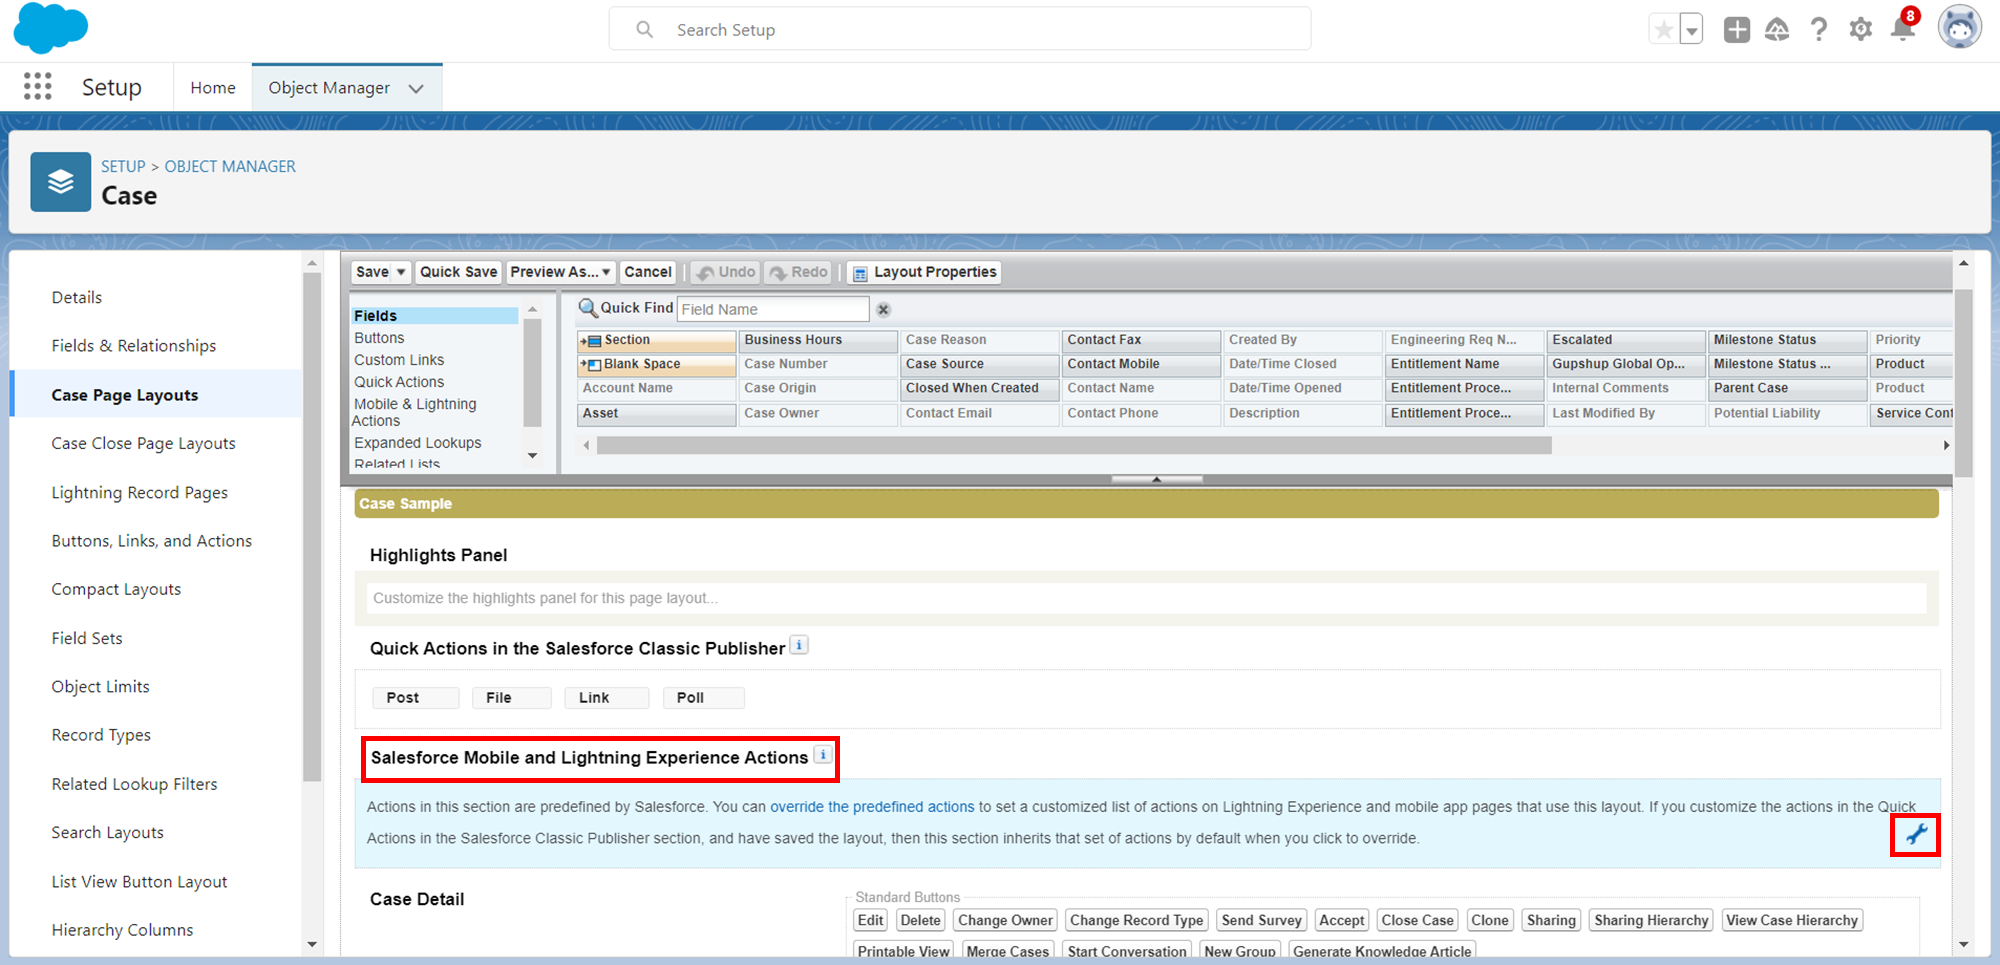
- Now, go to “Salesforce Mobile and Lightning Experience Actions” section, if it is not editable then click on wrench icon “Override to customize”.
- Then drag and drop the “Send Whatsapp Message” action from “Mobile & Lightning Actions” section to “Salesforce Mobile and Lightning Experience Actions” at the start.
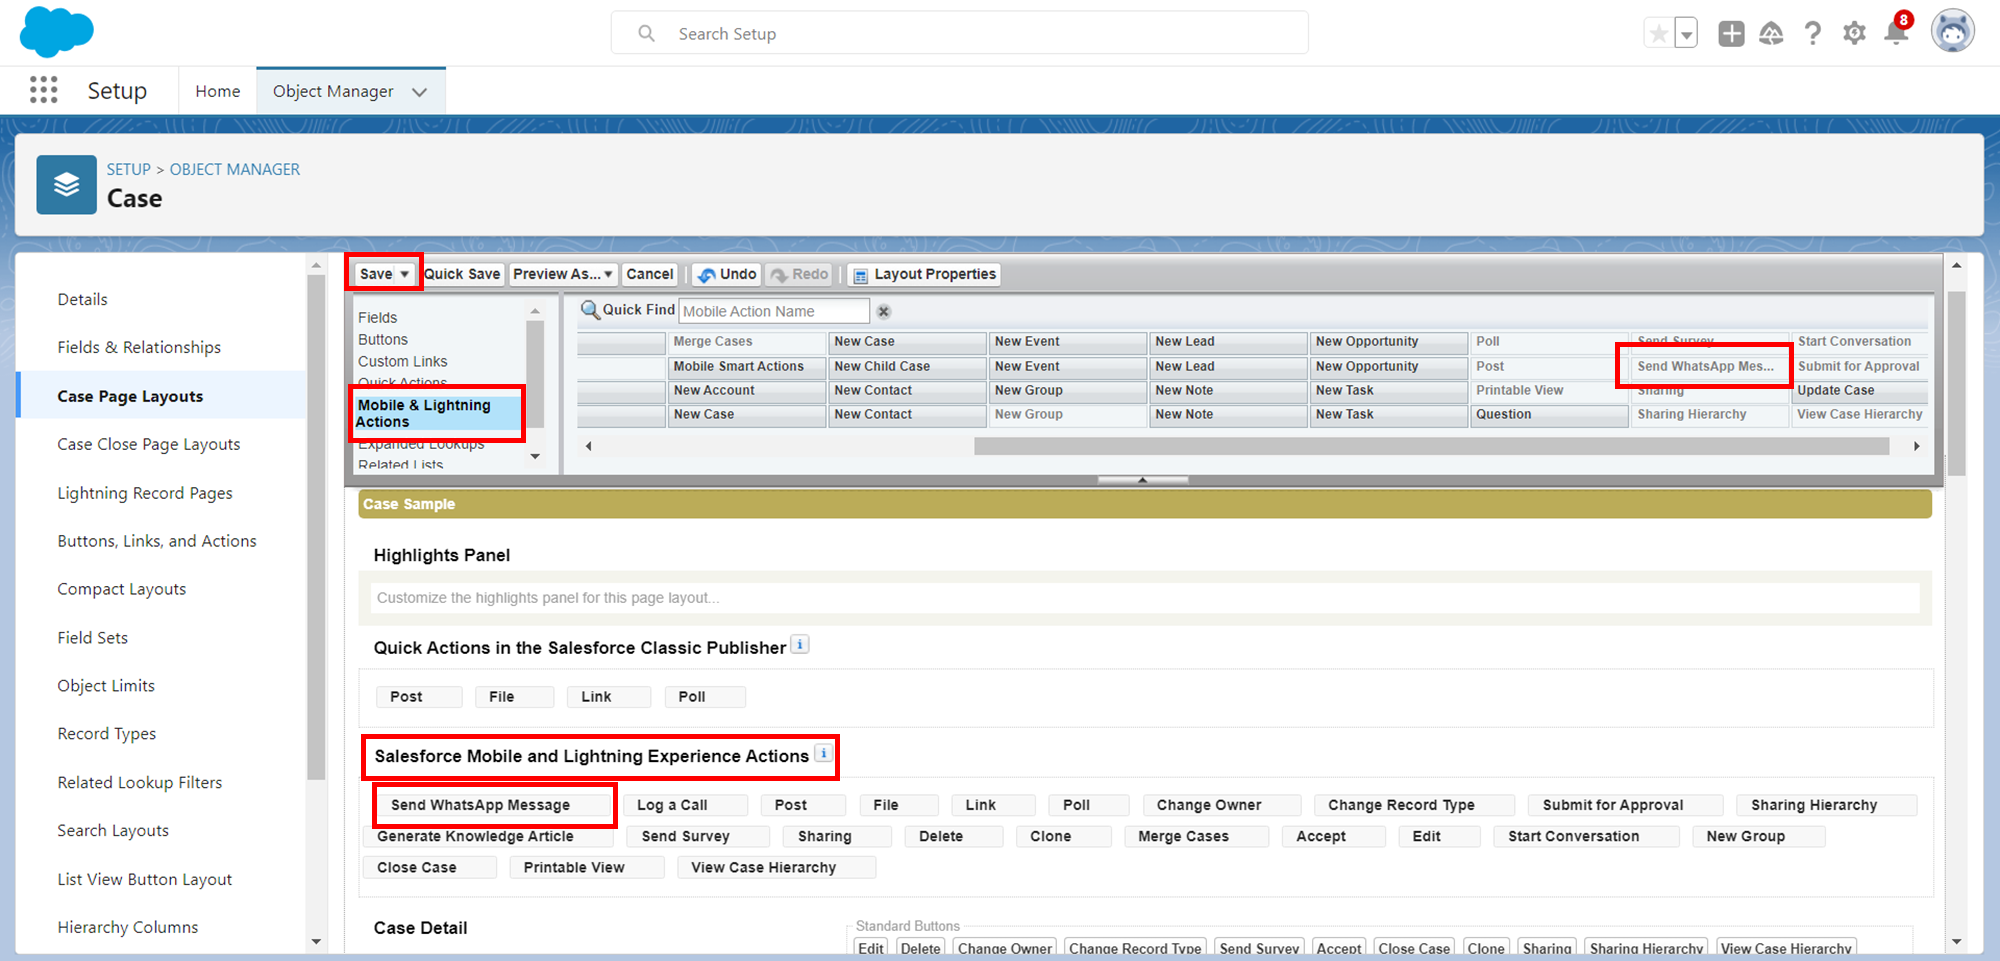
- Save your existing page layout.
- Please also verify that your existing page layout is assigned to the required profile.
- Click on “Save”.
Setting up the Lightning Record Page for Case Object
- In Case Object Setup, now click on “Lightning Record Pages” tab.
- If already using an existing Lightning Record Page, then clone it and edit it.
- Otherwise, click on “New” button and create a new Lightning Record Page. Give Object Name as “Case” and provide Label and click on Next, then click on “Clone Salesforce Default Page” tab and select Case Grouped View Default and click on “Done”.
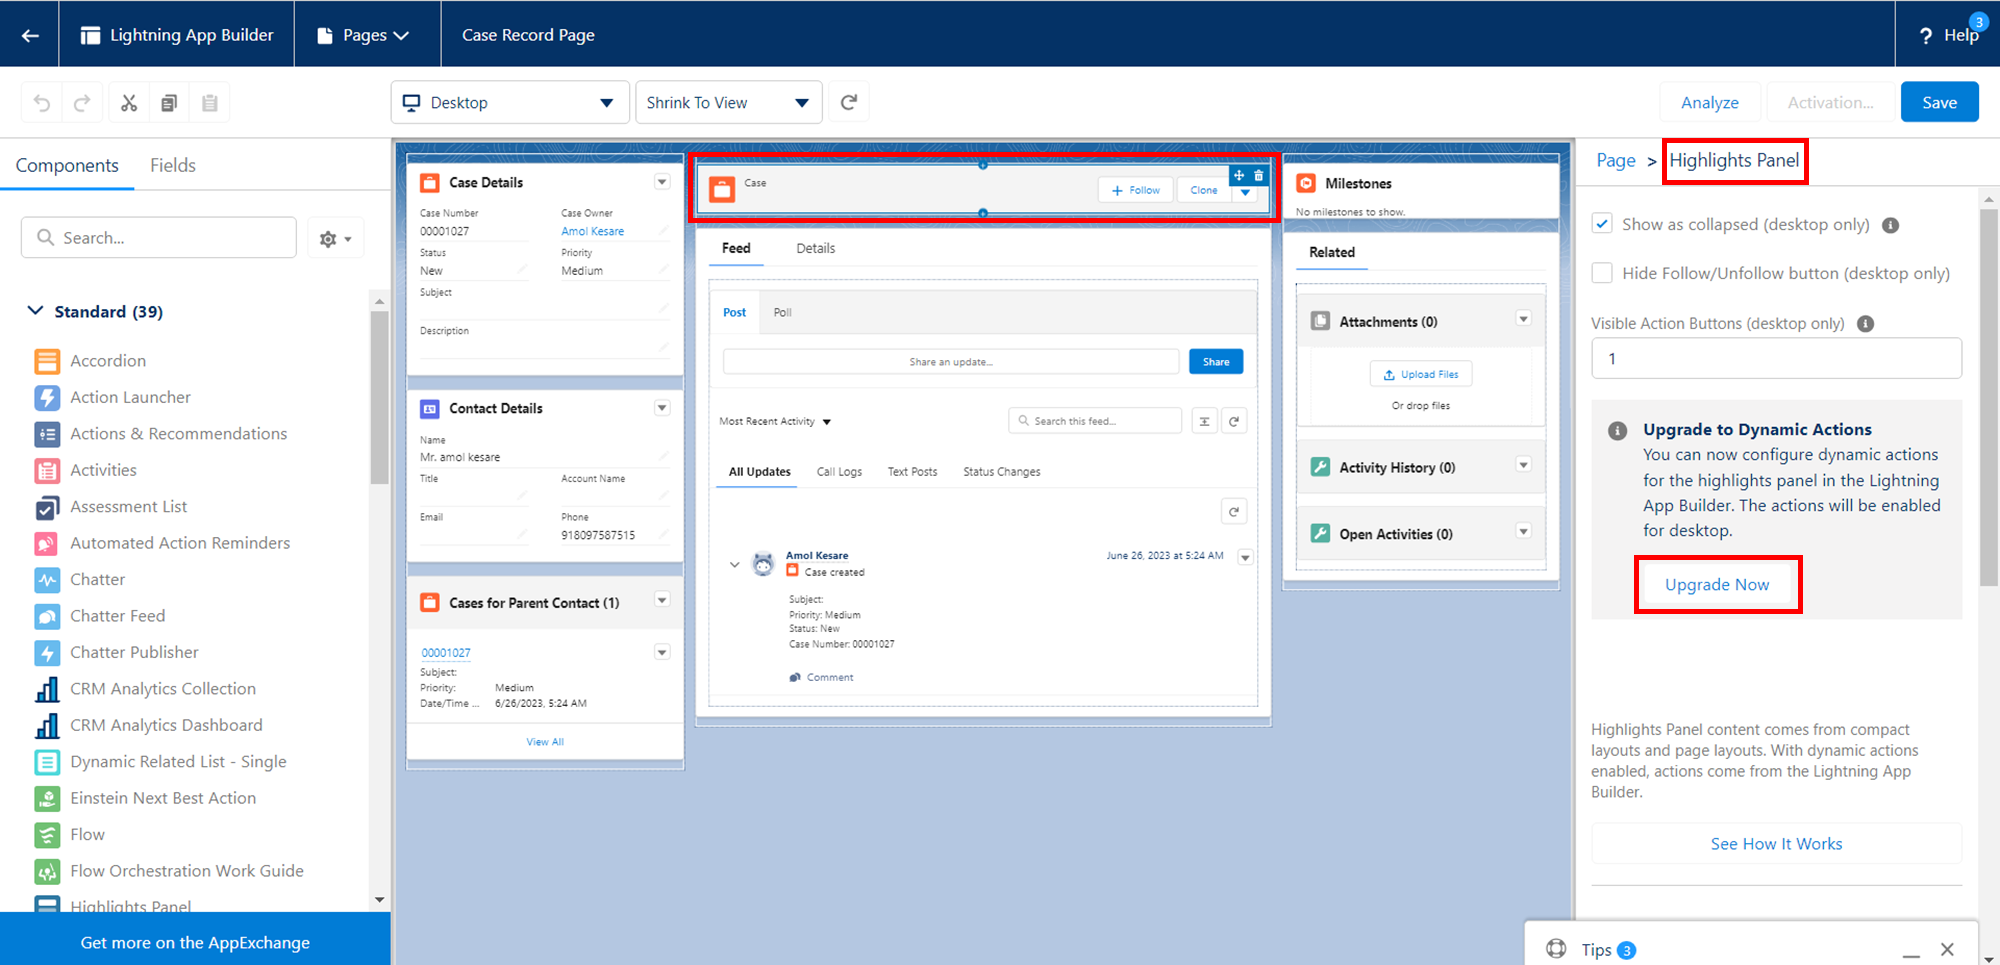
- Select “Highlight Panel” and click on “Upgrade Now” in “Upgrade to Dynamic Actions” section and select the “Migrate” option.
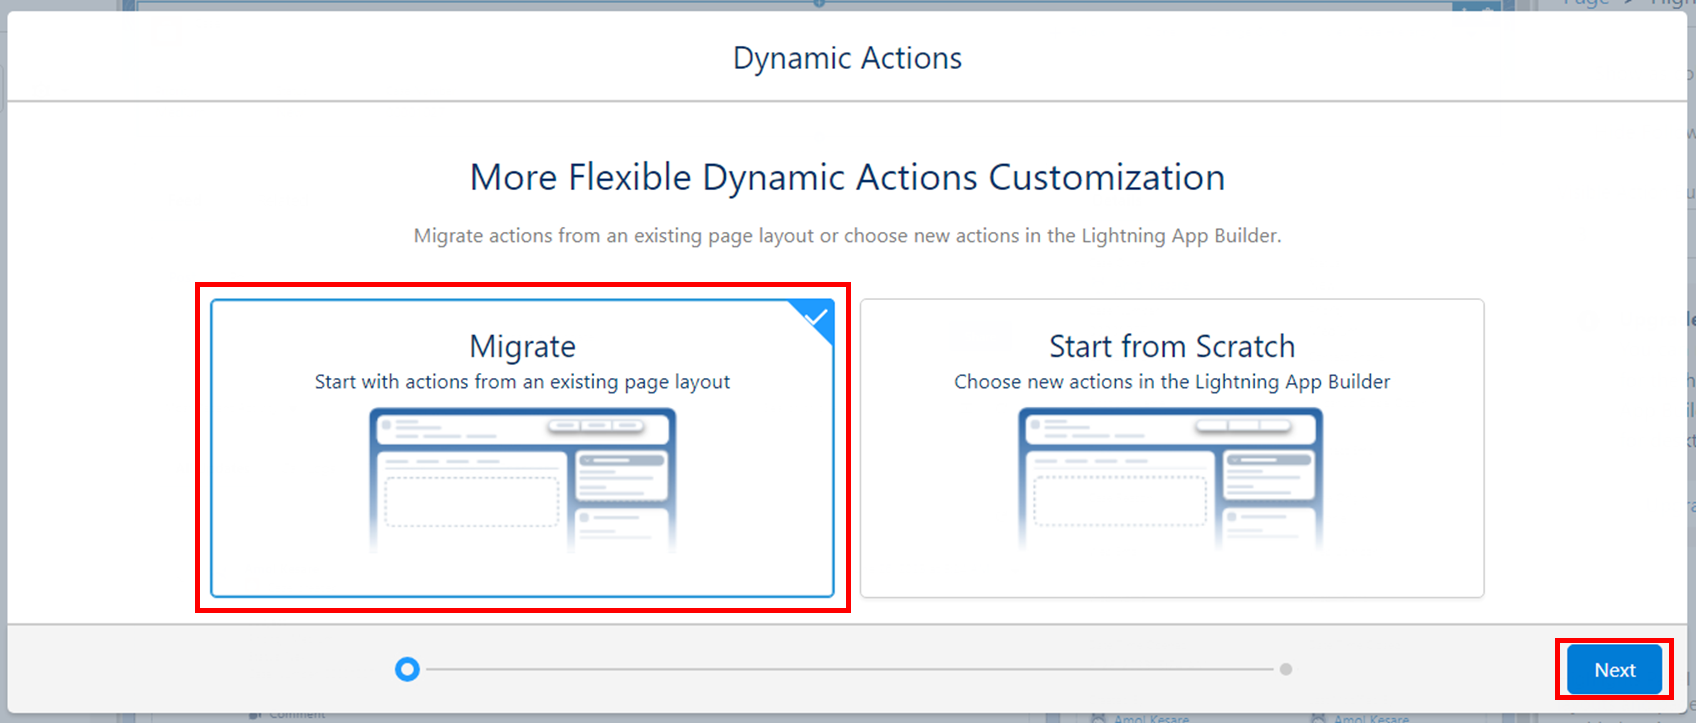
- Select you existing Case Page layout and click on “Finish”.
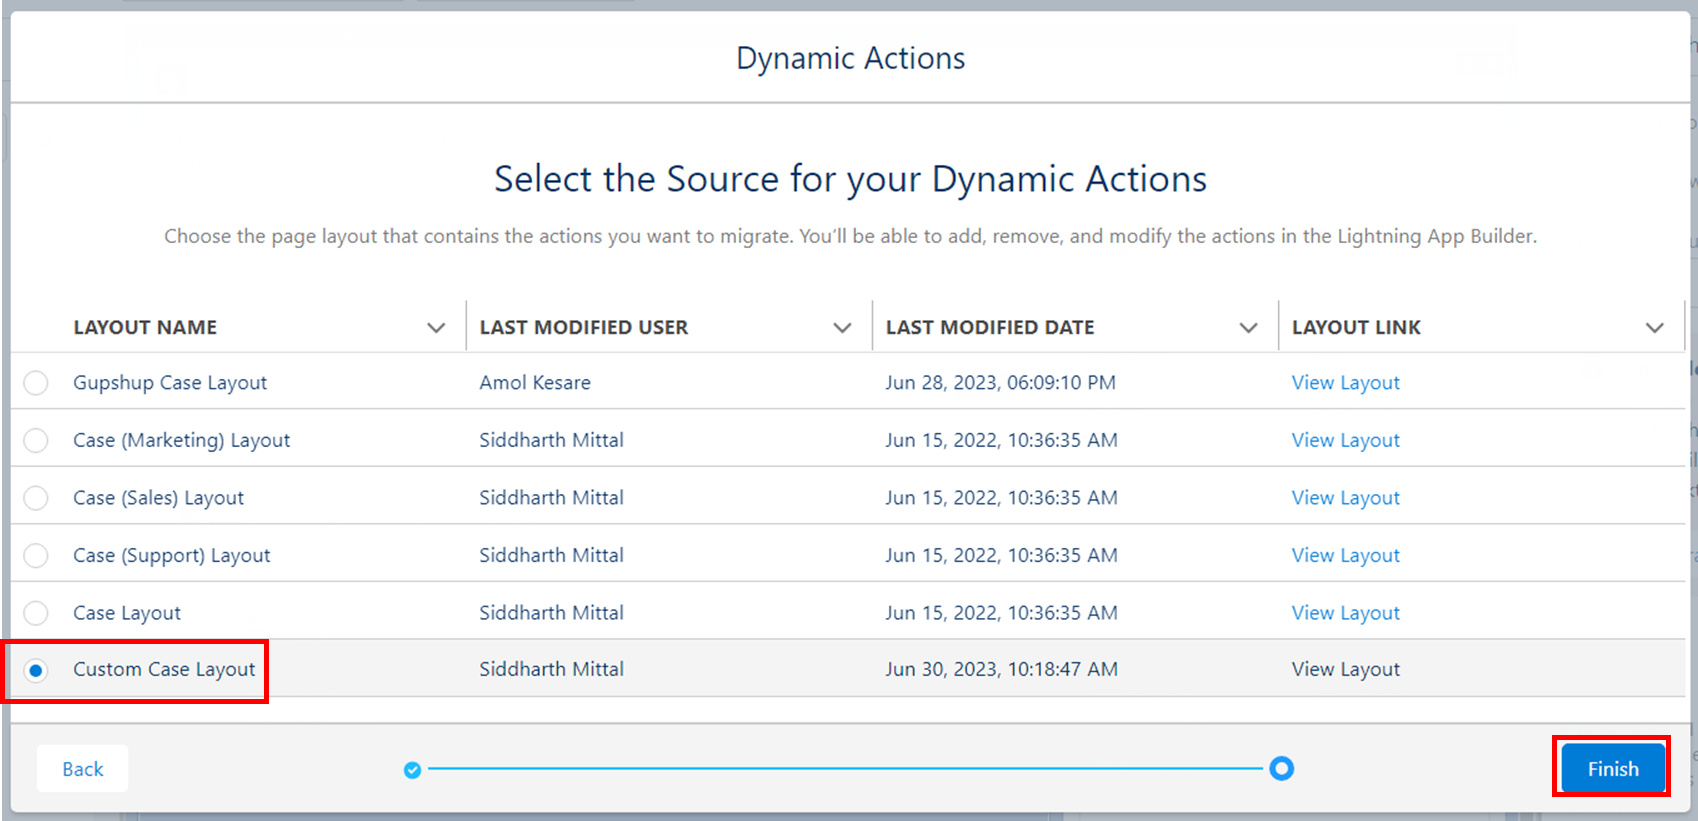
- Now verify “Send WhatsApp Message” button is visible to you, if not then alter the Actions tab to move “Send WhatsApp Message” button to above.
- Click on “Save”.
- Click on “Activation”.
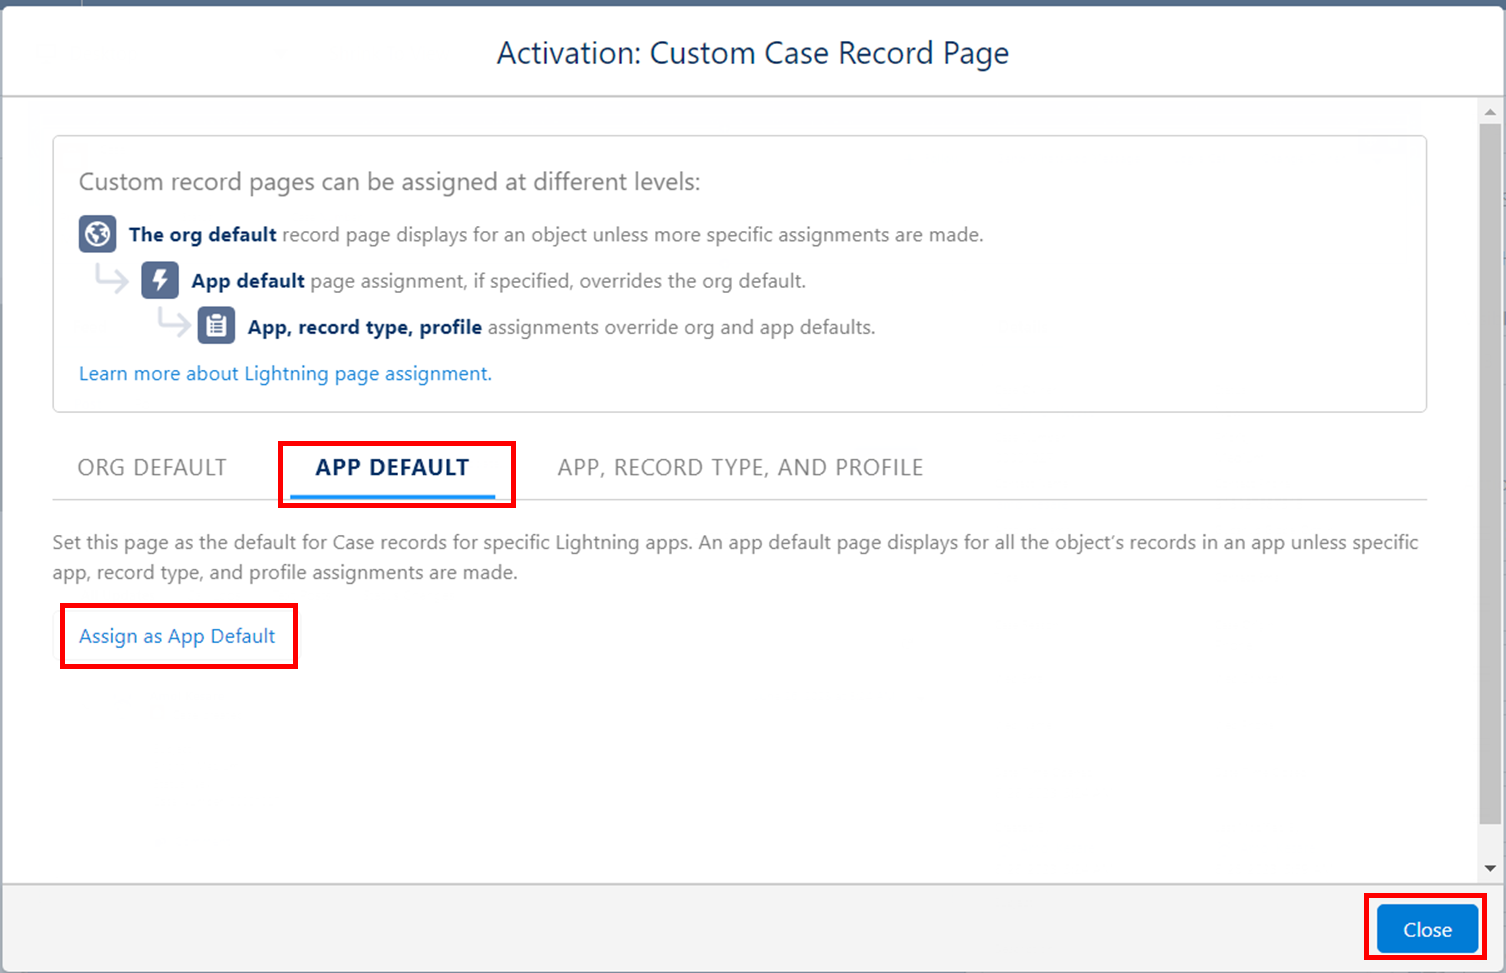
- Select the “App Default” tab and click on “Assign as App Default Button”.
- Select “Service Console” or your preferred App to assign the Lightning Record Page and click on “Next”.
- Select “Desktop” and click next and review assignment.
- Click on “Save” go back to Case Record Page.
Updated 3 months ago
