Installation
To use Gupshup plugin, you can download and install it from the WordPress Plugin Directory
There are 3 methods in which you can install this plugin. Below are the steps you need to follow:
Method 1:
- Log in to your WordPress Dashboard.
- Go to WordPress Dashboard->Plugins->Add New
- Search Gupshup Messaging Automation for WooCommerce using search option.
- Once you have locate the plugin, click Install
- After the installation is complete, click Activate
Method 2:
-
Navigate to Gupshup-Messaging-Automation-for-WooCommerce
-
Download the plugin Gupshup-Messaging-Automation-for-WooCommerce.zip
-
Unpack the Gupshup-Messaging-Automation-for-WooCommerce.zip file and extract the Gupshup-Messaging-Automation-for-WooCommerce folder
-
Upload the plugin folder to your /wp-content/plugins/ directory
-
Go to WordPress dashboard, click on Plugins from the menu
-
Locate the Gupshup Messaging Automation for WooCommerce plugin and click on Activate link to activate the plugin.
Method 3:
Install a Plugin using the WordPress Admin Plugin Upload
- Download the plugin Gupshup-Messaging-Automation-for-WooCommerce.zip
- Go to WordPress Dashboard -> Plugins -> Add New
- Click on Upload Plugin link from top
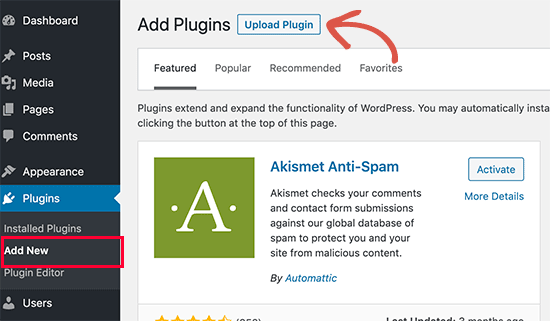
Click on Upload Plugin button
- This will reveal the plugin upload form. Here you need to click on the ‘Choose File’ button and select the plugin file you downloaded earlier to your computer.
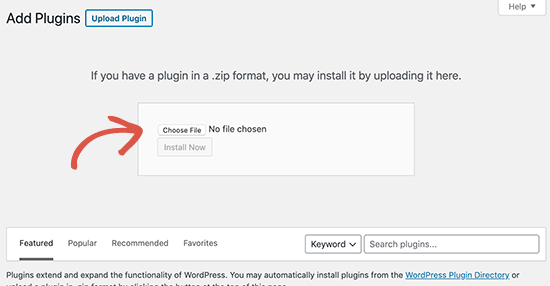
Choose file for installation
- After installation, click on Activate Plugin link to activate the plugin
To refer to this plugin on WordPress.org, Click here.
Updated 9 months ago