Step 3: Channel Setup
Don't have a Gupshup Account yet?
Get Started today: https://www.gupshup.io/contact-us
Already using Gupshup?
At Gupshup, we onboard our clients on 3 kinds of Accounts, based on their needs and use-cases. They are:
- Console Self-Serve
- Self-Serve
- Enterprise / Console Enterprise
NOTE: If you are not aware of the type of Gupshup account you are using, please check out the following documentation: https://docs.gupshup.io/docs/integration-configuration-assistant
Now that you might be aware of the type of account you are using, let's move forward.
Configure a Gupshup Enterprise / Console Enterprise Account
If you have a Gupshup Enterprise account, please head over to Channel config page and begin with creating a channel first.
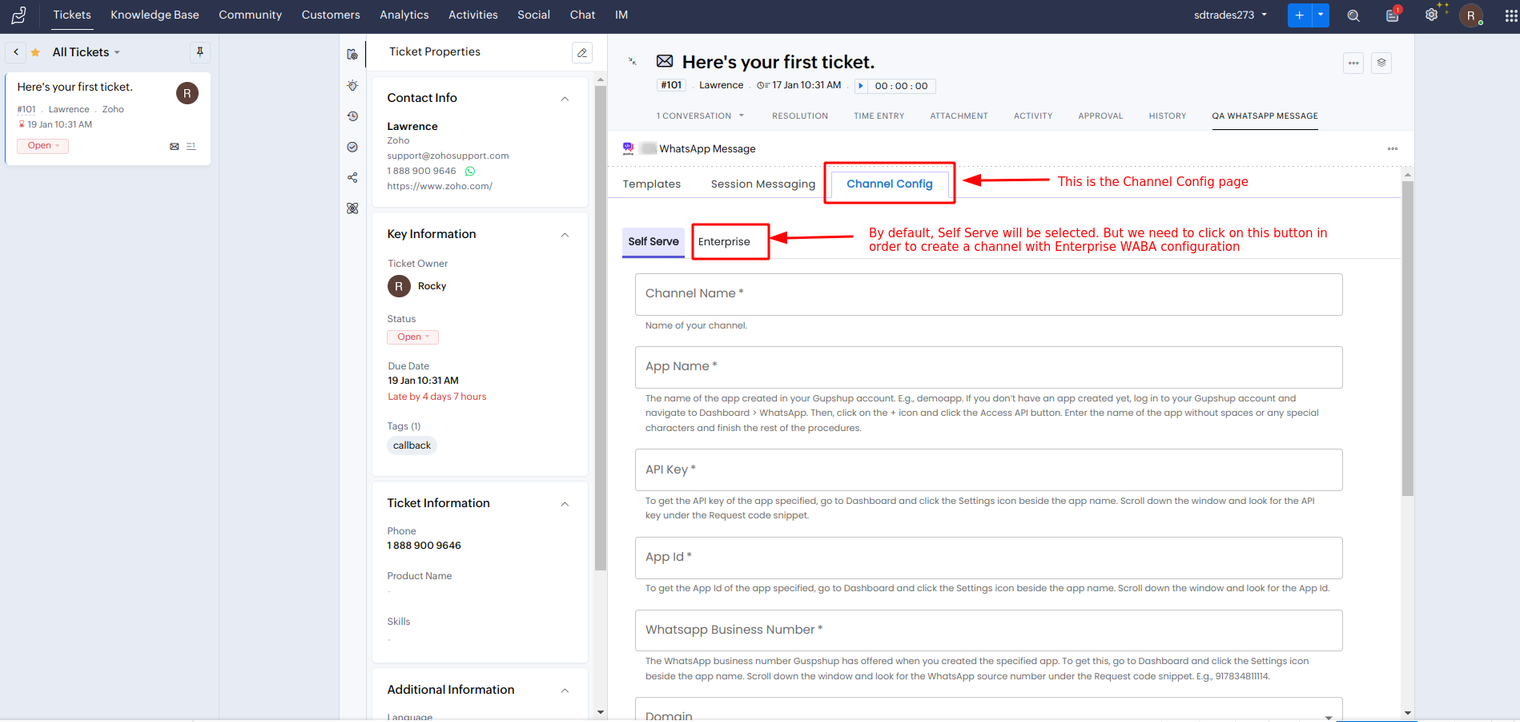
On clicking Enterprise button in Channel config screen, we will get to see the following fields which we need to fill up correctly :
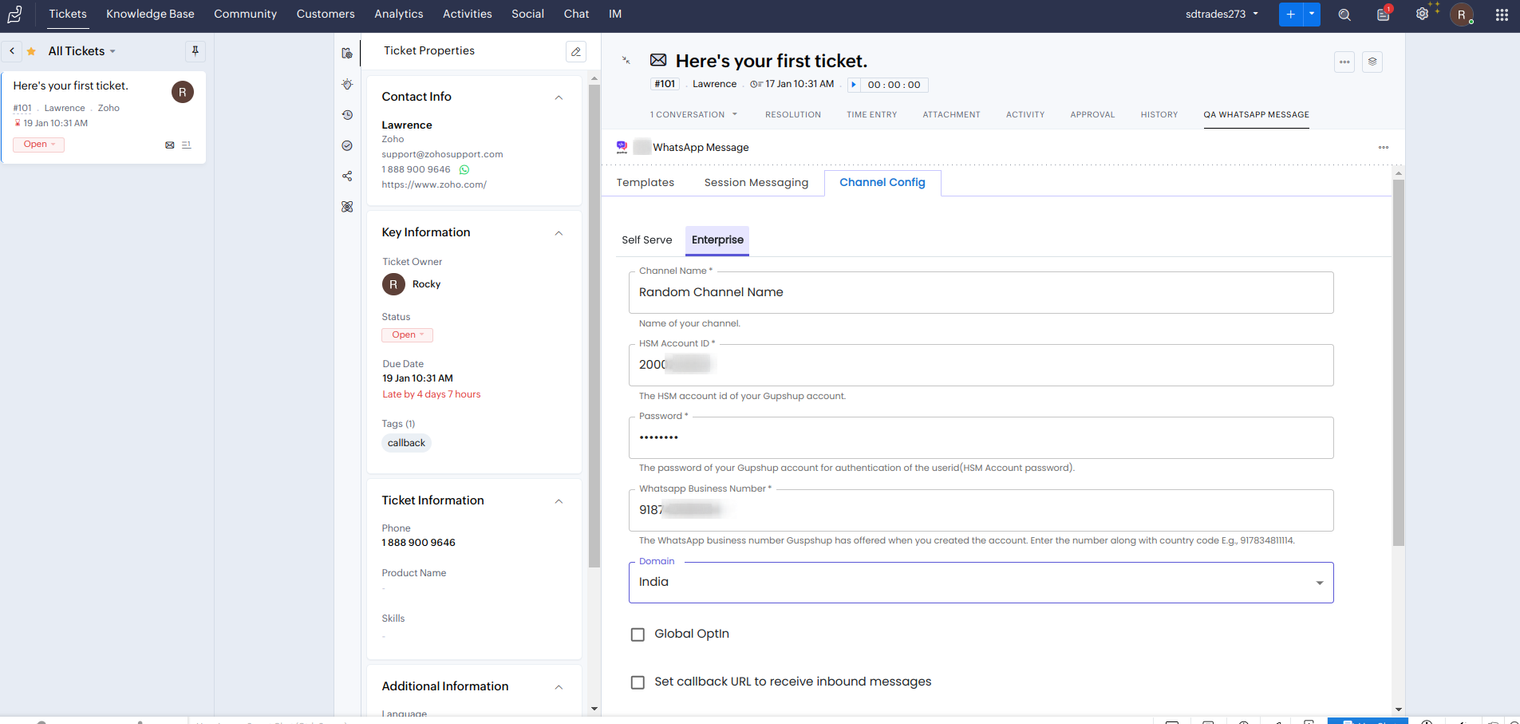
- Channel Name: Give any random name to your channel
- User Name: Use the HSM Account ID shared by the Gupshup team over Email during account activation.
- Password: Use the HSM Account Password shared by the Gupshup team over Email during account activation.
- WhatsApp No.: A Verified Business Phone Number, to test sending of messages, you must have a Verified Business Phone Number linked to your account.
- Domain: Select the domain based on your current location.
Once you enter the above mandatory details, select all features you want to enable by clicking on respective checkbox. [ Basically, we trying to enable some features by hitting the checkbox and submitting the configuration. We will make it clear what these features are all about in the Features document ]
At last, click on Submit button to save configuration details.
Configure Gupshup Self-Serve / Console Self-Serve Account
If you have a Gupshup Self-Serve account, please enter the following details and click submit button to save configuration. You need to choose the "Self-Serve" tab for configuring the integration.
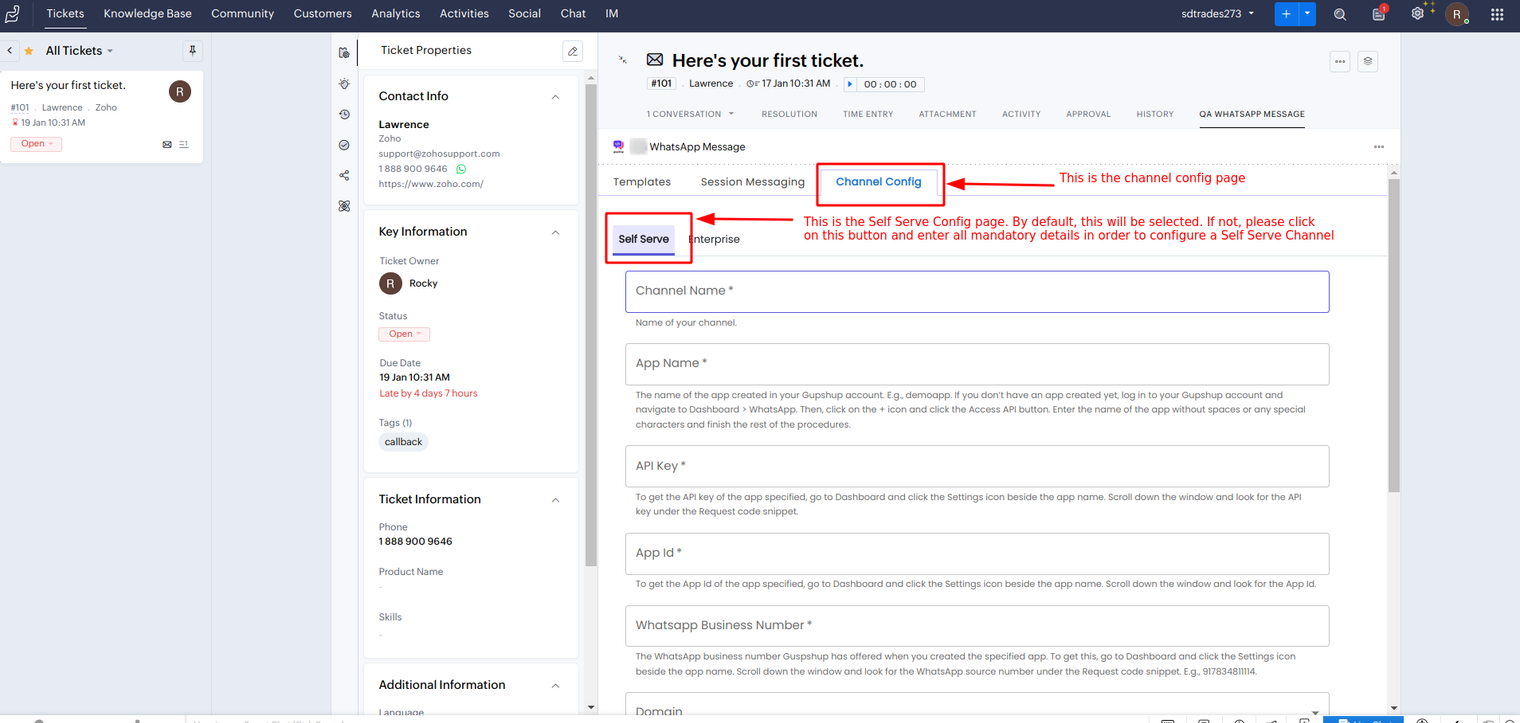
Following details are needed to configure the extension to use a Self-Serve account
- App Name
- App ID (WABA ID)
- API Key
- Business WhatsApp Number(WABA number)
In case you are facing trouble in retrieving these details, please follow the documentation below:
- Console Self-Serve Accounts: https://docs.gupshup.io/docs/configure-console-self-serve-integration
- Self-Serve Account: https://docs.gupshup.io/docs/configure-self-serve-integration
Once you enter the above mandatory details, select all features you want to enable by clicking on respective checkbox. [ Basically, we trying to enable some features by hitting the checkbox and submitting the configuration. We will make it clear what these features are all about in the Featuresdocument ]