Setup Configuration
Don't have a Gupshup Account yet?
Get Started today: https://www.gupshup.io/contact-us
Already using Gupshup?
At Gupshup, we onboard our clients on 3 kinds of Accounts, based on their needs and use-cases. They are:
- Console Self-Serve
- Self-Serve
- Enterprise / Console Enterprise
*NOTE: If you are not aware of the type of Gupshup account you are using, please check out the following documentation: https://docs.gupshup.io/docs/integration-configuration-assistant
Now that you might be aware of the type of account you are using, let's move forward.
After clicking "WhatsApp Messaging By Gupshup," a popup window will display three tabs:
1Template Messaging -Template Messaging refers to pre-approved message templates that can be used to send consistent and standardized messages to users.
2.Session Messaging - Session Messaging involves real-time, interactive conversations between a user and a business within a specific time frame.
3.Channel Configuration -Channel Configuration refers to the setup and management of communication channels used for messaging.
**Click on the "Add channel" textbox and input the necessary information to proceed with adding a new channel**
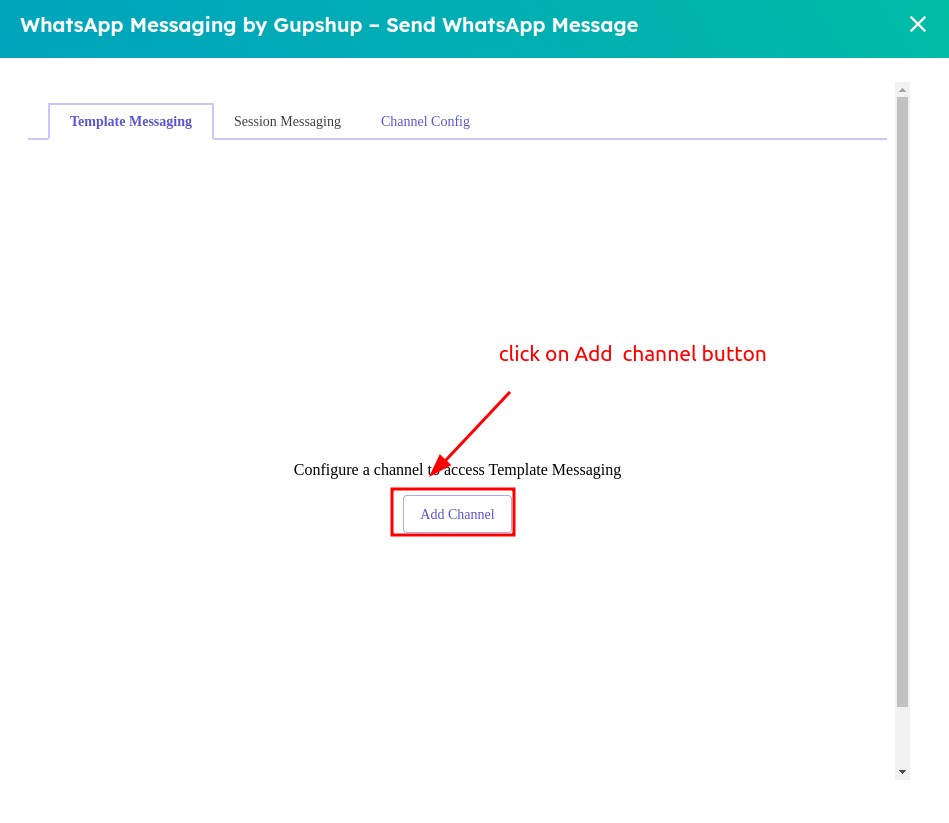
- After opening the configuration screen, you can proceed with entering the necessary channel details
- If your channel hasn't been configured yet, you'll be directed to the Channel Configuration screen.
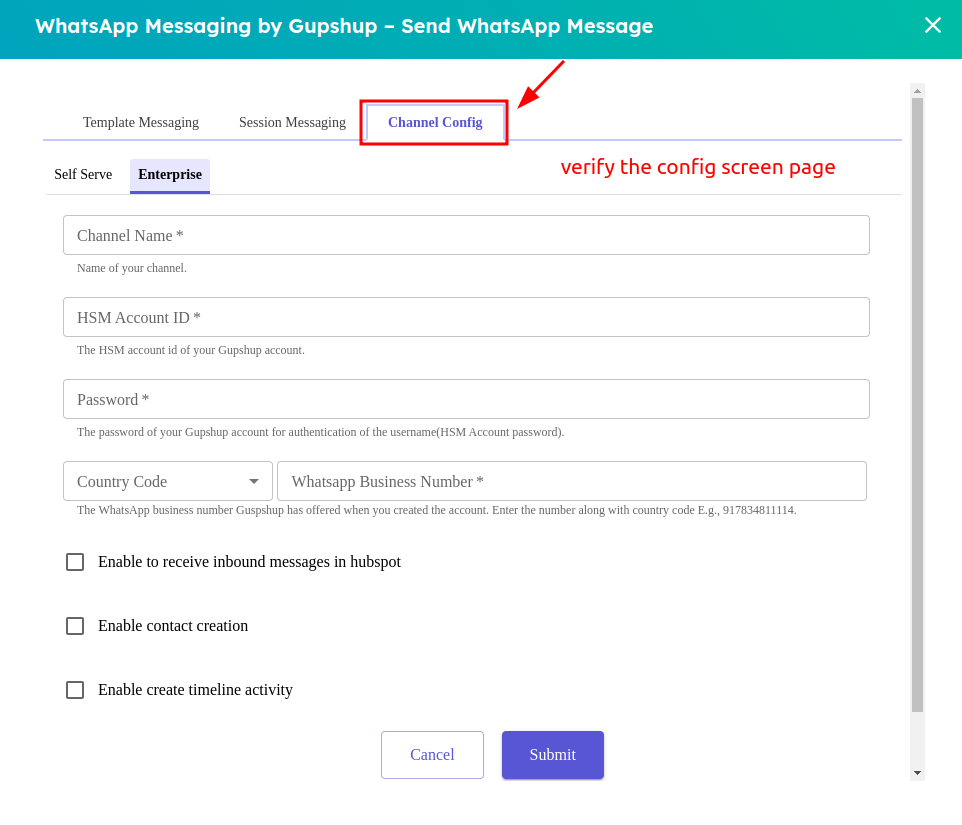
- In this documentation, we'll center our attention on the Channel Configuration tab. Click on this tab to proceed with configuring your Gupshup WhatsApp Business account.
- Don't have a Gupshup Account yet?
- Get Started today: https://www.gupshup.io/contact-us
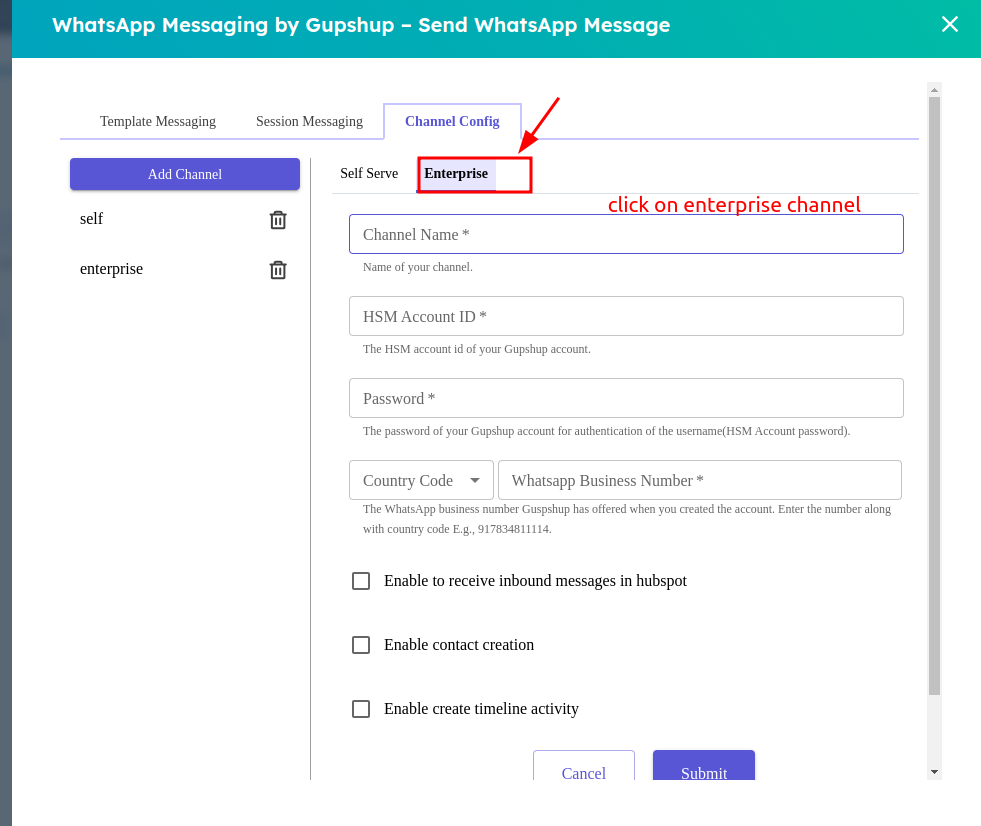
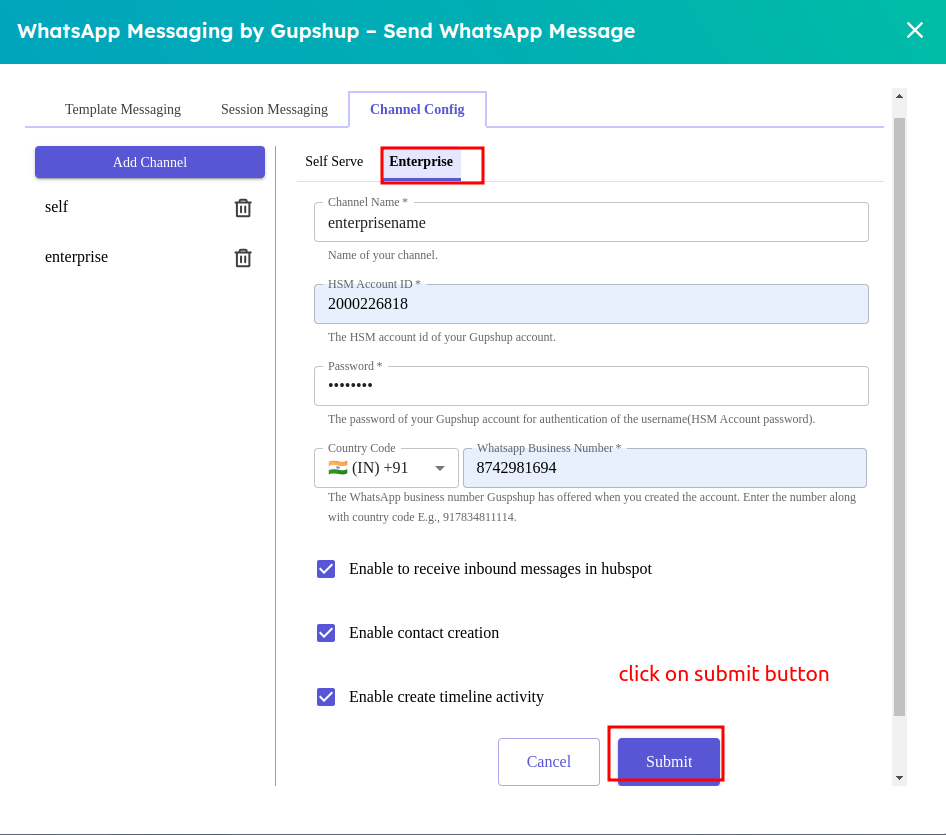
Configure a Gupshup Enterprise / Console Enterprise Account
- If you have a Gupshup Enterprise account, please head over to Channel config page and begin with creating a channel first.
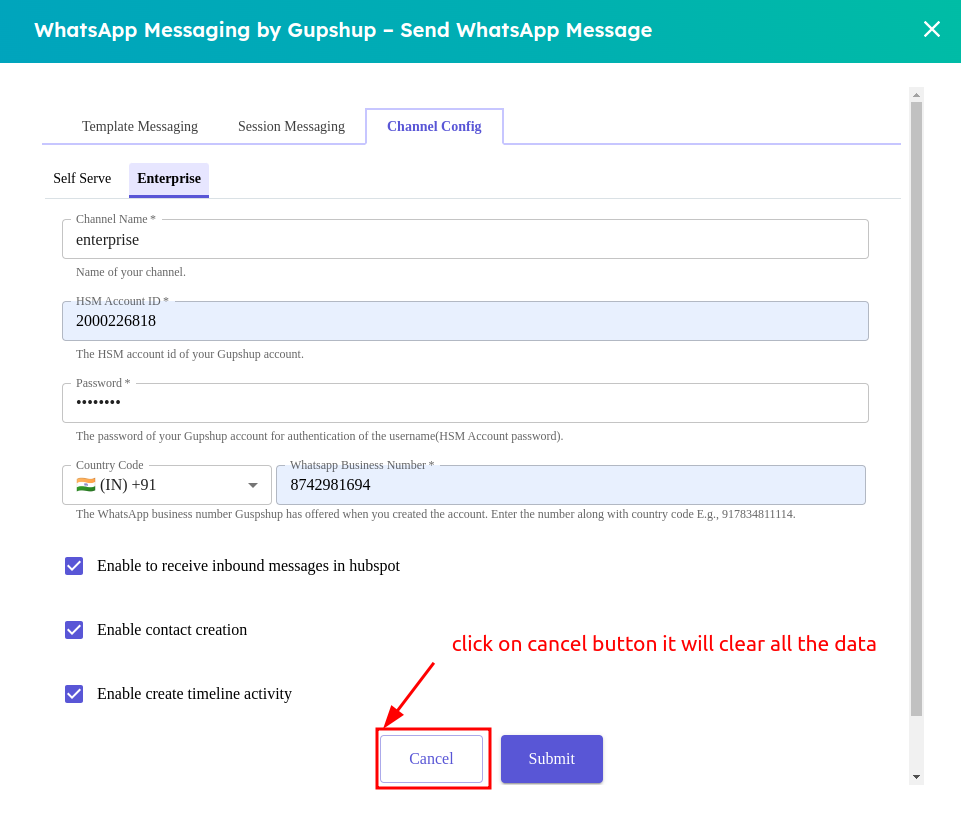
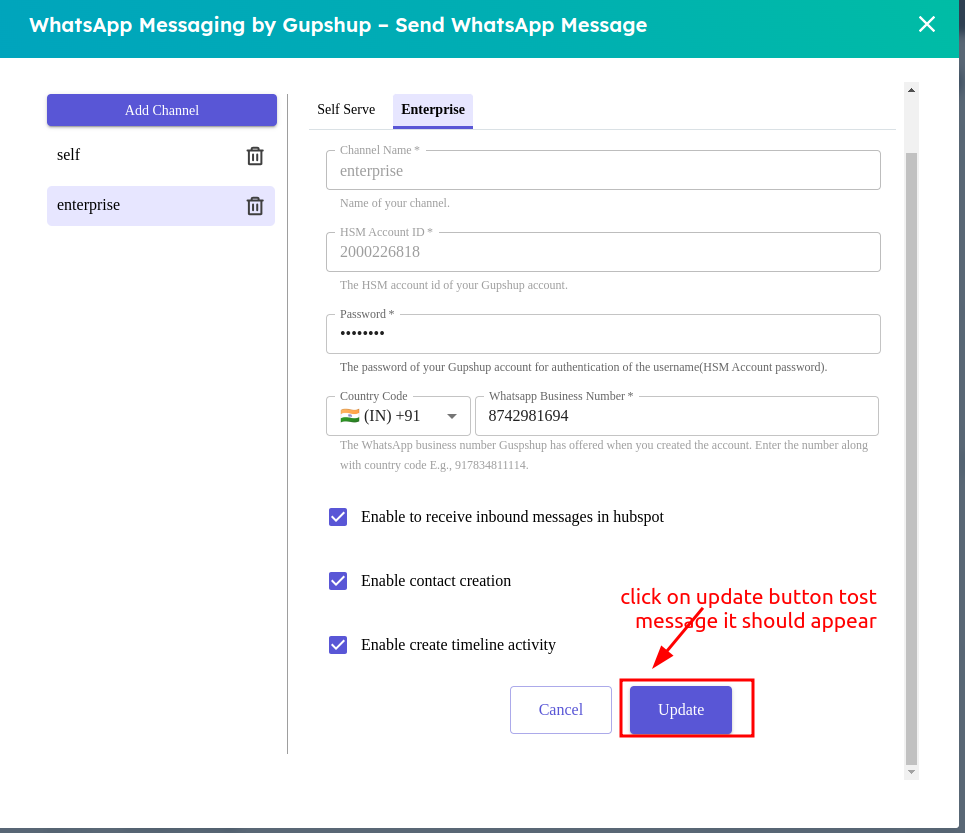
On clicking Enterprise button in Channel config screen, we will get to see the following fields which we need to fill up correctly :
1.Channel Name: Give any random name to your channel
2.User Name: Use the HSM Account ID shared by the Gupshup team over Email during account activation.
3.Password: Use the HSM Account Password shared by the Gupshup team over Email during account activation.
4.country code : Use the based on the country code field.
5. Business No: A Verified Business Phone Number, to test sending of messages, you must have a Verified Business Phone Number linked to your account.
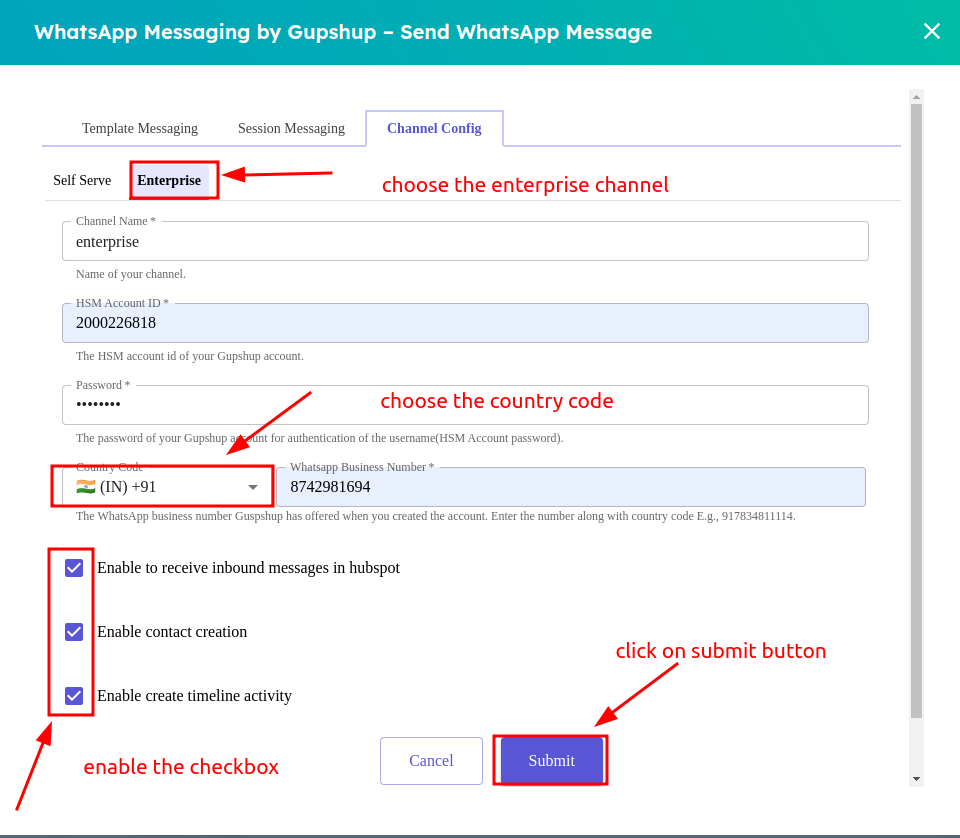
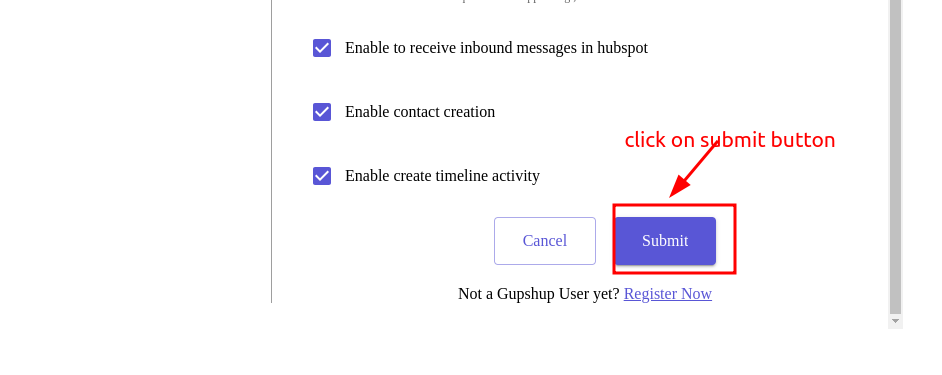
Once you've entered the required details mentioned above, choose the features you wish to activate by selecting their respective checkboxes. We'll provide detailed information about these features in the Features document. Finally, click the Submit button to save your configuration settings.
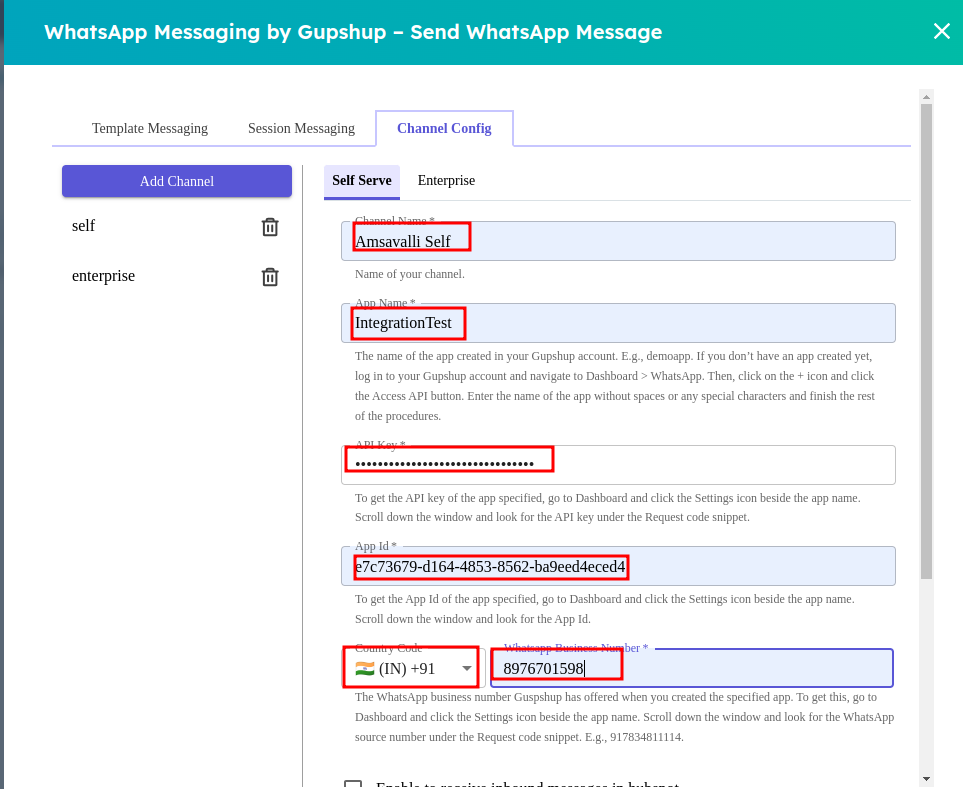
Configure Gupshup Self-Serve / Console Self-Serve Account
If you have a Gupshup Self-Serve account, please enter the following details and click submit button to save configuration. You need to choose the "channel config " tab for configuring the integration.
After opening the configuration screen, you can proceed with entering the necessary channel detail
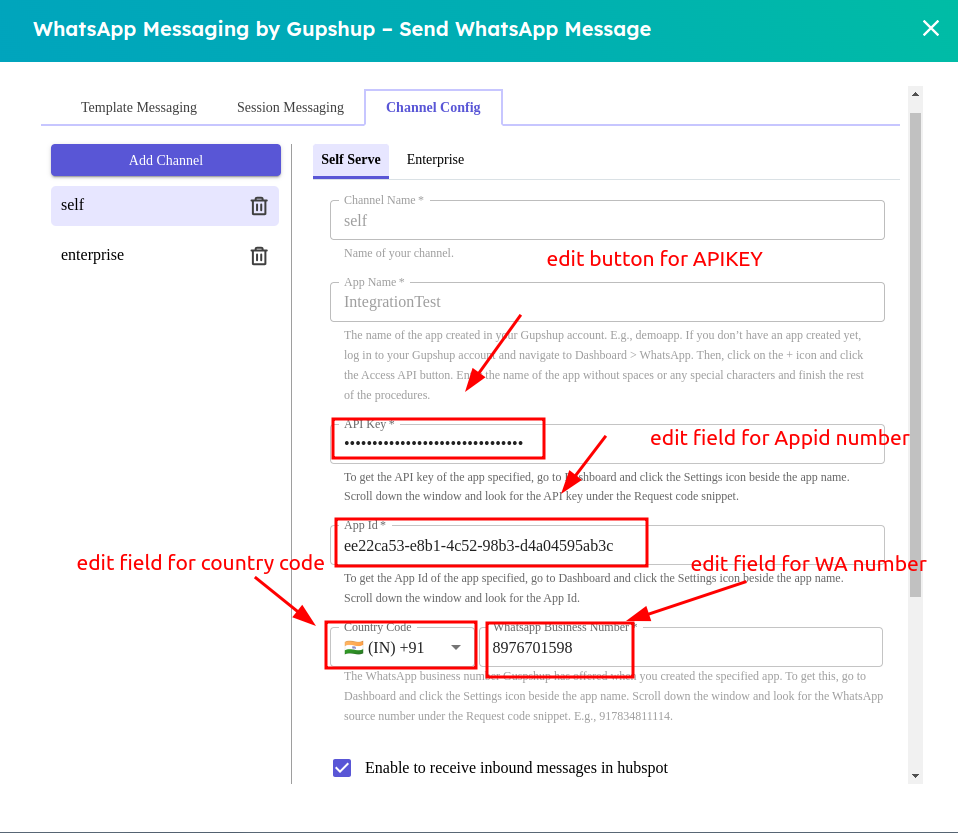
Following details are needed to configure the extension to use a Self-Serve account
1.channel name
2.App Name
3.App ID (WABA ID)
4.API Key
5.country ode
6.Business WhatsApp Number(WABA number)
In case you are facing trouble in retrieving these details, please follow the documentation below:
- Console Self-Serve Accounts: https://docs.gupshup.io/docs/configure-console-self-serve-integration
- Self-Serve Account: https://docs.gupshup.io/docs/configure-self-serve-integration
On clicking selfserve button in Channel config screen, we will get to see the following fields which we need to fill up correctly :
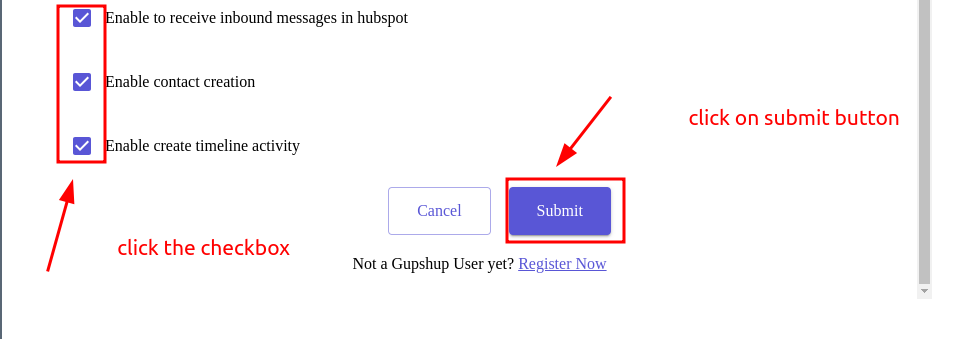
Enable to receive inbound messages in hubspot :
Enable this checkbox to receive incoming messages on the Waba number.
Enable contact creation :
Enable this checkbox to create a lead for incoming messages on the Waba number from unknown senders.
Enable create timeline activity :
Enable this checkbox to create a timeline activity
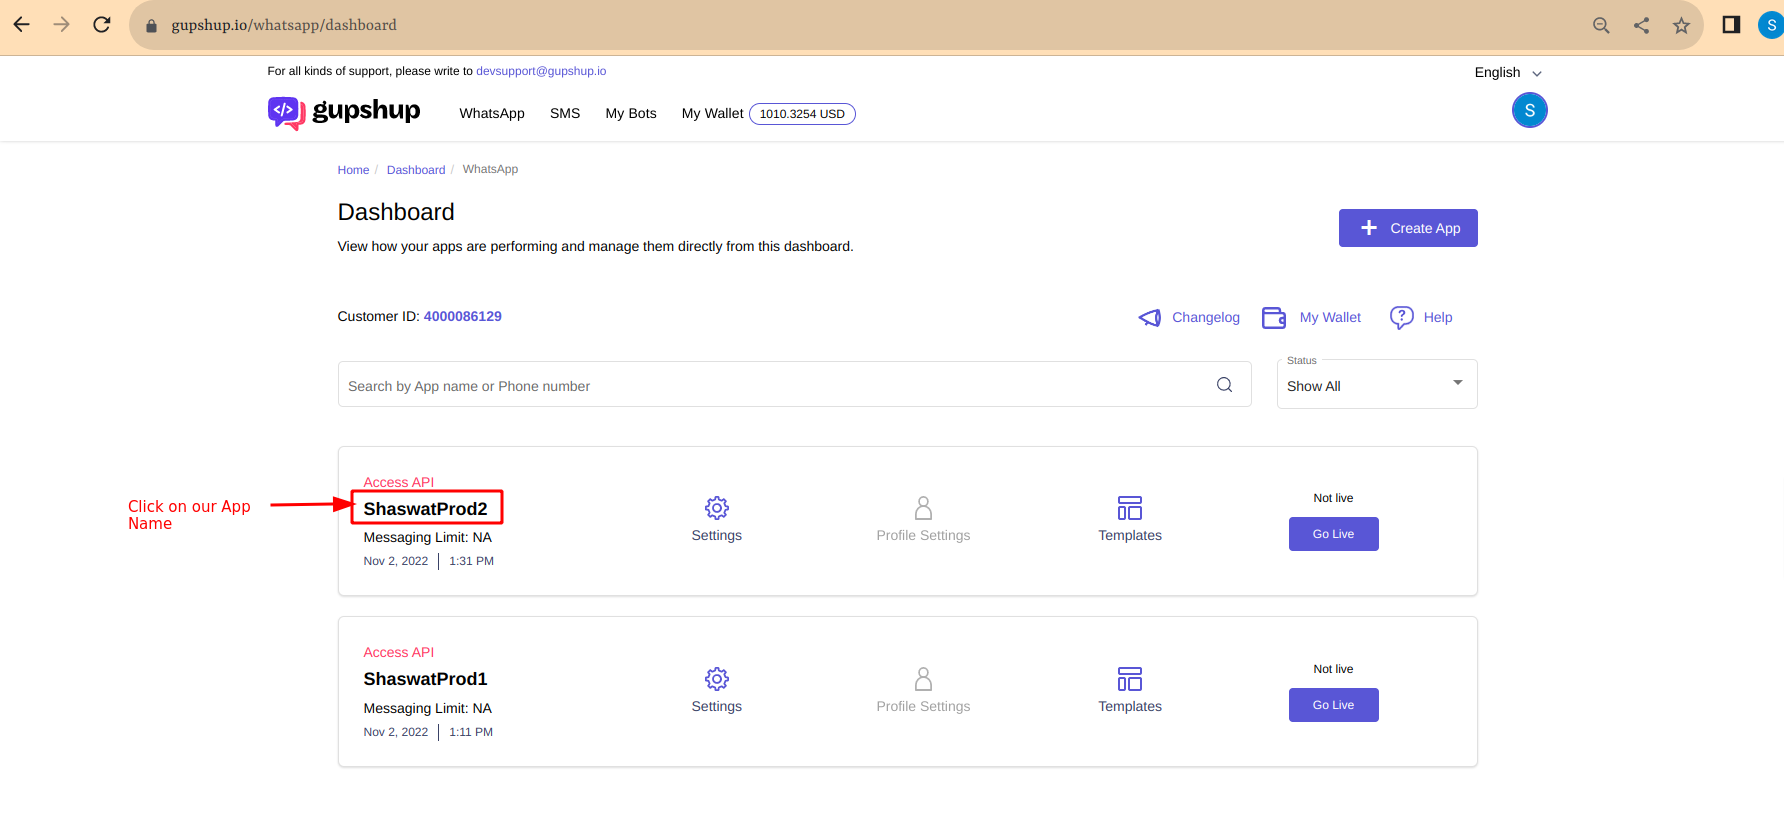
- Once done with the configuration of Self Serve WABA and Hubspot's Gupshup App Extension, we need to cross check if the Callback URL is set properly with our app. In order to do this, we will have to go to the Gupshup's official website [ gupshup.io ] and in Whatsapp's Dashboard section [ gupshup.io/whatsapp/dashboard ], we will find our App name. Just click on your App Name and then scroll down a bit to find Callback URL panel.
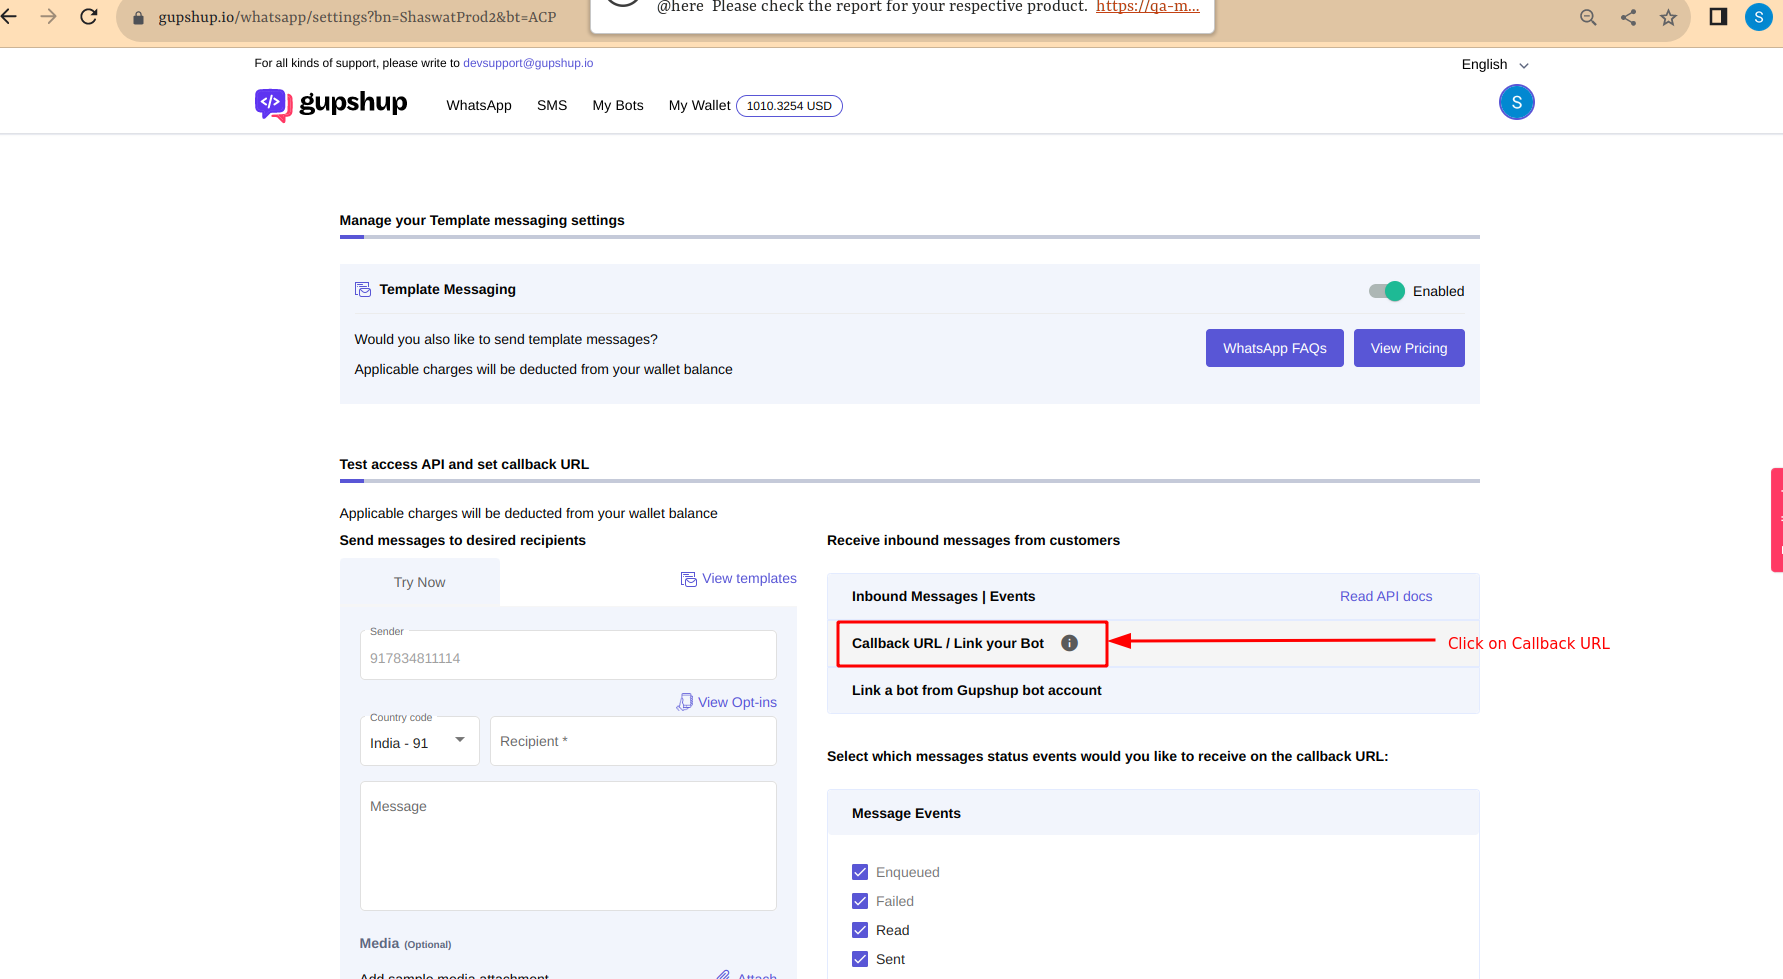
- Click on Callback URL / Link your Bot.
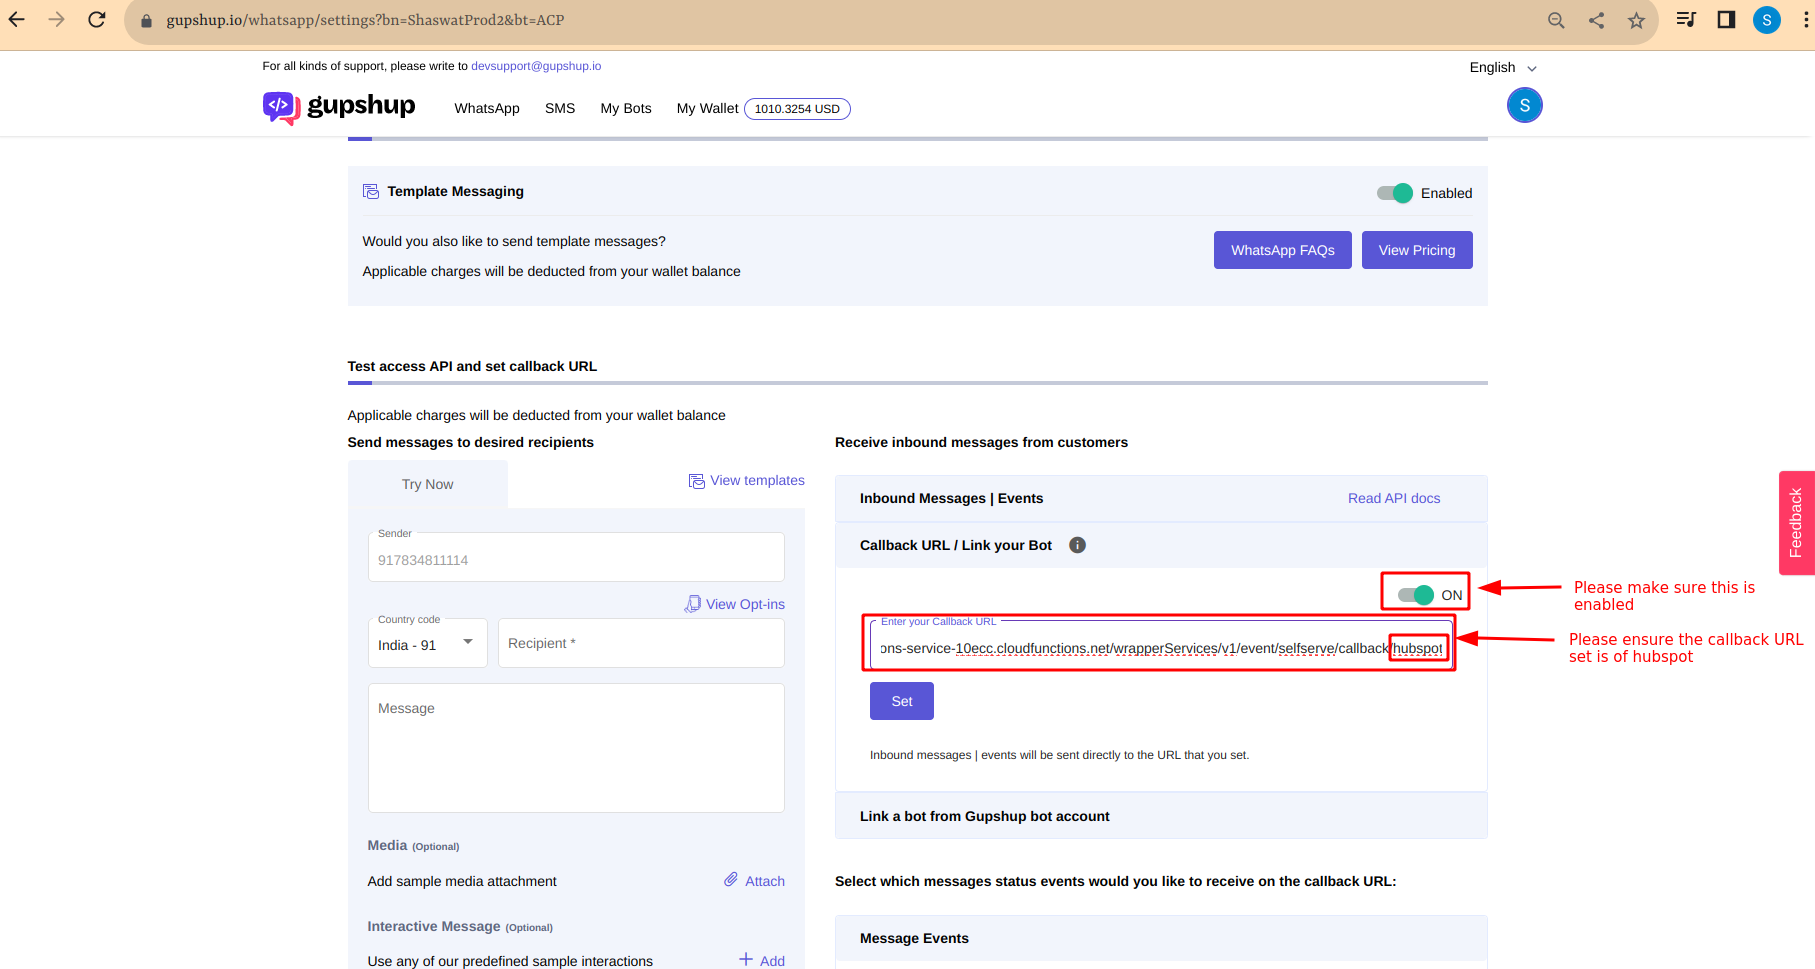
- Once we click on Callback URL,
- Please ensure that the Callback URL is enabled and
- Please make sure the Callback URL set is of Hubspot.
- Now we are all set to experience the benefits of having a two way communication with our Clients in the Hubspots's Gupshup App Extension by :
- Initializing the conversation by sending a template message from Hubspot's Gupshup App Extension.
- After we receive the first reply from Client's end, we can then be able to have a two way chat
- When you click on the "Cancel" button, all input field data will be cleared.[selfserve.

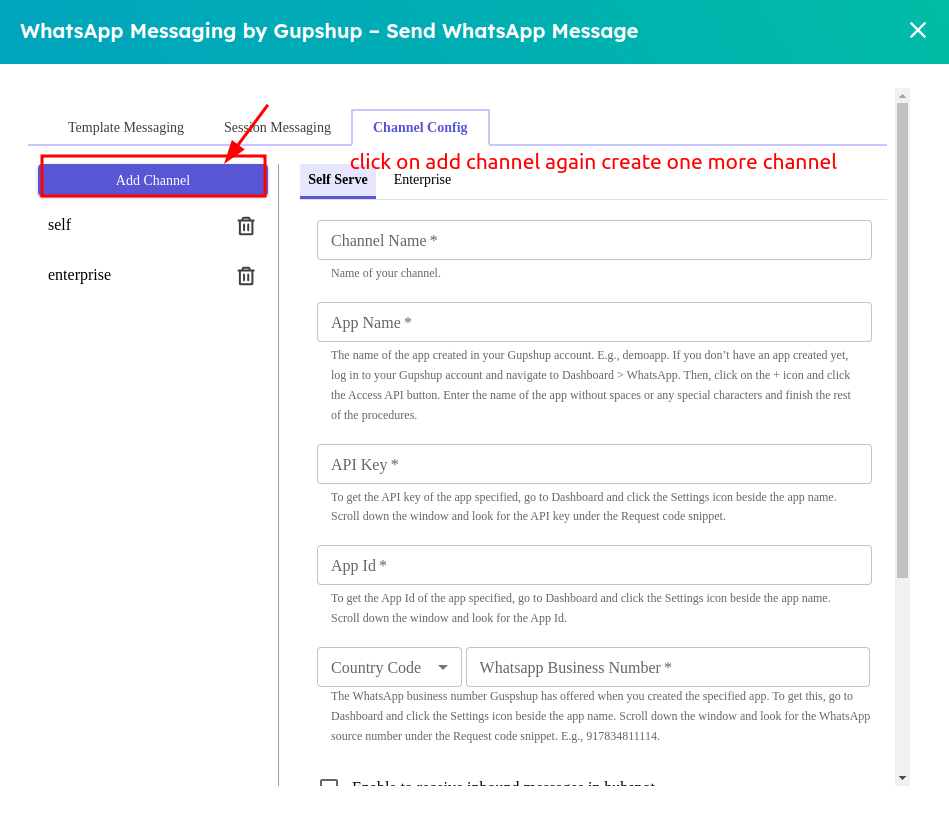
Add one more channel setup :
- we have already created one channel. Now, I am creating another by clicking on the blue "Add Channel" label.
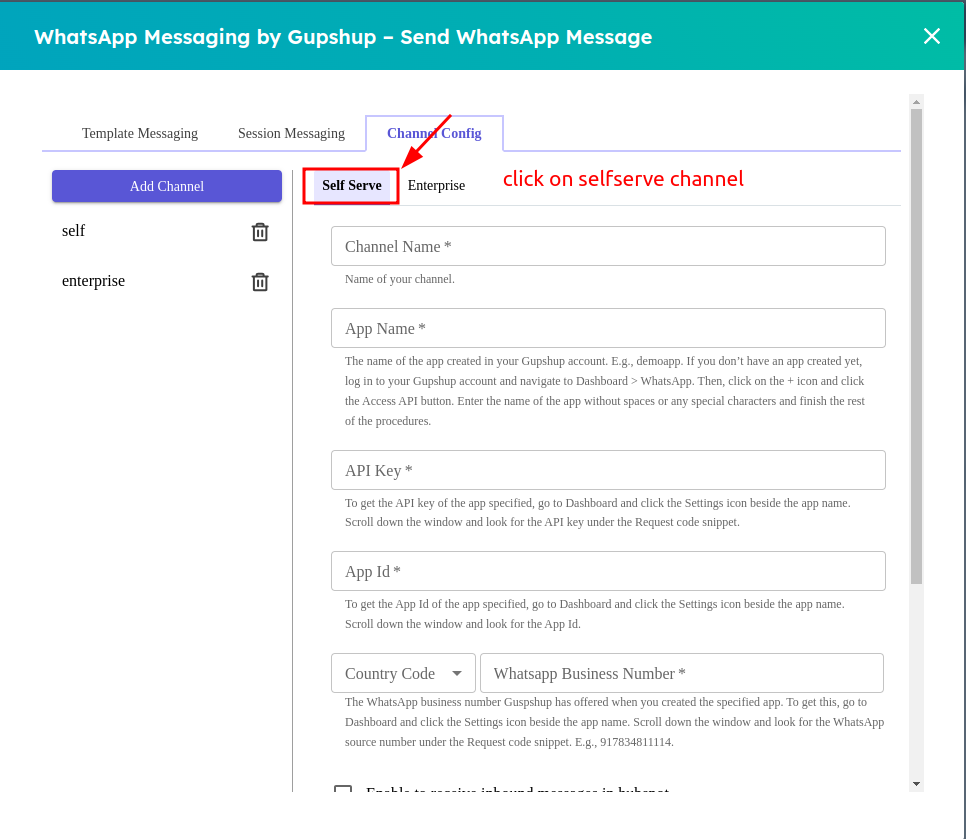
Add one more selfserve:
- we have already created a self-serve channel. Now, I am creating another channel for self-serve.
Add one more enterprise:
- weI have already created a enterprise channel. Now, I am creating another channel for enterprise
- You need to choose the Enterprise tab for configuring the integration.
Channel Name: Assign a unique name for your account to identify it.
HSM Account ID: Use the HSM Account ID shared by the Gupshup team over Email during account activation.
Password / HSM Account Password: Use the HSM Account Password shared by the Gupshup team over Email during account activation.
country code : Use the based on the country code field.
WhatsApp Business No: A Verified Business Phone Number, to test sending of messages, you must have a Verified Business Phone Number linked to your account.
- After entering the details, click Submit to save the configuration.
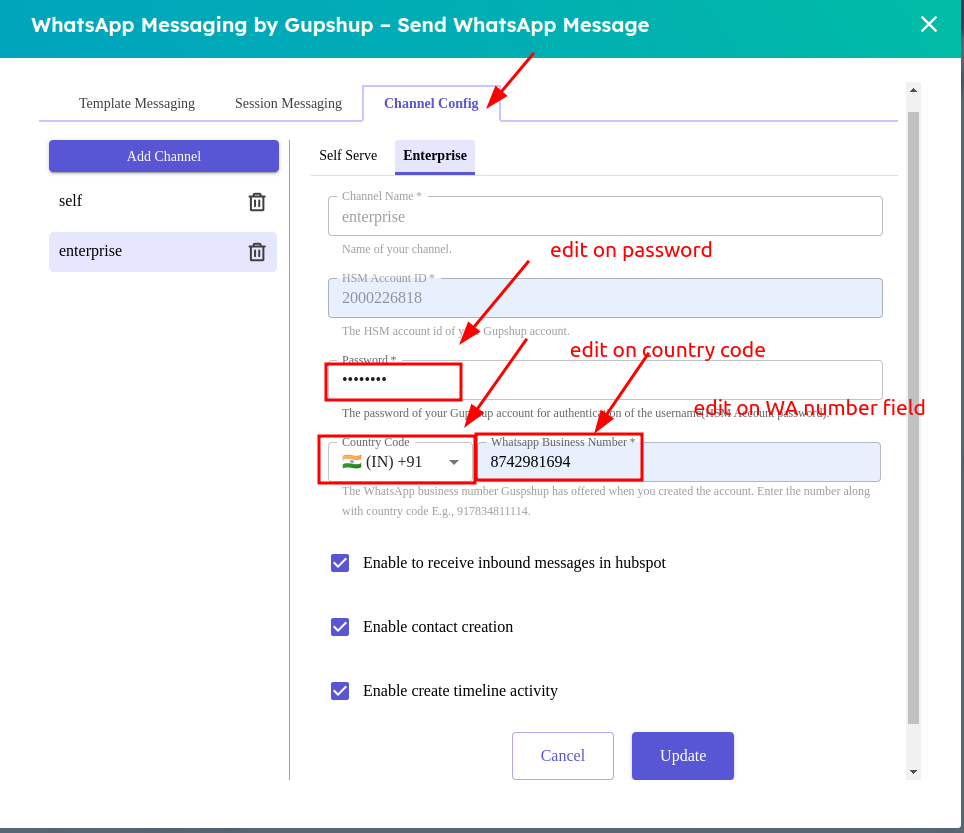
Edit field for enterprise:
- We have already created a enterprise channel. I need to make changes to the password and mobile number, Please click on the respective fields and make the changes.
Edit field for selfserve
- We have already created a self-serve channel. I need to make changes to the API key, app ID, and phone number. Please click on the respective fields and make the changes.
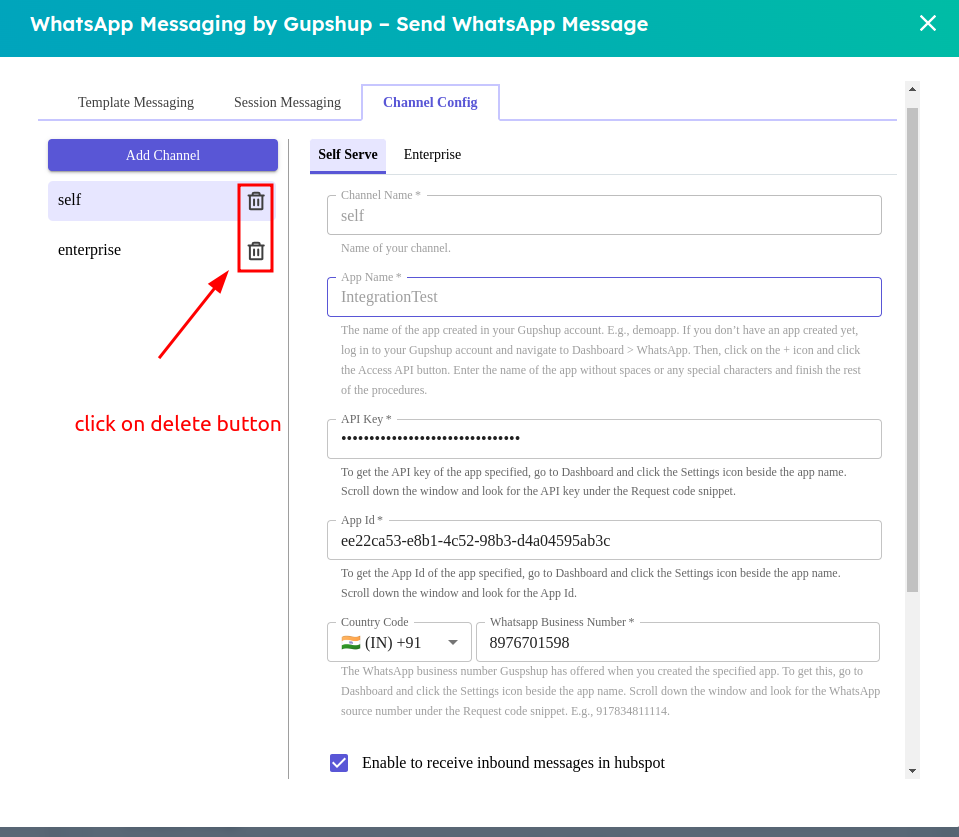
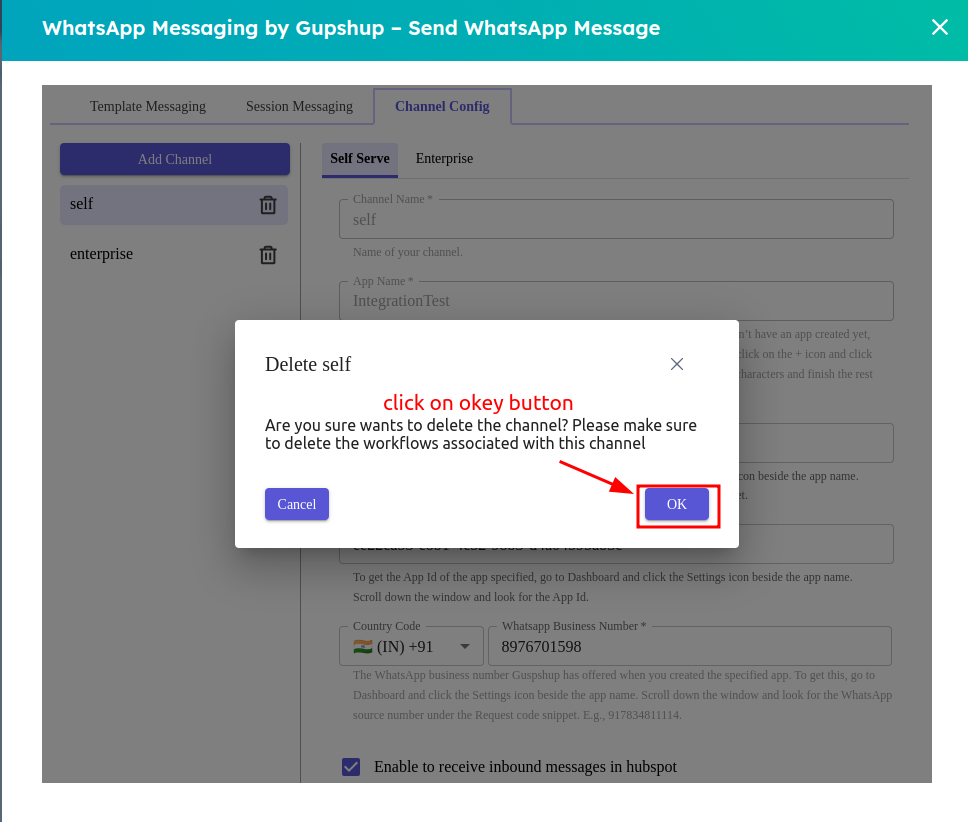
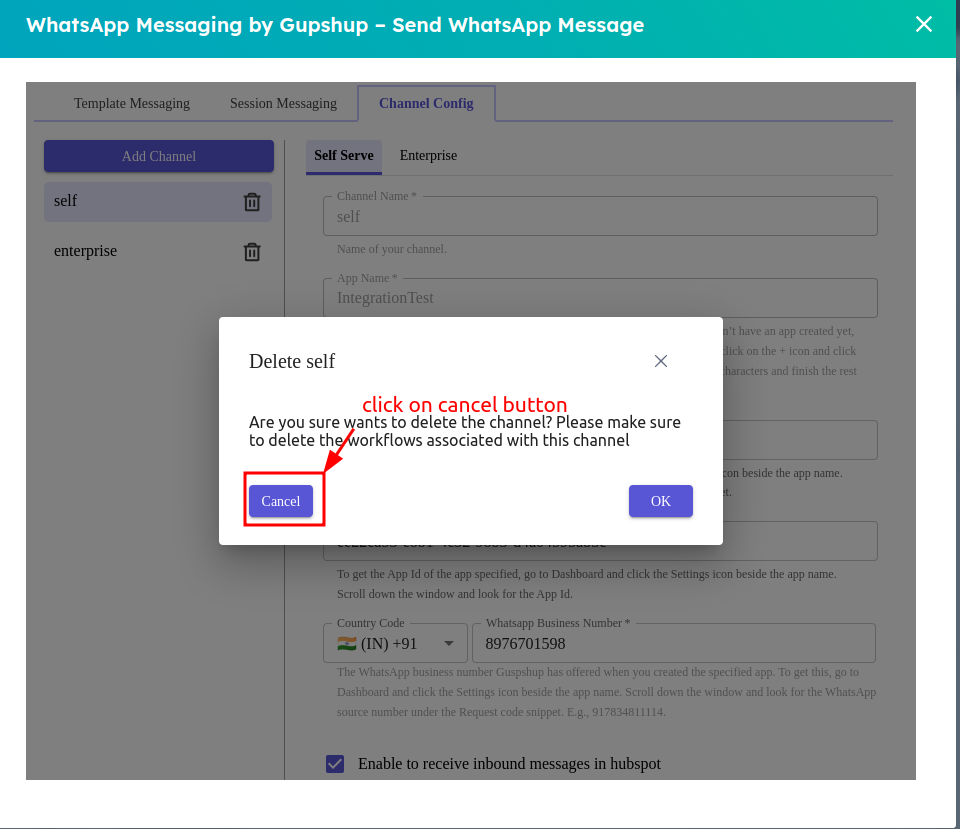
Click the delete button enterprise & selfserve
- we have already set up an selfserve channel to facilitate communication within our organization. However, due to certain changes or reasons, now need to remove this channel from our system
- When you click the "OK" button, the specific channel will be available for deletion on the configuration page.
- When you click the "Cancel" button, that particular channel will be available on the configuration page.
- When you click the "UPDATE" button, the specific channel will be updated.
Updated 9 months ago