Step 3: Channel Setup
After clicking WhatsApp Messaging By Gupshup, a popup window will appear with three tabs: Template Messaging, Session Messaging and Channel Configuration. If your channel is not yet configured, you will be directed to the Channel Configuration screen.
In this documentation, we'll focus on the Channel Configuration tab. Click on the Channel Configuration tab to continue configuring your Gupshup WhatsApp Business account.
Don't have a Gupshup Account yet?
Get Started today: Contact Gupshup
Already using Gupshup?
At Gupshup, we onboard our clients on 3 kinds of Accounts, based on their needs and use-cases. They are:
- Console Self-Serve
- Self-Serve
- Enterprise / Console Enterprise
NOTE: If you are not aware of the type of Gupshup account you are using, please check out the following documentation: Configuration Assistant
Now that you might be aware of the type of account you are using, let's move forward.
Configure a Gupshup Enterprise / Console Enterprise Account
To set up your Gupshup WhatsApp Business account or Console Enterprise Account for integration, follow these steps:
If you have a Gupshup Enterprise account, please enter the following details and click submit button to save configuration. You need to choose the Enterprise tab for configuring the integration.
- Channel Name: Assign a unique name for your account to identify it.
- HSM Account ID: Use the HSM Account ID shared by the Gupshup team over Email during account activation.
- Password / HSM Account Password: Use the HSM Account Password shared by the Gupshup team over Email during account activation.
- Country code : Select the correct country code from the dropdown.
- WhatsApp Business No: A Verified Business Phone Number, to test sending of messages, you must have a Verified Business Phone Number linked to your account.
Once you enter the above details, click on Submit button to save configuration details
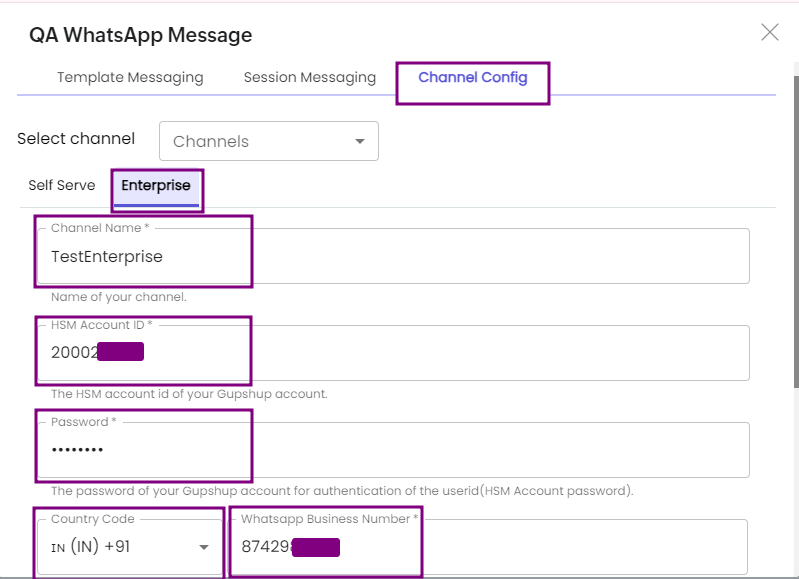
Enterprise Channel Configuration
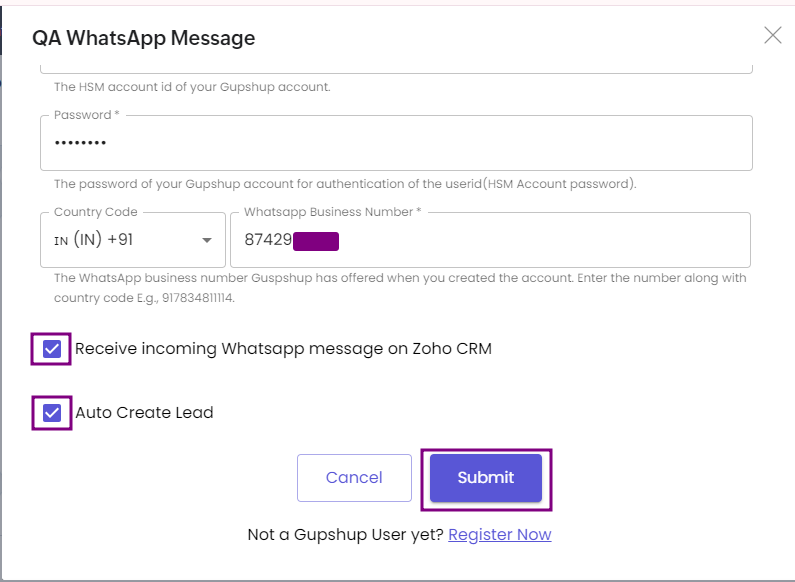
Enterprise Channel Configuration
Configure Gupshup Self-Serve / Console Self-Serve Account
If you have a Gupshup Self-Serve account, please enter the following details and click submit button to save configuration. You need to choose the "Self-Serve" tab for configuring the integration.
Following details are needed to configure the extension to use a Self-Serve account
- App Name
- App ID
- API Key
- Country Code
- WhatsApp Business Number
In case you are facing trouble in retrieving these details, please follow the documentation below:
- Console Self-Serve Accounts: https://docs.gupshup.io/docs/configure-console-self-serve-integration
- Self-Serve Account: https://docs.gupshup.io/docs/configure-self-serve-integration
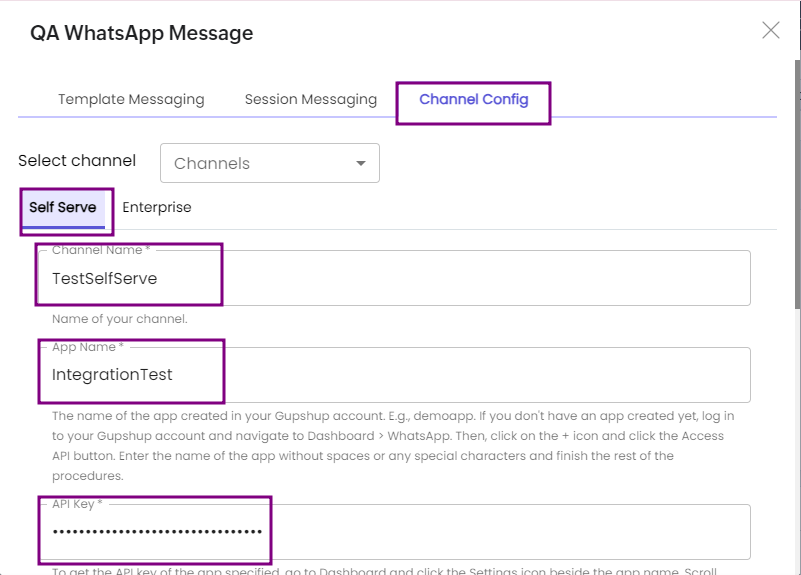
Self-Serve Channel Configuration
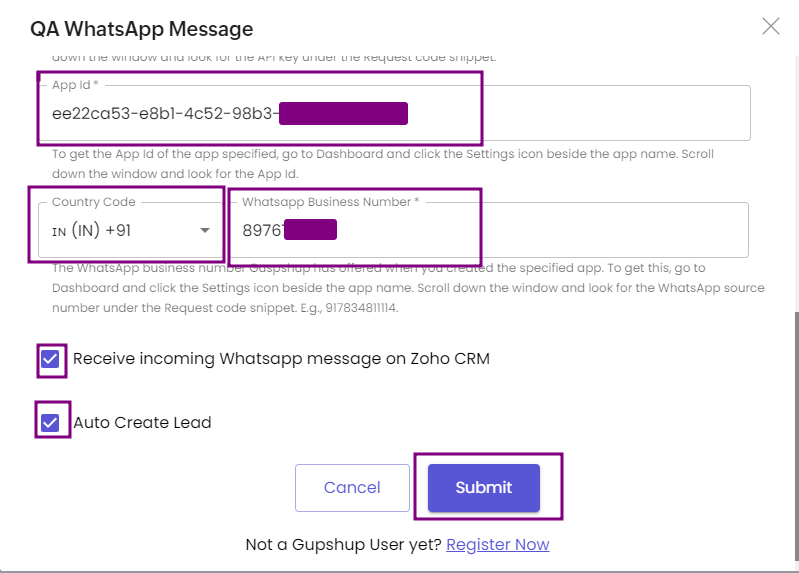
Self-Serve Channel Configuration
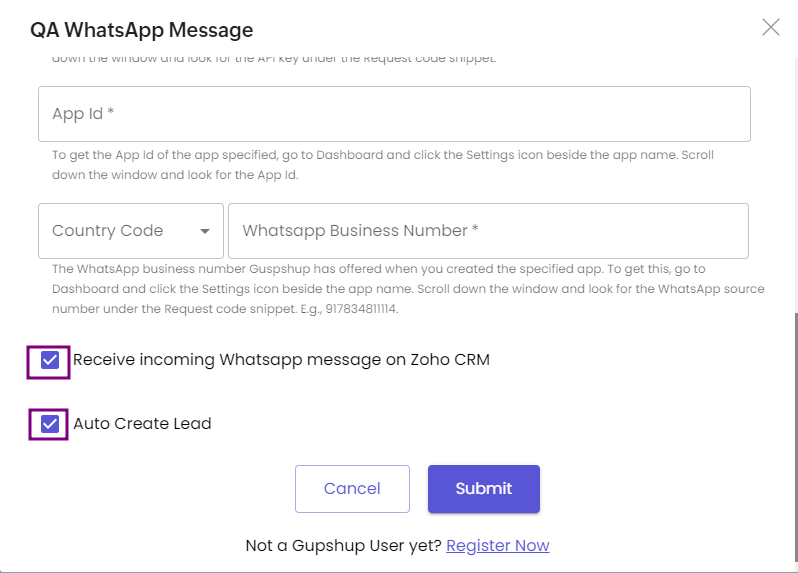
Note: Receive incoming WhatsApp message on Zoho CRM and Auto Create Lead checkbox are by default selected,
Receive incoming WhatsApp message on Zoho CRM: Enable this checkbox to receive incoming messages to Waba number.
Auto Create Lead: Enable this checkbox to create a lead when an incoming message is received on the Waba number from a sender that does not exist in the Lead or Contact Module.
app configuration
Updated 3 months ago
