Workplace
How to publish a bot on Workplace
Create a custom integration
- Go to the Workplace website and login to your account.
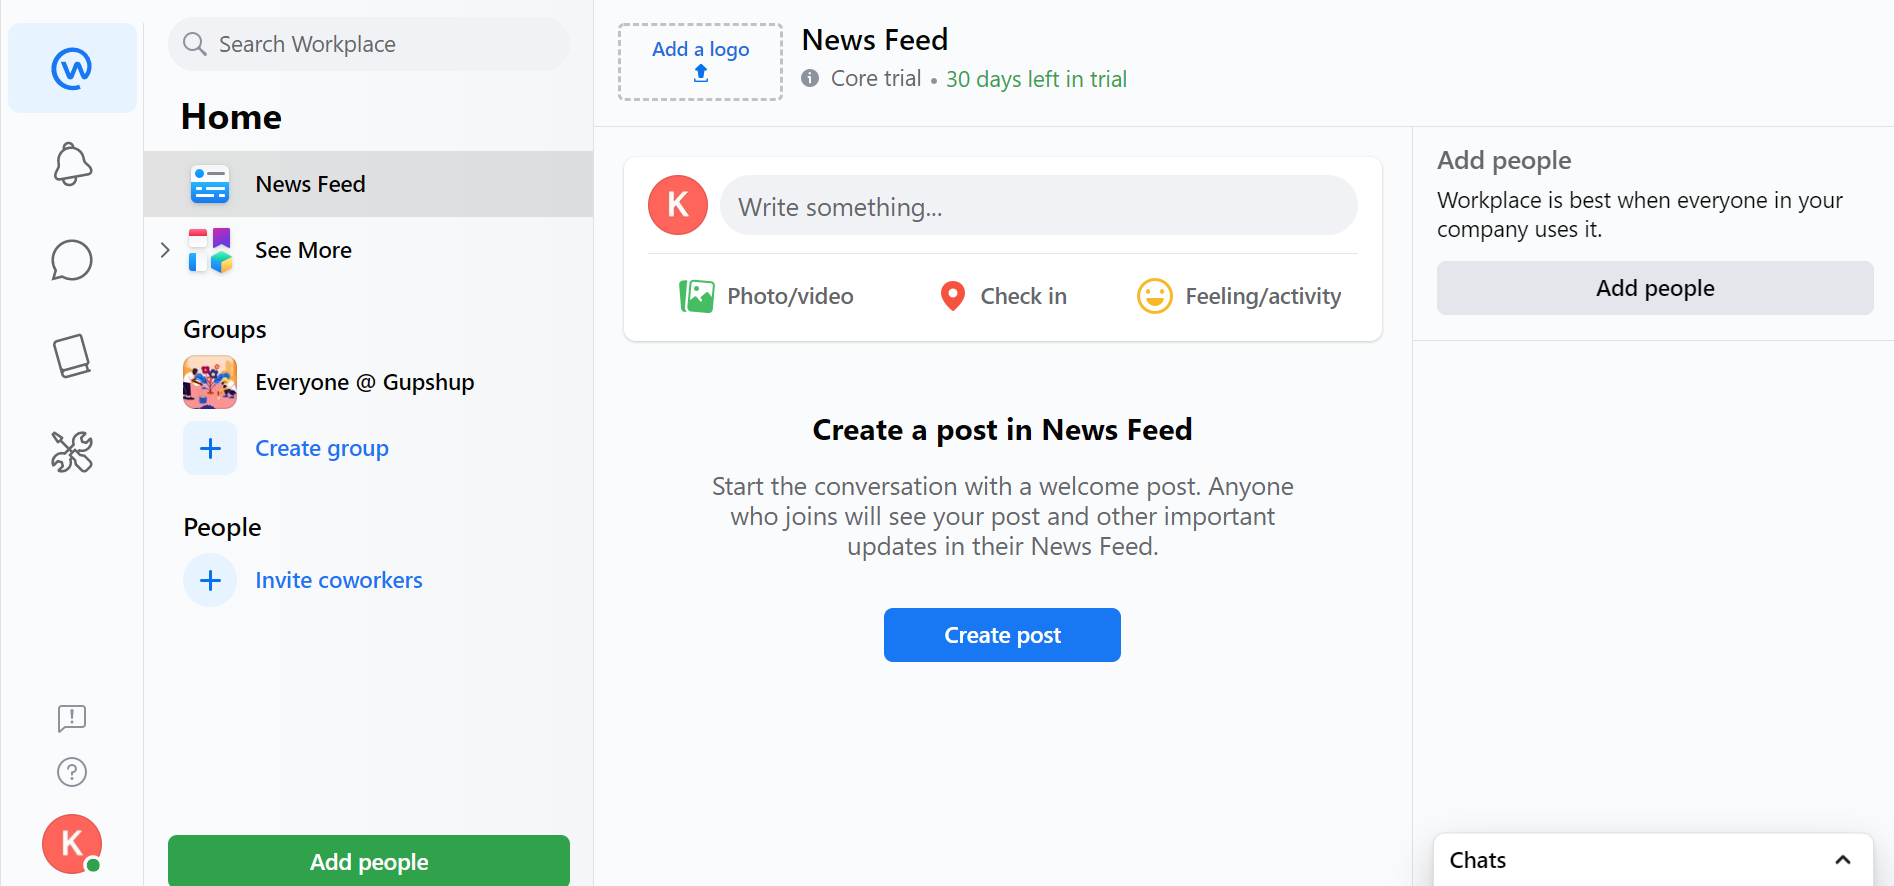
- Go to Admin Panel (wrench and screwdriver icon).
- Select Integrations.
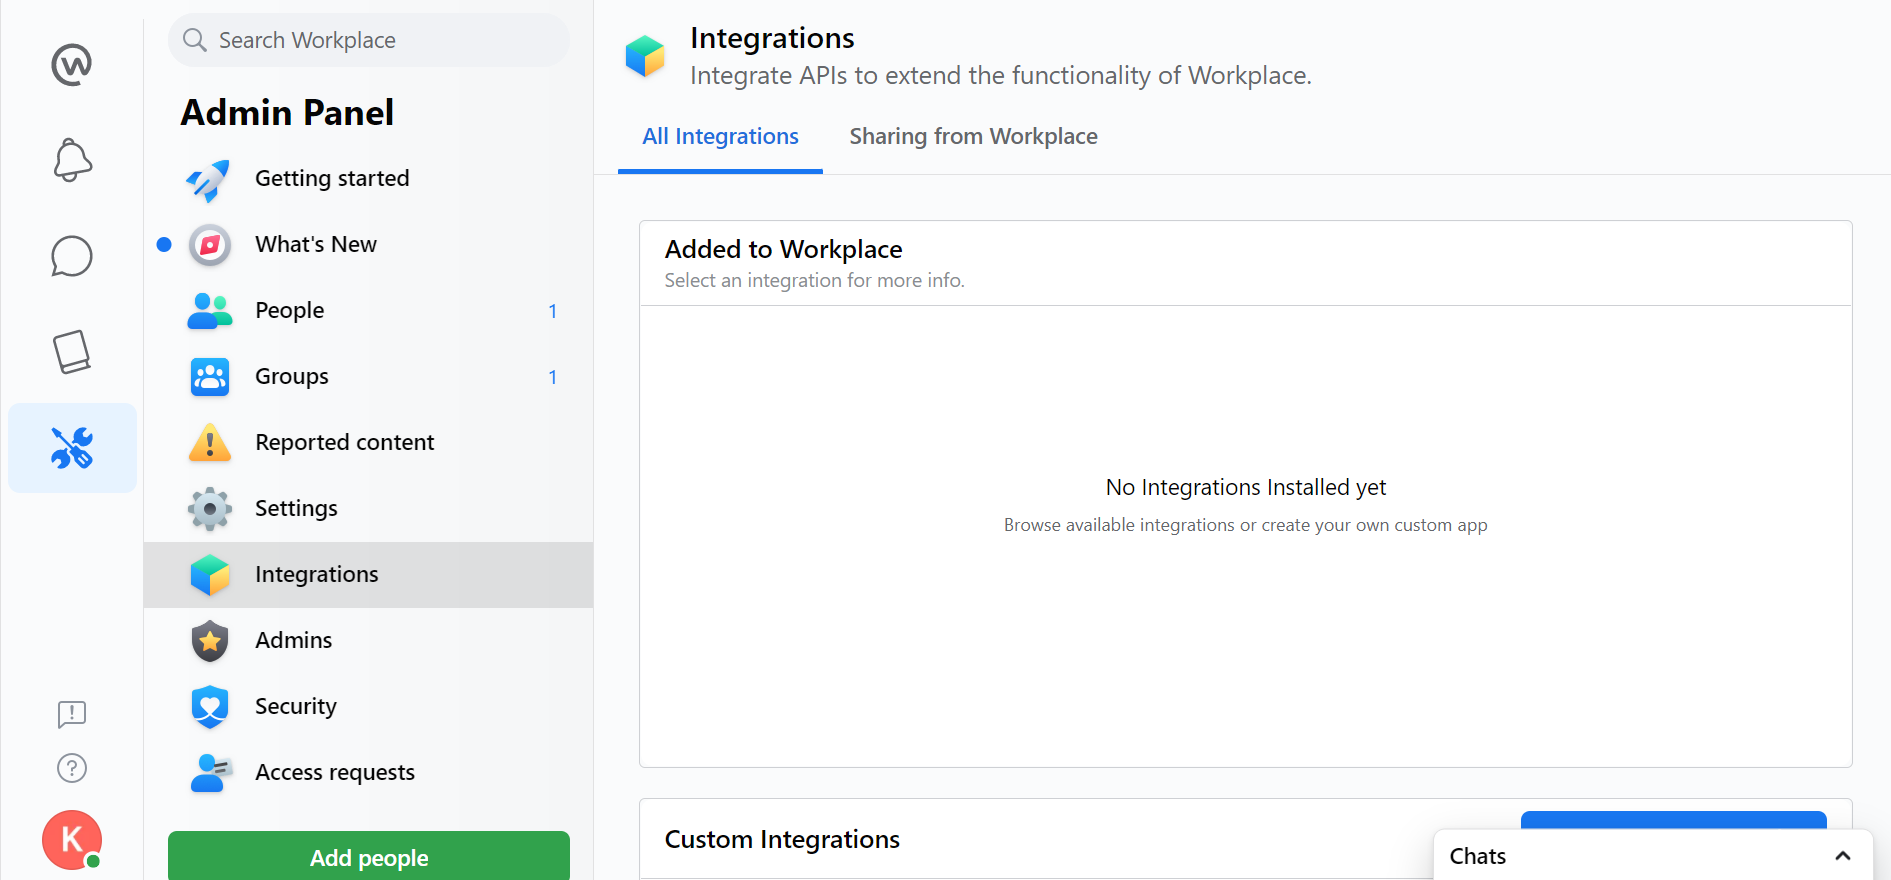
- Scroll down and click the Create Custom Integration button.
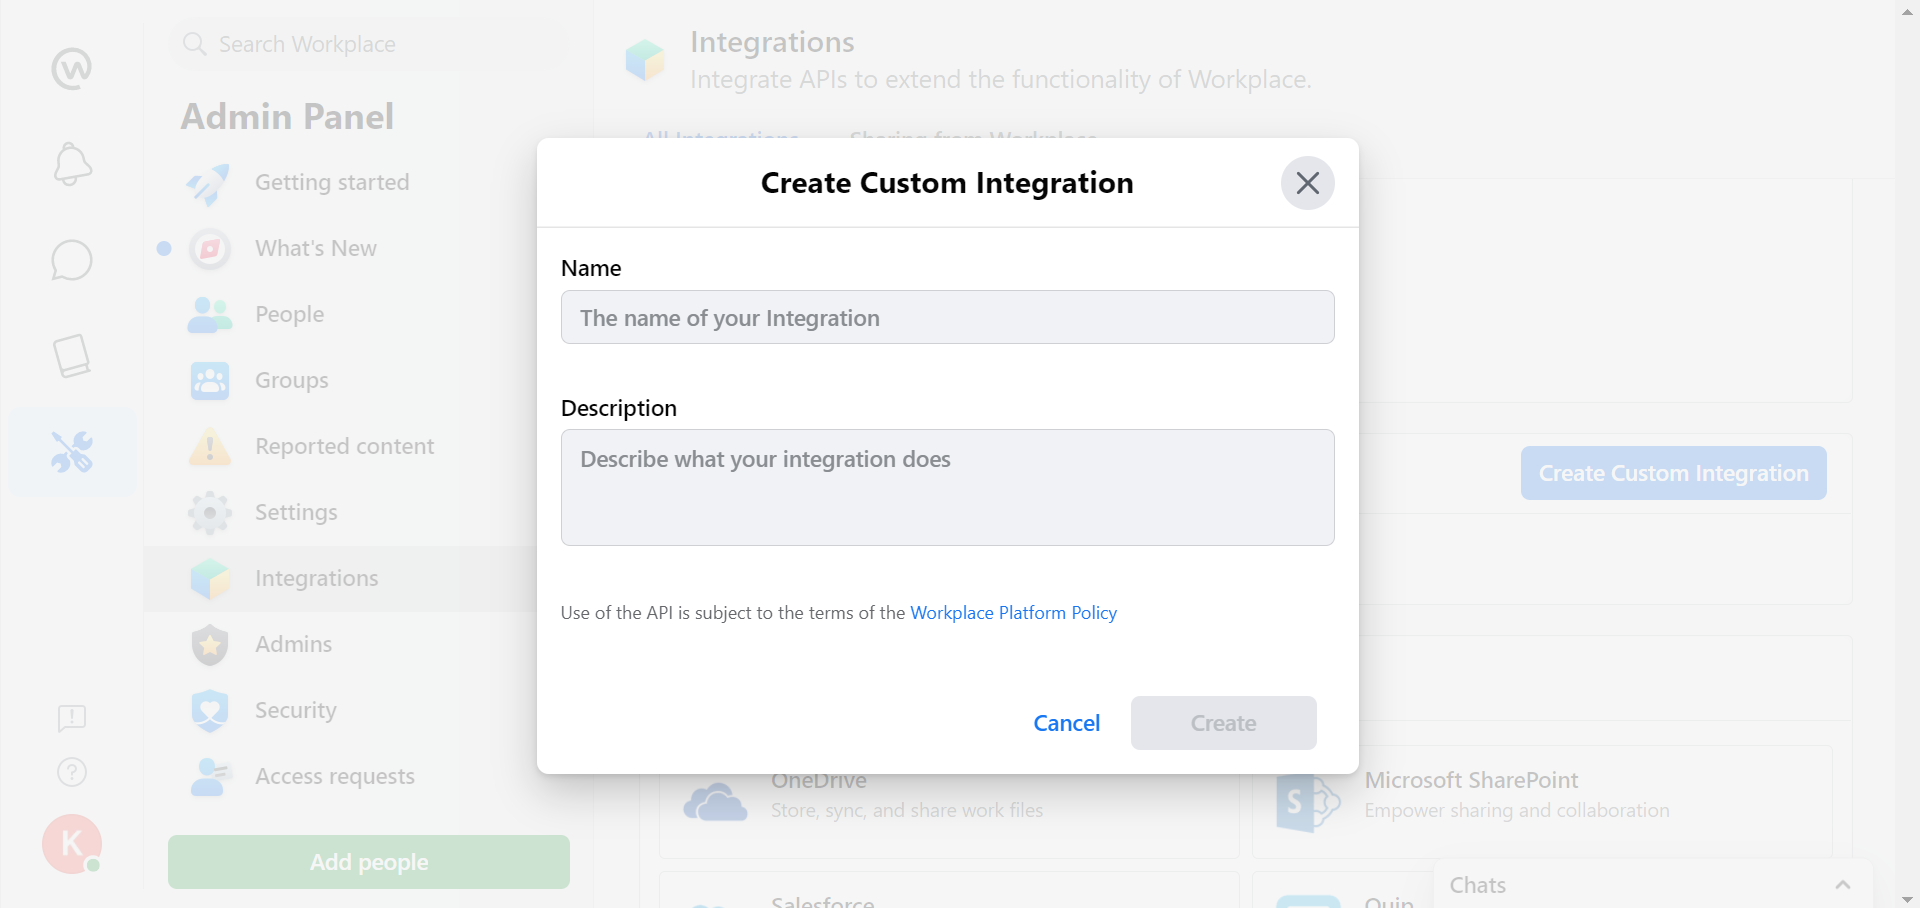
- Enter the name and description and click the Create button.
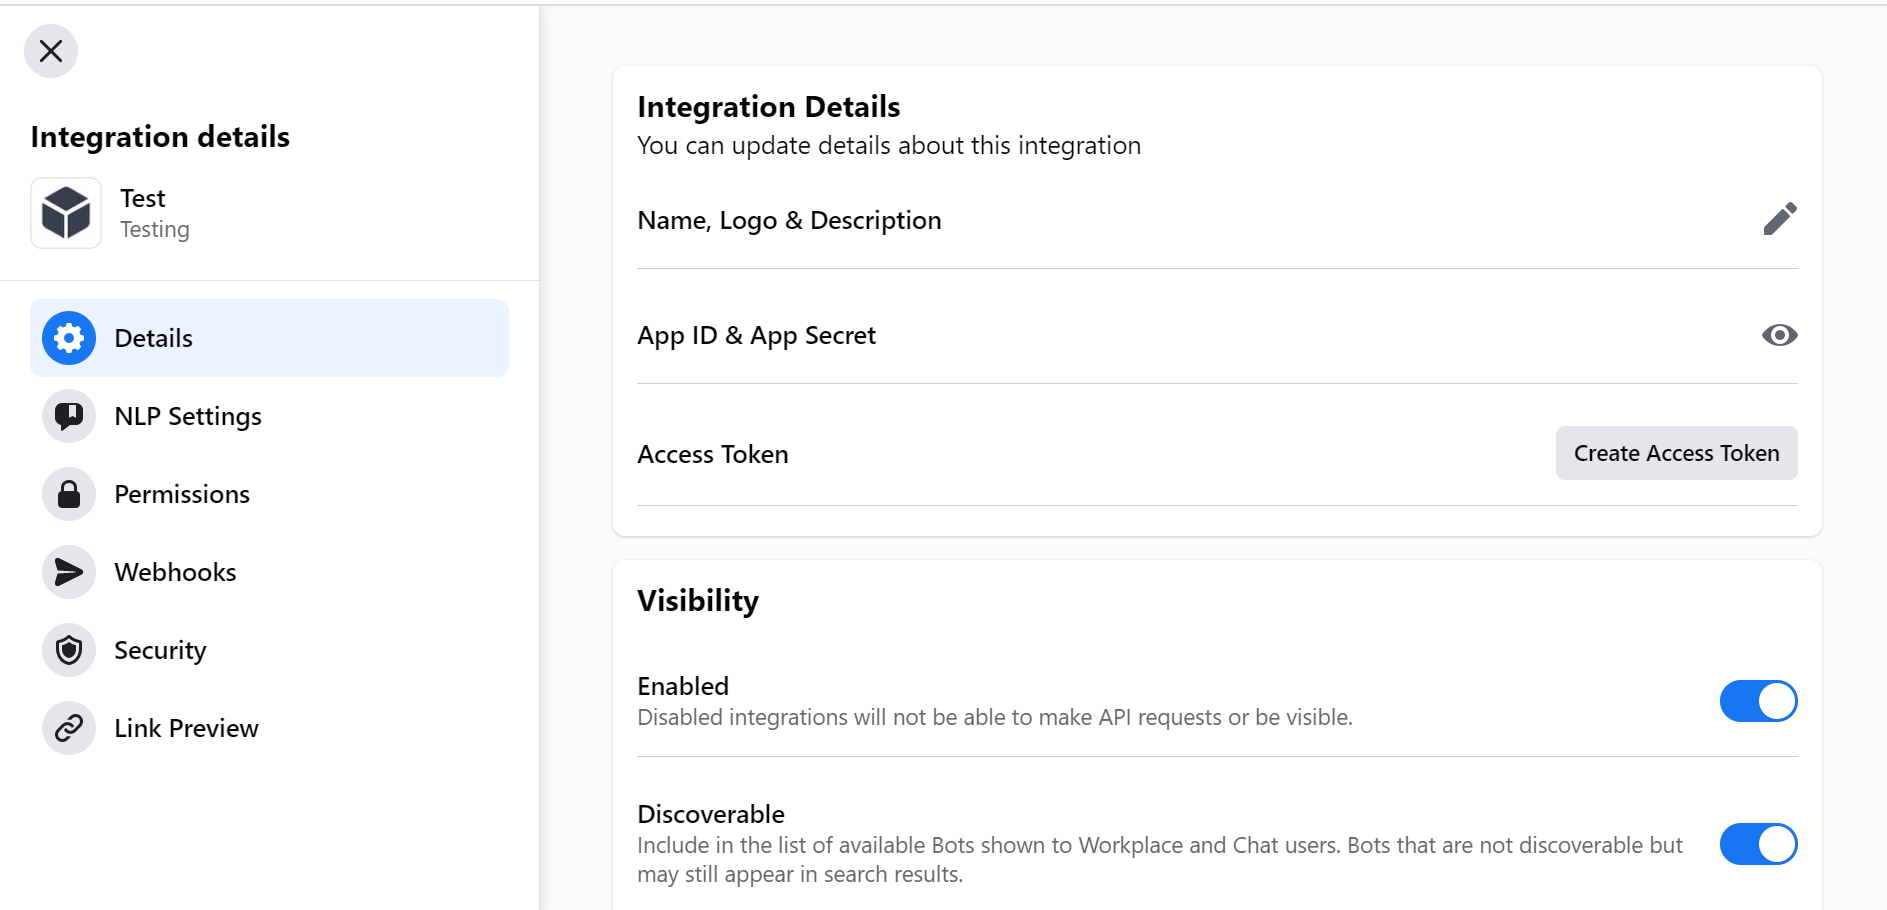
You are redirected to the Integration details page.
Create and get Access Token
- Go to Details in the sidebar.
- Click the Create Access Token button in the integration Details section.
- Copy the new token created for later use.
Enable permissions
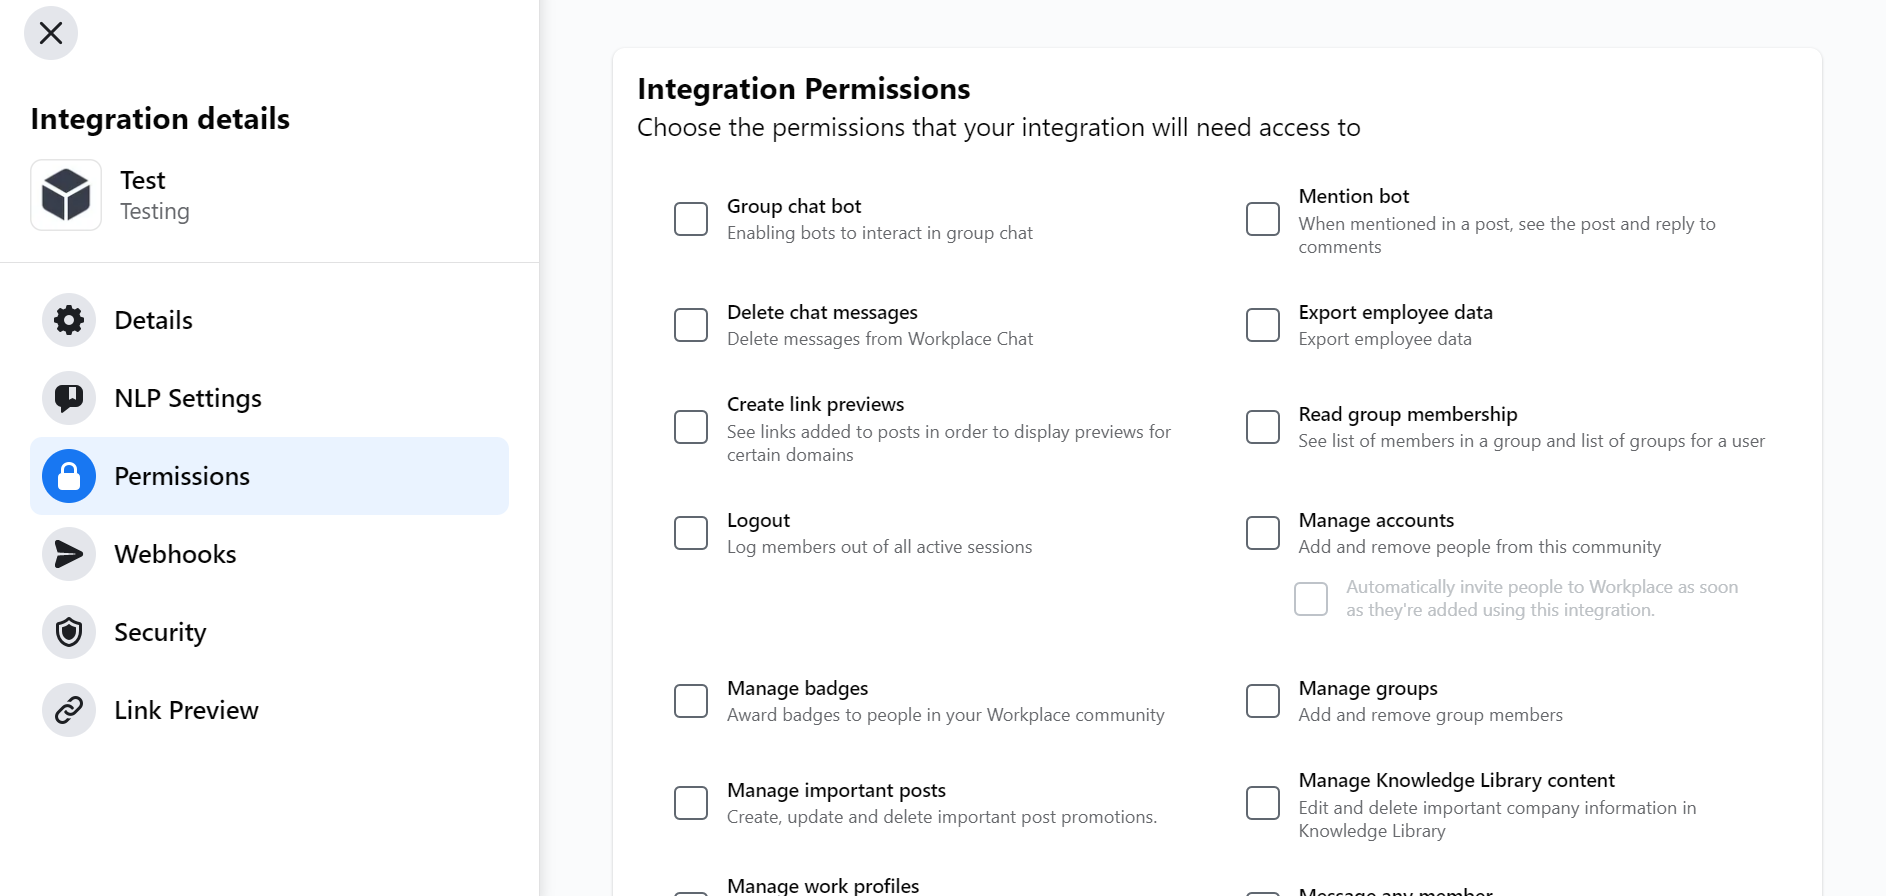
- Go to Permissions in the sidebar.
- Enable the permissions mentioned below.
Permissions |
|---|
Message any member |
Read all messages |
Read and action reported content |
Read group content |
Read Knowledge Library content |
Read user email |
Read user timeline |
Read org chart |
Read work profile |
Read group membership |
- Click Save.
Get Callback URL and Verify Token
- Log in to the Gupshup website.
- Go to Dashboard tab > My Bots section.
- Select the button under the Publish column against the bot you wish to publish.
- A list of channels will appear. Click on the Publish button against Workplace.
- Scroll down and click Configure webhooks.
- Copy the Callback URL and Verfiy Token for later use.

Configure webhooks
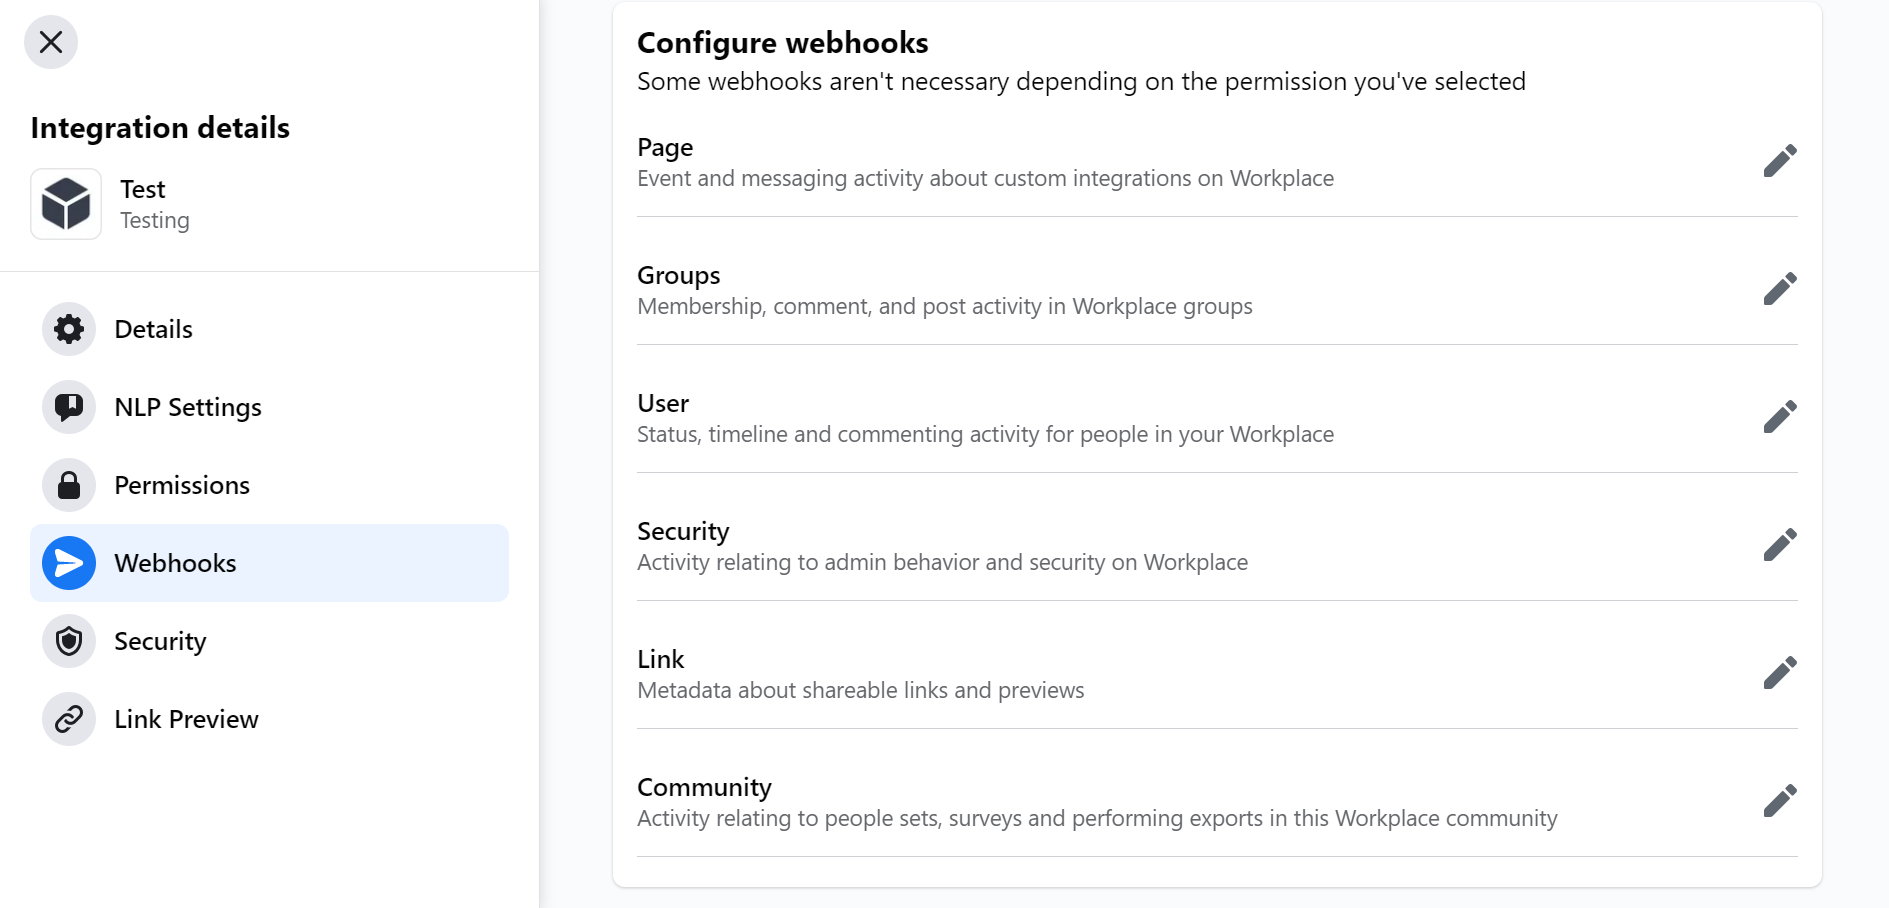
- Go to Webhooks in the sidebar on the Integration details page.
- Click the pencil icon against Page.
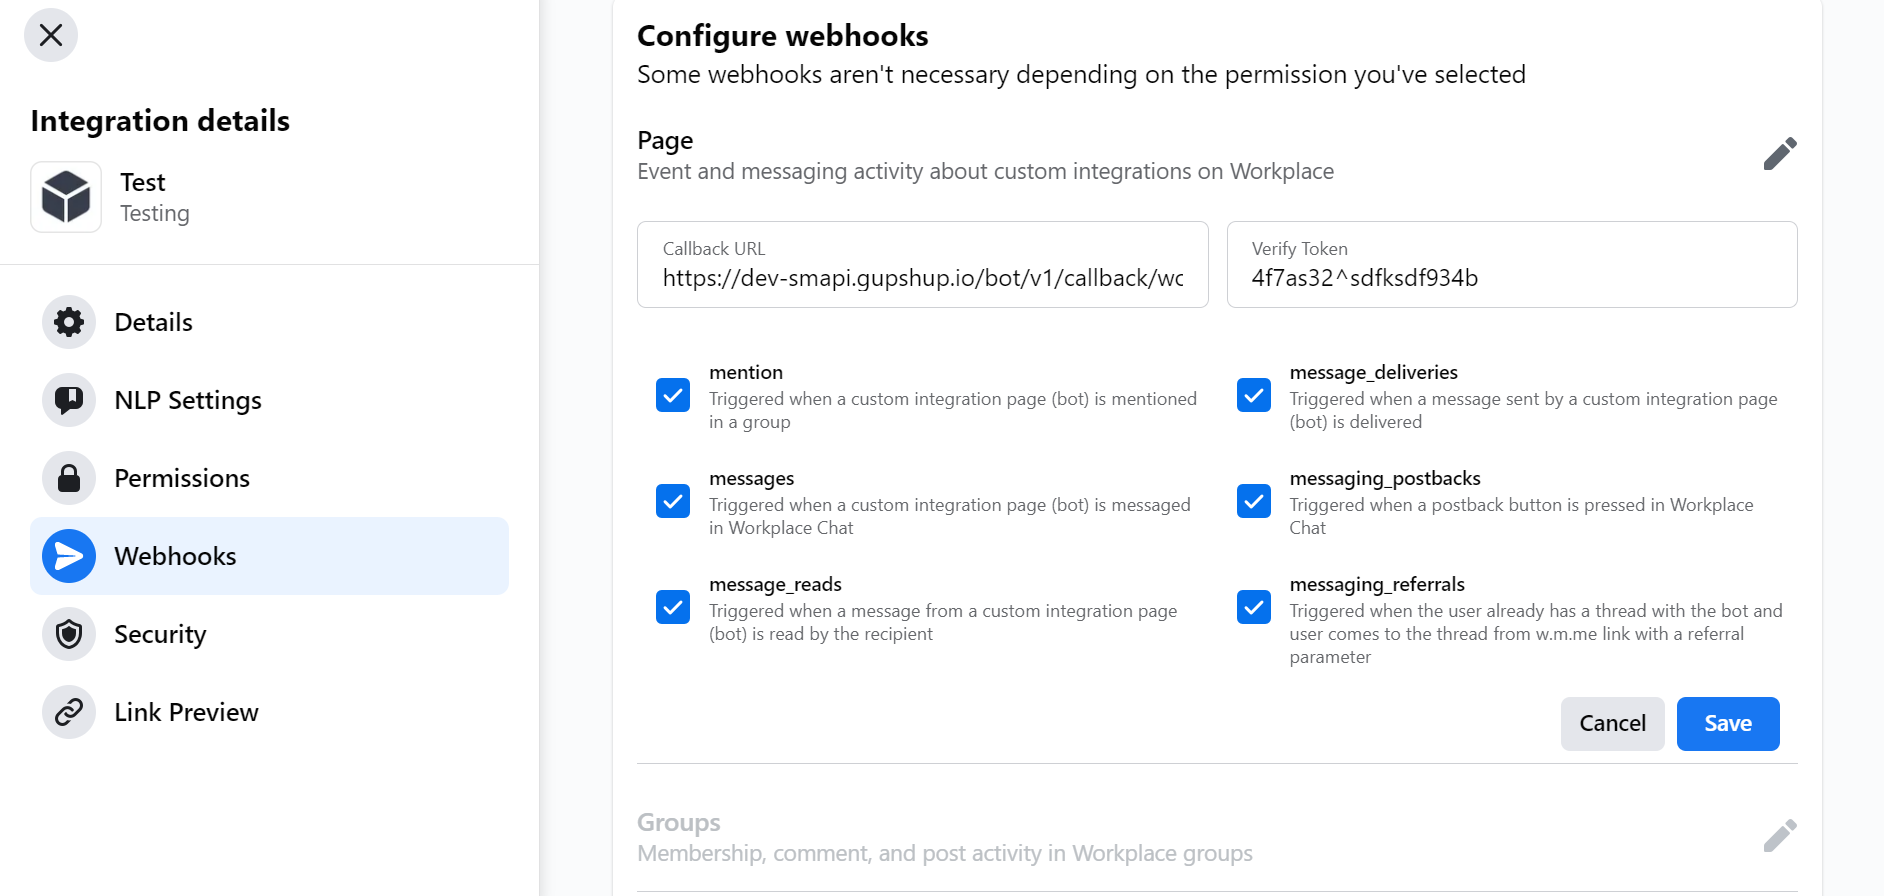
- Enter the Callback URL and Verify Token copied earlier in the respective fields.
- Select all event checkboxes given below and click Save.
Get Bot Page ID
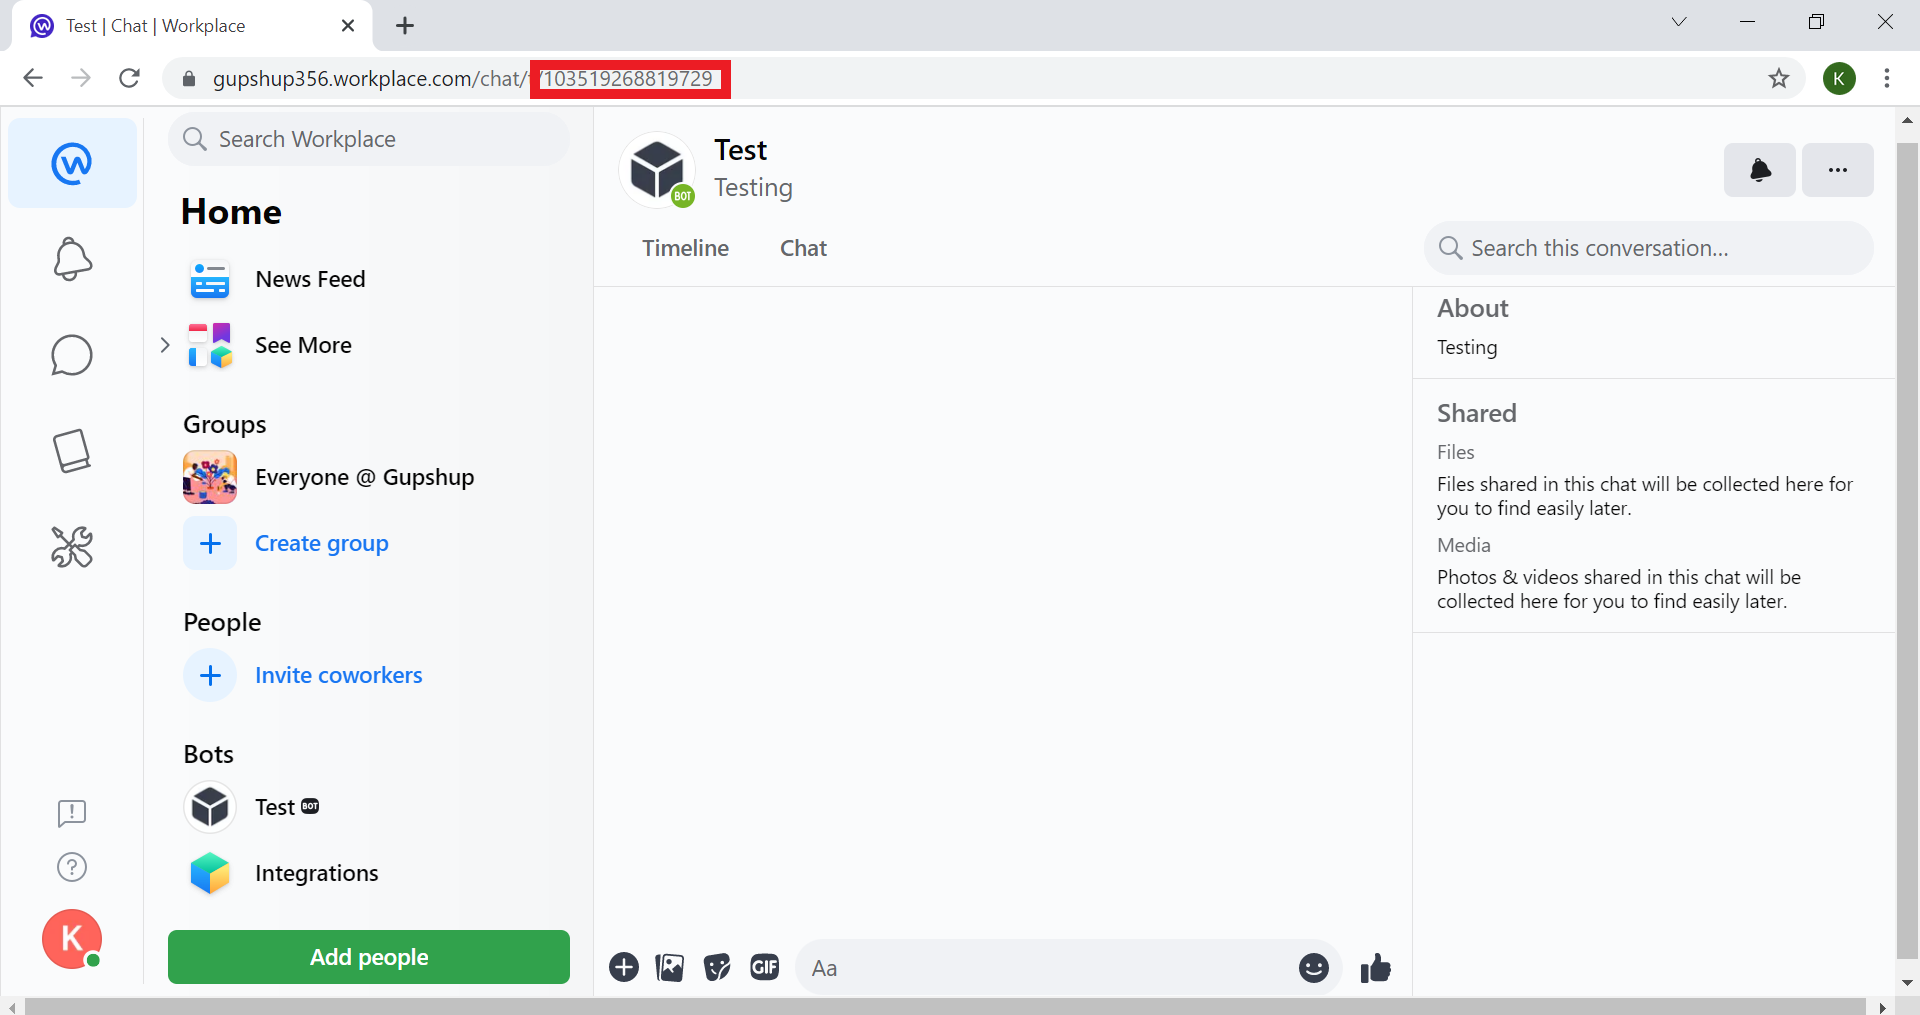
- Go to Home (Workplace logo icon).
- Go to the Bots section in the Home sidebar.
- Select the custom integration you created for the bot.
- Copy the ID given the end of the URL in the search bar of your browser for later use.
Submit your Page ID and Access Token
- Log in to the Gupshup website.
- Go to Dashboard tab > My Bots section.
- Select the button under the Publish column against the bot you wish to publish.
- A list of channels will appear. Click on the Publish button against Workplace.
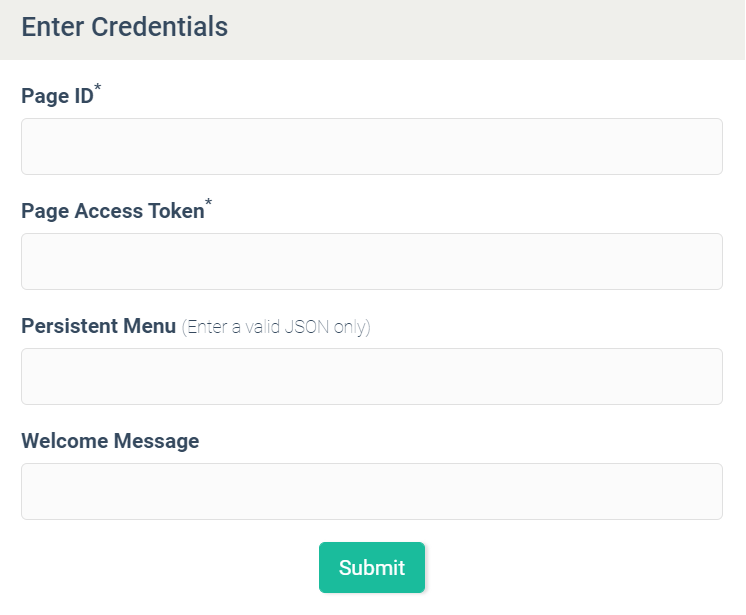
- Scroll down and click Submit your Page ID and Access Token.
- Enter the Page ID and Access Token copied earlier into the respective fields.
- Enter the Persistent Menu JSON and Welcome Message if you wish.
- Click Submit.
To configure a persistent menu for your bot, refer to Gupshup's persistent menu guide.
Updated 4 months ago
