Feature #1: Template Messaging
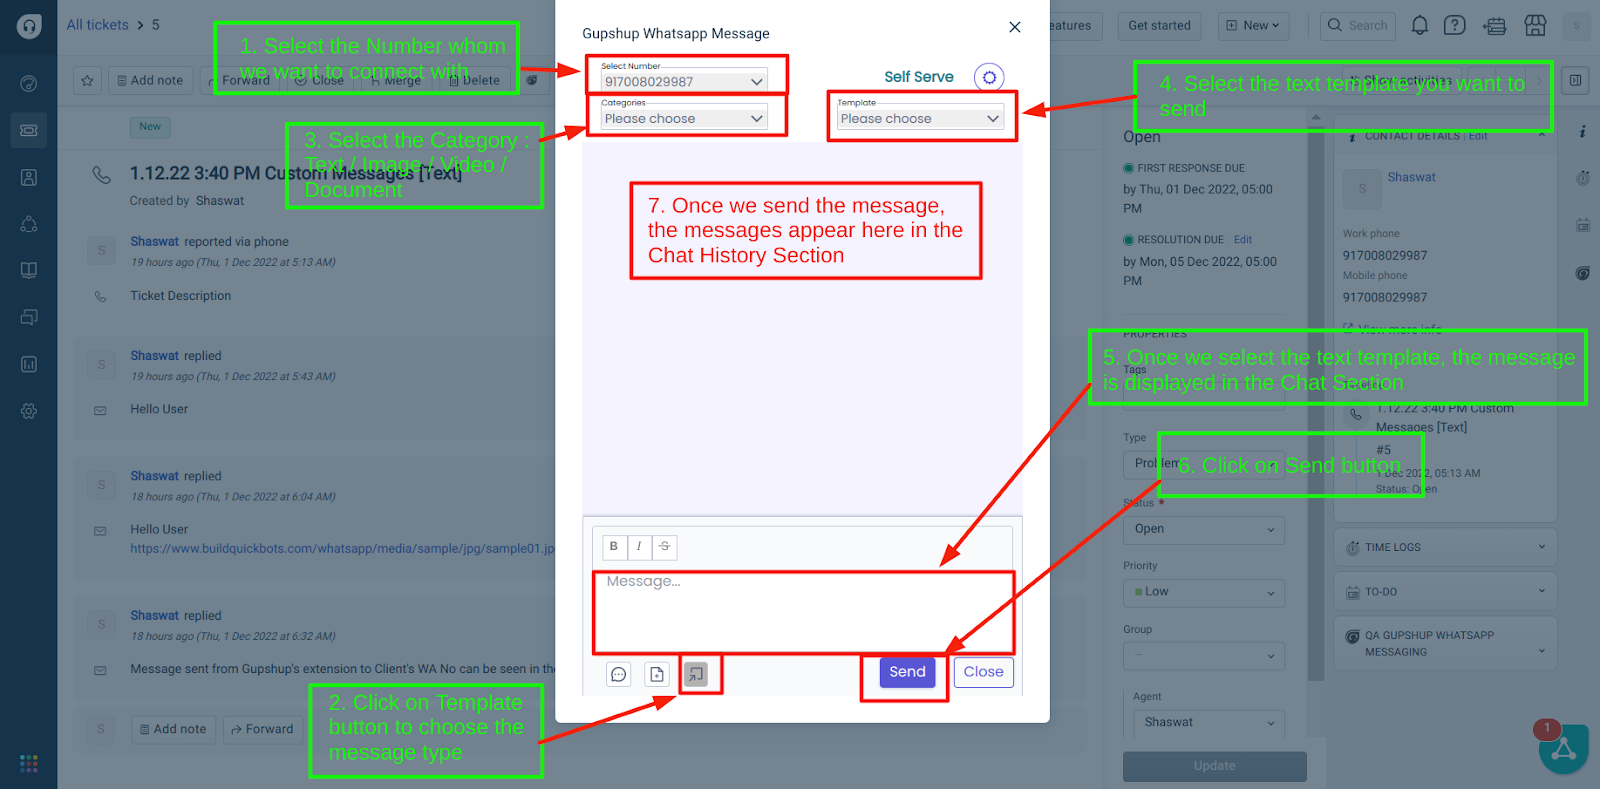
Once connection is setup between FreshDesk Account and Self Serve WABA, then we can move ahead with Chat Section, where we can have one-on-one chat with our Clients.
Text
Once we click on Submit button, we get redirected to the Chat Support Page. At the footer section of the Chat Support Page, we need to click on the Template button, then at the top header section we need to select the Category of the Template [Text / Image / Video / Document] and then select particularly that template which you want to send. The preview of the Selected template is viewable in the Chat Section. Click on the Send button.
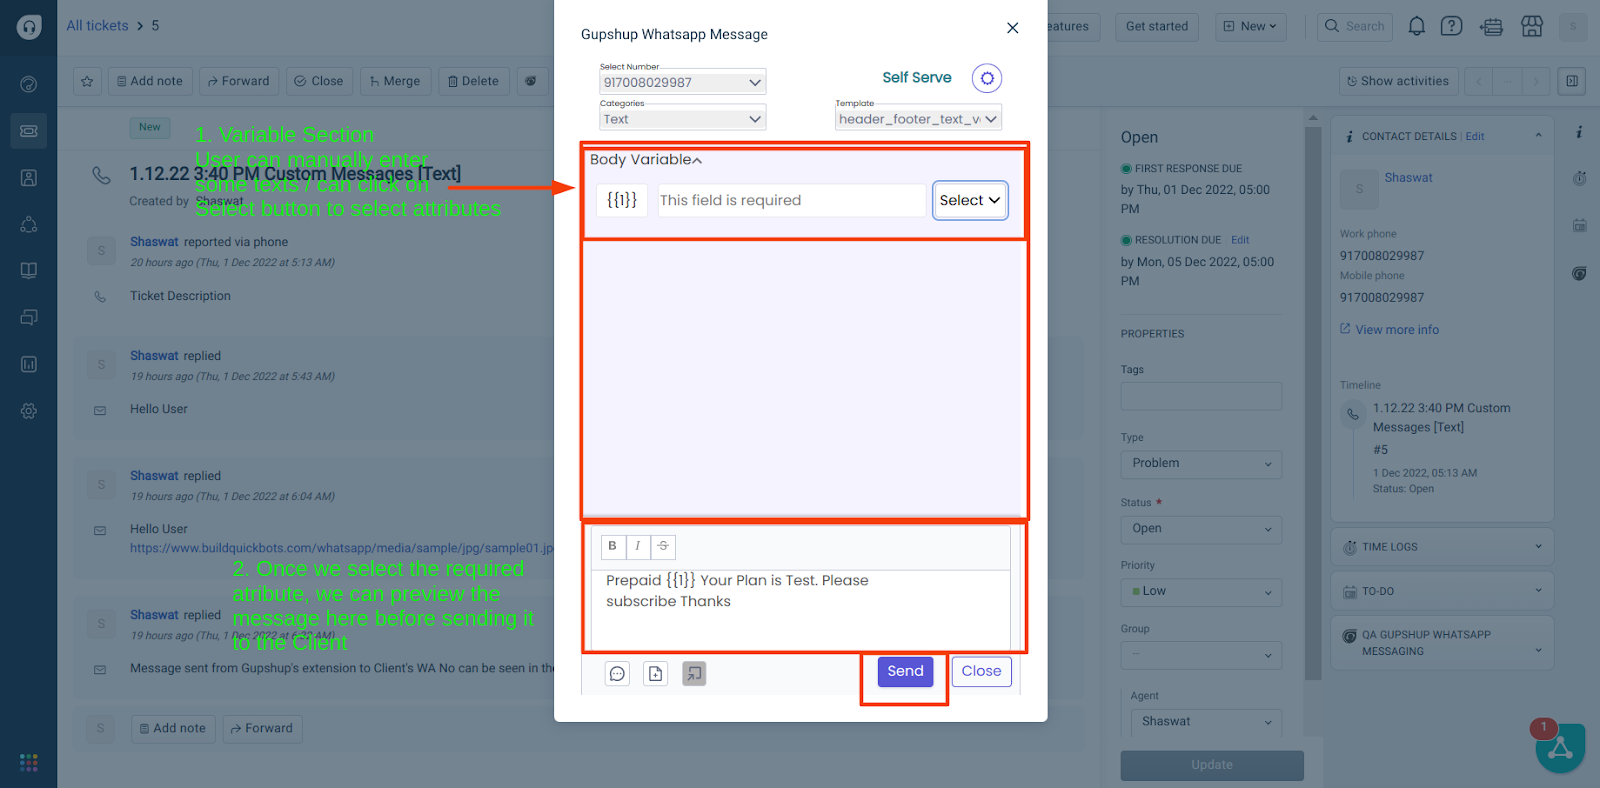
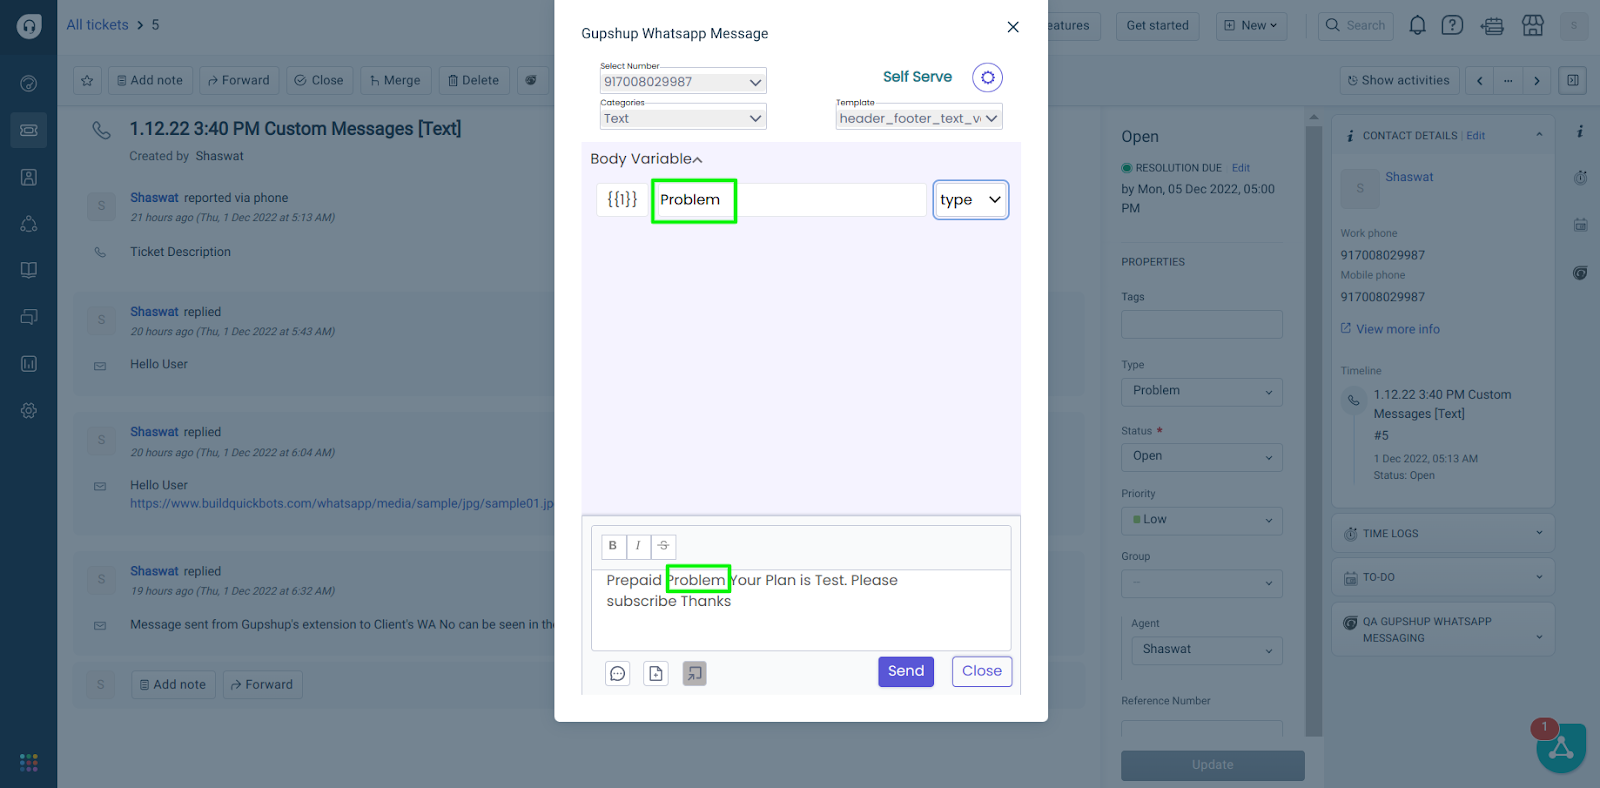
If the template message includes some variables
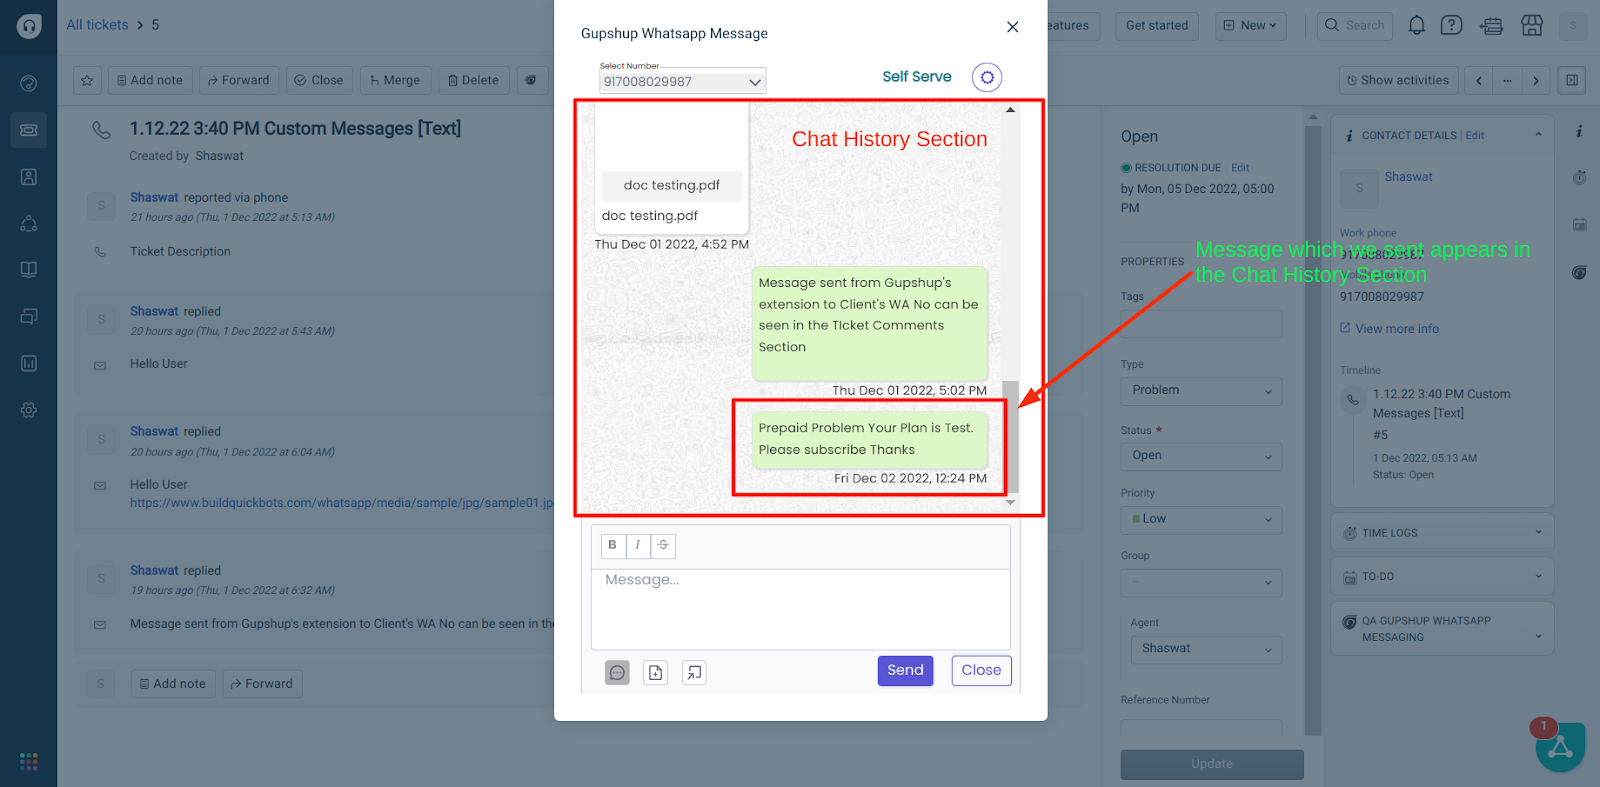
Once message is sent to the user, we receive a “Message Sent” notification and the message would appear in the Chat History Section

Image
- Click on Submit button in the Setup Connection Page and we get redirected to the Chat Support page
- Click on the Drop Down button of Select Number and then select the number to whom we want to connect with
- Click on Template button at the bottom of the Chat Support Page
- Click on Select Categories drop down button and then select Image
- Select the template which we want to send as message to our Client
- Copy and paste an Image URL, preview of which can be seen adjacent to this panel
- We need to add some variables [ This depends upon the template we choose to send ]
- Then click on Send
- We get a “Message Sent” notification and the message can be seen in the Chat History Section
- Message is finally received at Client’s end WA No.


Video
[Similar to what is mentioned above for Text and Image]
- Click on Submit button in the Setup Connection Page and we get redirected to the Chat Support page
- Click on the Drop Down button of Select Number and then select the number to whom we want to connect with
- Click on Template button at the bottom of the Chat Support Page
- Click on Select Categories drop down button and then select Video
- Select the template which we want to send as message to our Client
- Copy and paste an Video URL, preview of which can be seen adjacent to this panel
- We need to add some variables [ This depends upon the template we choose to send ]
- Then click on Send
- We get a “Message Sent” notification and the message can be seen in the Chat History Section
- Message is finally received at Client’s end WA No.
Document
[Similar to what is mentioned above for Text, Image and Video]
- Click on Submit button in the Setup Connection Page and we get redirected to the Chat Support page
- Click on the Drop Down button of Select Number and then select the number to whom we want to connect with
- Click on Template button at the bottom of the Chat Support Page
- Click on Select Categories drop down button and then select Document
- Select the template which we want to send as message to our Client
- Copy and paste an Document URL, preview of which can be seen adjacent to this panel
- We need to add some variables [ This depends upon the template we choose to send ]
- Then click on Send
- We get a “Message Sent” notification and the message can be seen in the Chat History Section
- Message is finally received at Client’s end WA No.