Callback URL Event on Starting Node
Introduction:
The Callback Event is an event type on the Starting Node in JB Canvas. This enhances Journey Builder's capability to listen to external events, in addition to various user events. The Callback URL can serve as a trigger point for initiating a journey and executing actions or sending outbound messages to users, facilitating multiple use cases such as payment confirmations and order updates etc..
What's New?
- Addition of Callback URL event on the Starting Node which can be configured from the Integrations module.
- Configuration of up to 5 Custom Events on the Starting Node.
- Create your own custom event with Custom Properties to be sent while triggering the event
- Store Callback Event payload on a variable to use it on a journey or use the information for sending the BIC Notifications to users.
How to use Custom Callback URL Event:
Custom Integration is a new Integration type added on the Integration Module. Bot designer can create the custom event and create its own payload which can be passed on the Event URL while triggering the Webhook.
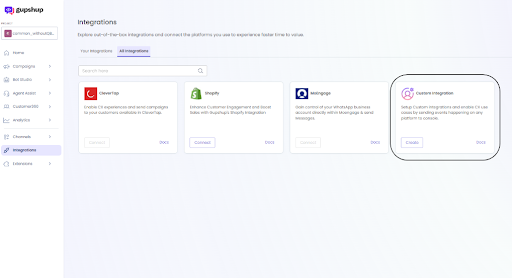
How to create Custom Integration?
You can create Custom Integration by clicking on the Create Button from the above screen in the Integrations Module.
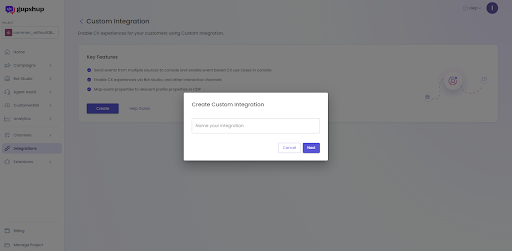
As a first step you have to provide a name to the Integration for identification while configuring the same on Journey Builder
Once the Integration is created you can view the different parameters of the Callback URL which will be generated by the Platform to be integrated to your system for sending the Events.
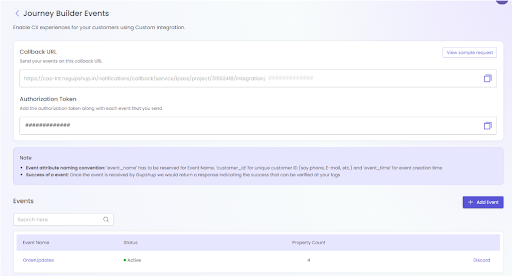
Callback URL: This is the Webhook through which the Event data can be send to the platform
Authorization Token: System generated token for authenticating the URL
You can add Events by clicking on the Add Event button and add your own custom properties to be passed on the Event Payload.
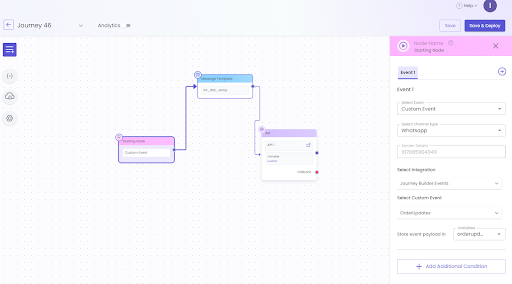
Configuring Custom Event on Journey Builder:
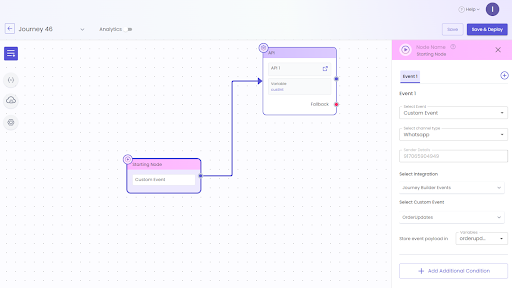
After the Custom Integration is created and the required events are created under the Integration you can configure those events in the Journey Builder Canvas Starting Node. The created events will be available on the dropdown of the Starting Node to be configured seamlessly.
Steps to Configure:
- Select Custom event from the top Event selection dropdown
- Select a Channel type to use the Event (This is required in order to send the user a BIC Notification or a UIC Message while in an open session)
- The available Sender Details will be pre-populated by the system and cannot be updated(as of now)
- Select the Integration from which you would like to receive the events
- Select the specific event based on which the journey should be triggered
- Store the payload on a JSON variable to use the incoming event payload in the journey
How to trigger BIC Template using Callback Events:
You can easily trigger a BIC Template from the journey linked to the Callback Event. Create your Callback event as shown above and configure the same on the starting node of the journey. Make sure that your event is active in order to start receiving the event in Journey Builder.
Once you have configured your starting node, the journey will look something like this (You may additionally add a few more nodes to call an API or save the info on CDP):
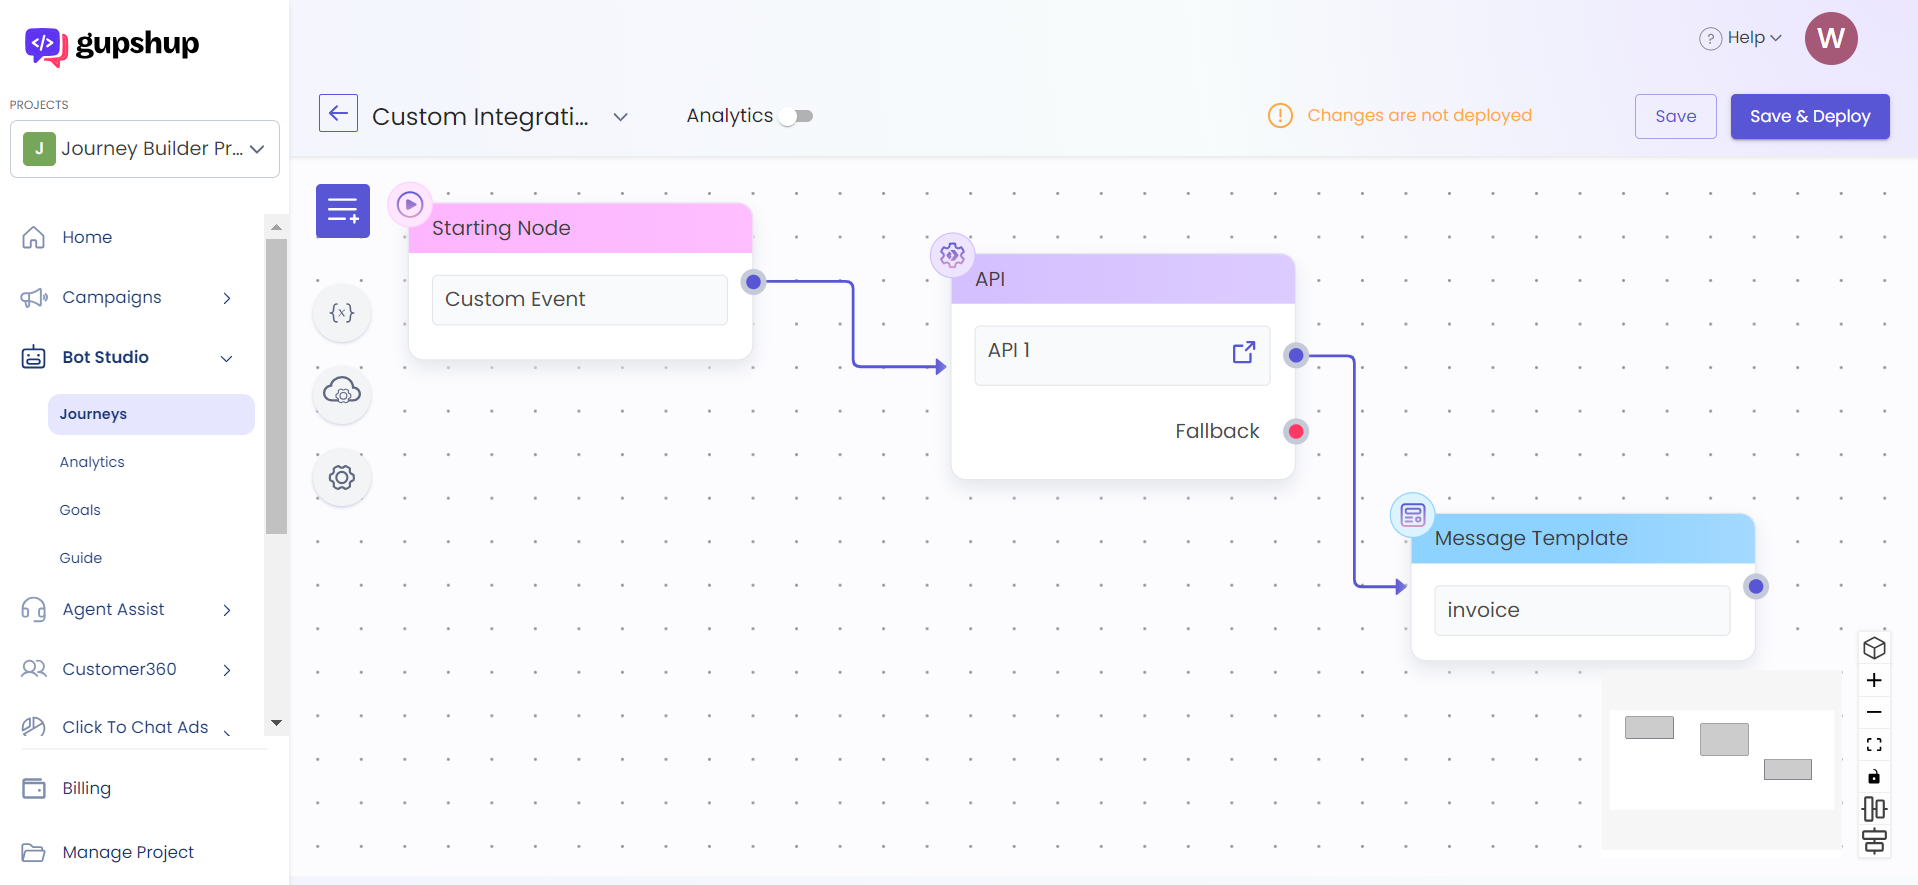
Here, the journey will be triggered whenever the configured custom event is received. Any third-party system can call the Callback URL provided in the Integration Module with the required details to be used inside the journey.
In the above journey, we have taken a scenario where the invoice needs to be sent to the user once the order is confirmed. For that, we have created an event orderid on the Custom Integration OrderUpdates1.
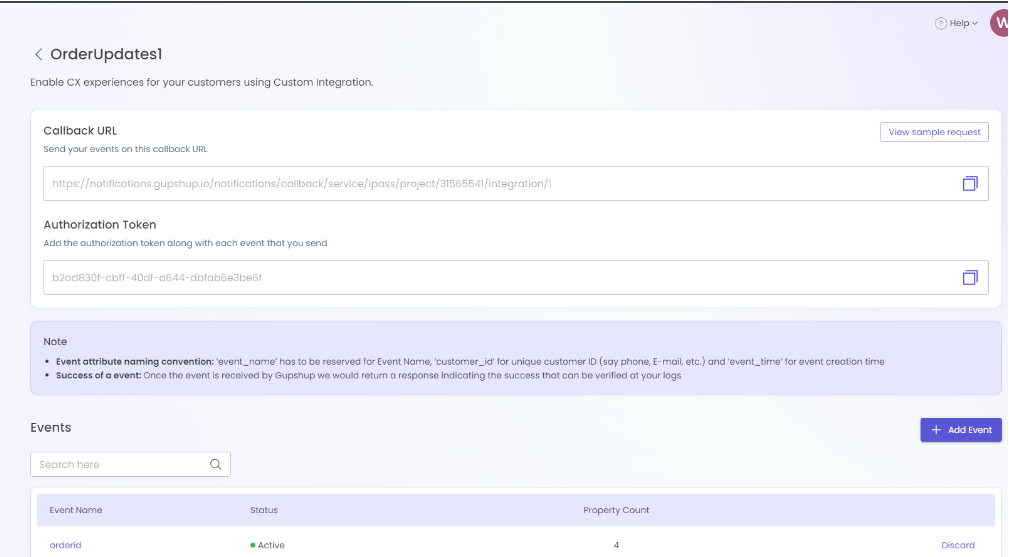
The event is activated, and the Callback URL is fetched to form the event curl with the help of the sample payload. Make sure to pass the event properties correctly in order to use them in the journey where the event will be consumed for triggering the template.
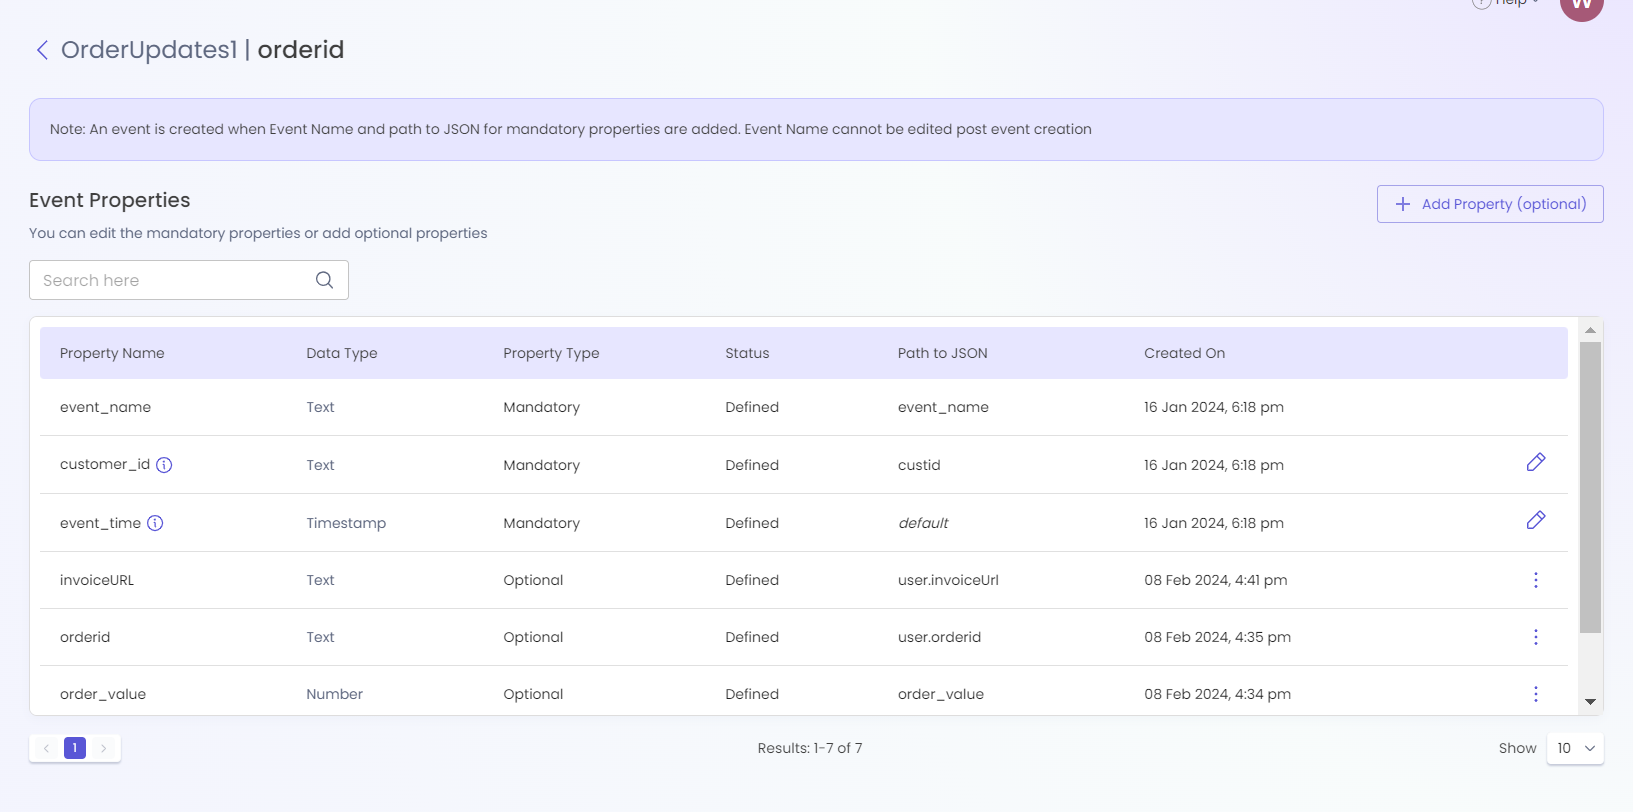
It's required to pass the phone number in the customer_id field to ensure that the template is sent to the user. You have to mention the Path to JSON where the customer_id can be fetched. Below is an example of the payload used for triggering this event:
{
    "event_name": "orderid",
    "event_time": "2024-12-26T13:37:10.023Z",
    "custid": "91909909090",
    "user": {
        "phone": "9090909090",
        "orderid": "xyz",
        "invoiceUrl": "https://gsfile.gupshup.io/invoice.pdf"
    },
    "order_value": "123"
}
Once the event is triggered, it will initiate the journey attached to the event, and the Template will be sent to the user along with the invoice, for which the invoice URL will be consumed in the Template Node. Bot designers can fetch the event payload from the variable where the event payload is stored in the Starting Node, from which the invoice URLs can be parsed.
Updated 9 months ago