Setup and Configuration
Configuring Gupshup WhatsApp Account in Oracle Responsys
Follow the steps below to configure your Gupshup WhatsApp Account in the Oracle Responsys.
Step 1: Navigate to App Management
- Log in to your Oracle Responsys account.
- Go to Account Management > App Management.
- Locate the Gupshup-Oracle App from the list of installed apps.
- Click the Edit Icon (pencil icon) next to the Gupshup-Oracle App.
Step 2: Configure Your Gupshup WhatsApp Account
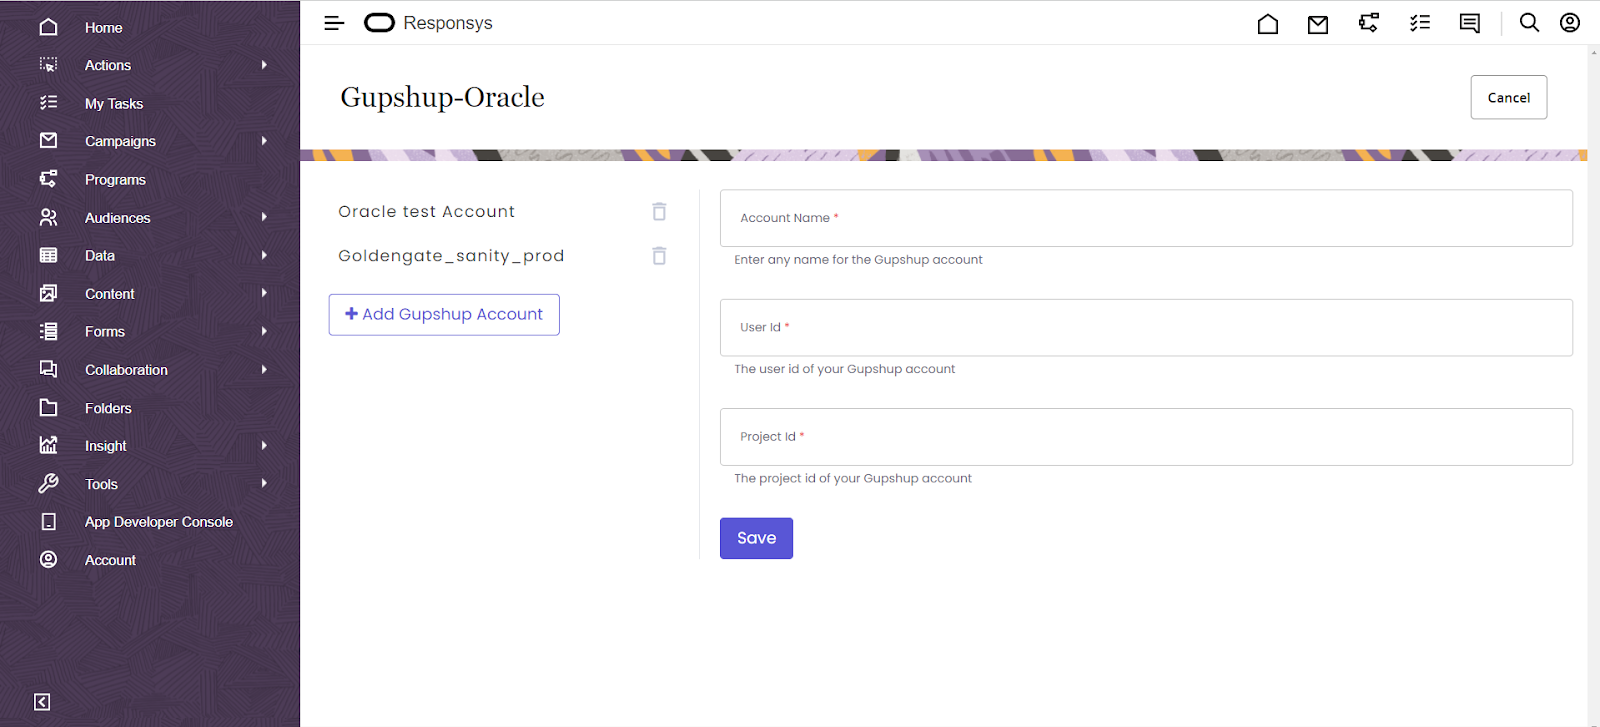
After clicking the Edit Icon, you’ll be directed to a configuration page where you can enter the necessary details for your Gupshup WhatsApp Business Account to connect Gupshup and Oracle Responsys.
- Account Name: Enter a name for the account. This can be any name you prefer to easily identify the account.
- User ID: Enter the User ID of your Gupshup Console account.
- Project ID: Enter the Project ID associated with your Gupshup HSM (Highly Structured Messaging) account.
Save the Configuration: Once you have entered all the required details, click the Save button to save the configuration settings.

Configure your Gupshup Account
Step 3: Adding Multiple Gupshup Accounts (Optional)
If you need to add multiple Gupshup WhatsApp Business Accounts, you can do so by following these steps:
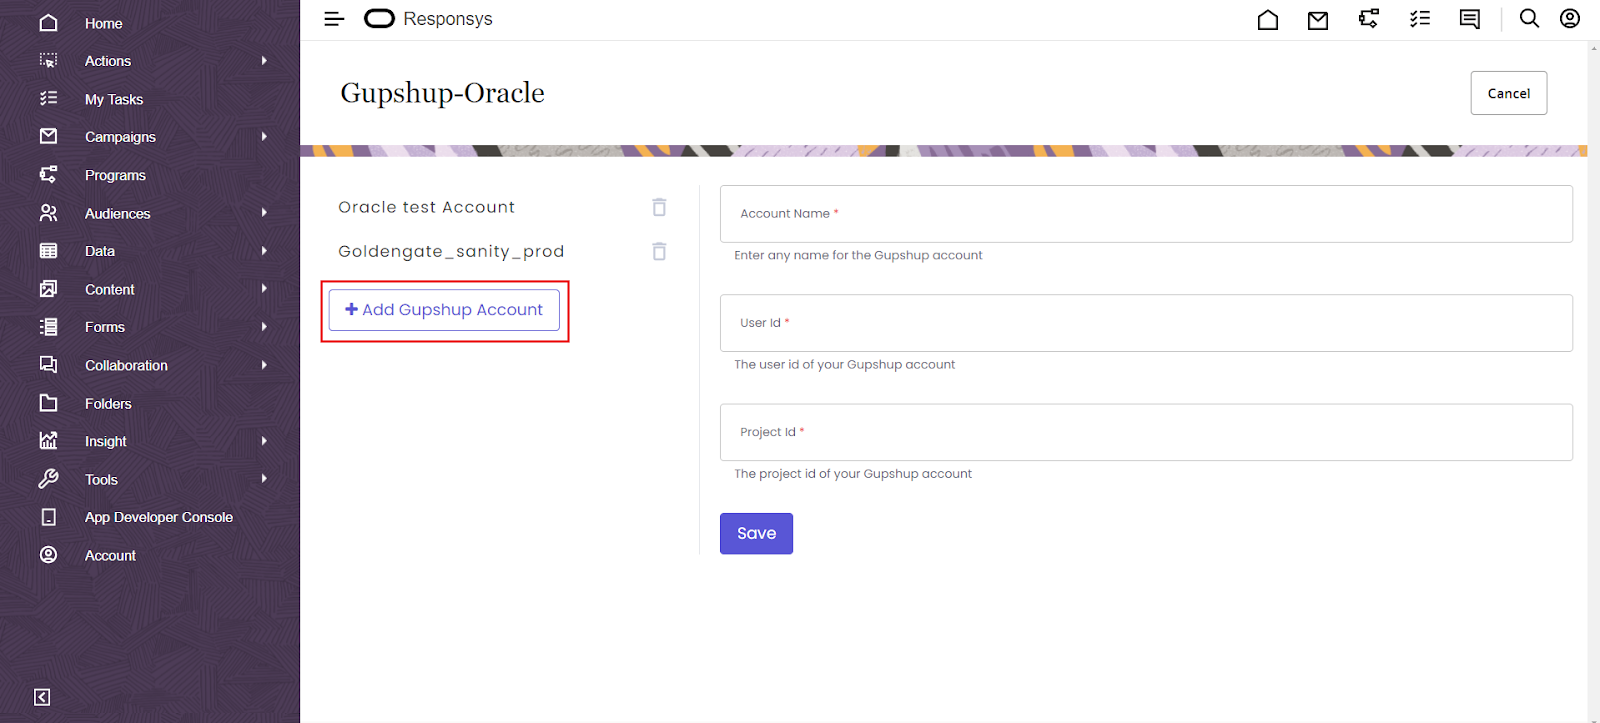
- Click the Add Gupshup Account button. This will open a new form for entering additional account details.
- Enter the same set of details (Account Name, User ID, Project ID) for the new Gupshup account.
- After entering the details, click the Save button to save the new account.

Adding multiple channels
Important: When adding or updating multiple accounts, please note that updating account details will affect any existing programs that are using these accounts.
Step 4: Finalizing the Configuration
Once the accounts are added and configured, the app will be ready to be used in Oracle Responsys programs.
- You can now integrate your Gupshup WhatsApp account(s) with your Oracle Responsys campaigns and workflows.
Video Demo on How to configure Gupshup WhatsApp account on Oracle Responsys
Updated 4 months ago
